Assess the wall first: inspect texture, joints, and moisture, then clear obstacles and protect surroundings. Gather the right plaster mix (lime for permeability or cement for fast set), bonding agents, water, and tools (hawk, trowel, mixing drill, brushes). Mix to a smooth, lump-free consistency, apply a 10–15 mm scratch coat, score for keying, then the blue coat, pushing into hollows and achieving a uniform plane. Finish with a light skim, then ensure full cure; more steps await.
Assessing the Wall Surface
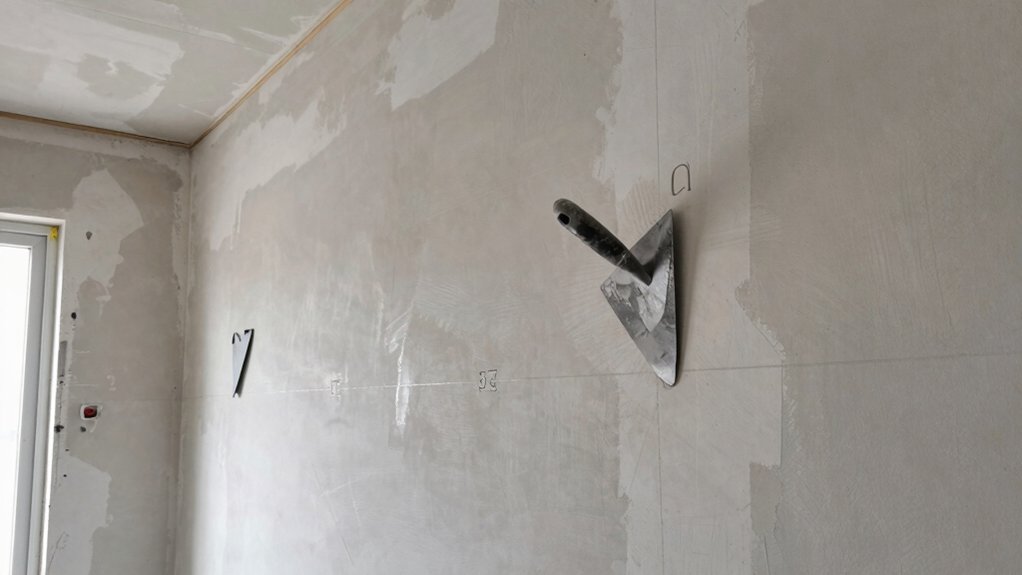
Evaluating the wall surface begins with a clear, objective inspection. You verify existing texture, joints, and any previous coatings for adherence and uniformity. Surface texture is evaluated for consistency, noting high spots, hollows, or chalky areas that could hinder plaster bond.
You identify efflorescence, mold, or moisture damage that requires correction before proceeding. Scrutinize corner geometry, plaster thickness, and substrate condition to determine if wall preparation steps must address underlayment, stabilization, or bonding issues.
You assess nail pops, cracks, and loose paper that would compromise finish quality, planning mechanical or chemical remediation as needed. Document findings, then categorize sections by remediation priority.
Your aim is a sound base: stable, clean, and receptive to plaster, with uniform contact across the entire surface.
Choosing the Right Plaster Mix
For the chosen plaster mix, you’ll control the water-to-plaster ratio to achieve the desired workability and strength.
Consider lime versus cement blends to balance permeability, hardness, and shrinkage based on room conditions and substrate.
Start with a precise ratio, document outcomes, and adjust only after testing on a sample panel.
Water-To-Plaster Ratio
The water-to-plaster ratio directly determines workability, strength, and surface finish, so start with a precise target and adjust only as needed. You’ll typically aim for a mix that yields a smooth, cohesive slurry without segregation.
Add water gradually to your dry plaster, mixing until the consistency resembles thick cream. If you see brush marks or sagging, back off water slightly and re-mix until uniform. Record the exact ratio you used for each batch to maintain consistency across walls.
Too much water causes extended drying times and weaker plaster; too little makes it stiff and difficult to spread, risking tool marks and cracking.
Monitor plaster drying closely and adjust subsequent batches to maintain even wall texture. Maintain steady temperature and humidity to support predictable curing.
Lime Vs Cement Mix
Lime-based plaster and cement-based plaster each have distinct performance characteristics, so choose the mix based on substrate, climate, and desired finish. You assess substrate porosity, moisture movement, and crack susceptibility to determine suitability.
Lime plaster advantages include flexibility, moisture buffering, and compatibility with historic or breathable surfaces; it cures slowly, allowing extended working time on larger pours.
Cement plaster disadvantages center on stiffness, reduced breathability, and higher heat of hydration, which can stress delicate substrates. For exterior or damp conditions, lime offers better vapor permeability and self-healing capacity; for rapid setting, superior strength, and airtight finishes, cement provides a robust base.
In mixed installations, consider a lime-putty scratch coat under a cement or hydraulic lime topcoat. Finalize by matching finish, thickness, and cure regime to your project requirements.
Gathering Tools and Materials
You’ll assemble the Tools Needed and Materials Checklist before starting, ensuring all items are within arm’s reach. Use the ready Materials Checklist to verify quantities and types match your plaster mix and wall size.
This quick prep keeps you on track, minimizes interruptions, and supports precise application.
Tools Needed Quick
To plaster interior walls efficiently, gather all essential tools and materials before you start; this minimizes interruptions and keeps work progressing smoothly. You’ll need a hawk and trowel, square-edged plaster knife, mixing drill with paddle, and a with-handle mud pan for controlled batching. Have a margin trowel, plasters of appropriate consistency, and clean water containers ready.
Line up plastering brushes, a stiff evropsku brush, steel float, and towel rags for cleanup. Include a gauges box to test consistency, a mixing bucket, and protective gear: gloves, goggles, and dust mask. Keep a damp sponge for initial smoothing, a plasterers’ rasp for keying, and a chalk line for alignment.
Decorative finishes and historic restoration considerations guide material choice, ensuring compatibility with substrates and long-term stability.
Materials Checklist Ready
With the right mix of tools and materials at hand, you’re positioned to begin plastering efficiently. Begin by assembling a durable hawk, trowel, margin trowel, plaster mixer or drill with paddle, and a level for consistent application. Secure plaster, bonding agent, clean water, a Utility knife, plastering float, and corner trowels.
Prepare mixing containers, strainers, and a clean workspace to minimize dust and interruptions. Verify stud layout and moisture barriers, then stock multiple batches to maintain consistency.
Consider plastering techniques for color and texture control, and choose wall texture options that align with your finish goals. Label containers, note batch times, and clean tools promptly to prevent set-on residue.
Maintain a damp cloth for touch-ups and record any deviations for future applications.
Preparing the Work Area
Before you mix plaster or apply any coats, clear the space of obstacles and protect surfaces that could be damaged. You’ll establish a clean, controlled work area to guarantee consistent adhesion and finish. Remove debris, loosened paint, and protruding nails; cover floors with a drop cloth and seal adjacent surfaces to guard against dust.
Verify ambient conditions: maintain stable temperature and low drafts, as curing can be affected by air movement. Set up lighting so you can see every detail, especially corners and joints. Prepare tools in reach: hawk, trowels, and a mixing container.
Implement surface preparation steps, including dust removal and flatness checks. Plan joint reinforcement placement where required, and ensure the wall substrate is sound before plastering proceeds.
Mixing the Plaster Correctly
Mixing plaster correctly starts with measured proportions and clean materials. You’ll combine dry plaster with water in a pot or mixing trough, using a clean mixing stick or drill with a paddle.
Begin by adding water to achieve a basin you can easily work in, then sieve in the plaster gradually to limit lumps. Stir steadily until the mixture begins to thicken, then pause to rest briefly and release any trapped air.
Return to mix until you reach a uniform, lump-free paste. Monitor plaster consistency as you go, adjusting water or plaster slightly to hold a smooth, spreadable texture.
Track mixing duration to avoid over-mixing, which can weaken bond and cause air voids. Maintain a consistent process for reliable results.
Applying the First Coat (Scratch Coat)
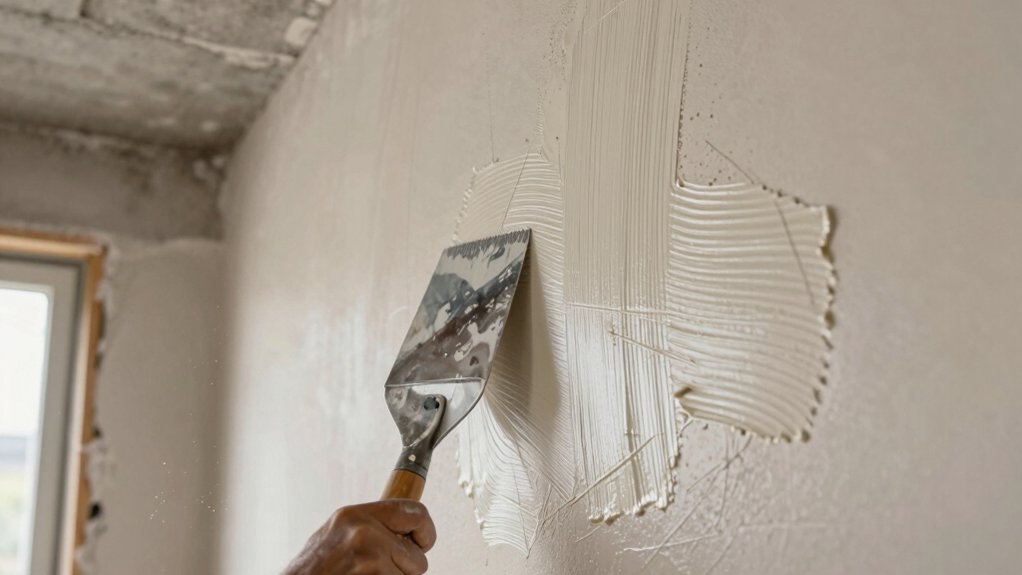
Applying the first coat (scratch coat) involves setting a uniform base layer that keying surfaces and improves adhesion for subsequent plaster.
You apply a damp surface and mix to a workable consistency, then spread the mix evenly with a straightedge to form a flat, continuous bed.
Maintain a consistent thickness, typically about 10–15 mm, and work in small sections to prevent drying cracks.
Score the surface with a scratch trowel while the plaster is plastic to promote keying for the next coat.
Include a plaster primer if required by substrate, ensuring proper bond and cure.
Monitor humidity and temperature to avoid premature drying.
Achieve a uniform wall texture that can receive the subsequent coats without swelling or debonding.
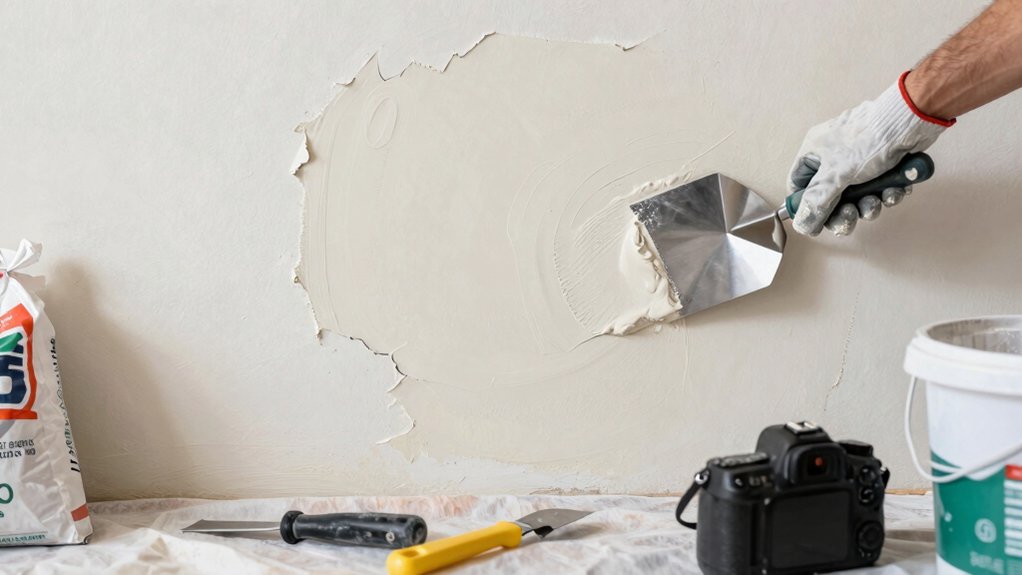
Applying the Second Coat (Blue Coat)
The second coat, or blue coat, is applied after the scratch coat has firmed and gained sufficient set. You mix a smooth, workable mortar with consistent slump, then apply evenly using a full-texture trowel to develop a true surface. Maintain firm pressure to push material into minor hollows, then strike off to a uniform plane. Keep joints tight and overlap passes to prevent cold joints.
Allow the blue coat to reach light set before continuous finishing, checking for consistent thickness across walls. Use controlled, deliberate motions to avoid gouging and to minimize lift. Consider texture patterns during initial shaping, but prioritize paint compatibility by selecting a base that bonds well with your finish coat.
Verify planarity, then proceed with subsequent processing only after full cure.
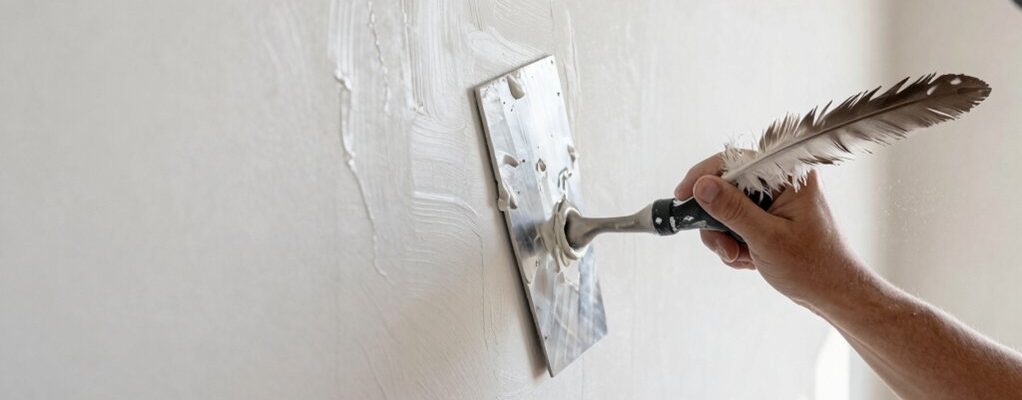
Finishing and Skim Coating
Having established a solid blue coat, you now finish the wall surface and apply the skim coat with controlled, precise motions to achieve a uniform, paint-ready plane.
Begin by loading the trowel with a thin layer, then spread adhesive-sine to fill minor gaps. Maintain a consistent angle and pressure, moving in long, even strokes across the entire surface. Work in small sections, feathering edges to eliminate ridges.
As you proceed, monitor texture consistency; aim for a smooth, flat finish with minimal capillary texture. Let the skim set briefly before a light burnish with steel trowel, removing tool marks without overworking.
Inspect for pinholes and pin them with a light pass. Finish techniques demand steady hands and strict timing to ensure a durable, ready-to-paint surface.
Troubleshooting Common Issues and Maintenance
Unexpected issues can arise even after a solid skim coat, so address problems promptly to maintain a durable finish. In this section, you identify symptoms, diagnose causes, and apply corrective steps with precision.
Start with surface preparation: remove loose material, clean dust, and re-wet or re-prime as required to reestablish a sound key.
For drying issues, verify ambient conditions, spacing between coats, and plaster thickness; adjust humidity and temperature to recommended ranges before rework.
If hairline cracking appears, assess movement joints and substrate flexibility, and apply compatible patching material with proper tooling.
Uneven sheen or trowel marks indicate insufficient trowel control or improper mud consistency; rectify by re-wetting, reboxing mix, and resmoothing in controlled passes.
Always cure sealed surfaces with appropriate ventilation and monitor for reoccurrence, documenting affected areas.
Frequently Asked Questions
How Long Does Plaster Take to Fully Cure?
Plaster typically cures in 1 to 2 days for initial set, with full hardness taking about 7 days; however, plaster drying time and curing process can extend to 14 days in humid conditions you’re working with.
Can Plaster Be Applied Over Wallpaper or Paint?
You can’t plaster over wallpaper or paint without prep. Treat wall prep like a foundation; remove or seal, then use plaster application techniques to guarantee adhesion and evenness. Otherwise, the surface peels, cracks, and finishes fail.
Is It Necessary to Seal the Wall Before Plastering?
Yes, you should seal first. For wall preparation, apply a suitable primer and let it dry before plastering; primer application improves adhesion and reduces suction, ensuring a smooth, even base for superior plaster results.
What Safety Gear Is Required for Plastering?
Gloves, goggles, and a dust mask are required. You should wear personal protective equipment and follow safe working practices. Use a respirator when mixing dry plaster; keep doors closed and clean up spills promptly. Proceed cautiously.
How Do I Repair Hairline Cracks After Finishing?
You repair hairline cracks after finishing by surface preparation, then crack filling with a compatible filler. You wipe dust, prime, and smooth edges, feathering beyond the crack to blend. You cure properly and inspect for uniform texture.
Conclusion
To plaster effectively, plan steps, prepare surfaces, mix correctly, apply coats evenly, and finish smoothly. Practice steady motion, monitor consistency, adjust for humidity, and clean tools promptly. Observe guidelines, test adhesion, and maintain safety throughout. Measure progress, compare results, and correct flaws promptly. Follow sequence, respect drying times, and inspect joints. Document outcomes, refine techniques, and store materials properly. Build confidence with consistency, precision, and patience. Mastery comes from repeatable, disciplined practice and meticulous attention to detail.