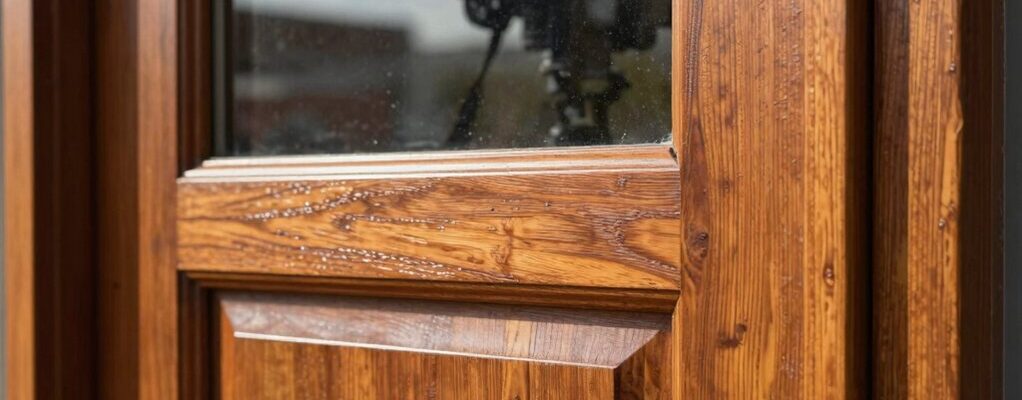
Did you know that a fresh door finish can add up to 10% curb appeal? You’ll start by cleaning, sanding, and masking the glass edges, then apply a primer suited for wood and glass areas. Choose a durable exterior paint, preferably semi-gloss or satin, and coat evenly before sealing with a clear topcoat. If you want a smooth, long-lasting result, you’ll want to follow each step carefully—and there’s more to cover before you finish.
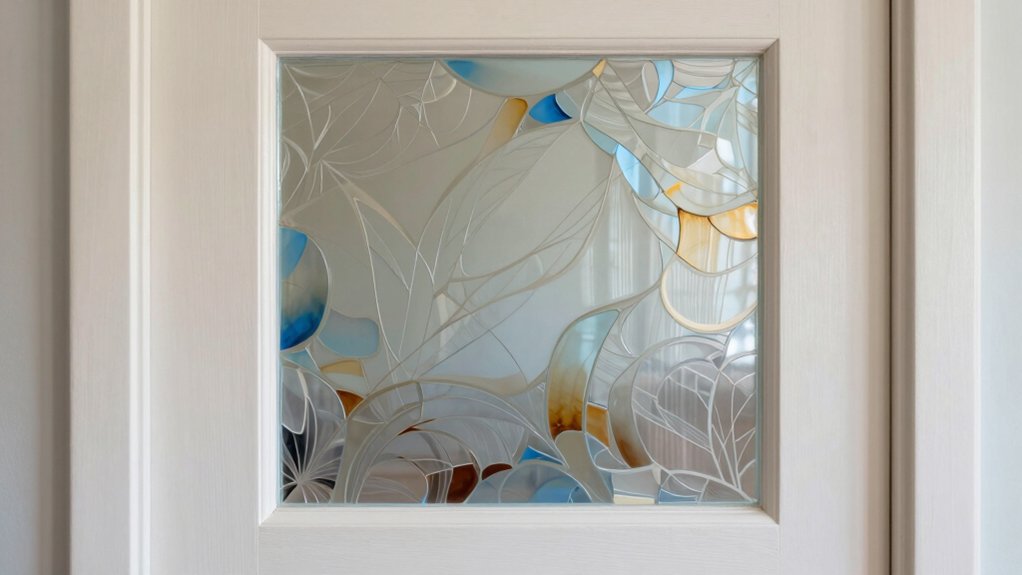
Selecting the Right Glass for Your Panel Door
Choosing the right glass for your panel door starts with understanding the door’s function and the room’s needs. You’ll select glass that balances light, privacy, and security.
Start with opacity: clear glass maximizes brightness, while frosted or seeded glass softens visibility. If you need privacy in a living area or hallway, go with frosted, sandblasted, or textured finishes.
Consider safety ratings—tempered glass is stronger and safer for door panels. If a window expands or cools a room, choose insulated glass with low-E coatings to improve energy efficiency.
For entrances, laminated glass adds impact resistance and sound dampening. Ensure the glass thickness matches the door’s construction and hardware compatibility.
Finally, verify maintenance needs and cleaning access to keep the panel looking pristine.
Tools and Materials You’ll Need
Before you start, gather the basics: the right glass options for your door and the corresponding tools, fasteners, and sealants. You’ll need safety gear, a measuring tape, a pencil, a straightedge, and a utility knife for any trim work. Have a glass cutter, glazing putty or mastic, silicone sealant, and painter’s tape handy for clean edges.
Gather a putty knife, a small sanding block, and fine-grit sandpaper to prep adjacent surfaces. You’ll also want a cordless drill, driver bits, a hammer, and galvanized screws or mounting brackets suitable for exterior use.
For glass installation, have glazing points, a bead of compatible glazing compound, and a caulking gun. Keep cleaning supplies, rags, and a light source nearby to inspect fit and finish as you work.
Preparing the Door Surface for Glass and Paint
Start by inspecting the door surface for any imperfections that could affect glass adhesion or paint adhesion. Clean the door thoroughly to remove dust, oils, and residue. Use a mild detergent solution, then rinse with clean water and let it dry completely.
Sand glossy areas with fine grit (120–220) to create a tooth for both glass and paint. Fill cracks and gouges with a compatible wood filler; allow to cure, then sand smooth to blend edges.
Remove any loose paint and smooth rough patches with a scraper or sanding block. Wipe down again to remove dust.
If you’ll install glass later, lightly roughen the frame edges to promote sealant adhesion. Ensure the surface is dry, dust-free, and ready for primer.
Masking and Protective Measures
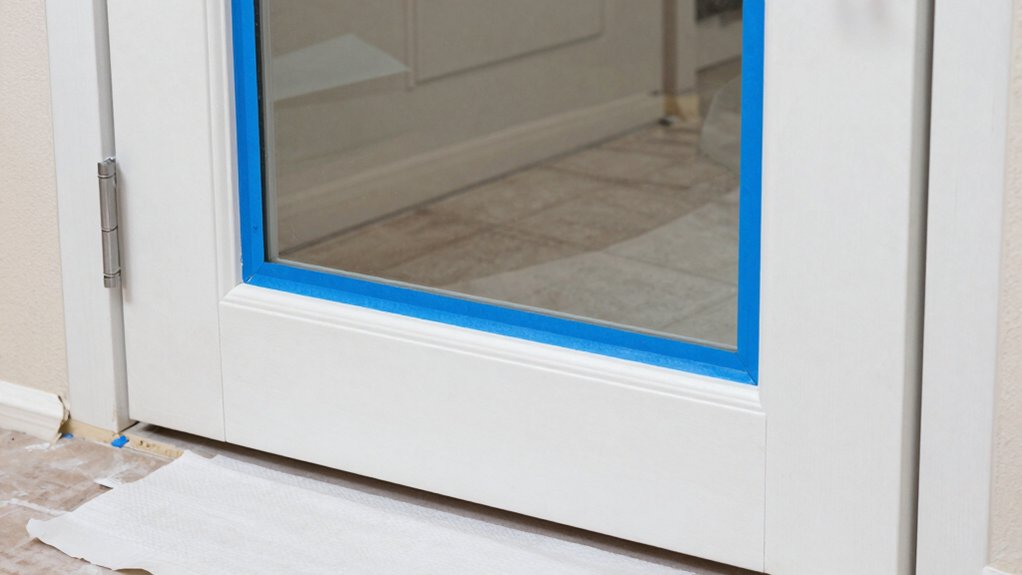
Masking the door and protecting surrounding areas is essential before applying glass and paint. Begin by covering adjacent trim, hemlines, and any glass edging with painter’s tape. Use a low-tack tape to prevent finish lift and clean lines.
Protect floors and furniture with drop cloths or plastic sheeting, secured with weights or tape. If you’re masking fasteners or hardware, remove them first, or shield with tape and cardboard to avoid adhesive contact.
For glass, apply a bead of painter’s tape along the edge to create a crisp boundary, then mask the frame completely. Ventilate the area and wear a dust mask while sanding or cleaning.
Clean tools promptly to prevent dried film and ensure even coverage later.
Choosing Paint Types and Finishes for Exterior Doors
Choosing the right paint types and finishes for exterior doors starts with understanding exposure and maintenance needs. You’ll pick finishes that resist UV fading, moisture, and temperature swings, while still reflecting the style you want.
For wood doors, select high-build acrylic or alkyd enamel with a durable topcoat to prevent cracking and peeling. Fiberglass or steel doors benefit from elastomeric or hybrid enamels that flex with expansion and contraction.
Satin or semi-gloss sheens balance durability with cleanability, making wipe-downs easy. Consider climate and sun exposure; darker colors hide dirt but fade faster in intense sun.
Waterborne formulas reduce odor and drying time. Always confirm compatible primers and sealers, and choose UV-stable pigments for long-lasting color. Testing on small panels ensures your finish looks right.
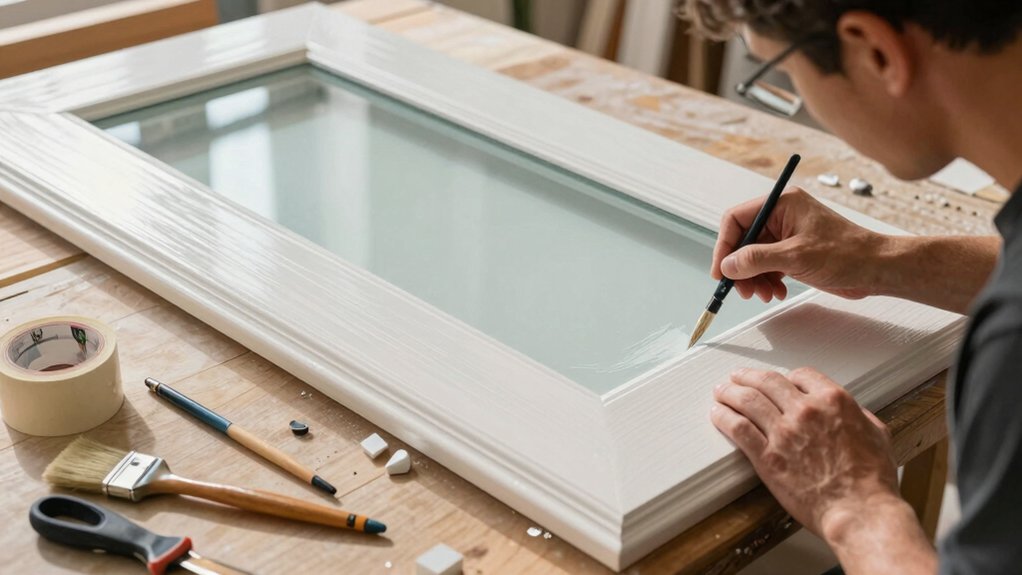
Applying Primer and Base Coat for Durability
Applying primer and base coat sets the foundation for lasting durability: you’ll improve adhesion, block tannins, and even out porosity before the color goes on.
For best results, sand the door lightly to create a smooth surface, then wipe away dust. Apply a high-quality stain-blocking or shellac-based primer, especially on knotty areas, in a uniform, even coat. Allow dry time per the manufacturer’s guidelines, then lightly sand again with fine grit and remove dust.
Next, apply a compatible base coat that matches your final color system, using long, smooth strokes to avoid lap marks. Thin layers if needed, rather than thick coats that trap air. Inspect for uniform coverage, touch up imperfections, and let the base cure fully before glazing or color applications.
This prep boosts durability and finish longevity.
Layering Glass-Friendly Paint With Color and Pattern
With the base coat set, it’s time to layer glass-friendly paint in your chosen color and pattern. Choose a medium shade for the main field and an accent color for details that will catch the light. Apply evenly in thin, consistent passes, using long, straight strokes to minimize brush marks. Build color gradually; three light coats beat one heavy one for a smooth finish.
Maintain steady hand pressure and keep the brush moving to avoid pooling. Test patterns on a scrap panel first; plan lines or shapes that won’t obscure the glass effect. For subtle texture, mix in a touch of glaze or use a stippling technique in small areas. Allow each layer to dry fully before the next.
Keep edges clean for crisp borders.
Sealing Edges and Adding a Protective Topcoat
To seal the edges and add a protective topcoat, start by cleaning the panel surface to remove any dust or oils. Then, scuff the edges lightly with fine sandpaper for better adhesion. Wipe away dust and let dry completely before applying sealant.
Choose a clear, compatible edge sealer and apply a thin, even bead along all exposed edges, including joints and any routed details. Allow the sealer to set per manufacturer timing, then lightly sand with fine grit to smooth any raised areas.
Next, apply a high-quality exterior topcoat or polyurethane over the painted surface, using long, even strokes to avoid lap lines. Maintain a steady pace, keep a wet edge, and apply two even coats for durable protection.
Allow fully cure before handling or exposure to moisture.
Maintenance Tips for a Long-Lasting Finish
Maintaining a long-lasting finish on a painted panel door starts with regular care and smart use. Inspect the surface monthly for chipping, cracking, or dull spots.
Clean with a mild detergent and soft cloth to remove grime without stripping the glaze. Avoid harsh abrasives that could scratch the finish; rinse and dry thoroughly.
When you see wear, touch up promptly with matching paint and a fine brush to prevent moisture intrusion. Recoat every few years or as needed, following the original topcoat’s curing instructions.
Protect edges and glass panels from overspray during maintenance. Use a thin, even layer to prevent runs, and give each coat ample dry time in dry, moderate conditions.
Store excess paint for future touch-ups and keep brushes clean.
Conclusion
You’ve got this, even if the glass seems offended by brushes. In short: prep like a monk, mask like a ninja, prime like you’re defusing a bomb, and paint with the confidence of a weatherproofing storm. Apply a satin or semi-gloss finish, seal the edges, and let it cure—no heroic shortcuts. If the door winks back, don’t panic; it’s just your masterpiece testing the weather. Maintenance is your encore, not the curtain call.