If you’re changing a UPVC door lock in a minute, you’ll start by gathering a few essentials and securing the door, then locate the retaining screw and align the key to loosen the cylinder. With the exterior cylinder out, you’ll swap in the new lock component, tighten everything firmly, and test the motion. It’s straightforward, but a small misstep can derail the speed—keep your focus, and you’ll see where things go wrong as you proceed.
Tools You’ll Need
To change a UPVC door lock, you’ll need a few reliable tools. First, gather a Phillips and flat-head screwdriver, plus a small hex key set for security screws. Have a wrench or pliers handy to hold nuts steady without marring plastic.
You’ll want a torque driver or screwdriver with adjustable tension to avoid over-tightening. A sharp knife or utility blade helps trim old gasket material if it sticks. Keep a flashlight for alignment checks in low light, and a clean cloth to wipe dust from the mechanism.
For stubborn components, a tiny rubber mallet prevents damage. Finally, lubricating spray or graphite powder assists smooth operation after reinstall. Store tools in a labeled kit for quick access.
Identifying Your UPVC Lock Type
Identifying Your UPVC Lock Type requires a quick, systematic check of the external cylinder, handle, and keep.
Start by noting the cylinder design: profile, euro or espagnolette, and any visible marks.
Inspect the handle orientation and type—lever, knob, or lever-with-press button—and confirm whether it operates independently of the lock.
Examine the keeps: surface-mounted or mortised, and look for a central locking rod pattern, indicating a multipoint system.
Check the keyway shape and slot count, noting anti-pick features or unique pins.
If you see a square spindle through the handle, identify unsupported variants.
Record any screws or visible screws on the escutcheon, as they hint at a set-up.
Finally, compare findings with your door’s manufacturer notes or model code to confirm the exact lock family.
Safety First: Prep and Secure the Area
Safety first means scripting a clear, controlled workspace before you touch the lock. You’ll clear the area around the door, removing clutter that could trip you up or obscure components. Lay out a small tray for screws and springs, and keep a container for dropped parts. Dim the lights if needed so you can see fasteners clearly, and set a flashlight within arm’s reach. Put down a protective mat to cushion drops and prevent floor damage.
Wear eye protection and avoid wearing loose sleeves that could snag the mechanism. Identify a stable stance and keep hands dry to prevent slips. Dictate a simple sequence: inspect, organize, secure, and proceed with calm, deliberate steps. Your focus prevents mistakes.
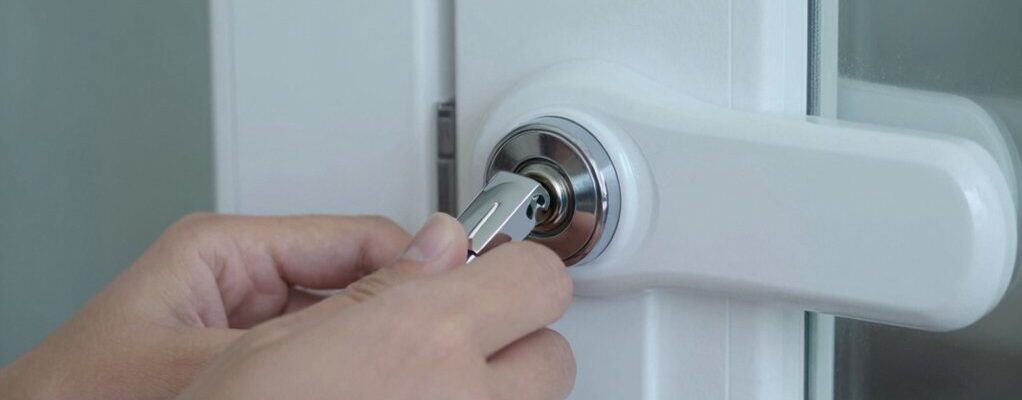
Removing the Exterior Cylinder
Want to remove the exterior cylinder with clean, controlled moves? Begin by locating the retaining screw on the cylinder faceplate. Use a suitable screwdriver to loosen it counterclockwise, but don’t remove it completely until you confirm the cylinder can slide.
Gently rotate the key to align the cam with the housing, if you have one, which frees the cylinder’s profile from the lock body. Push the cylinder inward about a centimeter and steady it with light pressure.
Grasp the cylinder body and pull straight out; avoid twisting, which could damage the door or frame. If stubborn, tap the edge lightly with a non-marring tool to free seized parts.
Once removed, inspect the spindle and seals for wear. Prepare the replacement cylinder for installation.
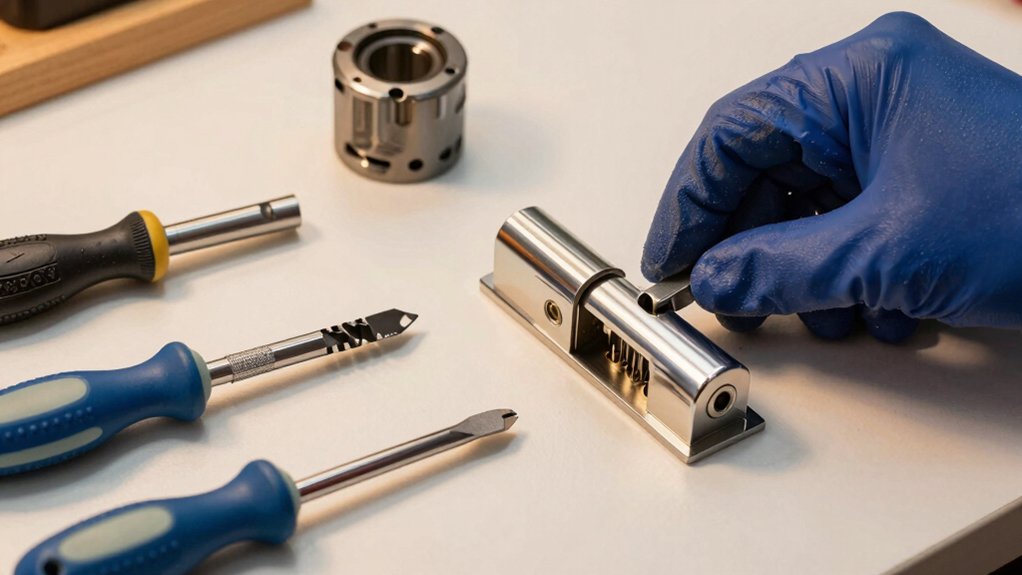
Extracting the Lock Actuator
With the exterior cylinder removed, you’re ready to extract the lock actuator. Begin by locating the actuator housing inside the lock case.
Gently release the retaining clip or screw that secures it, using an appropriate screwdriver or small pick. Apply steady, straight pressure to slide the actuator out without bending components.
If resistance occurs, recheck that the locking cams are aligned and not obstructing travel. Inspect the actuator for wear or damage as you remove it, noting any visible cracks or deformation.
Keep the actuator oriented the same way as it sits in the housing to ensure correct reinstallation. Set the actuator aside on a clean surface, ready for replacement or inspection.
Verify there are no leftover fragments before proceeding.
Choosing the Right Replacement Parts
When selecting replacement parts, start by matching the exact model and size of your UPVC door lock to guarantee compatibility. Check the lock type, spindle length, backset, and screw positions against your existing hardware.
Measure the escutcheon plates and ensure the replacement aligns with your door’s thickness and profile. Prioritize components rated for security and weather resistance; stainless steel or hardened zinc alloys perform best.
Confirm that the cylinder profile matches your door’s cylinder housing and that the cam direction aligns with lever or knob operation. Verify compatibility with the strike plate and keep an accurate inventory of missing or damaged parts.
Avoid generic substitutes that don’t fit the spindle or mounting holes. Precision today prevents fit issues tomorrow.
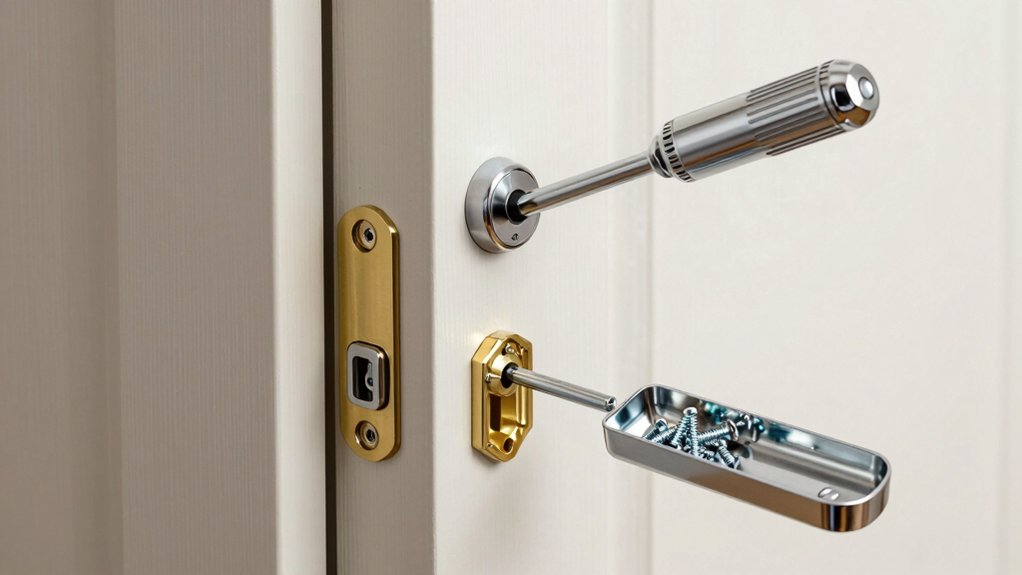
Installing the New Cylinder or Actuator
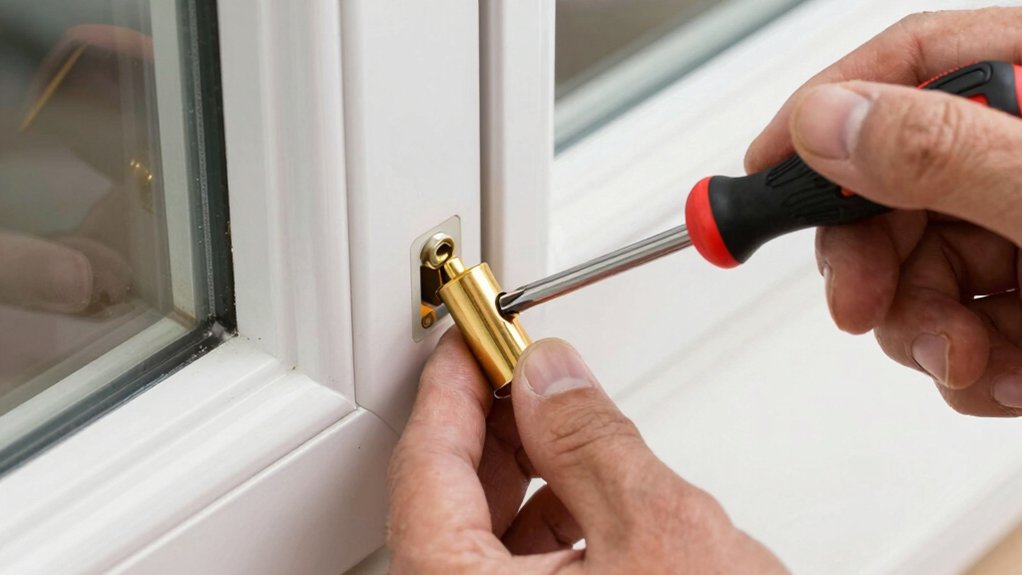
To begin installing the new cylinder or actuator, remove the old component and clear debris from the lock housing.
Inspect the housing for damage or burrs, and clean with a soft brush.
Align the new cylinder or actuator with the cam profile and install any spacers or washers as specified by the manufacturer.
Insert gently, ensuring the keyed side faces outward and that the tailpiece aligns with the lever or spindle.
Test smooth rotation before securing with screws; avoid overtightening, which can warp components.
If the device includes a retaining clip, seat it fully but without forcing.
Recheck that the cylinder rotates freely and returns to center when released.
Confirm compatibility with the existing handles and strike plate before proceeding.
Reassembling the Lock Mechanism
Reassembling the lock mechanism requires careful alignment of all internal parts before you reattach the exterior components. Begin by placing the spindle through the lever or deadbolt sleeve, ensuring it sits flush.
Align the reinserted springs and pins with their matching channels, verifying proper seating before any further assembly.
Fit the follower plate and tighten screws evenly to avoid binding; avoid overtightening, which could distort components.
Recheck that the locking cam and actuator engage freely when rotated by the key or turn knob.
Reposition any retaining clips, then slot the spring housing back into the case, confirming smooth movement through its full arc.
Finally, lightly test the mechanism by turning the cylinder and verifying the latch retracts cleanly, without snagging, before you proceed to exterior reattachment.
Testing Smooth Operation
Before you test, make sure the lock is fully reassembled and seated in the door. Start by inserting the key and turning it gently to verify smooth lower resistance, then lock and unlock several times. Check that the lever or handle returns promptly to its rest position without sticking.
If resistance appears, inspect the spindle alignment and strike plate gaps; small misalignments cause binding. Verify the latch retracts fully when the key turns and the handle is operated. Listen for unusual clicks or grinding; these indicate debris or misfit components.
Confirm the door closes fully without extra force and latches with a firm click. Record any stiffness, then adjust screws or strike plate as needed within safe, don’t-force limits. Re-test until operation remains consistent across cycles.
Maintenance Tips to Prevent Future Jams
Maintenance tips to prevent future jams are simple, proactive steps you can routine-build to keep your UPVC door lock smooth.
Start with regular lubrication using a silicone or graphite spray, applying sparingly to the cylinder, bolt, and keeping mechanism. Wipe away excess to prevent dust buildup.
Keep the door aligned; check hinges and frame screws twice a year and tighten if needed.
Clean the keyway with a soft brush, avoiding moisture entering the lock.
Use a light dust cover on the cylinder when not in use to reduce grime intrusion.
Avoid forcing the key; if resistance appears, stop and inspect alignment or lubrication before proceeding.
Schedule short maintenance sessions monthly to sustain consistent operation and prevent jams.
Conclusion
Picture your door as a patient clockwork guarded by a tiny, diligent locksmith. When you swap the lock in a minute, you’re winding its heart with calm precision. Align the cylinder, secure the screw, and test the ticking until it flows smoothly. If a jam blocks the rhythm, you’ve found the culprit and can reset. With careful hands and a steady plan, you’ll keep time on your side and doors safely singing open.