Did you know most sheds can double storage space with a proper shelf system? You’ll measure the area, locate studs, and confirm the surface will support twin slot rails. Then you’ll gather a level, drill, anchors, brackets, and the shelves themselves, marking heights precisely. Once you align brackets with studs, drill pilot holes, secure them, and slide the shelves into place, you’ll check level and stability before loading. There’s one detail that ties everything together you won’t want to miss.
Assess Your Space and Shelf Capacity
Begin by measuring the space where you plan to install the twin slot shelves. Then assess the wall material and hidden obstructions, noting studs, pipes, and wiring.
Determine available height, width, and depth, and mark a clear plan on the surface.
Calculate shelf capacity by listing items you’ll store, estimating weight per item, and summing them with a safety margin.
Compare your total against the shelf system’s rated load per slot, and guarantee you stay within limits.
Check floor levelness; if the floor tilts, plan for shims or adjustable feet.
Confirm access space for mounting hardware and future adjustments.
Plan for expansion by anticipating extra items.
Finally, document measurements and capacities in a simple checklist to reference during installation.
Gather Tools and Materials
Gather the right tools and materials before you start, so nothing slows you down later. You’ll need a tape measure, pencil, level, square, and a drill with bits suited to your wall material. Have a stud finder, masonry bit if needed, and wall anchors for non-wood surfaces.
Gather twin-slot shelves, screws or bolts specified by the manufacturer, and washers if required. Include a cordless drill, driver bit, and a spare battery. Keep a hammer, chisel, utility knife, and a small pry bar for any minor adjustments.
Have a correcting item like a pencil sharpener and a notepad. Lay out brackets, rails, and fasteners in labeled trays. Confirm all parts match your chosen model before starting installation.
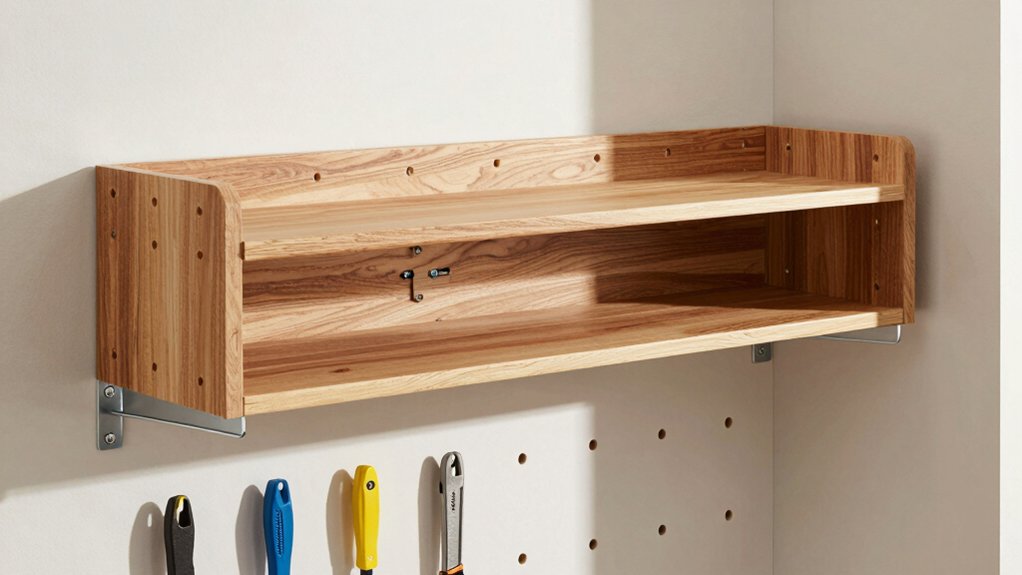
Choose the Right Twin Slot Shelves for Your Shed
Choosing the right twin-slot shelves starts with your shed’s layout and what you plan to store. Start by listing items by size, weight, and frequency of access. Prioritize adjustable shelves for future changes and choose steel or reinforced polymer for durability.
Measure available vertical and horizontal space, then compare shelf depths to avoid overhangs or wasted gaps. Consider load ratings; heavier tools need sturdier brackets and wider supports. If you’ll use bins, ensure shelf heights align with bin dimensions to maximize space.
Decide whether you prefer single- or double-slotted configurations, and look for modular kits that expand. Check installation hardware compatibility with your existing walls. Finally, factor budget against expected lifespan to minimize mid-project replacements.
Measure, Mark, and Plan for Alignment
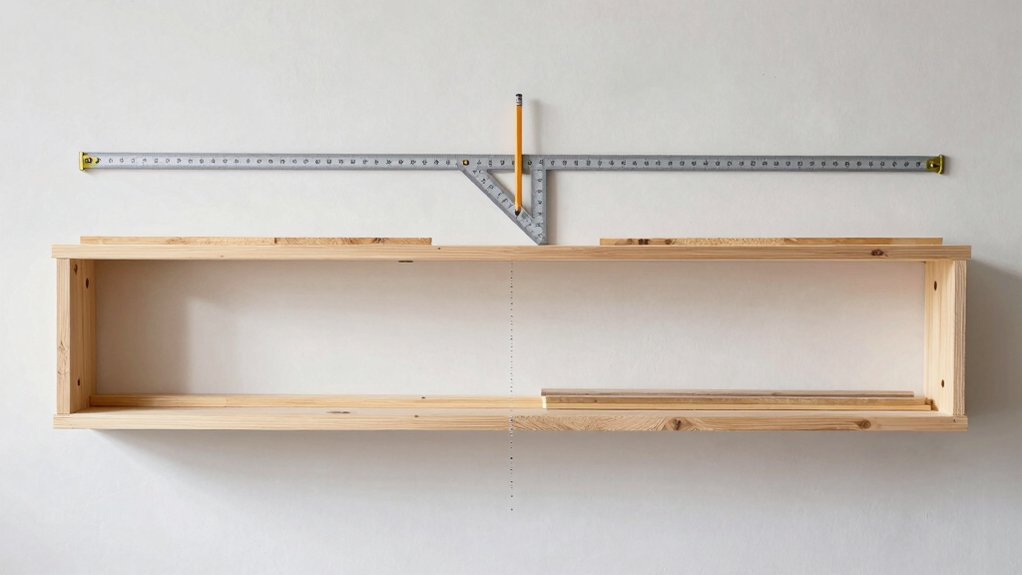
Before you install, measure the space carefully and plan for alignment across shelves and brackets. Begin by marking a horizontal reference line at the desired top level. Use a chalk line or ledger as your guide, ensuring it runs straight across the wall.
Measure from floor to line at multiple points, then verify vertical alignment at each stud or wall anchor location. Plot shelf positions with a pencil, noting equal gaps between units for symmetry.
Consider bracket spacing that fits your twin slots and allows access for loading. Double-check that upcoming screw placements won’t clash with utilities.
Create a simple template illustrating each shelf height and bracket location. Finalize marks, checking again for levelness and uniform spacing before drilling or securing.
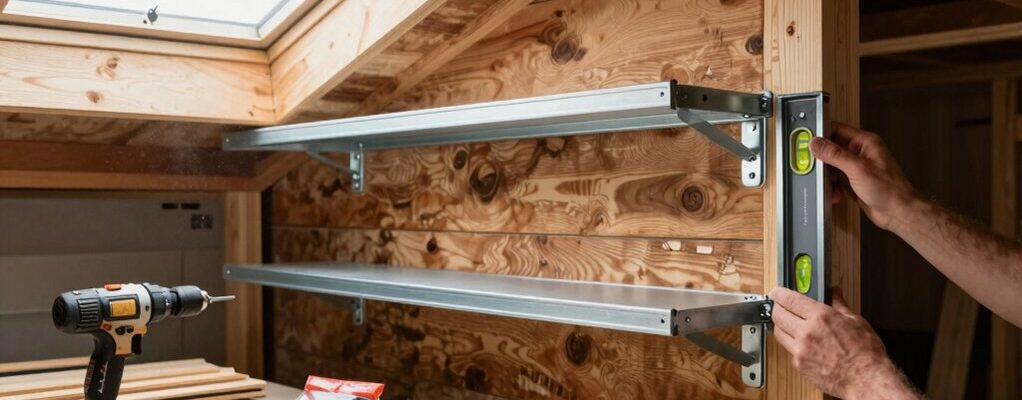
Drill and Secure Into Studs or Wall Panels
First, locate the studs or wall panels and mark their centers. You’ll drill pilot holes first to prevent splitting, using a bit slightly smaller than your wall anchors. Align the drill bit with your shelf mounting points, then steady your drill perpendicularly to the surface. Apply steady pressure, stopping as soon as you penetrate the material.
If you hit a stud, continue drilling through the center area to increase grip, then switch to a longer fastener if needed. For concrete or masonry, use a hammer drill with masonry bits and appropriate anchors.
Drive screws or bolts firmly into the studs or anchors, but don’t over-torque. Check alignment by gently lifting the mounting bracket, ensuring solid, even resistance. Proceed to attach the support brackets securely.
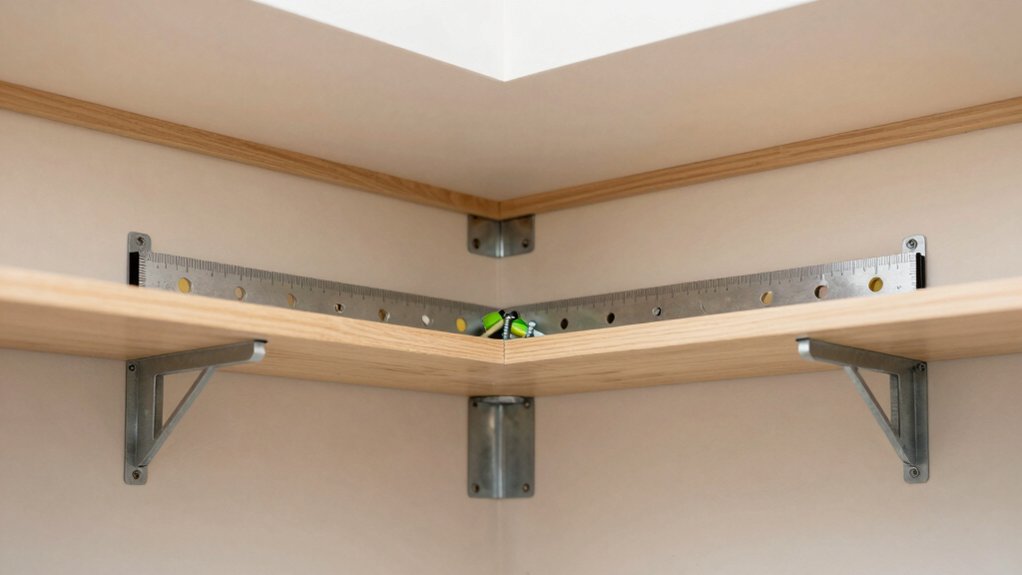
Install Shelves and Ensure Level, Secure Fit
Once the brackets or rails are mounted, set the shelves on top, ensuring the rails or brackets seat fully into the sleepers. Align each shelf to the vertical line you marked earlier, then place a level across the front edge. If any corner sits high or low, tweak by loosening the fastening slightly, adjust, and re-tighten until bubble sits centered.
Check both ends of every shelf; a misalignment at one end can tilt all. Use shims to fine-tune if the shelf surface isn’t perfectly parallel to the floor. Tighten fasteners in a crisscross pattern to distribute load evenly.
Re-check level after final tightening, and confirm each shelf is securely seated against the rails. Test with gradual weight to verify stability before loading fully.
Finishing Touches and Wobble Prevention
To finish the job, secure any remaining gaps and lock in stability by checking all fasteners again and tightening as needed.
Next, inspect shelves for wobble by applying slight pressure at each edge and center. If movement occurs, tighten mounting screws or add a third support bracket at the most flexing point.
Align twin slots with the wall studs and confirm screws still bite solidly.
Install anti-tip hardware if you’re in earthquake-prone areas or plan to hold heavy loads.
Seal gaps between posts and wall with appropriate gap filler or caulk to deter dust and moisture.
Clean surfaces, wipe away residue, and label shelves for future adjustments.
Finally, test load by modestly loading items and monitoring for shift.
Conclusion
Now that you’ve installed twin slot shelves, you’ll have a tidy, accessible shed space. Keep a quick check on level and secure fits as you add items. Think of the shelves like a fluent spine—straight, sturdy, supporting everything else. If a shelf feels off, tighten brackets and recheck studs or anchors. Regularly inspect for looseness and re-tighten as needed. With careful planning, your shed stays organized and efficient, ready for any project.