For pine, start with a clear, durable finish that preserves grain and resin bleed. If you want a natural look with easy maintenance, choose a water-based polyurethane; it dries fast, minimizes haze, and won’t yellow much. For warmth and depth, oil-based polyurethane or an amber varnish works well, though they take longer to cure. Penetrating oils keep grain visible, waxes add a soft sheen, and stains glaze color without hiding texture. Curious how to tailor it step by step?
Understanding Pine: Characteristics and Finish Considerations
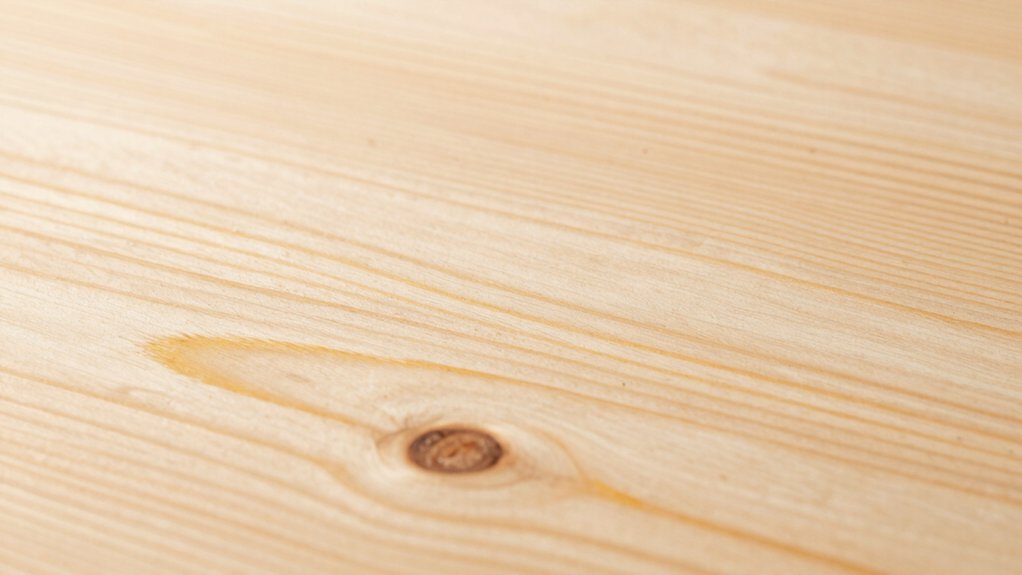
Pine is a versatile, affordable wood, but its color, grain, and resin content vary by species and grade, so choosing a finish starts with understanding those differences. You’ll notice three core traits: resin bleed, open grain, and natural color shift over time.
Resin bleed can push you toward sealers and compatible topcoats. Open grain invites filling for smoothness or a more rustic texture. When evaluating color, consider how stain or dye will interact with pale sapwood versus darker heartwood.
Wood grain patterns influence edge definition and tool marks. You may prefer a sealant that minimizes blotching while preserving character. For color enhancement, test samples on scrap or inconspicuous panels to predict final results.
Water-Based Polyurethane: Clarity, Protection, and Ease of Use
Water-based polyurethane offers clear, durable protection for pine with less odor and faster drying than solvent-based options. You’ll appreciate its low haze and minimal color shift, preserving the wood’s natural look.
Apply thin, even coats using 320–400 grit sanding between sessions to avoid lap marks. This finish dries quickly, so you can inspect color accuracy and brush marks promptly, then recoat after light sanding.
It provides solid protection against scratches and moisture without building up a noticeable film. Expect excellent color enhancement without ambering, keeping the pine’s warmth intact.
If you work outdoors, guarantee proper ventilation and avoid high humidity during application. For a crisp, refined appearance, follow manufacturer directions on cure times.
Natural grain remains visible, and the result remains easy to clean and maintain.
Oil-Based Polyurethane: Richness and Durability for Pine
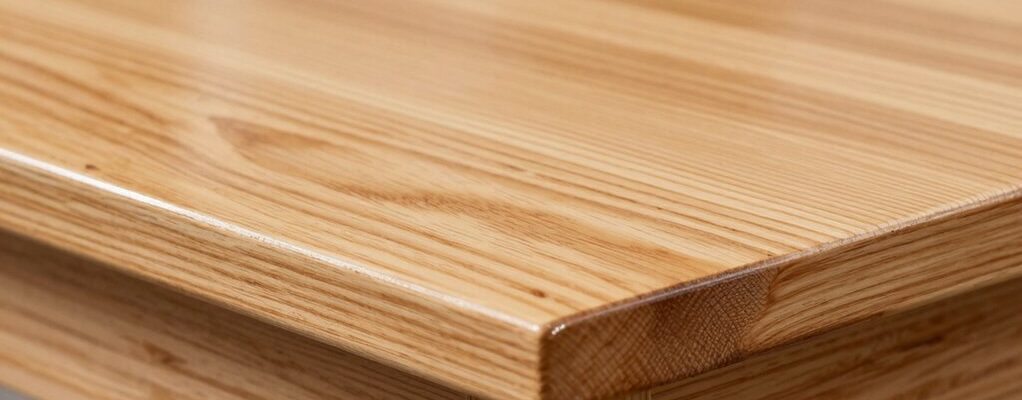
Oil-based polyurethane gives pine a richer amber tone and a tougher surface, so you’ll notice deeper color and more durability over time.
You’ll want to plan for longer drying and odor management, but the result is a resilient finish that stands up to wear.
If you prioritize richness and lasting protection, this option pairs well with careful surface prep and controlled application.
Richness of Finish
When you choose oil-based polyurethane for pine, you’ll notice a pronounced warmth and depth that enhances the wood’s grain. This richness comes from amber tones that layer evenly, producing depth without masking character.
Apply thin coats and allow thorough drying to avoid lap marks, then lightly sand between sessions for uniform clarity. Use strategic grain-following applications to preserve natural patterns, avoiding overbuilds that dull contrast.
Color matching matters: test a sample on a scrap piece to ensure the finish aligns with your existing wood tones or furniture.
Consider environmental considerations, such as ventilation and reduced odor periods, when planning application windows. Plan for controlled conditions to prevent dust settling into fresh coats, and document your process for repeatable results.
Consistency in technique yields consistently rich, professional-looking pine.
Durability on Pine
Even so, oil-based polyurethane on pine delivers notable durability alongside its richness, making it a reliable choice for high-traffic or serviceable surfaces. You’ll notice excellent wear resistance when properly applied, and the finish remains relatively forgiving over minor imperfections.
To maximize longevity, seal edges and end grain to reduce soaking and uneven gloss. Maintain a smooth film by following consistent brushing or padding techniques, avoiding heavy coats that trap air. Focus on controlled, thin coats and ample drying time between layers.
Wood grain shows through, but a well-polished surface minimizes micro-scratches that mar durability. For best results, pair with careful sanding techniques: progressively finer grits, dust-free surfaces, and a final wipe-down before recoating.
With patience, durability matches Pine’s natural warmth.
Varnishes for Pine: Traditional Protection With Warmth
Varnishes for Pine offer traditional protection with warm, amber tones that highlight grain without masking it. You’ll learn how to apply multiple coats for durability while preserving pine’s character, using simple techniques for even coverage.
We’ll cover warmth, preservation methods, and practical tips to boost finish longevity.
Traditional Varnish Warmth
Traditional varnishes add warmth and depth to pine, enhancing the wood’s natural grain while sealing against moisture and dust. You’ll notice a subtle color enhancement as coats build a translucent film that preserves the pine’s character.
Start with a clean, lightly sanded surface and remove dust before each application. Use a high-quality brush or cloth-based applicator to avoid lap marks, and apply thin, even coats. Allow adequate drying time, then lightly abrade with 320–400 grit between coats for a smooth finish.
For best warmth, opt for oil-modified or urethane varnishes with ambering tendency, but test on a sample first to confirm the look. Maintain even film thickness, and finish with a final gloss or satin coat to preserve wood grain and depth.
Pine Preservation Techniques
Pine responds best to coatings that balance protection with the wood’s natural warmth, so start with varnishes designed for durability and ambering. You’ll want a system that preserves color without overly darkening.
Begin with light surface prep: remove dust, clean resin, and lightly scuff with fine sanding. Apply a quality wood conditioner if you’re staining, then seal with a varnish base that offers UV resistance.
For protection, use multiple thin coats rather than one thick layer, allowing proper drying between applications. After each coat, inspect for pinholes or dust and address promptly.
Consider wood staining to achieve a consistent tone before final varnish. Be mindful of chemical treatments; select finishes compatible with any prior treatments.
Maintain ventilation during application and curing for best results.
Finishing Durability Tips
To maximize durability on pine, start with a balanced approach that protects the wood while preserving its warmth. First, choose a compatible varnish system—oil-based for depth or water-based for fast drying and easier cleanup.
Apply thin, even coats with a quality brush, sanding lightly between passes to maintain a smooth surface. Avoid thick layers that trap air and peel later.
Pre-sand to 220 grit to reveal the wood grain and ensure good adhesion. After the final coat cures, buff lightly to enhance color without creating glare.
Maintain durability by avoiding heat and moisture extremes, and recoat when the finish shows wear.
Store pine in stable conditions to prevent checking.
Inspect for compatibility with stains if you’re altering tone.
Penetrating Oils: Enhancing Grain Without Darkening
Ever wondered how to bring out pine’s grain without darkening it? Penetrating oils work by saturating the wood fibers and sealing the pores, not by adding surface film. Choose a light, neutral oil and apply a thin, even coat along the grain. Wipe off excess promptly to prevent nibbling into color shifts.
Allow the oil to penetrate for the manufacturer’s recommended time, then buff with a clean cloth to remove residual oil and reveal natural grain. For grain enhancement, avoid blends that tint the wood; opt for color-preserving formulations labeled non-yellowing or clear.
Reapply only as needed after cleaning, not after sanding. Maintain color preservation by maintaining temperature and humidity, and store leftovers tightly sealed. These steps deliver consistent, controlled results without darkening pine.
Wax and Wax-Polish Finishes: Soft Sheen and Easy Reapplication
Wax and wax-polish finishes offer a soft sheen that’s easy to maintain and reapply. You’ll get a light, even glow without deep saturation, so the wood grain stays visible. Apply thin coats with a clean cloth, buff lightly between passes to avoid buildup. These finishes dry quickly, so you can inspect color enhancement as you go and correct missed spots promptly.
Work on clean, dust-free surfaces and follow manufacturer guidance for curing times. Reapply at intervals that suit traffic and humidity; touch-ups blend best when you sand only lightly and dust off before the next coat. Wax finishes resist moisture better than untreated wood, but they aren’t stain substitutes.
Regular maintenance keeps the finish looking fresh while preserving natural pine character.
Stains and Glazes: Achieving Color Without Compromising Grain
Stains and glazes give you color while preserving the pine grain, so you can customize tone without hiding texture. You’ll choose products that penetrate or glaze lightly, then test on scrap to predict hue and depth.
Start with a compatible stain, applied evenly in the direction of the grain, and wipe off excess to prevent blotching. If you want subtle color enhancement, apply a thin coat and build in stages; for deeper tone, use a second pass after the first dries.
Glazes let you adjust warmth, shade, or richness without obscuring grain visibility. Seal with a compatible topcoat to lock in color and protect the surface.
Monitor color under task lighting, then finalize with even, controlled coats for durable, natural-looking finish.
Prep Steps: Sanding, Cleaning, and Grain Filling for Best Results
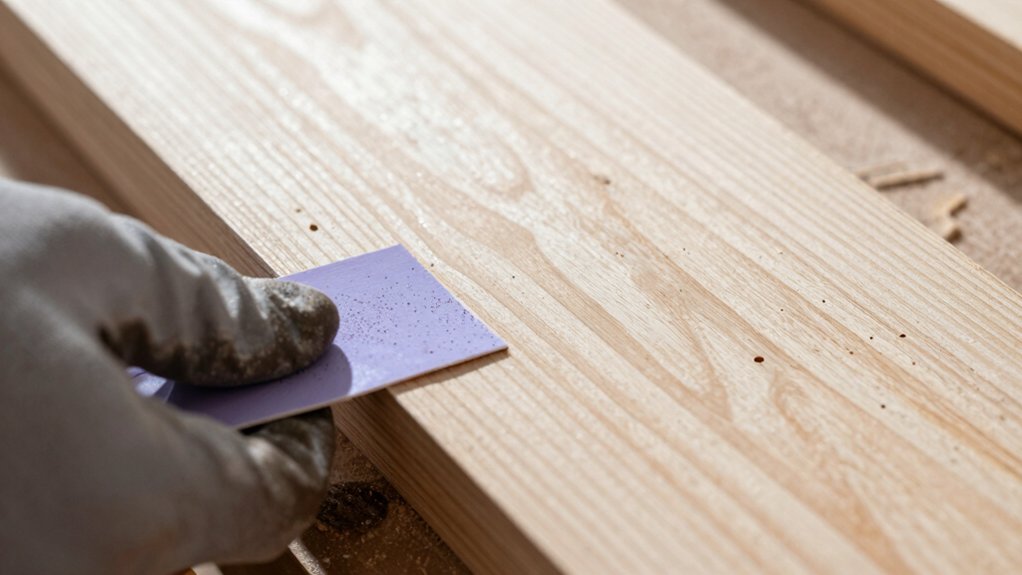
Before you apply any finish, start with a thorough prep: sand smoothly to remove imperfections, clean away dust and residue, and grain-fill where needed to even out surface texture.
You’ll begin with surface sanding, using fine grit (180–220) to establish a uniform base and reveal any remaining flaws. Wipe clean with a tack cloth, then inspect for raised fibers or fibers from the grain; address these with a light re-sand.
Move to grain filling only where you notice open grain, applying sparingly and smoothing flush to avoid high spots. Allow full drying per product guidelines, then perform a final wipe-down.
This sequence minimizes blotching and enhances finish adhesion, delivering a flatter, receptive surface for stains or topcoats. Repeat steps as needed for consistent results across the project.
Application Tips and Maintenance: Longevity for Pine Projects
Starting with a solid finish is essential for pine, so choose a compatible topcoat and apply it evenly in light, overlapping passes to prevent lap marks. Then maintain a steady climate during curing and avoid heavy handling until fully dry.
You’ll extend longevity by cleaning sanding dust between coats and inspecting for sags or runs, correcting promptly with light touch-ups. Use dedicated finishing tools to keep edges sharp and control buildup, and fuel your consistency with long, smooth strokes.
For wood grain highlights, graduated coats help reveal texture without overdosing. Store finished pieces in stable humidity and temperature, avoiding direct sunlight.
Re-coat as recommended, typically after 24 hours, and document your process for future projects to ensure repeatable results.