Did you know that the most effective semi-detached baths secretly hinge on wall placement and shared acoustics before fixtures? You’ll balance natural light with privacy, optimize layouts for tight footprints, and pick durable, water-ready materials that withstand busy mornings. Smart storage keeps clutter at bay, while soundproofing and layered lighting create calm in a space you share with a neighbor. Start here to shape a bathroom that feels private, stylish, and endlessly practical.
Design Principles for Semi-Detached Bathrooms

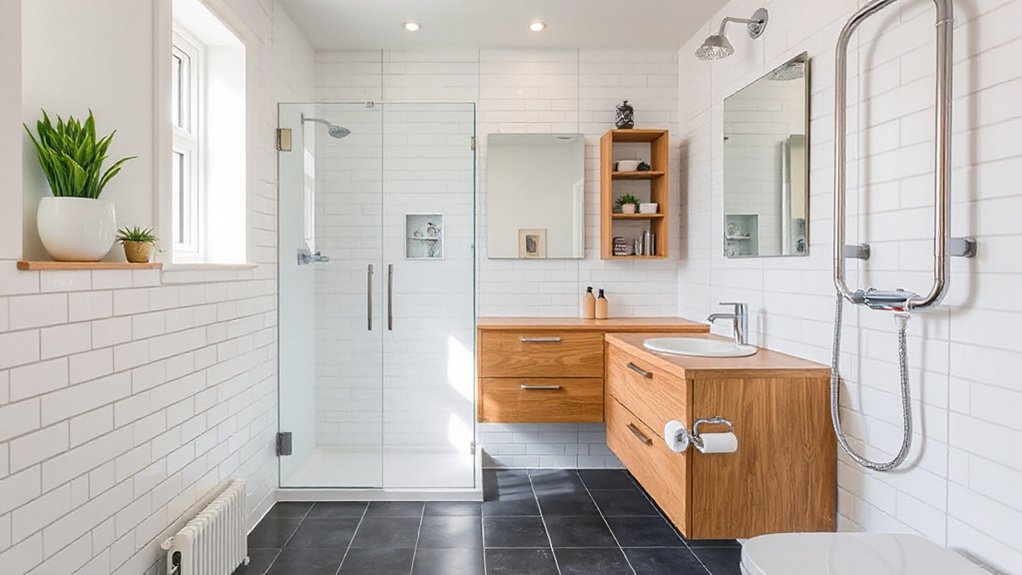
When designing a bathroom for a semi-detached home, start by optimizing layout to balance shared walls and private needs. You prioritize efficient circulation, logical fixtures, and dry zones, so leakage doesn’t cross into adjacent spaces.
Choose compact, wall-mounted storage to maximize floor area without clutter. Install bathroom ventilation that quietly moves moisture outside, preserving air quality and reducing mildew risk.
Select waterproof flooring with a textured finish for slip resistance and easy maintenance, extending from the shower to the vanity. Use neutral tones with a bold accent to convey calm yet modern character.
Plan plumbing runs to minimize noise transmission and simplify future upgrades. Finally, make certain sealing details are thorough, from corners to junctures, so the room remains durable and aesthetically cohesive.
Maximize Natural Light With Shared-Wall Considerations
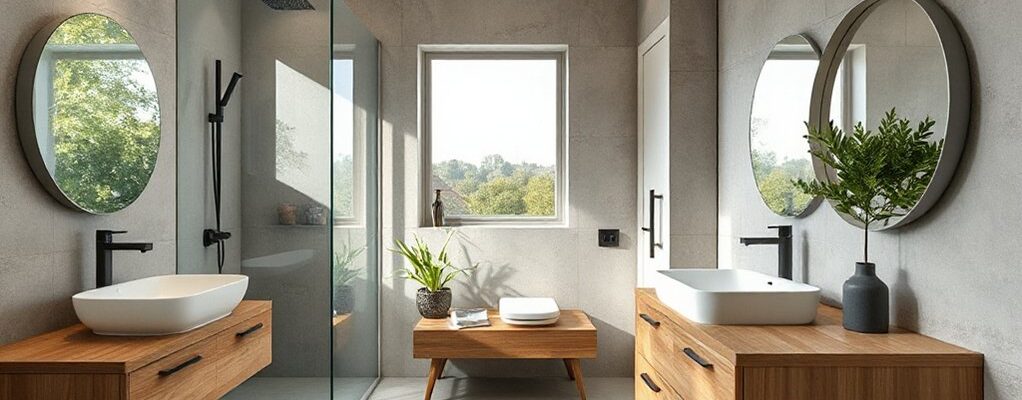
To maximize natural light in a semi-detached bathroom, leverage shared-wall considerations to pull daylight deeper into the space. You’ll optimize window placement and glazing choices on the shared wall to capture morning and afternoon rays without compromising privacy.
Use high-performance, low-iron glass and consider narrow, strategically oriented skylights or light tubes to distribute brightness evenly. Mirror arrays and frosted panels can amplify natural light while maintaining intimate zones.
For shared-wall privacy, position frosted or textured glass between the bathroom and neighbor areas, and employ radiator covers or towel warmers that double as light diffusers. Implement translucent partitions or panels to bend light without sacrificing function.
Prioritize natural light enhancement through consistent interior finishes—light-toned tiles, semi-gloss surfaces, and minimal clutter for a brighter, calmer retreat.
Space-Smart Layouts for Semi-Detached Homes
You’ll optimize corridor flow and twin-unit space planning to make everyday movements crisp and intuitive. By prioritizing clear sightlines, door placements, and compact storage, you’ll maximize usability without sacrificing style.
This space-smart approach sets the tone for efficient, elegant layouts in semi-detached homes.
Optimized Corridor Flow
Efficient corridor flow in semi-detached homes hinges on a thoughtful, space-smart layout that minimizes wasted steps and visually expands narrow passages. You prioritize clear sightlines, pocket doors, and corridor-width zoning to keep traffic fluid.
Positioned storage, slim furniture, and mirrored accents reduce perceived narrowness without overcrowding. Keep doors aligned with common walls to avoid cross-traffic entanglement, and consider a staggered corridor path that shortens travel distance between key rooms.
Lighting is critical: continuous, low-glare illumination makes *passage* feel longer and safer. Use color and texture to cue function—the bathroom or entryway deserve lighter, moisture-ready surfaces.
Within this framework, you’ll integrate Bathroom ventilation and waterproof flooring in practical, durable ways, ensuring a clean, maintenance-friendly corridor that remains visually cohesive and comfortable.
Twin-Unit Space Planning
Twin-Unit Space Planning focuses on crafting space-smart layouts that leverage the symmetry of semi-detached homes. You approach each bathroom as a paired module, aligning fixtures and storage so mirrors, vanities, and showers mirror across the shared wall.
This symmetry reduces wasted travel distance and simplifies plumbing runs, cutting material costs and installation time. Prioritize a clear zone for wet and dry areas, with compact, wall-mounted fixtures that maximize floor space without sacrificing usability.
Consider echo-reducing materials on the shared boundary to improve comfort; for example, insulated drywall and resilient channels dampen sound transfer. Use identical lighting schemes and color palettes to reinforce balance, while venting and humidity control remain individually tailored to each unit.
Twin unit symmetry enhances privacy, efficiency, and perceived space.
Durable, Water-Ready Materials for Busy Bathrooms
Durable, water-ready materials are essential in busy bathrooms, where humidity, splashes, and heavy use demand surfaces that resist mold, staining, and wear. You’ll prioritize products that remain stable under moisture, resist soap scum, and scrub clean without harsh abrasion.
Look for porcelains and porcelanized stones with low water absorption, plus quartz composites that mimic natural stone without porous vulnerabilities. Choose enamel-coated metals for fixtures that stay bright and resist corrosion, and consider solid-surface vanity tops that seal seams to deter water intrusion.
Eco-friendly fixtures help reduce footprint without sacrificing performance, while anti-slip surfaces boost safety around wet floors and showers. Pair with concealed fasteners and grout that’s sealed for routine wipe-downs, ensuring a durable, low-maintenance bathroom.
Smart Storage Solutions That Don’t Clutter Small Rooms
Maximize your bathroom’s footprint with clever wall-mounted storage that keeps essentials at hand without crowding the space. Use hidden storage techniques—built-in niches, toe-kick drawers, and recessed medicine cabinets—to maintain clean, streamlined lines.
This approach pairs functional efficiency with a refined, uncluttered look that suits semi-detached layouts.
Clever Wall-Mounted Storage
Ever wondered how to free up floor space without sacrificing style? In small bathrooms, wall-mounted solutions become your best ally.
Start with a slim, local vanity that tucks under any sink and uses recessed cabinetry for hidden odds and ends.
Choose wall-mounted shelves at eye level to keep daily items reachable without crowding counters.
A mirrored cabinet adds both light and storage, while magnetic strips or hooks keep tools organized and out of sight.
Install towel bars that double as rails for robes, freeing counter space for daily rituals.
For cohesive visuals, select finishes that echo your faucet or hardware.
With clever storage, you gain function, finessed lines, and a bathroom that feels larger and more intentional.
Hidden Storage Techniques
Hidden storage techniques build on the slim, wall-mounted approach by tucking away essentials without crowding the room. You’ll maximize every square inch with hidden compartments that blend into cabinetry, countertops, and mirrors.
Start with recessed niches in shower enclosures for soaps, razors, and sponges, keeping surfaces clear. Concealed niches in shelves organize cords, salts, and tote items without exposing clutter.
Choose furniture pieces with built-in pullouts—basket inserts, slim drawers, and tilt-out trays—so you never rummage. Use lift-up lids on vanity tops to store cosmetics and tools, and install mirror cabinets that hide grooming gear behind reflective fronts.
Integrate toe-kick drawers under sinks for cleaning supplies. Pair matte finishes with soft-close hinges to sustain a calm, streamlined look.
Spa-Inspired Details That Preserve Privacy in Shared Walls
Spa-inspired details can quietly elevate a shared-wall bathroom without compromising privacy. You’ll craft a serene retreat using tactics that respect line-of-sight and sound transfer, while still feeling indulgent.
Choose luxurious fixtures that sit snugly behind partial walls or frosted glass, so you experience opulence without visual drama on the adjoining space. Material choices matter: matte porcelain, warm wood tones, and brushed metals hide fingerprints yet read as premium.
Employ recessed niches and wall-mounted troughs to keep counters clear, reducing clutter that can echo between rooms. Ambient scents arrive through discreet diffusers or timed HVAC redirects, creating a spa-like atmosphere without permeating the neighbor’s area.
Finally, soft, layered lighting—cove, task, and accent—ensures depth without glare, preserving privacy while delivering refined comfort.
Noise-Reduction Tactics for Shared-Wall Bathrooms
When neighbors share a wall, quiet becomes a design feature, not a byproduct. You’ll prioritize soundproofing solutions that function as true room dividers, not afterthoughts. Begin with dense gypsum board on resilient channels, then add decoupling layers to break vibration transfer.
Organic materials like mineral wool or acoustic insulation batts tuck between studs, improving both impact and airborne noise control. Seal gaps with acoustic caulk around outlets, fixtures, and perimeter joints to prevent leaks.
Doors deserve attention too: install solid-core or mass-loaded vinyl-backed panels, plus soft-close hinges and tight weatherstripping.
Flooring choices matter—opt for floating subfloors with a dampening underlayment to reduce footfall.
Finally, integrate quiet HVAC zoning and recessed lighting that minimizes noise plumes while preserving a sleek, cohesive look.
Lighting Plans for Color and Mood
Lighting plans for color and mood start with a strategic mix of ambient, task, and accent lighting that complements your color palette and enhances the room’s atmosphere. You’ll balance soft, even surfaces for morning routines with brighter task zones for grooming. Dimmer switches let you tailor mood lighting to the moment, whether you’re unwinding or preparing for the day.
Choose fixtures that deliver consistent color rendering so skin tones and finishes look true, supporting color psychology goals. Layered lighting should highlight architectural details—tile textures, vanity mirrors, and shelving—without glare.
Consider a cool white for clarity during peak hours and a warmer tone for relaxation. Remember, good lighting creates perceived space, improves function, and reinforces the room’s style without shouting.
Budget-Friendly Upgrades With Big Impact
Upgrading on a budget doesn’t require a full reno to make a bathroom feel refreshed and bigger. You can achieve this with focused, high-impact swaps that keep costs in check.
Start with hardware: swap cabinet pulls and faucet hardware for sleek, cohesive finishes to instantly modernize without reconfiguring plumbing. Choose eco-friendly fixtures that save water and reduce future bills, then pair with bright, durable finishes like matte white or soft gray to widen the space optically.
Add vintage accents—a framed mirror, retro soap dish, or a porcelain tumbler—to inject character without a heavy overhaul.
Reconsider lighting with layered options: a slim vanity light plus a recessed fixture can sharpen shadows and highlight new details.
Keep storage sleek: baskets, slim cabinets, and wall shelves prevent clutter and feel intentional.
Frequently Asked Questions
How Can I Ensure Privacy From the Adjoining Unit in a Shared Bathroom?
To guarantee privacy, install privacy screens and soundproof barriers between units; use frosted glass or opaque panels, door seals, and weighted curtains. Add acoustic caulk, soft-close hinges, and ventilation with discreet reset switches for a functional, stylish retreat.
Which Ventilation Options Work Best for Semi-Detached Layouts?
You should choose high-quality mechanical or natural options; for semi-detached layouts, prioritize ventilation efficiency and reliable Airflow solutions. Opt for continuous exhaust with humidity sensors, plus windows or vents that maximize cross-ventilation while minimizing noise and drafts.
Are There Zoning or Building-Code Concerns for Shared-Walls?
Shared wall insulation helps you prevent noise and drafts, and yes, zoning regulations can impact you. About 60% of homeowners overlook it until an inspection, so verify permits and fire-stop rules for your semi-detached project.
How Can I Reduce Noise Transfer Between Bathrooms?
To reduce noise transfer between bathrooms, install soundproofing solutions like solid core doors and resilient channels, and add acoustic insulation behind walls and under floors. You’ll achieve quieter spaces with practical, stylish, detail‑oriented improvements.
What Are Quick, Low-Cost Upgrades for a Cohesive Dual-Space Look?
A traveler steering two ships by one compass, you’ll choose quick, low-cost upgrades: cohesive hardware and finishes, decorative accents, and color coordination. You fix mismatches with simple, functional touches that feel stylish, unified, and unexpectedly refined.
Conclusion
You’ll love sharing a wall that practically hugs you with privacy—how quaint. You’ve turned cramped into clever, sunlight into a feature, and moisture into manageable with smart materials. No clutter, just streamlined storage and a spa vibe pretending to be affordable. The layout nails function, the finishes wink at durability, and the noise stays politely distant. Enjoy the illusion of seclusion—because nothing says luxury like knowing your bathroom isn’t a performance venue for your neighbor. Irony, fully installed.