
Yes, paints can dry darker or lighter, but the shift isn’t random—it’s predictable with prep and testing. You’ll see changes from lighting, finish sheen, and how evenly you apply the coat. Primer, base coats, and environmental factors like temperature and humidity matter, as do pigment load and drying time. To forecast the final shade, test large swatches in the actual room under the same lighting and from multiple angles. If you keep going, you’ll reveal more precision tips.
Do Paints Dry Darker Or Lighter? Core Facts You Can Use Today
When paints dry, they can appear either darker or lighter than the wet finish, depending on the formulation and ambient conditions. You’ll notice this shift due to pigments, binder, and film thickness, which alter light reflection.
In practice, the outcome hinges on proper paint mixing and consistent application, then patience as the film cures. To manage expectations, perform color calibration with a small, representative sample panel under similar lighting.
Compare wet and dry swatches once the surface reaches commandable cure; this reveals true color behavior for your space. If a shift concerns you, adjust your mix ratios or select a product with known dry behavior.
With deliberate color calibration and precise paint mixing, you’ll achieve dependable, harmonious results.
Why Wet Color Looks Different in Your Room Lighting
Room lighting can make wet paint look different from its true color because light interacts with the film while it’s still wet. You’ll notice shifts in color perception as the pigment pools, spreads, and evaporates thinner, altering opacity. This isn’t a flaw; it’s the film’s natural response to illumination.
Focus on paint consistency during application, as thickness variations exaggerate perceived changes. In warm rooms, wet color often appears warmer or duller until it cures; in cool spaces, it may read more blue or gray.
To anticipate results, test on a small area under your actual lighting. Remember that once the film dries, color stabilizes. Use controlled trials to align your choice with desired outcomes, reinforcing belonging through predictable, deliberate decisions.
Sheen, Undertones, and Finish: What Matters Most for Dry Color
Sheen, undertones, and finish determine how the dry color reads in the space just as much as pigment and binder do. You’ll notice that higher sheen reflects more light, making the color appear brighter, while flat finishes emphasize depth and mood.
Undertones matter: a warm base can cozy a room; a cool base can feel crisp and modern.
Finish choices align with your goals for atmosphere and practicality: washability, touch-ups, and glare control all factor in. When you choose, evaluate color temperature in situ, not on a swatch alone.
Consider paint texture and its impact on perceived color depth, then test in multiple lighting moments. Your goal is consistent mood, clarity, and belonging, not guesswork.
The Role of Base Coat and Primer in Dry Shade
A solid base coat and primer set the stage for true-dry color by sealing surfaces, controlling porosity, and stabilizing undertones. You’ll notice how paint texture becomes more predictable once the substrate is uniform, reducing graininess and blotchiness.
Primer choices influence how color reads on the wall, aligning with your chosen color temperature so warm and cool tones don’t drift as the dry phase progresses. A proper base coat minimizes subtle shifts, making your finish more faithful to the sample you selected.
With consistent adhesion, you gain durable, even color that resists recovery after touch-ups. In short, base coat and primer establish the foundation for reliable shade behavior, delivering belonging through clarity, precision, and confidence in every room.
Temperature and Humidity: How They Change Dry Color
Temperature and humidity aren’t just background factors—they actively shape how a dry color reads after the surface has been sealed. You’ll notice shifts based on air moisture and temperature, which influence how paint chemical composition settles and cures. Environmental factors drive subtle, yet perceptible, color changes once the film locks in.
- Temperature fluctuations alter pigment settling and resin interactions, nudging color toward lighter or darker readings.
- Humidity affects solvent evaporation and film formation, impacting saturation and edge clarity.
- Consistent conditions minimize color drift, helping you predict the final look more reliably.
Understanding these dynamics helps you choose finishes with confidence, knowing your environment shapes the result, not illusions of fate.
Embrace the science, respect the conditions, and your color will align with intention.
Predicting the Final Shade Before You Paint
Understanding final shade starts with your sheen and pigment base, because gloss or matte finishes can shift perception.
Pay attention to lighting and undertones, since the color you see on walls can lean warm or cool under different conditions.
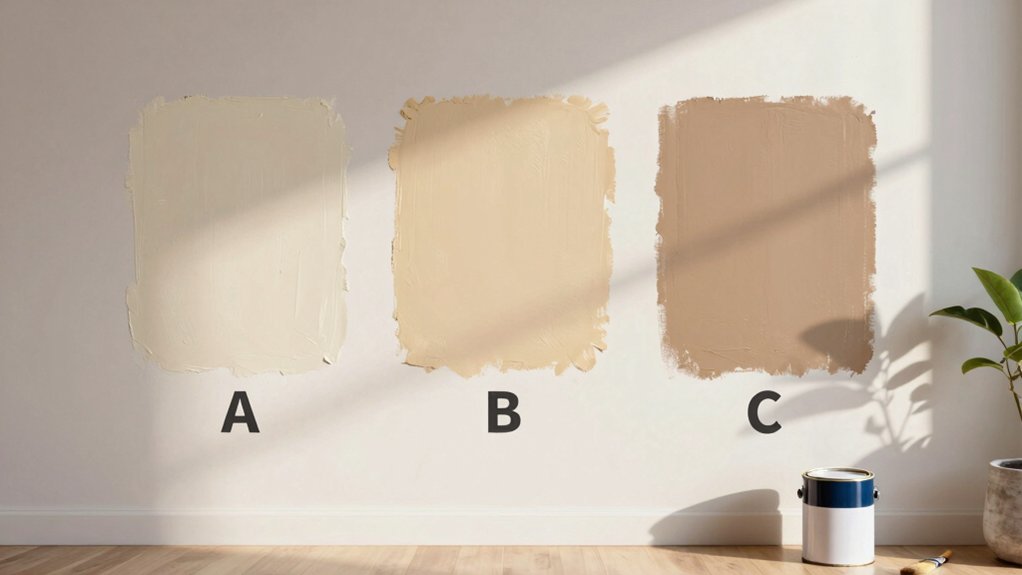
Use swatch testing method to compare samples in your actual space before committing.
Sheen And Pigment Base
Ever wonder how sheen and pigment base shape the final color before you even paint? You’re not alone—these elements set expectations you’ll rely on as you plan. The right combination helps you predict the shade, not just the finish, so you feel confident choosing a palette that fits your space. Here’s how it works:
- Pigment consistency matters: finer bases blend more smoothly, stabilizing the color you see on swatches and walls.
- Sheen influence guides perception: higher sheen can look lighter or brighter, while flatter finishes reveal depth and undertones.
- Consistency between base and sheen reduces surprises, ensuring the final shade mirrors your intended look rather than shifting after drying.
Lighting And Undertones
When you predict the final shade, lighting and undertones matter just as much as pigment and sheen. You’ll see how natural, artificial, and even indirect sunlight shift perceived tint, warmth, and depth throughout the day.
Consider undertones—whether you favor cool, warm, or neutral—since they reveal themselves differently under your rooms’ lighting mix. Good planning combines paint color psychology with your actual lighting plan, anticipating how fixtures, windows, and wall proximity influence tone.
Seek color harmony by pairing undertones with adjacent hues and furnishings, preventing discord or muddy results. Test mentally, not just on swatches: imagine morning, noon, and evening scenes, and adjust accordingly.
With intentional lighting-aware choices, you’ll achieve a cohesive, inviting space that feels like belonging.
Swatch Testing Method
To predict the final shade before you paint, start with a methodical swatch-testing approach that mirrors how lighting and undertones will behave in your space. You’ll compare multiple colors on large, labeled swatches, in both natural and artificial light, across time, to reveal true color behavior.
This method sharpens color consistency and highlights finish durability, so you’re not surprised later.
- Test large swatches in your actual lighting at different times of day, on the wall, not on a card.
- Record undertone shifts and compare finishes (matte, eggshell, satin) for consistency.
- Review after 48 hours of exposure to light and ambient colors, then finalize with confidence.
Finishes That Retain Their True Color When Dry
A true-color finish stays faithful to its hue as it dries, so you should pick products proven to resist tint shifts. When you choose finishes that retain true color, you gain predictability and confidence in your space. Look for formulations tested for color stability across drying conditions, and favor matte, satin, or low-luster options known for minimal hue drift.
Prioritize paint durability so your walls resist wear without sacrificing shade integrity. For rooms with bright light or strong artificial lighting, these finishes keep saturation from washing out or blooming into a different tone.
In practice, read label claims about pigment load, binder quality, and UV resistance to ensure color saturation remains consistent from first coat to final cure. Belonging comes from knowing your color will stay true.
Common Mistakes That Skew Perceived Color Change

Lighting can dramatically skew how you perceive drying color, so verify your samples under the same illumination you’ll use in practice.
Finish sheen also shifts appearance, meaning a higher gloss can look different at the same color than a matte finish.
Lighting Confounds Perception
When color appears to shift, lighting is often the culprit: different light sources, intensities, and directions can fool the eye into perceiving changes that aren’t in the paint itself. You want reliable color, so acknowledge how color perception hinges on ambient illumination and how it travels across a room.
1) Observe test patches under multiple light types (daylight, warm bulbs, LEDs) before deciding.
2) Compare samples at the actual wall height and nearby surfaces to gauge true color under ambient illumination.
3) Avoid dramatic swaps in lighting during editing or evaluation; consistency builds confidence and belonging.
Finish Sheen Influences Outcome
Finish sheen matters as much as color itself, because the surface’s gloss or matte quality reflects and refracts light differently. You’ll often notice a color shift when you switch finishes, even with the same base color. A higher sheen reflects more ambient light, brightening edges and corners, while a flat finish absorbs light, muting contrast.
This sheen influence compounds perceptions created by lighting and substrate, leading you to misread true hue. To avoid mistakes, test color samples side by side under real room conditions, not on a swatch alone. Ask for ambient-light-adjusted comparisons, and review after a full coating dries.
Quick Testing Methods: Sample Boards and Real-Room Tests
Quick testing methods save time and provide real-world clarity. You’ll verify color behavior before committing, using both sample boards and real-room tests. This approach helps you see color consistency across lighting and surfaces, and it sharpens your application techniques for a uniform finish.
1) Use large sample boards painted under the same conditions as your walls to compare color shifts in daylight and artificial light.
2) Test real rooms with chips in multiple spots, noting how sheens, texture, and neighboring colors influence perception.
3) Move from boards to a small wall panel to confirm consistency before full-room application, adjusting technique as needed.
These steps keep you confident, informed, and connected to your project goals.
Step-by-Step Guide to Forecasting Your Dry Color
You’ll forecast your dry color by weighing Dry Color Variability, so you know what to expect across batches.
Consider Lighting Impact Forecast to map how your finish shifts under different rooms and bulbs, then use a Swatch-Based Projection to anchor those changes to real samples.
This approach keeps your plan precise, actionable, and ready for tweaks before you commit to a full coat.
Dry Color Variability
Dry color variability is the reality you must account for when forecasting a paint’s final appearance, because small changes in pigment load, binder ratio, and drying conditions can shift hue, saturation, and brightness as the film cures. You’ll track color perception shifts as the finish dries, guided by paint chemistry to anticipate outcomes rather rather than guesswork.
- Observe early samples under controlled conditions to compare hue shifts and saturation changes.
- Document resin type, pigment load, and film thickness to predict how color will evolve.
- Calibrate expectations against repeatable tests, adjusting formulas to stabilize final appearance.
This approach keeps you aligned with expert standards, fostering belonging through precise, data-driven decisions about color outcomes.
Lighting Impact Forecast
As you forecast your dry color, consider how lighting shapes perception at every stage. You’ll compare daylight, fixtures, and ambient glow to set expectations for the final tone. Moderate, cool, or warm light shifts hue subtly, so note how each source alters your swatch in real time.
Document differences under real conditions, not in idealized moments. When you track drying time, factor how heat, humidity, and air flow influence color settling—these elements change with lighting, too.
Be mindful of paint odor as it evolves; odor can signal volatile adjustments in the surface that affect perception until complete cure. Use a consistent lighting plan during assessment to ensure reliable forecasting and avoid misinterpretation of a shade that’s still drying.
Swatch-Based Projection
Could you predict the final hue from a swatch with a clear, repeatable method? Yes, and Swatch-Based Projection lets you do it with confidence. You’ll translate swatch behavior into a forecast for your painted surface, anchoring results in color consistency and proven application techniques. Follow a disciplined process, not guesswork, to minimize surprises.
- Align conditions: compare the swatch to the room’s lighting and substrate, then note finish and sheen.
- Calibrate timing: observe color shifts at multiple intervals as the film cures, recording gradual changes.
- Validate against the target: apply a small test panel, then contrast dry results with the swatch under similar light.
This approach strengthens belonging through predictable outcomes and precise, repeatable steps.
Frequently Asked Questions
How Long Does It Take for Paint to Fully Cure Color?
You’ll see paint curing and color development complete in about 1–4 weeks, depending on product and conditions. You’ll notice the finish stabilizes as humidity and temperature align; subtle shifts sync with your environment, reinforcing your sense of belonging.
Can Drying Color Differ Between Indoor and Outdoor Environments?
Yes, drying color can differ: indoor conditions slow or accelerate drying, while outdoor environments introduce humidity, temperature swings, and airflow. You’ll observe the paint drying process shift due to environmental influence, influencing finish consistency and curing times.
Do Lighting Changes After Painting Affect Final Shade Permanently?
Yes, lighting changes after painting can permanently influence final shade due to color perception shifts; you’ll notice lighting impact across rooms, so choose swatches under varied light to guarantee your chosen color reads consistently in all spaces.
Do Different Brands’ Base Formulas Alter Dry Color More?
Brand differences can alter dry color slightly; you’ll notice shifts tied to paint consistency and drying agents, so test samples first. You’ll gain confidence when you compare shades firsthand and choose formulas with stable drying behavior.
Will Applying a Second Coat Darken or Lighten the Final Color?
Sure: a second coat darkens the final color slightly as color saturation increases with paint layering. It won’t dramatically change, but you’ll notice deeper tones where the pigment concentrates, especially on porous surfaces.