
Lead paint is most likely in homes built before 1978. To spot it, look for cracking, chalking, or peeling layers—especially on trim, windows, and doors. Deterioration may leave a chalky dust or rough, powdery surface. Heat, moisture, and age accelerate deterioration, so prioritize areas exposed to stress. If you see risk signs or suspect paint is chipping, test promptly and, if needed, bring in a professional. More practical steps await as you continue.
What Is Lead Paint and Why It Matters
Lead paint is powdered or chipped paint that contains lead, a toxic metal that can linger in dust and soil. You should understand why this matters: exposure risks are highest for children and pregnant people, yet adults can be affected too.
Lead sources include older homes, furniture, and imported products. A lead hazard can cause cognitive delays, learning difficulties, and other health problems over time.
Paint safety means recognizing that not all lead exposure is obvious, and proper precautions are essential during renovations or cleanup. Even small peeling areas can produce dangerous dust.
If you suspect lead paint, stop work, isolate the area, and consult guidelines for testing and remediation. Prioritize safe handling, containment, and professional evaluation to reduce long-term harm.
Spotting Lead Paint at Home: Obvious Signs You Can See
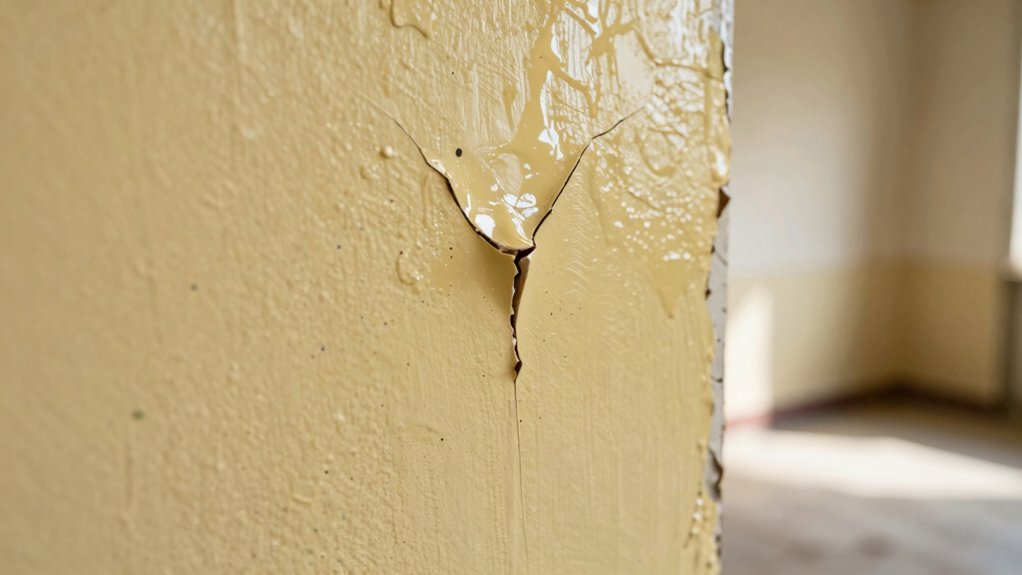
If you’re in an older home, look for paint that shows telltale signs of lead exposure: cracking, chalking, or peeling in layers—especially on trim, windows, and doors. Spotting lead paint at home starts with careful surface inspection. Look for paint that’s chipped or flaky, and note areas where layers separate from underlying wood.
Chalky residue on walls or sills often signals degraded enamel or latex coatings containing lead. Use good lighting and run a gloved finger gently across surfaces to feel for rough, powdery texture. If you observe deteriorating paint, treat it as a potential risk and limit disturbance that could release dust.
For confirmation, arrange professional testing rather than DIY measurement. Prioritize safer renovation practices and proper containment to minimize exposure.
How Building Age Raises Lead Paint Risk
Older homes often carry a higher lead paint risk because they’re more likely to have been painted before lead was banned.
As buildings age, deterioration can expose layers of lead-containing paint, increasing exposure potential.
Understanding the timeline of lead paint helps you prioritize inspection and safe remediation steps.
Old Homes, Higher Risk
Old homes are more likely to contain lead-based paint because many were built before 1978, when the practice was common and regulation lax. You’ll see higher risk in older structures, especially with frequent renovations or deteriorating coatings.
Historical housing patterns show that mass-built, pre-1970s homes used lead pigments and lead-based primers, increasing exposure potential during chipping or sanding. You should prioritize testing before any disturbance, particularly in layers near kitchens, windows, and doors where contact is common.
Renovation hazards include fine lead dust, which can linger on surfaces and be inhaled or ingested. Use proper containment, wet methods, and certified contractors.
Document findings, update safety plans, and communicate risks to occupants, so you protect vulnerable groups and maintain a safer home environment.
Lead Paint Timeline Factors
Lead paint risk climbs with a building’s age, because pre-1978 construction widely used lead-based pigments and primers. As you examine timeline factors, you’ll see how paint durability declines differently over decades, increasing the chance of chipping and exposure during renovations.
Older coatings often lack modern stabilization, making surface wear more consequential. Environmental factors—temperature swings, moisture intrusion, and soil contamination—accelerate deterioration and complicate remediation.
You should note that heat and humidity promote blistering and cracking, while freezing cycles can cause flaking. Renovation crews must plan for containment and proper disposal, since exposed layers may release lead dust.
Track historical renovations, re-coat intervals, and maintenance history to gauge current risk. Understanding these factors helps you prioritize testing, PPE, and compliant removal before disturbing painted finishes.
Renovation Triggers That Raise Lead Exposure Concerns
Renovation activities can stir up lead hazards, especially when they disturb painted surfaces or components installed before 1978. You’ll want to anticipate which tasks most commonly create exposure and plan accordingly.
- Disturbing painted trim, molding, or windows during sanding or scraping
- Demolition or drilling into plaster or drywall that contains lead-based paint
- Renovation in poorly ventilated areas that traps dust and fumes
- Weather-related activities that expose interior surfaces to windborne dust
Lead dust can linger after work ends, and renovation triggers may reintroduce it with every cut, nail, or grind. Use containment, removal by qualified pros when needed, and strict cleanup to minimize risks.
Document procedures and monitor for lingering dust to protect occupants.
At-Home Tests: Quick Checks You Can Do Yourself
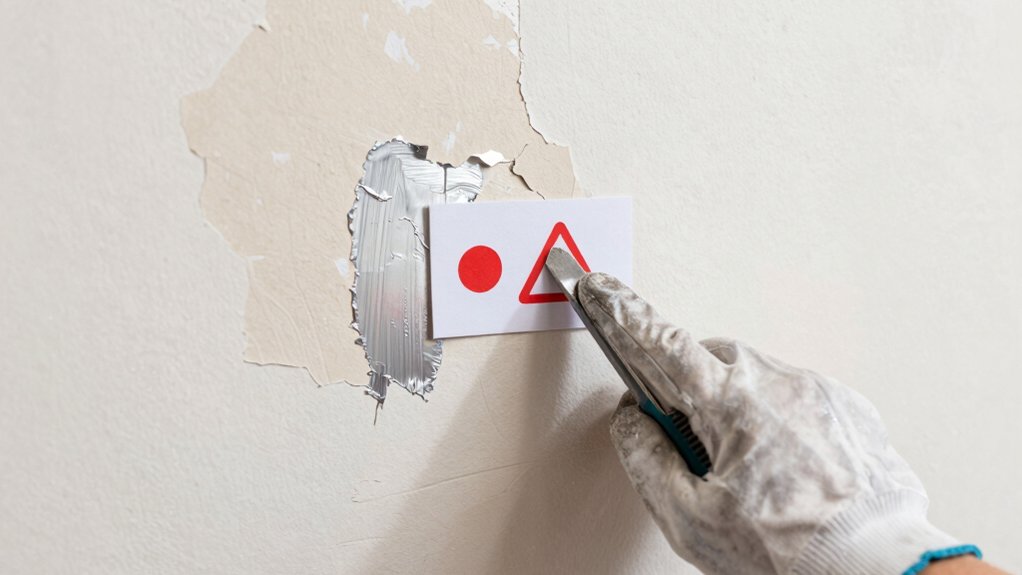
If you want a quick sense of whether lead might be present in your home, start with simple at-home tests that don’t require special equipment. DIY testing kits can indicate the likelihood of lead-based paint on surfaces, but they aren’t definitive. Read and follow directions carefully, and use multiple samples from suspect areas to check for consistency. Avoid assumptions from a single result.
For painted surfaces, avoid disturbing layers beyond routine cleaning to minimize dust exposure. Wear gloves and work in a well-ventilated space, and seal tested areas after sampling. Document results and note any deteriorating paint.
Safety precautions include keeping children and pets away during testing and cleaning. If results are inconclusive or you see chipping, seek professional evaluation and proper remediation guidance.
When to Hire Professionals for Testing and Abatement
You should hire professionals when initial tests are inconclusive or when you uncover deteriorating paint, since experts can confirm lead presence with certified testing and provide safe abatement options.
- They assess risk quickly and accurately, reducing exposure during remediation.
- They implement code-compliant containment and cleanup, avoiding DIY removal hazards.
- They offer options tailored to your home’s structure and occupant vulnerability, including children.
- They verify results post-abatement to ensure no lingering contamination and address lead paint myths with facts.
Rely on licensed testers to interpret results and plan next steps, rather than relying on DIY removal myths.
Professional testing and abatement deliver clarity, safety, and measurable peace of mind for you and your family.
Reading Lab Results: What the Numbers Mean for You
Now that you’ve considered when to call in pros, it’s time to interpret lab results and understand what the numbers mean for your family’s exposure and next steps.
When you see a lab report interpretation, focus on the reported lead concentration, units, and the sample type. Paint chip analysis often shows results in micrograms per gram (µg/g) or parts per million (ppm); consult the report’s reference ranges and detection limits.
Higher numbers indicate greater potential exposure, especially if multiple samples exceed thresholds. Consider the context: sample age, surface location, and recent renovations.
Use the results to guide risk discussions with professionals and prioritize remediation. Always verify QA/QC notes and method used, so you can trust the interpretation and plan practical next steps confidently.
Preventing Lead Exposure in Daily Life
Regularly clean and test high-risk areas, and adopt simple everyday habits that reduce lead exposure in your home. You’ll lower risk by managing dust, avoiding disturbed painted surfaces, and choosing safer materials when remodeling. Focus on paint safety and hazard awareness in daily routines, from kitchen counters to window sills.
Work areas should be well-ventilated, with damp cleaning to minimize airborne dust. Keep children away from renovations and wash hands after activities that stir dust. If you suspect lead paint, hire certified professionals for assessments and containment. Document findings and communicate risks to household members.
Use age-appropriate cleaning practices, label painted zones, and create a maintenance plan to sustain low exposure levels.
- Regular dusting with a damp cloth
- Wash hands after playing outdoors
- Isolate and test renovation areas
- Dispose of waste per guidelines
Frequently Asked Questions
Can Lead Paint Affect Pets Differently Than Humans?
Lead paint can affect pets differently: you may notice quicker GI upset or neuro signs in animals, compared to humans. You should minimize pet exposure, monitor symptoms, and consult a vet promptly for appropriate veterinary risks assessment.
How Long Does Lead Dust Stay in the Home After Abatement?
You’ll be surprised: 70% of homes with lead paint have detectable lead dust months after abatement. Lead dust can linger, but residual contamination typically drops to safe levels within weeks to months with proper cleaning and ventilation.
Do All Chipped Paints Contain Lead in Older Homes?
Not all chipped paints contain lead in older homes, but many do. Treat any paint chips as potentially lead-based; assume risk and test professionally before disturbance, since lead-based paint often appears as chips from earlier renovations.
Are There DIY Safe Practices During Renovations Around Lead-Painted Areas?
Yes—use DIY safety practices: seal off the area, wear disposable coveralls, use a HEPA vacuum, and avoid sanding. For lead paint removal, don’t DIY; hire licensed pros and follow local regulations to minimize exposure risks.
How Often Should Air Testing Be Repeated Post-Remediation?
Lead dust lingers like a cautious shadow; you should repeat air testing at 3–6 month testing intervals until you confirm clearance. You then continue annual checks, ensuring lead dust stays below safe thresholds with practical, evidence-based vigilance.
Conclusion
Lead paint awareness matters for your family’s health. You can spot risk, test safely, and act promptly, but don’t overpromise results from DIY checks. Use clear evidence: age, chipping, or dust can hint at trouble. When in doubt, call pros for testing and remediation. Prioritize prevention—keep surfaces clean, seal or replace risky areas, and follow lab guidance. Your careful steps reduce exposure and protect everyone under your roof.