Brickwork problems can explode into major damage overnight if you neglect them, so you’ll want a clear, methodical approach from the outset. You inspect, document, and monitor joints, spalling, and damp, then use proper tools to clean and re-point with the correct mortar depth and profile. You’ll check drainage and moisture levels to prevent ingress, and replace damaged bricks or coping when needed. But a persistent issue or structural concern means professional input—especially for historic or intricate work—to guarantee long-term stability.
Common Brickwork Issues UK Homes Face
Common brickwork issues in UK homes typically stem from moisture and movement. You’ll notice rising damp, salt efflorescence, and spalling when moisture migrates through porous brick and mortar. Spalled faces reveal friable brick surfaces and compromised strength, while efflorescence leaves white crystalline deposits on the brickwork. Seasonal expansion and settlement generate cracks that track through the mortar bed, causing loss of cohesion and potential bowing of walls. You should assess brick color variations as indicators of water ingress or efflorescence-related staining, rather than decorative changes. Mortar texture changes, including powdery or crumbly joints, signal deterioration of bond strength and reduced weather resistance. Prioritize identifying moisture sources, drainage faults, and structural movement before selective repointing, ensuring that any remedial measures maintain the wall’s intended breathability.
How to Assess Brick Mortar Joints and Pointing Quality
Moving from identifying moisture and movement issues, you now need a clear method to evaluate the mortar joints and pointing quality. Begin with a visual scan for uniform joint lines, cracks, and openperimeters around brickwork. Assess depth by probing joints with a dart or thin screwdriver—shallow gaps indicate poor compaction or missing mortar, deeper voids suggest movement or degradation. Evaluate mortar texture: trowel-rough surfaces imply under-worked joints, while overly smooth textures may indicate overwatering or improper workmanship. Check color consistency across bricks and joints to spot grading or efflorescence influences; Brick color uniformity reflects proper mix and curing. Use a simple rating: sound, compromised, or failed, documenting affected bays. Record joint profile, width, and cracking patterns to guide targeted repointing decisions.
Salt Efflorescence and Damp Intrusion: DIY Detection and Fixes
Salt efflorescence and damp intrusion are detectable through targeted surface observations and moisture tests. You’ll inspect crystalline deposits on brick faces, efflorescence staining on mortar, and stonework porosity, then confirm with relative humidity and moisture meter readings at interior walls and wakes of damp patches. Identify moisture sources: rain ingress, wind-driven leaks, or rising damp from ground level. Apply controlled tests, such as surface damp meter checks and decorative render lift, to distinguish mineral efflorescence from mildew or paint films. For efflorescence prevention, assure proper drainage, flashing integrity, and ventilation to reduce surface tension and moisture films. Employ damp proofing techniques judiciously, prioritising cure-compatible barriers, breathable coats, and sealants only where appropriate, avoiding exterior moisture entrapment.
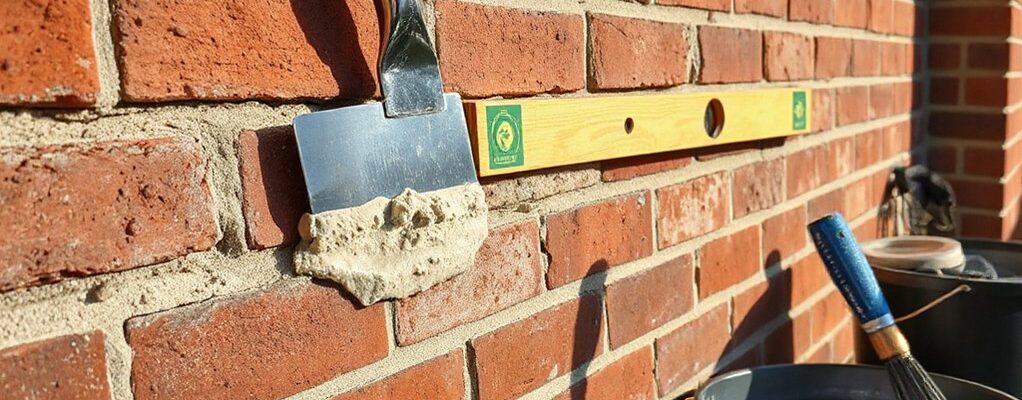
Repointing Loose Joints: Tools, Steps, and Tips
To repoint effectively, you’ll review the required tools, from point chisels and stiff-bristle brushes to mortar rakes and mixing tools, ensuring you have sharp, clean joints before work begins. Next, follow a structured sequence for joints and joints depth, selecting the appropriate mortar mix and application technique to maintain brickwork integrity. Finally, heed common issues in loose joints and apply precise tips for consistent compaction and joint finish to prevent recurring movement.
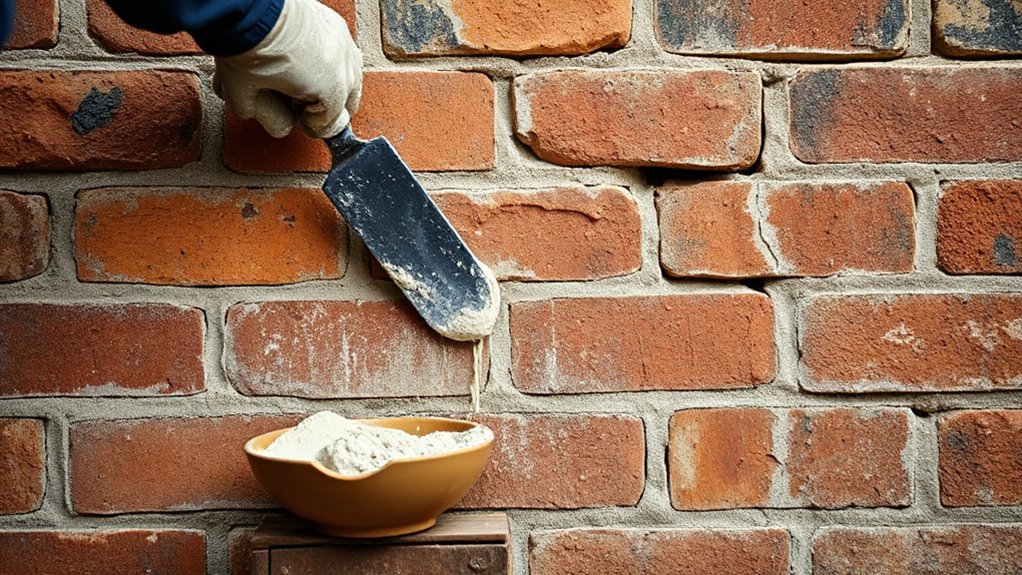
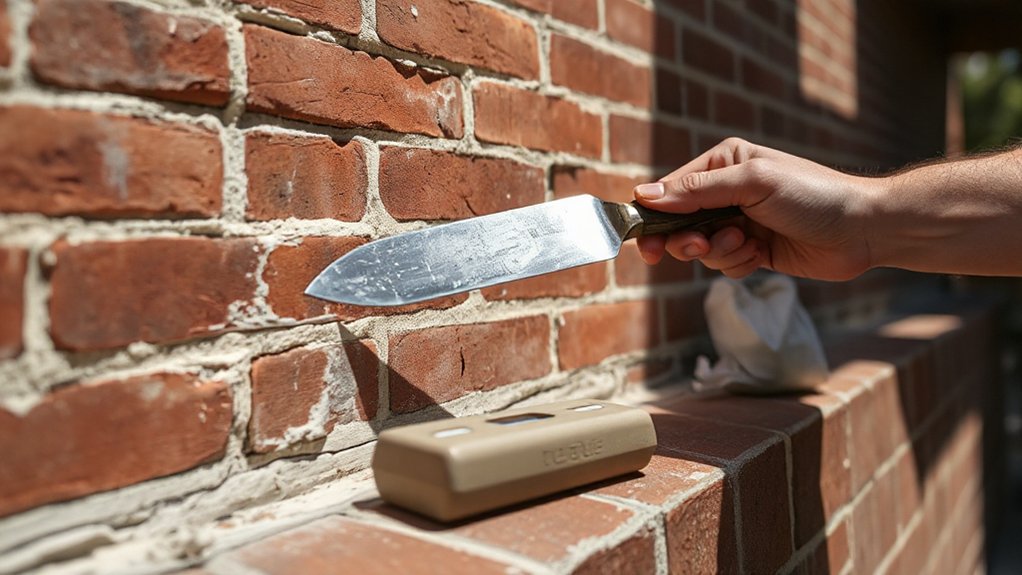
Tools For Repointing
Repointing loose joints demands the right set of tools, careful preparation, and a methodical approach. You’ll need a chimney brush or stiff bristle brush for initial dust removal, a sharpening knife for joint profiling, and a pneumatic or manual jointing trowel to shape the mortar bed accurately. A pointing trowel, margin trowel, and neusser or grout bag support consistent mortar placement. For removal, use a cold chisel or multi-tool with a carbide blade, plus a plaster/drywall knife for trimming edges. Dust containment matters; wear eye protection and a dust mask. Choose a mortar bag or consistent masons’ tub mix, ensuring compatibility with existing brickwork. When pursuing Brick color matching or historical restoration, test batches on a sample area before broad application. Clean tools promptly to prevent mortar set.
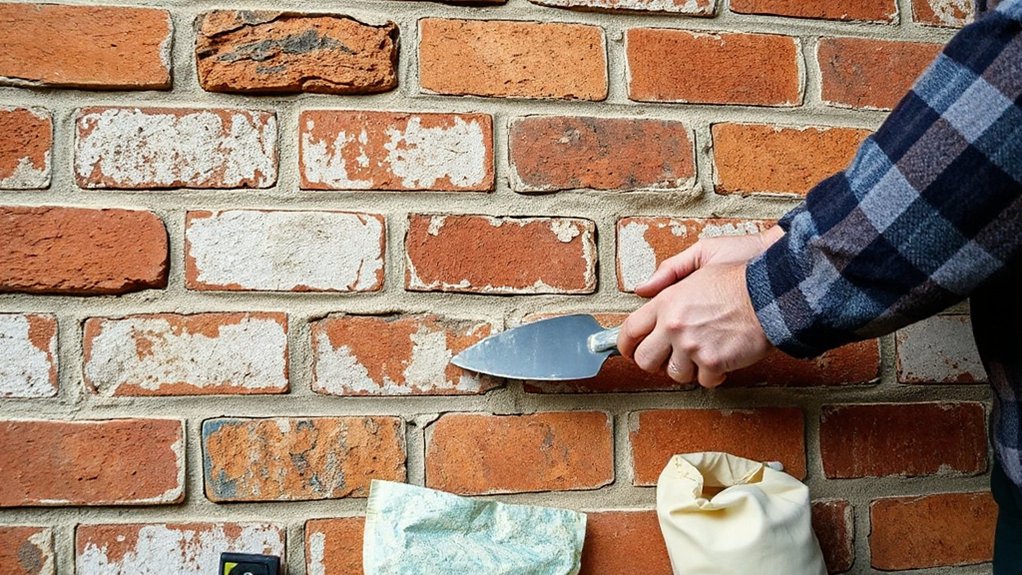
Steps To Repoint Joints
Begin by evaluating the joint depths and mortar softness to determine removal depth and washing needs. You then grade the joints for soundness, marking loose sections for targeted removal. Use a grinder or chisel with a brushing gauge to remove failing mortar, cleaning shoulders to a uniform width. Keep dust down with a vacuum and damp sponge to avoid debris embedding. Repoint with a Portland-based or lime-putty mix, matching mortar color and texture to historical brickwork standards. When tooling, strike joints true and square, avoiding over-widening. Refill in passes, compacting each layer to expel voids and prevent cracking. Consider decorative brick patterns and ensure surface sheen aligns with surrounding work. Regularly inspect for efflorescence and adjust moisture management accordingly.
Tips For Loose Joints
If joints are loose, start by confirming the extent of movement with a firm push and by probing for hollow sounds that indicate internal voids. You should isolate problem bays, then assess mortar type and brickwork age to tailor a repair plan. Use a cold chisel and stiff brush to clean joint faces, removing dust, decayed mortar, and loose particles without damaging surrounding headers or decorative brick patterns. Select a compatible mortar mix—often lime-based for historic brickwork—and implement controlled backer fills with a pointing trowel, ensuring joints are recessed to the manufacturer’s recommended profile. Repoint with consistent pressure and cross-tatch tooling to achieve a closed, weatherproof joint. Document outcomes for future maintenance, noting historical brickwork nuances and any impact on decorative brick patterns.
Repairing Cracked Coping and Brick Edges
Cracked coping and damaged brick edges compromise both aesthetics and structural integrity, so evaluate the extent of deterioration before proceeding. You’ll identify whether cracks are superficial or indicate substrate weakness, and determine if repointing, replacement, or capwork is required. Start with clean joints using a non-metal brush, then inspect for spalling, loose units, and mortar hardness. If coping is cracked but secure, you can consolidate with appropriate adhesive and install a compatible coping cap to shed water. For severely damaged edges, selectively replace bricks, matching size, texture, and color to minimize visual impact. Use Portland cement-lime mortar with a lower lime content to improve breathability. Consider decorative brick accents only where preservation criteria permit, aligning with historic brick preservation principles and avoiding invasive alteration that could compromise fabric. Verify shouldered joints and ensure proper damp-proofing at the setback.
Preventive Brickwork Maintenance: Checks and Routine Tasks
Perform regular visual inspections to identify hairline cracks, bulges, or displaced bricks before they progress, and document findings with dates and locations. Monitor moisture and drainage by checking for standing water, efflorescence, or damp patches after rain, and confirm gutters and downpipes direct water away from the brickwork. Plan seasonal maintenance tasks such as repointing where mortar shows deterioration, removing vegetation, and cleaning surfaces with appropriate methods to prevent ongoing damage.
Regular Visual Inspections
Regular visual inspections are your first line of defense against brickwork deterioration. You should schedule brief, systematic checks that cover every elevation and collector point to identify early signs of damage. Look for hairline cracks, spalling, and displaced or missing mortar joints, noting location, size, and progression. Inspect at least twice annually, preferably after seasonal shifts, and pay attention to historical brickwork and decorative brick patterns to avoid misreading as authentic aging. Document observations with clear measurements and photographs, updating a maintenance log for trend analysis. Confirm that parapets, lintels, and openings maintain proper clearance and drainage paths. Use non-destructive methods first, escalating only when you’ve established a baseline and flagged concerns for professional assessment. Maintain consistent standards to guide future repairs and prevent escalation.
Moisture and Drainage Checks
Moisture control is the backbone of preventive brickwork maintenance. You detect moisture ingress by inspecting exposed brick faces, mortar joints, and flashing for damp staining, efflorescence, or bulging plaster. Measure ground and sill clearances, ensuring at least 150 mm between soil and vulnerable brickwork; adjust grading where needed. Test drainage efficiency by observing downpipes, gullies, and surface run-off after rainfall, and verify that water discharges away from the wall. Implement drainage solutions to reduce hydrostatic pressure, including properly sized gutters and discreet downpipes directed away from foundations. Apply moisture barriers where leakage risk exists, such as damp-proof membranes beneath beds or re-pointed mortar with compatible mixes. Maintain clean, unobstructed air flow around wall cavities, and document observations for targeted repairs.
Seasonal Maintenance Tasks
Seasonal maintenance tasks should be integrated into your preventive brickwork routine, with focused checks aligned to each season’s conditions. You’ll structure inspections around moisture risk, freeze-thaw cycles, and material aging, documenting findings for year-to-year comparison. In spring, verify repointed joints and flashing integrity, clean flues, and remove vegetation that can trap dampness. Summer warrants surface cleaning to prevent efflorescence, plus sun exposure checks on mortar color stability. Autumn should prioritize drainage alignment, gutter clearance, and capstone protection against rainfall surges. Winter requires frost-resistance checks, moisture monitoring, and timely resealing to prevent brick discoloration from prolonged damp. If historic restoration applies, use appropriate mortar compositions and fabric matching to avoid aesthetic and structural mismatch. Adhere to manufacturer guidelines and local conservation standards while scheduling routine rechecks. Maintain concise logs for traceable, proactive maintenance outcomes.
When to Call a Professional and What to Expect
If a brickwork issue persists after basic DIY checks—crumbling mortar, visible cracks wider than a pencil, or damp patches that don’t improve with ventilation—it’s time to call a professional. You’ll receive a structural assessment, including load-bearing analysis and moisture testing, to determine risk to stability and indoor health. Expect documented findings, recommended remediation, and a phased plan with milestones and cost estimates. Professionals will verify brick color matching to avoid conspicuous repairs and advise on compatible mortar mixes and, where required, historic restoration considerations. They’ll detail access requirements, scaffold or confined-space needs, and potential site containment. Prepare to provide building plans, recent cavity wall emissions data, and any prior remedial reports. Clear, written scope minimizes delays and ensures compliant, durable results.
Frequently Asked Questions
How Long Does DIY Brick Repointing Typically Last Before Maintenance?
A typical DIY brick repointing lasts about 15–25 years with proper maintenance. You’ll preserve brick color consistency and mortar matching, inspecting annually and cleaning joints, adjusting for cracking or spalling to extend longevity and prevent deterioration.
Can Salt Efflorescence Indicate Structural Issues Beyond Moisture?
Salt efflorescence can signal structural concerns beyond moisture. You should assess moisture sources, capillary rise, and potential plaster or mortar degradation, as these factors expose hidden structural issues and guide further engineering investigation and remediation.
What Safety Gear Is Essential for DIY Brick Repairs?
You need protective gloves and safety goggles for DIY brick repairs. Wear sturdy boots, hearing protection if grinding, and a dust mask when mixing mortars. Make sure goggles seal properly, gloves resist abrasion, and your workspace remains well-ventilated.
Are Cementitious Mortars Suitable for Historic Bricks?
You should avoid cementitious mortars on historic bricks; instead, prioritize historic mortar compatibility, leaning toward lime. Cementitious vs lime matters: lime offers breadth of movement and breathability, preserving fabric while you repair delicate joints effectively.
How to Differentiate Between Water Ingress and Capillary Rise?
Water intrusion is caused by actual moisture entering the structure, while capillary action draws dampness up through pores; differentiate by measuring moisture profiles, observing with a damp meter, and noting vertical rise patterns versus direct penetrating leaks.
Conclusion
Conclusion (75 words):
So, you’ve dutifully inspected the brickwork, logged photos, and learned the sacred arts of pointing and repointing. Great. If the walls still murmur like a leaking teapot or resemble a medieval dragon’s sneeze, don’t pretend you’re a stonemason—call a professional. They’ll translate your notes into a battle plan, guarantee compliance, and spare you the ethics of DIY disaster. Until then, monitor moisture, replace damaged bricks, and pretend, with confidence, that you’re mastering the ancient craft of maintenance.