
Did you know your lease may require express landlord consent even for simple changes you think are minor? You’ll need to review every clause, identify what counts as alterations, and secure written approval before starting. This isn’t a guesswork process—you’ll want clear, documented permission, especially with shared or listed buildings. Start with a plan, then mapping out permits, deposits, and reversible updates so you can proceed with confidence and avoid future disputes. Let’s map a careful path forward.
Start by Reading Your Lease and Securing Landlord Consent

Begin by reviewing your lease carefully to understand what’s allowed and what isn’t. You’ll want to identify key Lease terms and any restrictions on alterations, decoration, or structural changes. Check for permitted works, notice requirements, and any consent clauses that specify timing or conditions.
Next, locate Rental clauses that address consent, default remedies, and removal of improvements at the end of your tenancy. Confirm who must approve projects and whether written agreements are required.
If consent is needed, prepare a concise summary of planned work, including scope, materials, and finish dates. Note any potential impact on insurance, warranties, or the building’s shared systems.
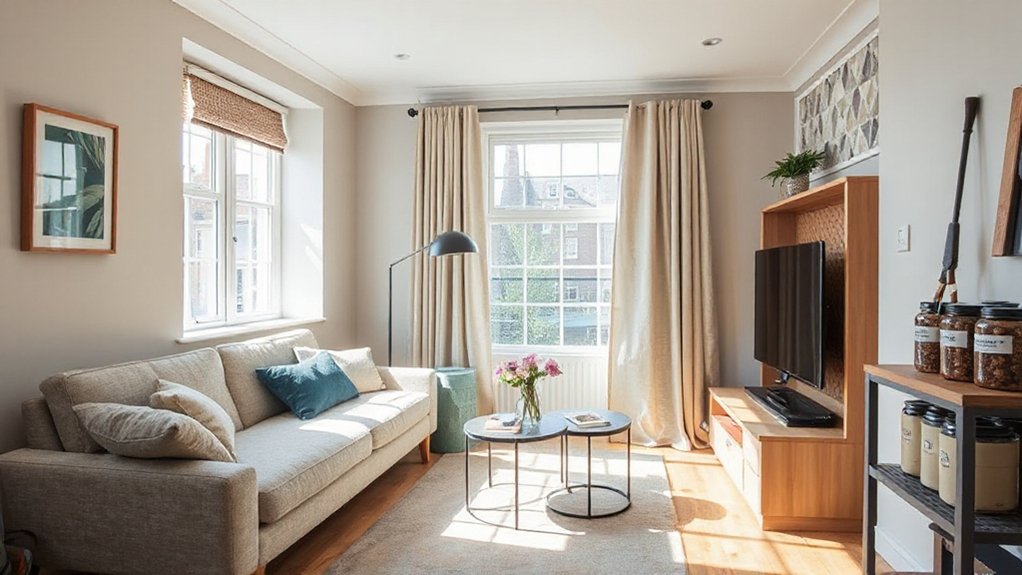
Decide What Counts as Non-Permanent Renovation in London
Non-permanence matters because it determines what you can remove or revert later without breaching your lease.
In practical terms, decide what counts as non-permanent renovations by distinguishing fixtures from fittings and permanent alterations. Temporary fixtures are items that can be removed with minimal damage and without altering structure, such as shelving you can detach, or wall hooks you can fill.
Removable decor includes wallpaper remnants, temporary paint, and movable units like freestanding wardrobes.
Focus on items that don’t require special permissions beyond standard consent and don’t involve structural changes.
When planning, document what you intend to keep versus remove, and confirm with your landlord which categories apply.
This framework reduces disputes and keeps you compliant with typical London tenancy rules.
Budgeting for London Renovations: Costs, Deposits, and Permits
Budgeting for London renovations requires a clear plan for costs, deposits, and permits up front. You’ll itemize all anticipated charges, including professional fees, materials, labor, and contingency.
Distinguish between essential work and luxury upgrades to stay aligned with budget constraints. Check your lease and landlord requirements early, and secure written permission for any works that affect structure, services, or common areas.
Permit costs vary by project scope and borough; factor processing times into the timeline. Deposit what you can safely cover, and avoid tying up funds in non‑essential items.
Maintain a transparent record of quotes, invoices, and changes to avoid disputes. Remember, precise budgeting protects compliance, schedules, and your investment while enabling informed decisions.
Safety and Compliance for Listed Buildings (What You Can Change)
If you’re renovating a listed building, safety and compliance shape what you can change from the outset. You’ll need to assess constraints before planning any alterations.
Listed status means assessments for historical preservation are mandatory, guiding both interior and exterior work. Consult the local planning authority and a conservation officer to confirm what’s permissible, as some features may be protected or require specialist approval.
Building regulations govern structural, electrical, and fire safety standards, and they apply even to non-structural changes.
Where alterations are allowed, opt for methods that preserve character, use appropriate materials, and document decisions.
Always obtain approvals, keep records, and schedule inspections as required.
Your approach should minimize risk while meeting statutory duties and safeguarding heritage value.
Choose a Reversible Color Palette and Simple DIY Fixes
Choosing a reversible color palette and simple DIY fixes helps you protect your lease and future resale value: start with neutral, low-commitment hues and removable finishes so you can restore the original look if required.
You’ll prioritize color coordination that remains adaptable to different interiors and light levels, minimizing long-term impact on walls and fixtures.
Select peel‑and‑stick wallpapers, temp panels, and matte finishes that can be peeled without damage, paired with easy, repeatable DIY techniques.
Use washable paints in light tones for easy touch-ups, and avoid permanent fixtures that require patching.
Document materials and finishes before applying them so you can match replacements later.
Opt for practical, reversible changes that satisfy regulatory expectations while preserving flexibility for future tenants or resale.
Get Permissions and Notify Your Landlord: A Step-By-Step
Before you start any changes, you must secure written permissions and inform your landlord about planned alterations.
You’ll map the scope of work with clear details, including locations, materials, and timelines.
Next, check for building regulations and your lease clauses to identify required approvals.
When applicable, obtain Renovation permits from the local authority or managing agent, and attach copies to your formal notice.
Present your plan in a concise document, outlining safety measures, contractor credentials, and insurance coverage.
Expect a landlord review and potential revisions before consent is granted.
Document all responses in writing to satisfy Tenant responsibilities.
Don’t proceed until approvals arrive in writing.
Maintain open, respectful communication and avoid unauthorized changes that could breach tenancy terms.
Protect Your Deposit With Clear Documentation and Inspections
To protect your deposit, document every change and schedule inspections so you have a clear, auditable trail. You should keep dated photos, receipts, and written notes of any alterations, even if they’re reversible.
Before works start, obtain written consent detailing scope, materials, and timelines, and confirm your tenancy agreement’s deposit rules.
During and after works, conduct interim inspections with the landlord or managing agent, recording condition statuses and any deviations from agreed plans. This meticulous record supports tenant rights by proving what you changed and when.
If a dispute arises, use your documentation to pursue dispute resolution promptly, referencing relevant tenancy and variation clauses. Good records deter deductions and help you recover funds quickly if deductions are deemed unfair or excessive.
If You Move, Keep Your Home Sale-Ready: Long-Term Value and Clean Exit
If you move, keep your home sale-ready to protect long-term value and guarantee a clean exit; tidy presentation and documented upgrades help potential buyers see the property’s true worth and reduce post-sale disputes.
You should stage essential rooms to convey space, light, and neutral appeal—this is Home staging done with purpose, not decoration for its own sake.
Maintain an organized record of improvements, warranties, and receipts to support value in negotiations.
Consider Market timing: align selling windows with favorable demand, but avoid delaying required maintenance.
Confirm permits and safety certificates are up to date, reducing exposure to post-sale claims.
Prepare a straightforward disclosures pack and be ready to provide clear, verifiable information during viewings and closes.
A prepared seller minimizes risk and maximizes sale outcomes.
Frequently Asked Questions
Can I Install Built-In Storage Without Consent?
No, you generally can’t install built-in storage without consent; it counts as wall modifications. You should request permission for custom cabinetry and wall modifications, outlining plans, durability, impact on structure, and reversion to original condition if required.
How Do I Document Improvements for Deposit Protection?
“A stitch in time saves nine.” You should document improvements for deposit protection by tracking dates, costs, and before/after photos, and reference Tenant responsibilities and Lease agreement clauses to guarantee proper approval and compliance.
Are Removable, Non-Permanent Fixes Allowed Everywhere?
Removables aren’t universally allowed; check your lease and landlord permissions first. You can do DIY painting and furniture rearrangement, but avoid permanent alterations. Seek written consent for any fixes, document changes, and maintain compliance with lease terms.
Do Listed Buildings Require Additional Permissions Beyond Consent?
Yes, listed buildings require additional permissions beyond consent. You must respect historic preservation requirements and comply with Building regulations, ensuring any alterations maintain character, seek approvals from conservation officers, and coordinate with planning authorities before starting work.
What Constitutes Non-Permanent Changes Versus Permanent Renovations?
Non-permanent changes are cosmetic or removable without damage; permanent renovations involve structural or irreversible alterations. You, as tenant, should assess permissions, deliver schedules, and consider restrictions to protect tenant rights and avoid breaching renovation restrictions.
Conclusion
You’ve navigated leases, secured consent, and chosen reversible updates. But the final pages aren’t written yet—what happens when the next tenant wants to reimagine your space? Stay vigilant: keep records, track permits, and document inspections. The safest path isn’t always the easiest, and a single overlooked clause can change everything. When you finally move, your careful groundwork should still protect you, preserve value, and keep the home’s story intact—yet there’s always one more step to secure. The ending awaits.