To install energy-efficient windows in a home, start with precise measurements of the rough opening, verifying plumb and level, then square the opening and frame accordingly. Choose frame materials like vinyl or fiberglass and select glass with a low U-factor and suitable SHGC for your climate. Use proper flashing, sealants, and insulation to seal perimeters, install factory-charged units, and make certain correct fastener spacing and shimming for a tight fit. Proper performance comes from meticulous flashing, sealing, and alignment—you’ll learn more as you continue.
Key Takeaways
- Assess climate and orientation to select energy-efficient glass (low U-factor, appropriate SHGC) and frame materials that minimize heat transfer.
- Precisely measure and prepare rough openings, verify plumb and square, and account for deviations before ordering windows.
- Use proper flashing, moisture protection, and weather seals to ensure a draft-free, energy-efficient installation.
- Install with attention to frame alignment, proper fasteners, shims, and sealing to maintain airtight performance.
- Plan for post-installation checks: seal integrity, hardware operation, and interior humidity control to sustain efficiency.
Why Energy-Efficient Windows Matter for Your Home
Energy-efficient windows cut heat loss and gain, reducing energy use and smoothing indoor comfort. You’ll experience tighter control over indoor climate, lower utility bills, and fewer temperature swings across seasons.
The right Windows improve building envelope performance, minimizing drafts and condensation risks that compromise comfort and durability. By selecting energy-smart frames, insulating fills, and proper sealing, you optimize heat transfer resistance without sacrificing light.
You gain predictable room conditions that support HVAC efficiency and occupant productivity. Consider how window styles influence operation, maintenance, and long-term costs, not just initial price.
Aesthetic options matter too, because you’ll want a look that fits your design intent while preserving performance. Choose configurations that balance daylight, ventilation, and energy savings for a resilient, high-performance home.
How to Choose Glass: U-Factor, SHGC, and Performance
When selecting glass, focus on three performance metrics: U-factor, solar heat gain coefficient (SHGC), and overall performance in your climate. Your choice drives comfort, energy bills, and control over glare.
U-factor measures heat transfer; lower values reduce cooling and heating loads.
SHGC gauges how much solar radiation becomes heat inside, guiding summer comfort and winter warmth.
Compare products rated for double or triple glazing, low-emissivity coatings, and air gaps to optimize both metrics.
Consider climate, orientation, and nighttime tempering strategies to maximize efficiency.
Balance thermal performance with window aesthetics to maintain design impact.
Glass tinting can tailor glare and heat: benefit from selective tinting without sacrificing visibility.
Informed glass selection sets the baseline for further efficiency gains and overall system performance.
Frame Materials That Maximize Efficiency and Value
Choosing frame materials that minimize heat transfer and maximize value builds on selecting glass performance. You’ll weigh frame conductance, durability, and installation compatibility to sustain long-term efficiency and curb maintenance costs. Consider materials that balance rigidity with lightweight behavior, preserving daylight without sagging over time.
The right choice supports window aesthetics and framing styles, aligning curb appeal with performance.
1) Aluminum-clad/wood hybrids for structure, exterior durability, and refined looks.
2) PVC/vinyl composites for thermal resistance, cost savings, and consistent finishes.
3) Fiberglass for minimal expansion, high strength, and predictable performance in varied climates.
Targeted material selection reduces heat gain, resists moisture, and accepts precision hardware. Pair frames with insulated sashes to optimize air sealing.
Focus on tolerances, coatings, and fastener compatibility to sustain value and visual coherence.
Low-E Coatings and Gas Fills: What Works Best
You’ll compare different Low-E coating types for balance between visible transmittance and thermal performance.
You’ll weigh gas fills for reducing heat transfer without increasing cost.
Consider how argon, krypton, or xenon fills perform in typical double- and triple-pane assemblies.
Also, consider how spacer systems influence overall efficiency.
This discussion sets the baseline for selecting coatings and fills that meet your climate, window size, and budget goals.
Low-E Coating Types
Low-E coatings and gas fills affect window efficiency by reducing heat transfer through both conduction and radiation. You choose coating types based on performance targets, climate, and aesthetics, balancing energy savings with durability and glance.
- Spectrally selective coatings optimize solar gain and visible light without sacrificing comfort.
- Soft-coat ( sputtered ) layers deliver high performance with improved long-term stability.
- Hard-coat methods emphasize rugged material durability for abuse-prone applications.
These choices influence window aesthetics and structural integrity, so you pick a solution that stays effective in real-world conditions.
You’ll notice better insulation, frame compatibility, and predictable performance.
For power-minded homeowners, prioritize coatings that deliver consistent R-values and low emissivity over the life of the window.
Avoid compromising on durability; it preserves value and reduces maintenance.
Gas Fill Efficacy
Gas fills markedly influence thermal performance by reducing convection between panes and minimizing heat transfer from radiation when paired with low-E coatings. You’ll understand that gas fill efficacy hinges on proper sealing, pressure, and gas composition. Argon and krypton deliver superior insulation, with krypton excelling in narrower gaps.
You’ll choose inert gas benefits when frame tolerances accommodate tight cavities, minimizing convective loops and edge heat loss. The balance between gas density and cavity width dictates overall U-values, so installation precision matters. Avoid overfilling, which raises pressure and risk seal failure.
In practice, factory-charged units backed by quality certification guarantee consistent performance. Monitor for leaks, verify spacer integrity, and maintain door and sash alignment. Gas fill efficacy directly translates to steady indoor temperatures, reduced energy bills, and improved comfort.
How to Compare Ratings and Certifications (R-Value, NFRC)
You’ll start by understanding R-value metrics and how they quantify a window’s thermal resistance.
Then you’ll read NFRC certifications to verify performance claims and compare products on a like-for-like basis.
This sets a precise baseline for evaluating energy efficiency across different window assemblies.
Understanding R-Value Metrics
Understanding R-value metrics is essential for comparing window performance across brands. You’ll measure insulation quality by R-value and U-factor, not hype, so focus on data from reputable sources.
Higher R-values mean less heat flow; lower U-factors indicate better overall performance. NFRC labels provide standardized data you can trust when evaluating window styles and performance in real-world conditions.
R-values apply to the entire assembly, including frames and spacers, so compare like-for-like products. Use these guidelines to assemble a rapid decision framework:
1) Prioritize higher R-values for temperate-to-cold climates.
2) Cross-check continuously with NFRC results, not marketing claims.
3) Consider installation tools and frame materials that maximize realized R-values, not just nominal numbers.
Reading NFRC Certifications
NFRC certifications provide a standardized snapshot of a window’s thermal and visible performance. You’ll use this data to compare R-values, U-factors, and Solar Heat Gain Coefficient across products without guessing.
Read the label like a spec sheet: higher R-values and lower U-factors mean better insulation, while SHGC dictates solar gain. Confirm frame and glass combos meet climate goals, then match performance to your home’s design.
Use NFRC numbers to evaluate consistent performance across window styles and brands, avoiding marketing fluff. Check color options and finishes alongside thermal metrics, since coatings can influence both glare and visible light transmission.
Keep a checklist handy: calculate projected energy savings, verify warranty terms, and ensure the chosen units align with your energy targets and aesthetic priorities.
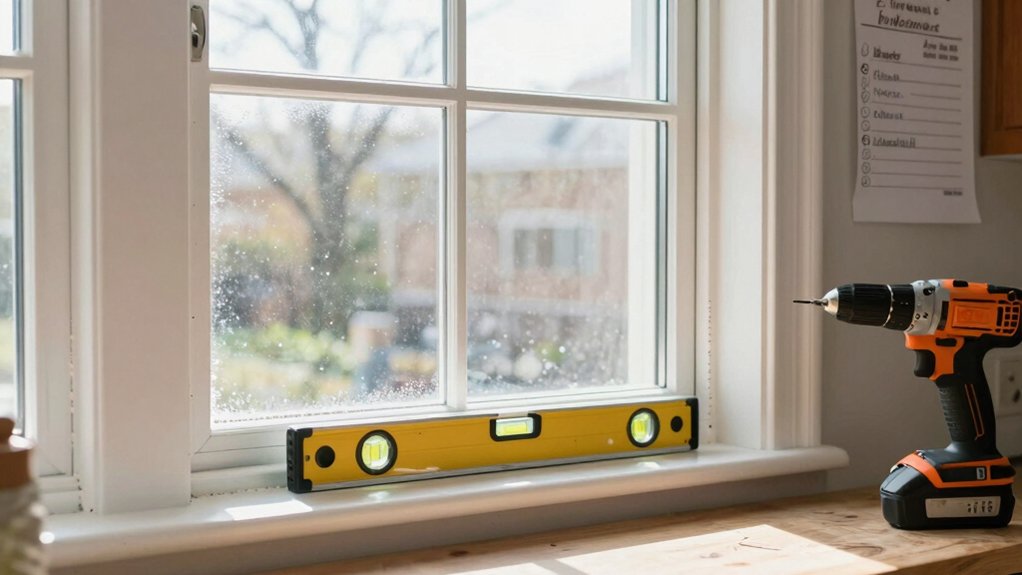
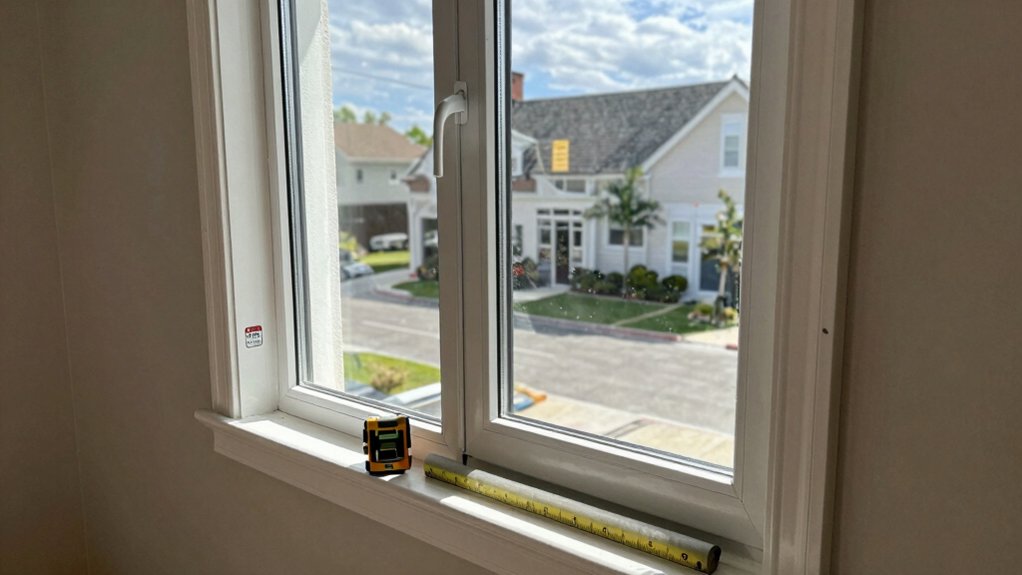
How to Size Replacement Windows Correctly

When sizing replacement windows, accuracy begins with a precise measurement of the existing opening. You must establish exact width, height, and depth to ensure a proper fit, weather sealing, and performance.
Next, verify the reveal and rough opening consistency across all sides, correcting irregularities before ordering. This prevents sash binding, improper drainage, and thermal bridging.
- Measure at multiple points and record the smallest width and height for a true fit.
- Check for square openings by tracing diagonals and confirming equal lengths.
- Note any trim, sill, or jamb deviations that require compatibility adjustments.
Keep two priorities in view: window aesthetics and historical preservation, preserving character while delivering efficiency.
Precision sizing reduces rework, ensures tight insulation, and supports long-term value.
DIY vs. Professional Installation: Criteria and Steps
You weigh DIY considerations, including skill, tools, and time, against the expectations for a professional install.
You’ll compare criteria such as QA standards, warranty coverage, and building-code adherence to decide who should perform the work.
You’ll outline a concise, task-oriented steps plan that covers preparation, removal, installation, and verification, noting where each approach aligns with the DIY considerations and professional criteria.
DIY Considerations
DIY installation can save time and money, but it also carries risks if you lack the right tools or skills. You’ll assess feasibility, instrument quality, and site constraints before proceeding. Focus on accuracies, weather sealing, and code compliance to protect long-term performance. If you proceed, prioritize controlling risk with deliberate steps and know when to halt.
- Verify structural readiness and subframe compatibility
- Confirm moisture barriers, flashing, and sealants meet manufacturer specs
- Inspect window styles alignment with exterior aesthetics and functional performance
Key considerations: precision cuts, proper fasteners, and interior/exterior finish impacts. Your choice affects energy performance, air leakage, and warranty validity. Plan for any trim or casing revisions to maintain clean exterior aesthetics. Maintain strict adherence to manufacturer installation instructions and local codes. If in doubt, defer to safer, reproducible methods.
Professional Criteria
Professional installation criteria balance skill, safety, and long-term performance. You weigh DIY risks against professional precision, tooling, and warranty protection.
For window styles, accuracy in framing and sealing determines energy claims, moisture control, and operable function. A pro delivers consistent, code-compliant installation, reducing air leaks and thermal bridges that undermine efficiency.
Consider exterior aesthetics; professional fit ensures trim, siding, and flashing align with design intent while meeting manufacturer requirements.
Safety protocols, fall protection, and rigid adherence to manufacturer instructions safeguard you and your investment.
Timeline predictability, contingency planning, and site logistics matter when coordinating heavy units and assists.
If complex substrates, structural supports, or retrofit envelopes exist, professional crews optimize performance.
In high-demand homes, concierge service, detailed documentation, and post-install checks preserve warranty and performance.
Preparing Your Home for Window Replacement Day
Preparing your home for window replacement day guarantees a smooth, efficient install. You’ll establish clear boundaries, protect valuables, and support installers with a defined workspace. Plan around access, dust containment, and material storage to minimize disruption and maximize productivity.
Key actions:
- Identify active work zones and route materials to minimize trip hazards.
- Remove window treatments and relocate fragile items to protect finishes and glass.
- Communicate house-specific requirements (window styles, historical preservation) to ensure compliance with design intent and code constraints.
Results you’ll achieve: secure site, predictable schedule, and preserved aesthetics.
You’ll coordinate with the crew to review measurements, confirm frame conditions, and ensure proper debris containment. This foundation supports a clean, fast, high-performance replacement aligned with historical preservation goals and modern energy standards.
Air Sealing Basics to Maximize Gains
Air sealing lays the groundwork for energy gains after you’ve prepared the workspace and installed new windows. You’ll target joints, gaps, and penetrations with precision, because even small openings sap heat and impose load on the HVAC.
Start at the rough opening, sealing with high-performance caulk at edges and sill plates. Move to exterior penetrations—nail fins, vents, and electrical boxes—using backer rods where necessary to prevent compressive gaps.
Apply insulation where required, focusing on cavities that align with window frames to maximize R-value. Seal around window perimeters after installation, ensuring continuous barriers to drafts.
Consider window styles and interior decor compatibility; select sealants and tapes that resist aging and UV exposure. Result: tighter envelope, quicker gains, better comfort.
Weatherization Strategies for Moisture Control

Moisture control starts with understanding moisture paths and how they interact with windows, interior assemblies, and surrounding soils.
You’ll assess moisture control basics, optimize airflow and drainage, and plan vapor barrier placement to prevent condensation and mold.
This discussion lays the groundwork for integrated weatherization strategies that balance humidity, ventilation, and wall assembly performance.
Moisture Control Basics
What’s the simplest way to reduce indoor moisture and prevent related damage? You optimize enclosure integrity and control vapor paths with disciplined moisture management. You’ll pair sealing discipline with informed ventilation to maintain stable humidity without compromising comfort or energy goals.
Focused strategies promote durable performance and preserve exterior aesthetics.
- Inspect and seal leaks around windows and penetrations using high-performance gaskets and weatherstripping.
- Use controlled ventilation—intermittent or continuous—that matches occupancy and climate, minimizing condensation risk.
- Manage interior humidity with sensible limits, dehumidification when needed, and proper drainage away from the structure.
These steps reinforce window treatments and exterior aesthetics while safeguarding materials, preventing mold, and reducing long-term maintenance costs.
Airflow and Drainage
Effective airflow and proper drainage are core to sustaining moisture control after tightening a building envelope. You manage airflow by balancing supply and exhaust paths, ensuring vents aren’t blocked, and using operable windows to vent humidity when conditions permit.
Direct exterior drainage away from foundations and window openings reduces splashback and capillary rise, while sloped sills prevent water accumulation near glazing. Maintain interior gradients with continuous, unobstructed paths for air movement, including crawlspaces and attics, to limit condensation pockets.
Use flashing and weep routes to channel condensation toward exterior drainage without compromising window aesthetics or curb appeal. Regularly inspect seals around sashes and frames; degraded seals spike moisture risk and compromise performance.
Align these practices with intentional design to preserve energy gains and strike a confident, purpose-driven balance.
Vapor Barrier Placement
Where should you place vapor barriers to optimize moisture control without trapping water inside the building envelope? Proper vapor barrier placement minimizes condensation risk around windows and walls, aligning with window placement for ideal performance. Position barriers to separate conditioned space from exterior moisture sources, ensuring continuity at seams and around openings. Keep barriers on the warm side in cold climates to reduce seasonal shifts, while avoiding pinholes and gaps that compromise performance. Use air sealing methods upstream of the barrier to prevent moisture bridges. Ensure compatibility with flashing and window installation to maintain drainage paths.
- Verify continuous barrier coverage from sill to framing without interruptions
- Seal all joints, penetrations, and around fasteners with compatible sealant
- Integrate vapor barrier with flashing and weather barriers for robust defense
Window placement and vapor barrier work together for durable moisture control.
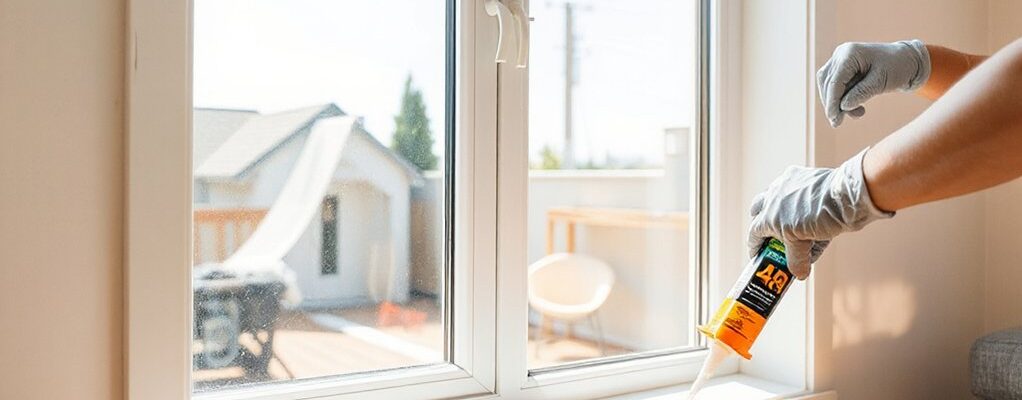
How to Minimize Drafts With Proper Flashing and Installation
Flashing and proper installation are critical to minimizing drafts around energy-efficient windows. You’ll create a continuous weather seal by detailing flashing tapes, kick-out flashing, and two- and three-sided protection against moisture intrusion.
Start at the rough opening, align the sill pan, and set the window square to confirm the nailing fin seats flush without bow. Use fasteners per manufacturer specs, avoiding over-tightening that distorts framing.
Apply a high-performance sealant at joints, corners, and weep holes to prevent air movement.
Inspect window operation, confirming smooth closure and consistent pressure along the frame.
When selecting window styles, prioritize airtight design and historical accuracy where needed, balancing aesthetics with performance.
Finalize with backer rod and flashing transition to siding, guaranteeing durable, draft-free performance.
Interior Finishing: Blinds, Grilles, and Trim Considerations
Interior finishing ties the window assembly to the room by selecting blinds, grilles, and trim that complement both performance and aesthetics. Doing so requires precise measurements, compatible fasteners, and attention to mounting depths to avoid binding or gaps.
You focus on how window treatments influence energy performance and visual impact, balancing insulation with style through deliberate choices. Aesthetic considerations guide material, profile, and color to match trim and furniture while maintaining airtight seals around the sash.
- Measure reveal, sill, and jambs accurately to select compatible components.
- Choose low-veneer or composite blinds and grilles that minimize thermal bridging.
- Verify mounting depth and hardware fitment to prevent binding and gaps in operation.
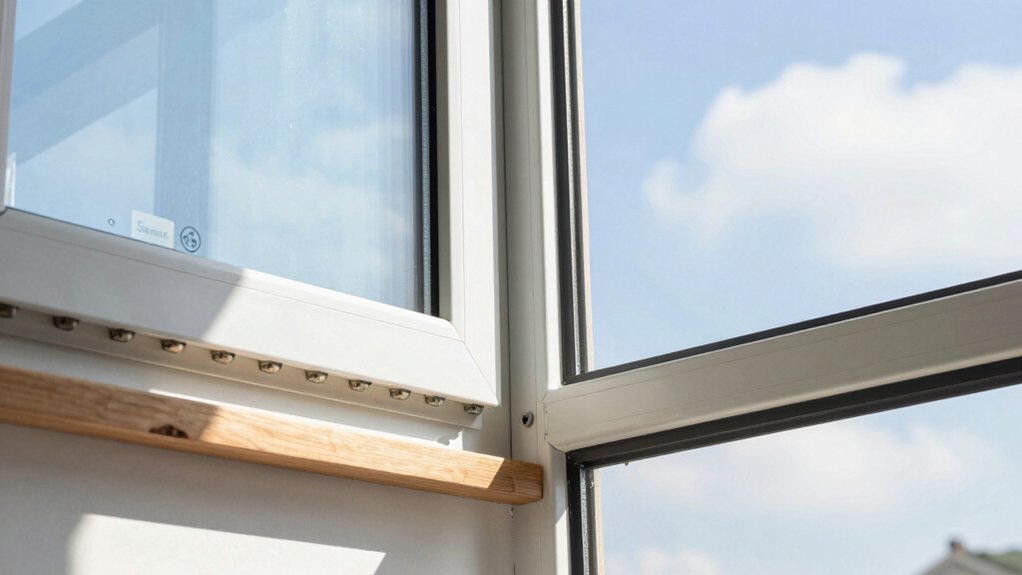
Installing Frames: Rough Openings, Squaring, and Nailing Fins
Installing frames begins with accurate rough opening measurements, then guarantees squares are true and nails or screws engage the framing properly. You verify plumb and level with a framed test fit, adjusting shims as needed to maintain a square opening that aligns with door and window headers.
Set the rough opening to accommodate acceptable window styles, accounting for expansion gaps and drainage planes. Nail fin positioning is critical: drive fasteners through the nailing fins into framing members at consistent intervals, ensuring no bowing or warping.
Check plumb sides, then secure by alternating fasteners to prevent skew. Seal perimeter joints, aligning exterior trims for a clean, weather-tight finish. Maintain consistent margins to support performance and aesthetics, avoiding binding or misalignment during operation.
Fasteners, Shimming, and Insulation Techniques
If you’re securing a window in place, choose fasteners that suit the frame material and sheathing, then place them at consistent intervals to prevent bowing or movement. Shim as needed to maintain plumb, square, and alignment with surrounding framing.
You must use fastener selection that matches load demands and weather exposure, ensuring continuous edge support without overdriving. Apply shimming techniques to fill gaps, verify level and plumb across reveals, and lock the unit into plane with consistent bearing.
1) Pre-checks: confirm opening dimensions and strap lines before fastening
2) Fastener cadence: standardize spacing and edge distances for all sides
3) Verification: re-check plumb, squareness, and securement after glazing
Focus on precision, performance, and durable fit.
Maintenance Tips to Sustain Efficiency Over Time
Maintenance tips keep energy-saving gains intact after you’ve installed and shimmed a window. To sustain performance, perform periodic inspections of seals, frames, and sashes for cracks, gaps, or weathering. Tighten fasteners where applicable and verify that insulation remains continuous around perimeters.
At least twice annually, examine operating hardware for smooth action and correct alignment; address any sticking or rattle promptly to prevent degradation. For cleanliness, use window cleaning techniques that avoid solvent damage to coatings or gaskets, and ensure tracks stay clear of debris that could hinder operation.
If you deploy decorative curtains, choose light-blocking options that don’t press against seals, preserving thermal integrity. Keep humidity in check in interior spaces to minimize condensation-related issues and preserve glazing performance over time.
Incentives, Rebates, and Common Pitfalls to Avoid
States and local programs frequently offer incentives or rebates for energy-efficient window installs, but eligibility and amounts vary widely, so verify requirements before purchasing. You’ll want to navigate energy tax credits and rebate programs with sharp efficiency, targeting maximum net benefit. Understand that certain programs stack, while others are exclusive to contractor-installed projects or specific product ratings.
- Verify coverage, limits, and eligible costs before signing contracts.
- Document pre- and post-install performance for tax credit or rebate claims.
- Maintain compliance with product certifications and installer qualifications to avoid clawbacks.
Common pitfalls include mixing non-qualifying products, failing to meet installation timelines, and overlooking local metering or utility requirements.
Conclusion
You’ve got the tools to choose and install windows that cut energy use and boost comfort. Think of each choice as a tighter seal on a leaky ship: a small improvement compounds into big savings over time. A typical NFRC label can shave your heating bill by 5–15% when you replace older windows. Prioritize low U-factor, low SHGC, and proper installation. With good materials and workmanship, your home stays warmer in winter and cooler in summer.