
Upgrade your space fast with simple, high-impact moves. Tackle weekend plans: refresh walls with smart colors that ampliar small rooms, patch and caulk for flawless surfaces, and swap hardware on furniture and cabinets for immediate texture. Save big on lighting by adding layered, dimmable LEDs, then boost airflow with budget fans. Add paintable wallpaper for quick depth, and set up a simple labeling system to keep clutter away. If you keep going, you’ll open even more practical tweaks.
Key Takeaways
- Refresh a space quickly with a new coat of light, neutral paint to visually enlarge rooms and boost mood.
- Swap cabinet hardware and door pulls for an instant, low-cost facelift with high impact.
- Add layered lighting (ambient, task, accent) and dimmable LEDs to transform atmosphere without major wiring.
- Declutter strategically: use labeled, slim storage solutions that maximize wall space and reduce visual noise.
- Use mirrors or reflective surfaces to bounce light and make small rooms feel larger.
Plan Your Weekend: Define Budget, Time, and Goals

Before you pick up a hammer, decide what you’ll accomplish this weekend. You’ll set a tight plan, then execute with focus.
Begin with budget planning: determine the total you’ll spend, reserve for unexpected costs, and confirm tools you already own.
Next, map your time: block two clear windows, assign tasks, and leave a buffer for delays.
Establish goal setting that aligns with impact: prioritize changes that deliver measurable results, like tighter closets, brighter lighting, or a cleaner entry.
Define nonnegotiables and tradeoffs upfront so you don’t wander off track.
Track progress in real time, cut low-value tasks, and adjust as needed.
Stay disciplined, deliberate, and direct.
When you finish, you’ll see concrete gains without wasting momentum or money.
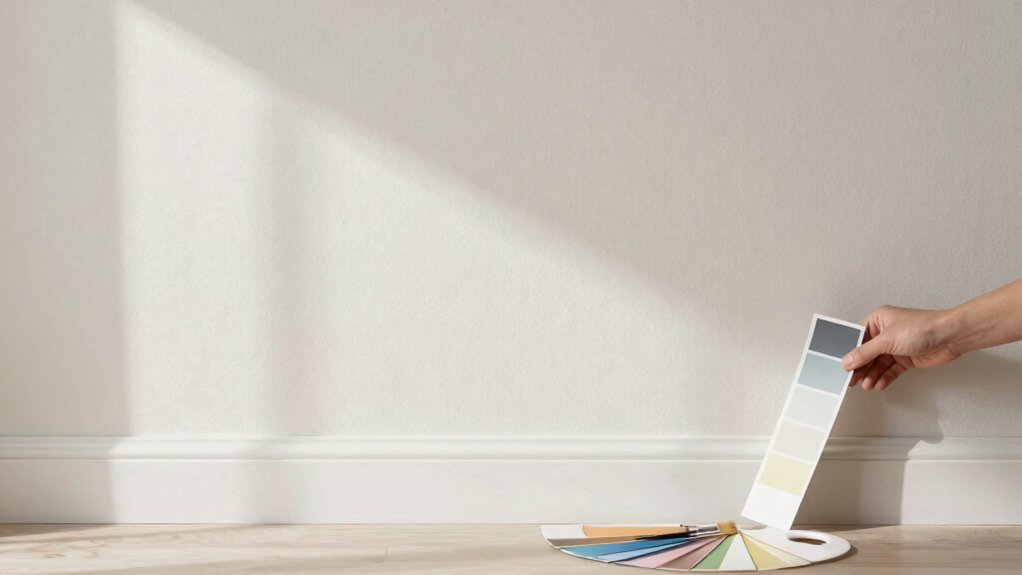
Freshen Walls First: Smart Paint Colors for Small Spaces
Fresh paint can do more than refresh walls—it’s your first, most affordable upgrade for small spaces. You pick colors that visually expand rooms and sharpen moods. Use color psychology: cool neutrals make ceilings feel higher; pale blues and soft greens calm cramped corners; warm off-whites brighten without glare.
Test swatches on multiple walls at different times of day to see true shifts. Avoid heavy, dark palettes in tight rooms unless you pair them with reflective accents. Plan a unified scheme across adjacent spaces to reduce visual clutter and boost perceived space.
Then reinforce the vibe with wall art ideas that align the palette and scale to the room. Choose minimal, bold pieces that breathe, not crowd, the walls. Your walls, your power, your space.
Quick Wall Finishes: Caulk, Patch, and Prep Like a Pro
After setting fresh color, you’ll want a smooth, durable surface to keep that look long-term. Quick wall finishes keep edges clean and joints seamless, so you project power with confidence. Focus on caulk techniques and patching essentials to seal gaps and prevent cracks from reappearing.
Prep is half the battle: clean, dry, and dust-free before you start. Tool control matters—steady caulk lines create professional results, while proper patch application hides flaws without overdoing it.
- Inspect gaps and choose the right caulk for the area
- Mask edges, apply steady beads, and tool with a damp finger
- Sand patched areas flush once dry
- Prime small repairs before painting
- Wipe excess for a crisp, durable finish
Swap Hardware, Transform Furniture and Cabinets

Swap hardware, transform furniture and cabinets by choosing pieces that fit your style and budget, then install them with simple steps. You grab a plan, pick hardware that complements your pieces, and commit to a bold, clean look.
Start with a hardware swap on drawers and doors to refresh the face of your furniture and cabinets without a full remodel. Measure precisely, drill confidently, and tighten until secure—don’t overdo it.
For cabinet transformation, replace knobs and pulls with condensed, high-contrast hardware for a striking result. Choose finishes that resist wear and feel durable in daily use.
Label and group fasteners to stay organized, then test alignment before final tightening. You’ll gain standout texture, higher perceived value, and a refreshed space that communicates power and control.
Save on Fixtures: Affordable Lighting That Looks Luxe
Start with budget-friendly fixtures that deliver a luxe look without the price tag. You can mix statement pieces with simple, efficient options to get high-end vibes on a low cost.
Think bold finishes, warm light, and smart placements to elevate every room without overspending.
Budget-Friendly Fixtures
Looking to upgrade your lighting without breaking the bank? You can transform spaces with budget-friendly fixtures that still feel luxe. Focus on impactful choices, install smart design, and finish strong with practical upgrades. You’ll save energy, boost mood, and project authority with clean lines and thoughtful placement.
Use fixtures that pair well with modern controls, so lighting feels effortless and precise. Remember, the goal isn’t flash, it’s function combined with style. Embrace efficiency without compromise by selecting versatile pieces and easy installs.
Lighting automation and smart thermostats can amplify control, drying the gap between budget and premium feel.
- Recessed or slim-profile ceiling lights for a clean look
- Dimmable LEDs for ambiance on demand
- Plug-in sconces for versatility
- Under-cabinet strip lights to boost workflow
- Smart bulbs with simple routines
Luxe Look, Low Cost
Affordable lighting can feel luxe without a big price tag if you choose smartly. You don’t need showroom-level spend to elevate a room; you need smart choices that signal luxury finishes. Start with metal finishes in matte black, brass, or nickel to anchor the space and read as high-end.
Opt for fixtures with clean lines and substantial shades to add presence without excess. Layer lighting—ambient, task, and accent—to create depth and control. Swap out harsh bulbs for warm LED options to fuse warmth with efficiency.
Focus on scale: oversized pendants over a dining area or a bold chandelier in a foyer can transform budget decor into statement lighting. Finally, reuse existing sockets with updated trims to maximize value and impact.
Mirror Magic: Reflective Surfaces for Brightness
Even small mirrors can dramatically brighten a room by bouncing natural light around. You’ll release brightness quickly by choosing strong reflective surfaces and smart mirror placement.
Position high-contrast frames to avoid dull corners, and angles that double light without glare. Consider a pair for depth and a thin run along a hallway to extend daylight.
- Reflective surfaces strategically frame key views to amplify light
- Mirror placement near windows to steal every sunbeam
- Use two smaller mirrors for depth instead of one large
- Place near lamps to redirect artificial light efficiently
- Lean rather than hang for quick, adjustable brightness
Declutter in an Afternoon: Four-Step Storage Optimization
Start by clearing your desk to clear your mind.
Then choose vertical storage solutions to free up surface space.
Establish a daily declutter routine so every item has a home and stays there.
With these steps, you’ll keep things organized and maintain focus throughout the day.
Clear Desk, Clear Mind
Clear your desk in one afternoon by following a simple four-step storage plan. You’ll reclaim focus, leverage momentum, and charge your day with confidence.
Start by sorting items into keep, relocate, or discard. Next, assign a designated home for every item, using labeled containers for quick access. Then purge obsolete clutter, resisting the urge to justify it.
Finally, implement a daily reset ritual to sustain momentum and maintain a clean workspace.
- Prioritize essentials and eliminate nonessentials
- Designate a single home for every tool
- Use labeled bins for quick access
- Schedule a daily five-minute desk reset
- Pair organization with mindfulness techniques for focus
This approach reduces stress, boosts productivity, and sharpens decision-making for high-impact work.
Vertical Storage Solutions
Looking to reclaim floor space fast? You deploy vertical storage as your first move. Vertical shelving pulls heavy clutter off desks and floors, creating immediate breathing room.
Install wall mounted organizers at reachable heights, so daily items become instantly accessible without bending or digging. Choose modular units that lock in place and scale as needs grow, preserving flexibility. Label bins clearly to stop second-guessing and keep momentum going.
Use adjacent walls to corral tools, chargers, and supplies, turning corners into productive zones rather than dumping grounds. When you stack smartly, you gain square footage without expanding footprint.
Maintain discipline by returning items to their homes after use. These small, decisive changes deliver a leaner, faster workspace today.
Daily Declutter Routines
Decluttering day by day keeps clutter from piling up and turning the project into a marathon. You can dominate this space by adopting a quick, four-step rhythm that fits into an afternoon.
- Schedule a 15-minute daily sweep to corral items before they escape.
- Toss, donate, or relocate with a single decisive action.
- Return items to their designated spots for steady storage organization.
- Label bins and shelves to sustain clutter reduction over time.
- Review what’s left weekly to prevent backsliding and reclaim control.
This routine sharpens focus, speeds decisions, and reinforces your authority over the environment. You’ll see sharper organization, faster retrieval, and less visual noise, proving small daily actions deliver big wins in storage efficiency.
Add Removable Storage That Feels Built-In
If you want removable storage to blend in, choose options that match your decor and stay discreet when not in use. You’ll project control by selecting removable shelving that integrates with existing lines, not jars and clutter.
Opt for mounts rated for your space—walls, backs of cabinets, or under desks—and aim for tools-free installation so you move fast, with minimal disruption.
Use temporary wall panels to hide equipment while keeping access handy, then swap in heavier items as needed without commitment.
Prioritize slim profiles and neutral finishes that echo your room’s palette, so the storage feels built-in rather than added.
Label discreetly, and test removal paths to ensure clean returns.
This approach delivers clean aesthetics, reliable access, and real command over your environment.
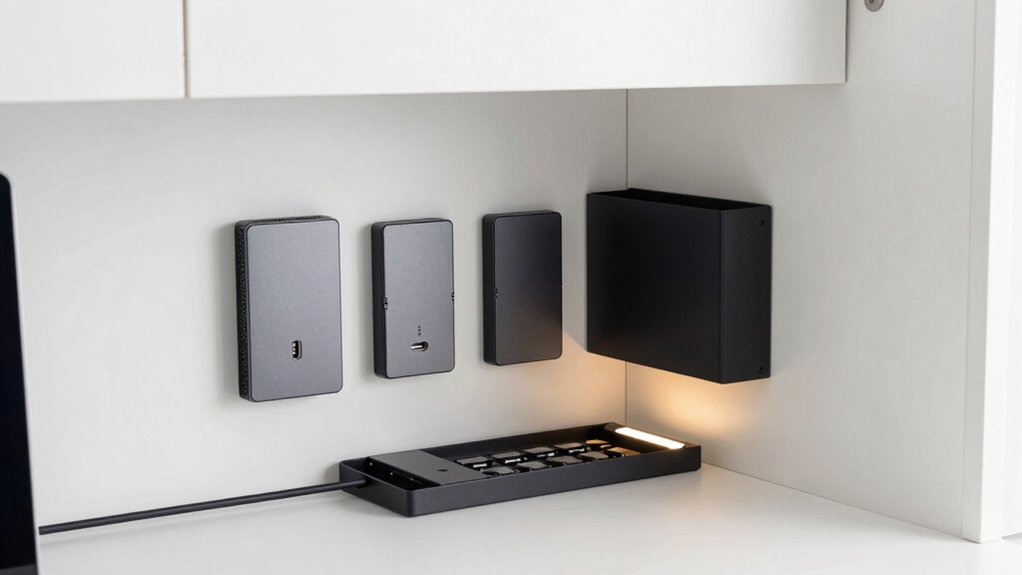
Polished Details: Upgrade Switch Plates and Outlets
Upgraded switch plates and outlets can refresh a room without a full remodel. Match color and finish to your trim or décor for a cohesive look, while keeping safety in mind.
If you’re remodeling, consider hidden wiring solutions to tidy cords and protect connections.
Upgraded Switch Plates
Switch plates and outlets are small details that can make a big difference in a room’s finish and safety. Upgraded switch plates lift the look with clean lines, robust materials, and precise fits. You want plates that withstand daily use, resist tarnish, and coordinate with your lighting upgrades.
Choose options that feel substantial yet unobtrusive, and install them over existing boxes for a quick upgrade. Prioritize metal, satin, or brushed finishes for a modern edge, or go classic with white ceramic for contrast.
Confirm grounding is intact and screws are secure. Decorative switch plates can add visual punch without dominating the space, so pick subtle textures or bold frames wisely.
Lighting upgrades and tasteful plates together sharpen perceived value.
- Elevate with metal or ceramic plates
- Pick finishes matching fixtures and hardware
- Confirm proper grounding and secure screws
- Pair with subtle textures for impact
- Choose decorative plates that complement, not compete
Outlet Color Coordination
Color coordination pulls everything together. You upgrade not just the look but the impression of every room with outlet color coordination. Match switch plates to wall color or trim for a seamless field of vision, then pick outlets that complement the palette—brushed nickel, matte black, or white—so contrast stays intentional, not accidental.
Consider lighter walls with subtle metallics to reflect light, or dark walls with bright outlets to create a bold anchor. You’ll want uniform outlet styling across rooms to enforce consistency and perceived quality, especially in high-visibility zones.
Hidden Wiring Solutions
Hidden wiring isn’t a cosmetic afterthought—it’s a core detail that sharpens a room’s finish. You upgrade switch plates and outlets to tame concealed cables and reveal hidden outlets where you need them most. Stay clean, stay safe, and squeeze a little extra power into every space.
- Pick low-profile plates to reduce gaps and glare
- Match finishes to trim for a cohesive look
- Use tamper-resistant outlets in kid zones
- Install outlets flush with walls to hide cords
- Label circuits for quick, clean trips to the panel
Kitchen on a Dime: Hardware Tweaks and Tiny Tweaks That Matter
Small changes can deliver big results in a kitchen you love, and you don’t need a full remodel to see impact. You’ll start with hardware swaps—pulls, knobs, and hinges—that upgrade the vibe without touching studs. Choose matte black or brushed brass for a modern edge, and guarantee consistent sizing so you don’t overthink the install.
Tighten drawer slides, replace grommets, and add under-cabinet LED lighting for task clarity. If you crave utility upgrades, consider functional tweaks like a staggered shelf or magnetic knife strip to reclaim counter space.
For power, plan safe, simple DIY electrical updates; avoid rewiring major circuits. Tie aesthetics to practicality by coordinating cabinet tones with your countertops.
Finally, don’t neglect outdoor landscaping cues that influence kitchen vibe from the outside in.
Bathroom Uplift: Grout Refresh and Vanity Trim
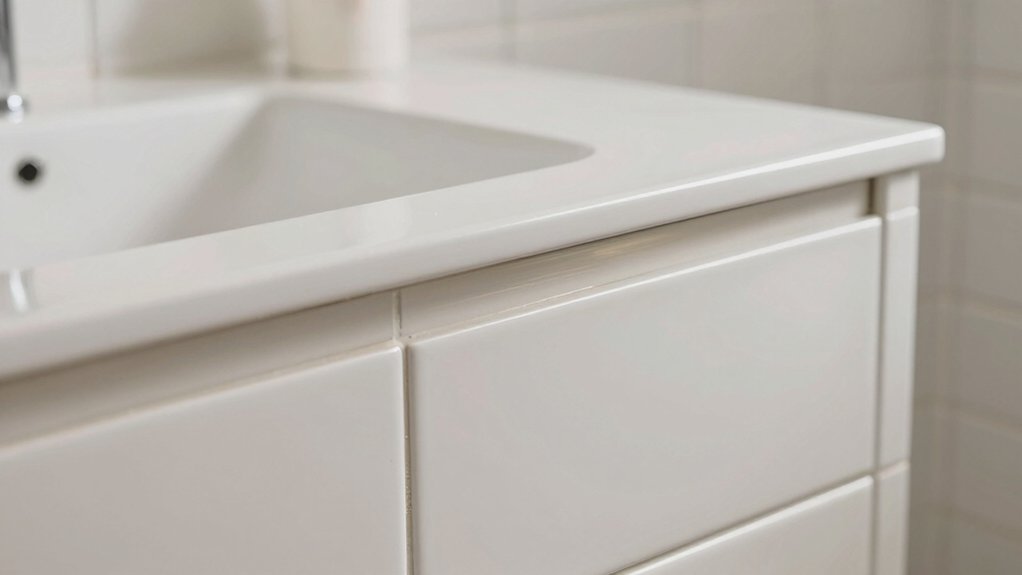
If you’ve been tweaking hardware in the kitchen, you’ve already got a good feel for how small updates move the whole space. In this bathroom uplift, you’ll refresh grout and trim vanity edges to sharpen the look without ripping out fixtures.
A clean grout line brightens tiles and hides wear, while a precise vanity trim adds clean, intentional lines. Use a grout cleaner that targets mildew without harsh scrubbing, then seal to prevent future staining.
For vanity decorating, choose a single bold accent and keep hardware cohesive with the rest of the room. You’ll gain a polished feel with minimal effort and maximum impact.
- Clean grout with purpose and seal
- Pick a bold accent color
- Match hardware finishes
- Trim edges for crisp lines
- Add purposeful accessories
Soften Acoustics: Textiles for Comfort and Quiet
You can start by choosing textile installs that quietly block noise and soften echoes in your rooms. Consider sound-blocking fabric choices and how soft furnishings, like rugs and curtains, make a practical, noticeable difference.
Small, targeted updates here can yield big gains in comfort and quiet without a full remodel.
Textile Installs For Quiet
Textile installs can quietly transform a room’s acoustics by absorbing echo and dampening noise. You want faster, smarter results, so pick practical textiles that clearly cut clutter and boost focus. Start with items that work together: soundproof curtains, acoustic panels, and strategic placement.
Choose dense fabrics, tight weaves, and solid colors that hide wear while delivering performance. Install height-balanced textiles to tackle reflections at ear level and above. Keep measurements simple: target problem zones first, then fill gaps.
Maintain airflow where needed by layering rather than crowding. Treat spaces with consistency—uniform textures reduce jittery sound. You’ll enjoy calmer meetings, better music, and quieter work.
- Soundproof curtains for window walls
- Acoustic panels on key walls
- Layered textiles at seating zones
- Ceiling-friendly fabric panels
- Floor rugs to dampen footfall
Sound-Blocking Fabric Choices
Dense, sound-absorbing fabrics reduce echo and lower noise levels quickly, so choose materials that balance performance with maintenance. You want control, not clutter, so pick fabrics that suit your space and routine.
For immediate impact, consider soundproof curtains; they add mass, dampen flutter echoes, and simplify deployment without remodeling. Pair curtains with perforated surfaces or rug layers to boost absorption where voices bounce.
If you need a DIY-friendly option, opt for acoustic foam panels in key zones, then cover them with fabric to blend aesthetics and function while keeping cleanup easy.
Prioritize fabrics with dense weaves and breathable backing to avoid moisture buildup. Test lighting and airflow to prevent hot spots, and maintain fibers with regular vacuuming for lasting performance.
Soft Furnishings Impactful Changes
Soft furnishings can quietly transform a room’s feel by soaking up echoes and smoothing hard edges. You’ll feel the difference fast when you choose textiles that balance sound with style, boosting comfort without clutter. Use decor accents and window treatments to tune dynamics, not just decorate.
- Add thick curtains or layered drapes to dampen noise and control light.
- Choose upholstered seating with firm back support for better sound absorption.
- Layer rugs to absorb reflections and define zones.
- Incorporate tactile throw blankets and pillows for warmth and hush.
- Integrate decorative panels or tapestries to enhance acoustics subtly.
Move Air, Not Money: Inexpensive Fans for Better Flow
If you’re tackling a small home upgrade, inexpensive fans can move air effectively without blowing your budget. You’ll want ceiling fans with solid(build) quality and versatile speeds to drive real air circulation. Choose models with reversible blades for seasonal airflow and a compact motor for efficiency, not noise.
Position the fan to optimize flow: the blade sweep should push air downward in warm months and pull it upward in cool months. Use higher speeds for high-traffic rooms and lower speeds where people sit or work.
Pair fans with strategic window openings to create cross-ventilation and maximize comfort. Focus on reliability, simple maintenance, and uniform blade balance to avoid wobble.
Result: cooler rooms, steadier airflow, lower energy use, stronger air circulation.
Subtle Accent: Paintable Wallpaper for Impact
Paintable wallpaper adds texture and depth without committing to permanent color. You’ll transform spaces fast, leveraging paintable accents to control mood, lighting, and focus. This subtle upgrade delivers a high-impact look without a full remodel, keeping you on top of your project list.
Expect smooth installation, clean lines, and durable surface that’s easy to refresh with a new shade or pattern later. Your walls gain definition, while you maintain flexibility for future design shifts.
Embrace economical chic that scales from accent walls to entire rooms, with minimal mess and maximal payoff.
- Quick texture boost with lasting impression
- Easy cutouts for outlets and fixtures
- Seamless color updates without repainting
- Durable, wipeable surfaces for busy homes
- wallpapers transformation that commands attention
Tidy Systems: Labeling for Easy Access
Ever wonder how a small labeling system can save you minutes each day? You set up tidy systems that cut search time and decision fatigue. Start with durable, high-contrast organization labels on bins, shelves, and drawers.
Map zones: kitchen, workshop, laundry, and tools, then label with clear categories and universal icons. Use consistent fonts, sizes, and color codes so your eye locks in instantly.
Put wraparound labels on to-go containers and sealed jars for airtight clarity. Create a quick-reference label you can update as needs shift, not as a chore.
Regularly audit your labels—outdated terms slow you down. With precise labeling systems, you reclaim control, speed tasks, and keep momentum. Your space becomes efficient, predictable, and ready for action.
Greenery Everywhere: Low-Cost Natural Texture Ideas
Add greenery without breaking the bank by mixing low-cost plants, DIY planters, and natural textures. You’ll create an indoor garden that feels polished, purposeful, and powerful, without overpaying. Use smart plant arrangements to maximize impact with minimal effort, and choose textures that echo nature for a cohesive look.
- Choose compact, airflow-friendly plants for tight spaces
- Create DIY planters from repurposed containers
- Layer textures: rattan, jute, and concrete-inspired pots
- Group plants by height for a bold vertical statement
- Use a simple weekly care routine to keep greenery thriving
This approach elevates your space fast, keeps maintenance low, and reinforces authority over your environment. Indoor garden vibes, plant arrangements, and budget-smart decisions converge for maximum effect.
Conclusion
You’ve got a weekend plan that pays off fast. With bursts of paint, smart hardware swaps, and tidy labeling, small changes feel big and doable. Don’t overthink the finish—caulk, patch, and prep first, then layer affordable lighting and natural texture for polish. Keep the momentum and stay flexible; progress compounds when you act now. The goal is simple: fresh spaces, fewer headaches, more flow. It’s time to roll up your sleeves and make it happen. You’ll thank yourself later.