Does the idea that tiny terraced bathrooms must feel cramped hold up under smart design? You can group wet and dry zones along shared walls, use compact, wall-mounted fixtures, and open sightlines with recessed storage to transform the space. Think through door swings, circulation, and multi-functional storage so every inch serves a purpose. There’s more to balance—and the best layouts reveal how to keep flow, durability, and light at the forefront as you plan.
Key Takeaways
- Map wet, dry, and storage zones to optimize circulation and minimize trips between fixtures.
- Use corridor or L-shaped layouts with aligned doors and thresholds to preserve daylight and reduce congestion.
- Maximize vertical storage with tall, recessed, and wall-hung units to reclaim floor space.
- Choose compact, wall-mounted fixtures, corner showers, and linear drainage to visually widen tight spaces.
- Leverage mirrors, light-penetrating finishes, and recessed niches to enhance brightness and perceived area.
Define the Unique Challenges of Tiny Terraced Bathrooms
Tiny terraced bathrooms pose unique challenges due to limited space, awkward layouts, and shared plumbing—factors that can limit both function and flow. You’ll contend with tight corners, door swing conflicts, and awkward入口s that waste usable area.
Because plumbing runs along familiar routes, you’ll face single-wall constraints that complicate rerouting for outlets, ventilation, or additional fixtures. Every inch matters, so you’ll prioritize compact, efficient fittings and careful fixture spacing to avoid crowding.
To elevate the space without expanding it, plan with intent: consider drainage symmetry, mirrored or light-penetrating elements, and high-contrast finishes that visually enlarge the room. Luxury fixtures can deliver perceived space through streamlined silhouettes, while Vintage styles provide character without bulk, aligning form with function in tight confines.
Zone by Zone: Choose Core Layout Options
Zone by zone, you map out where every core layout option fits your space, so circulation stays smooth and fixtures stay reachable.
Start with the essential zones—wet, dry, and storage—and test how each choice affects daylight, door swing, and future tweaks.
From here, you’ll compare core layouts with a clear eye for efficiency, flexibility, and long-term value.
Zone By Zone Essentials
To choose core layout options for each zone, start by aligning flow with how you live: the most-used spaces should be accessible, well-lit, and flexible, while storage and utility areas stay tidy and unobtrusive.
Zone by zone, map each area’s role—daily routines, guests, and quiet moments—then lock in primary circulation. In wet zones, prioritize efficient access from the door, minimized steps, and clear sightlines.
For zones that see heavy use, opt for durable materials and straightforward maintenance. Embrace compact, adaptable furniture and built-in storage to reduce clutter.
Include vintage fixtures as focal points without sacrificing flow, and choose eco-friendly materials to lower impact.
This strategic approach preserves comfort, increases efficiency, and supports long-term, edge-to-edge usability.
Core Layout Options
When you map core layouts, start with how you move through the space daily: place the door you’ll use most near the main circulation, then align adjacent zones so you don’t zigzag.
In small terraced homes, optimize flow by grouping wet zones (bath, toilet) and dry zones (vanity, storage) along a logical line to minimize travel.
Choose a layout that preserves daylight and mirrors the needs of daily routines, such as a compact corridor bath with a separate shower and toilet, or an L-shaped arrangement that keeps traffic out of the main living area.
Integrate thoughtful bathroom accessories and streamlined storage to reduce clutter.
Plan ventilation solutions that exhaust efficiently without compromising quiet, and guarantee operable windows or vents, especially in compact depths.
Maximise Floor Area With Pocket Doors and Sliding Panels
Ever wondered how pocket doors and sliding panels can reclaim precious space in a small terraced bathroom? You’ll gain square footage by trading swing doors for recessed panels that disappear into walls, freeing corridor and shower floor for essential fixtures.
Choose track systems that sit flush, minimizing toe-kick clutter and enabling easy, one-wall access. Align panels with plumbing lines to avoid offsets, and use lightweight, durable materials to reduce installation impact.
Opt for pocket doors with soft-close mechanisms to prevent pinched fingers and door slam. Incorporate vintage fixtures as focal points, balancing timeless charm with space-conscious design.
Favor eco-friendly materials and low-VOC finishes to sustain air quality. These moves create visually open, functionally generous bathrooms without sacrificing style or privacy.
Corner-First Fixtures: Fitting Bath, Toilet, and Sink in Snug Rooms
Corner-first layouts demand a tight plan: in snug rooms, you should place the bath, toilet, and sink where they share walls to minimize plumbing runs and free floor space.
Start with the toilet placement near the shared wall to reduce waste lines and awkward angles. Then tuck the basin adjacent for a single vent and easy water supply; align the bath so its taps and drain run parallel to that wall.
Plan door swing and clearance to avoid bottlenecks, particularly near the shower or bath edge. Confirm Bathroom ventilation is integrated—pulling stale air from the toilet zone and shower head area, with a continuous exhaust or balanced system.
Visualize traffic flow, then tighten dimensions to maximize usable space without sacrificing comfort or reach.
Create Calm Circulation With Smart Layouts
Creating calm circulation starts with deliberate, simple paths through the space. You map movement by aligning doors, fixtures, and thresholds in a clean sequence, minimizing detours. Tactile cues—flooring changes, consistent height differentials, and quiet hinge hardware—signal flow without shouting.
Use visual barriers sparingly to guide eyes toward the next logical zone, not to trap you. Vintage fixtures anchor context while maintaining clear circulation lines, and retro tiles define transitions without interrupting sightlines.
Prioritize a single, obvious route from entry to key zones, with secondary checks tucked near corners to prevent congestion. In small terraces, every corridor becomes a design detail, shaping perception and efficiency.
- Define primary pathways with unobtrusive thresholds
- Place fixtures to maintain continuous sightlines
- Use vintage fixtures and retro tiles as circulation accents
Light and Color Strategies to Expand a Small Bathroom
Light reflects space, so you can make a compact bathroom feel bigger by choosing reflective surfaces and strategic lighting.
Pair bright color schemes with cool neutrals to push the eye outward and keep the room feeling airy.
Use consistent finishes and ample daylight or soft LED layers to create a cohesive, expansive vibe.
Light Reflects Space
Natural light plays a central role in making a small bathroom feel bigger, so start by maximizing its reach. You’ll use light reflectors, glossy surfaces, and strategically placed mirrors to bounce illumination around the room, amplifying perceived space.
Your approach blends Lighting techniques with thoughtful Color psychology to create brightness without glare. Focus on a cohesive palette that enhances reflected light, not clashes it. Keep fixtures minimal and edges clean to prevent visual clutter.
- Position mirrors opposite windows to double daylight
- Choose high-gloss tiles and trim in pale tones
- Apply controlled artificial lighting that mirrors natural warmth
This method makes the space feel open, precise, and future-ready, guiding you toward a brighter, more expansive bathroom.
Bright Color Schemes
Use paint finishes deliberately: matte walls read quieter, satin or semi-gloss on surfaces enhances durability and light bounce without glare. In tight layouts, keep ceilings light to visually lift the room.
Carry a consistent color thread across cabinetry, tile, and fixtures to reduce fragmentation. Introduce color through accessories, towels, and storage fronts rather than large fields.
Test samples at different times of day, then commit to a restrained palette that maximizes perceived space while preserving personality.
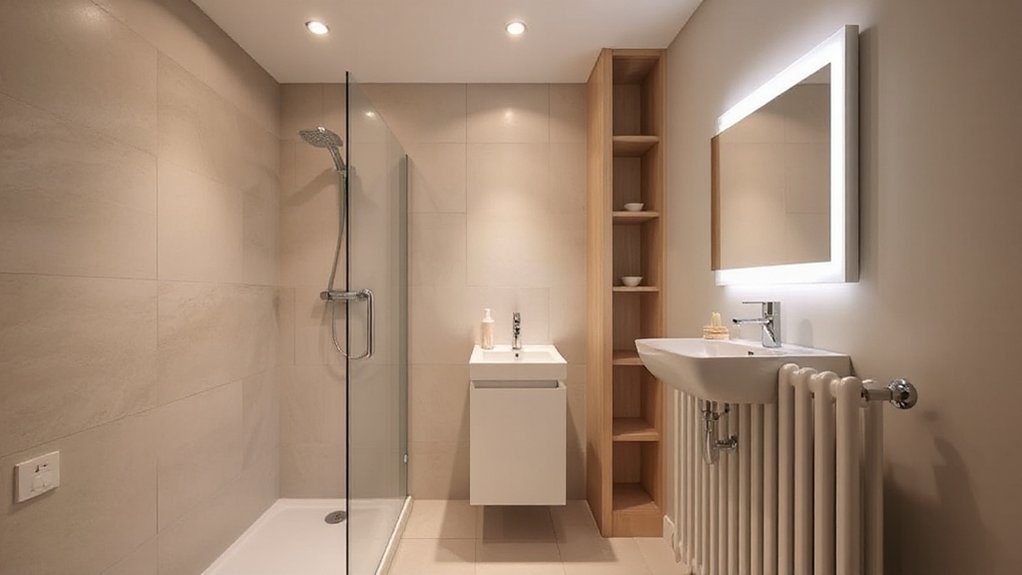
Storage Hacks That Don’t Crowd the Room
Even in a tight bathroom, smart storage can feel expansive when you prioritize vertical space, hidden corners, and multi-purpose fixtures. You’ll reclaim floor area by wall-mixing shelves, tall cabinets, and slim pullouts that glide silently. Choose built-ins with rounded edges for safety and luxury finishes that read spacious. Opt for eco friendly materials that resist moisture and wear, then seal with a low-VOC coating to preserve air quality.
Multifunctional pieces—vanity with linen storage, mirror cabinets, and a laundry bin integrated into the base—cut clutter while boosting usability. Lighting stays bright and targeted to avoid shadowy nooks, enhancing perceived space.
- Vertical racks above the toilet for towels and toiletries
- Mirror-fronted storage with hidden compartments
- Slim, corner pullouts that extend without crowding
Off-the-Wall Storage: Niches, Recesses, and Overhead Ideas
Off-the-wall storage leverages every inch you can’t reach with standard cabinetry. You’ll carve niches, recessed shelves, and overhead compartments into walls you already use, so vertical real estate becomes your ally. Position corner niches at eye level for daily essentials, then tuck lightweight items up high in slim, lift-assisted boxes that glide when needed.
Use recessed mirror panels to multiply light and make small spaces feel larger. For overhead ideas, install shallow cabinets with soft-close lids and integrated lighting to reveal contents without clutter.
Choose sustainable materials—bamboo, recycled glass, or FSC-certified plywood—with low VOC finishes to preserve air quality. Pair with creative lighting to highlight niches, and keep cords hidden to preserve clean lines.
This approach blends practicality with a forward-looking, adaptable bathroom ethos.
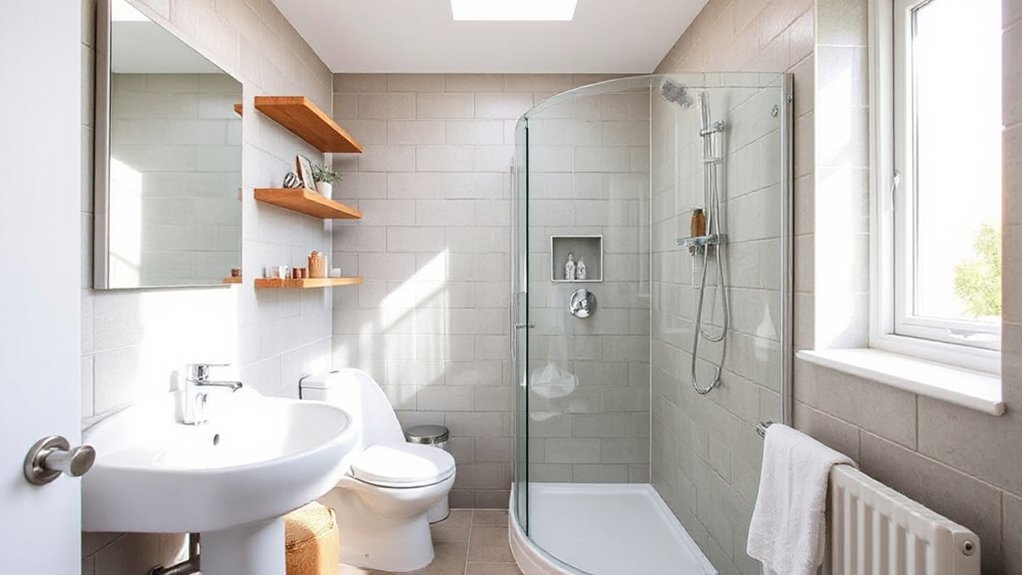
Layouts for En-Suites in Terraced Houses: Compact Luxury
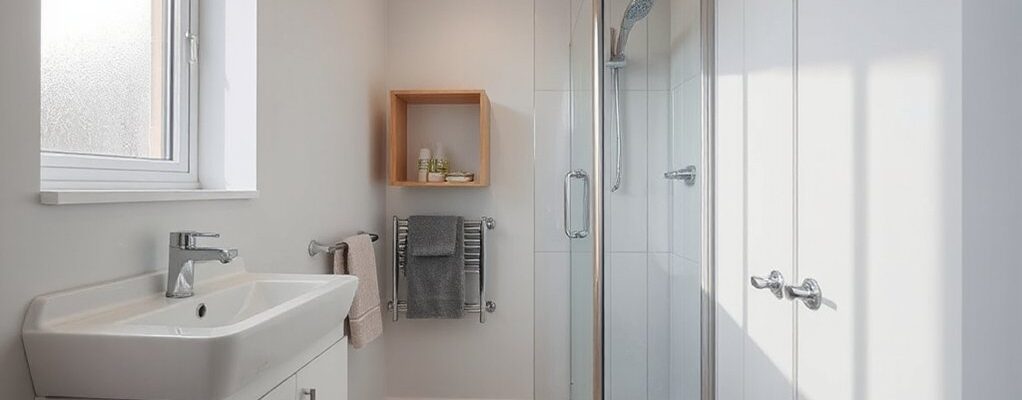
In terraced houses, en-suite layouts must maximize comfort without sacrificing footprint, so think compact luxury that feels expansive. You’ll prioritize a floating vanity, corner shower, and linear drainage to keep sightlines clean. Choose compact fixtures with glass doors to visually widen the space, and install a tall mirror to multiply light.
Vintage fixtures add character without bulk, while eco friendly materials reduce environmental impact and boost warmth. Plan for smart storage: recessed niches, slim medicine cabinet, and towel bars integrated into the vanity.
Keep color and texture cohesive to avoid congestion, and use layered lighting to create depth. This approach delivers hotel-like serenity in a footprint-conscious design.
- Vintage fixtures that don’t overpower the room
- Eco friendly materials for warmth and durability
- Hidden storage solutions maximizing every inch
Budget-Friendly Reconfigurations That Pay Off
Budget-friendly reconfigurations pay off when you optimize every inch and every line of sight. You’ll gain function by prioritizing compact fixtures, smart storage, and a clear traffic flow that reduces wasted steps.
Start with a dry run: sketch door swings, window positions, and the path to towels. Focus on Bathroom ventilation and the avoidance of damp corners, since good airflow preserves tile life and air quality.
Where possible, swap bulky units for slim profiles and wall-mounted essentials to free floor space. For plumbing upgrades, consolidate pipes to minimize demolition and reuse existing lines where feasible, reducing cost and disruption.
Choose adjustable shower bars, modular cabinetry, and shallow vanity drawers to maximize usability without clutter. Your reconfigurations pay off in comfort, efficiency, and long-term value.
Real-World Case Studies: Before, After, and Lessons Learned
You’ll see real- world results in the Before-After snapshots, showing exactly what changed and why it mattered.
Space-saving solutions reveal how smart layouts free up usable area without sacrificing comfort.
Practical lessons learned distill what works, what doesn’t, and how to apply it to your own small terraced bathroom.
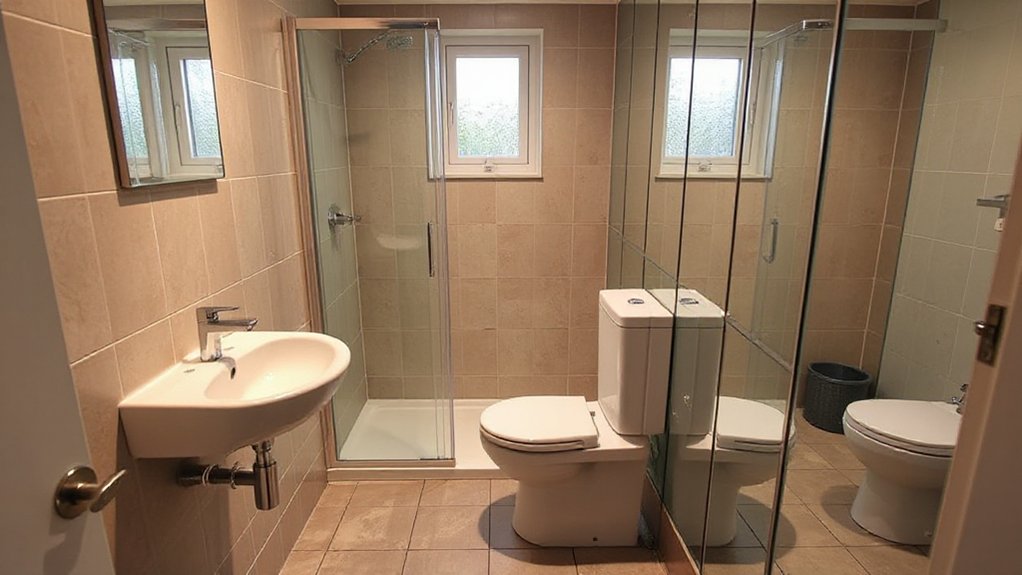
Before-After Comparisons
Before-and-after comparisons reveal how small changes in a bathroom layout can release significant usable space and improve daily workflows in tight terraced-house plans. You’ll see how shifting a shower enclosure, repositioning the toilet, or adding a pocket door can transform daily routines without expanding footprint.
These case studies highlight the dual value of Bathroom aesthetics and Plumbing upgrades, showing that better finishes and efficient piping deliver a noticeable difference in comfort and reliability. You can replicate the logic: minimize wasted travel, maintain clear sightlines, and preserve moisture-control integrity.
- Space-efficient fixtures and door mechanics that keep traffic flowing
- Coordinated color, texture, and lighting to enhance perceived space
- Practical plumbing upgrades that reduce noise, improve pressure, and simplify maintenance
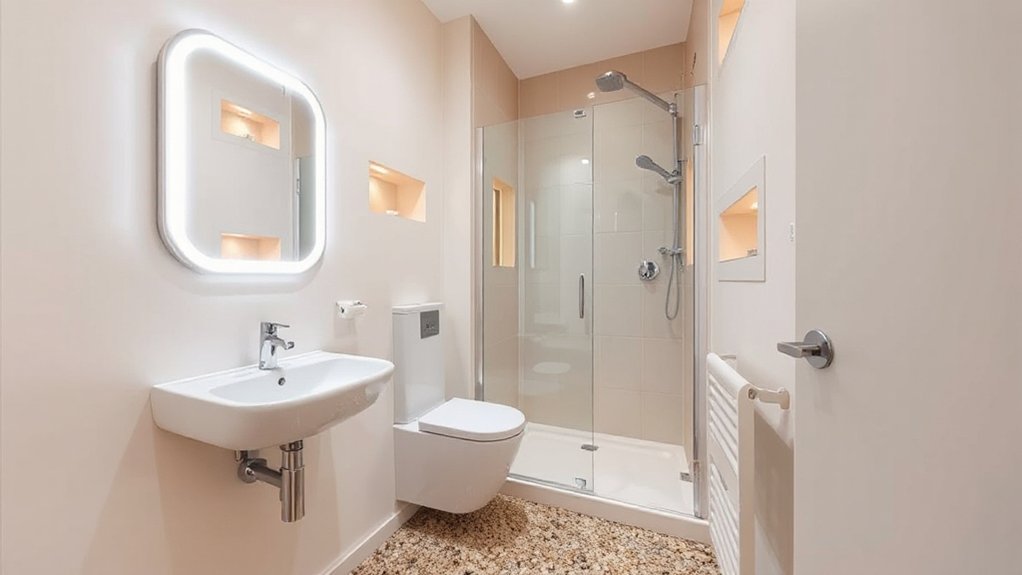
Space-Saving Solutions
Small spaces demand smarter layouts, and real-world case studies prove it: you can reclaim square footage and daily flow without expanding the footprint. In these before-and-after stories, you’ll see compact fixtures, pocket doors, and vertical storage reshaping routine use.
Choose a wall-hung sink and toilet to free floor space and simplify cleaning, then pair with a recessed cabinet for essentials. Prioritize clear sightlines and logical zoning to minimize wasted movement.
For moisture control, install efficient Bathroom ventilation that runs consistently, avoiding damp pockets that prompt rework. Consider Shower curtain options that maximize openness while containing spray, using curved rods or semi-opaque fabrics to soften light.
The lessons: measure relentlessly, test flows, and iterate hardware placements before committing to materials. Space-saving success hinges on deliberate, repeatable adjustments.
Practical Lessons Learned
Even so, real-world case studies show that the biggest gains come from frequent testing and honest evaluation of what actually worked. You’ll see how small changes—like layout tweaks, smarter storage, and lighting—translate into daily ease.
Before-and-after comparisons reveal practical priorities: durability, water use, and user comfort. Lessons learned point toward deliberate material choices, compact fixtures, and adaptable zones that still feel spacious.
You’ll adopt a mindset that blends luxury fixtures with pragmatism, ensuring moments of retreat without wasted space. Eco-friendly materials prove essential, balancing performance with long-term impact.
The goal is a bathroom that’s both efficient and aspirational, guiding future updates without overhauls.
- Prioritize flexible storage and accessible layouts for daily use
- Benchmark water and energy savings to justify upgrades
- Choose durable, eco-friendly materials paired with tasteful luxury fixtures
Quick-Win Checklist to Plan Your Own Tiny Bathroom Redesign
If you’re redesigning a tiny bathroom, start with a quick-win checklist that prioritizes airflow, function, and perceived space. Begin by surveying layout constraints, door swing, and clearance zones. Then identify three high-impact changes you can implement this week.
Prioritize ventilation—exhaust fan or window use—and a door that doesn’t intrude into the room’s flow. Plan for efficient plumbing fixtures that free up floor area, such as a compact toilet, a shallow vanity, and a corner or wall-hung basin.
Consider bathroom decor elements that visually expand the space: light colors, reflective surfaces, and strategic lighting. Map out zones for shower, toilet, and sink, ensuring easy access and maintenance.
Keep measurements precise, materials durable, and installation steps clear.
Frequently Asked Questions
How Small Is Too Small for a Comfortable Bathroom Layout?
You’ll find “too small” is anything under about 5 by 7 feet for a full bath. If you can’t fit a toilet, sink, and shower without cramming, you’ll compromise.
Aim for smart, 2–3 foot clearances and use space saving furniture to maximize usability.
Embrace minimalist decor to keep the room visually spacious.
Prioritize a corner shower, wall-hung fixtures, and recessed storage, so circulation stays comfortable and you still feel inspired.
Can Battery-Powered Lighting Make a Tiny Bathroom Feel Bigger?
Yes, battery-powered lighting can make a tiny bathroom feel bigger. You’ll create the illusion of space with bright, even glow and fewer shadows.
Eco friendly lighting choices keep energy use tiny yet effective, while sensors guarantee you’re never fumbling for switches.
Aim for a practical layout that complements a modern fixture design, using slim profiles and layered light.
You’ll achieve a visionary, functional feel—efficient, stylish, and surprisingly expansive.
Are Radius or Curved Fixtures Better for Tight Spaces?
Curved fixtures are better for tight spaces, you’ll gain smoother movement and the illusion of room. They soften edges, reduce snag points, and enhance flow, which supports space optimization.
Use radius basins, a curved shower enclosure, and rounded corners on cabinetry to maximize usable width. You’ll feel larger, calmer footpaths and easier cleaning.
Plan with precise measurements, keep lines continuous, and prioritize accessible storage. Curved fixtures help you envision and achieve a more expansive, efficient bathroom.
Should I Relocate Plumbing to Optimize Tiny Layouts?
Yes, you should relocate plumbing to optimize tiny layouts. You’ll gain flexibility for roomier fixtures and smarter flows.
Plan around essential lines first, then chase space saving fixtures that fit tight corners. Consider vertical stacks to minimize wall intrusion and reduce demolition.
Use Plumbing rerouting to rehome bulky components, freeing elbow room. Visualize a clear, functional path from door to shower, toilet, and sink.
Your future bathroom will feel expansive, efficient, and beautifully precise.
What’s the Fastest Way to Create a Fake Ceiling Height?
The fastest way to create a fake ceiling height is to install a ceiling illusion: a hidden grid, light coves, and lighter tones above. You’ll trick the eye, not the room, by pairing a shallow silhouette with vertical mirrors and high-contrast trim.
Ceiling illusion works fast, feels spacious, and uses precise detailing. You’ll notice Fake height benefits in daily flow, brighter corners, and a sense of openness that keeps your space practical and visionary.
Conclusion
In a tiny terraced bathroom, smart layouts turn constraints into calm, open sightlines into real space. You’ll gain more usable area with pocket doors, corner-first fixtures, and lean, durable fittings that ease maintenance. A well-lit, mirror-flushed feel boosts perception of size, while smart storage keeps clutter at bay. Did you know 60% of homeowners report bigger perceived space after tightening circulation and using vertical storage? Plan methodically, test layouts, and you’ll design for comfort, accessibility, and long-term value.