
Dealing with damp and mould isn’t ideal, but it’s a common property issue you’ll want to understand before you commit. You’ll face a mix of upfront remediation costs, long‑term prevention, and variable rates by region, influenced by your home’s size, structure, and the underlying moisture source. Pinpointing causes, testing needs, and whether DIY steps or professional remediation is appropriate will shape your budget and timelines. There’s more to uncover that can keep your property dry and costs predictable, if you keep exploring.
What Damp and Mould Costs UK Homes to Fix
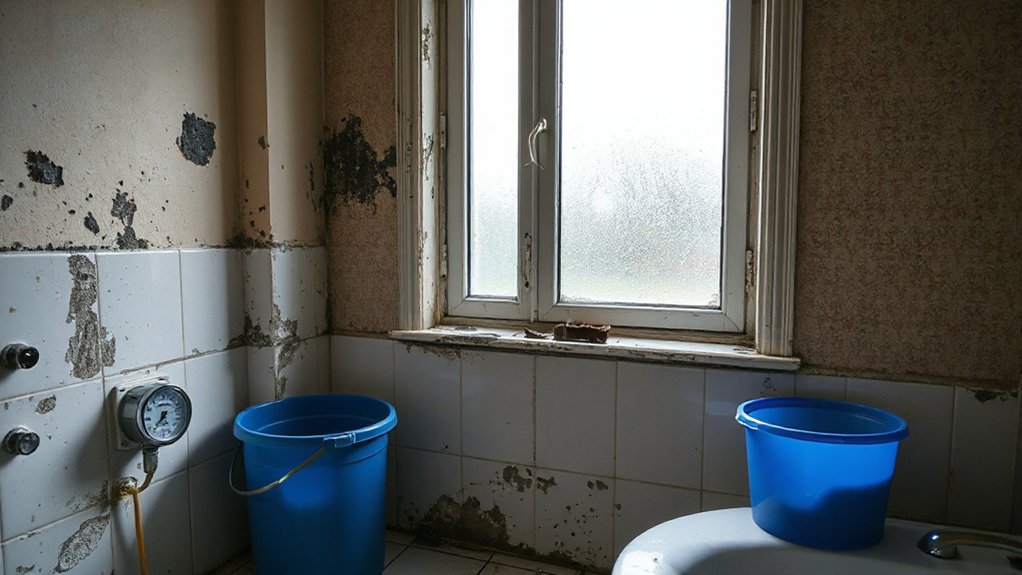
Damp and mould remediation costs in UK homes vary widely, but most fixes fall into a few core categories: assessment and diagnosis, moisture source reduction, ventilation improvements, and remediation of affected materials.
In a historical building context, expect higher diagnostic times and targeted interventions, as fabric details influence treatment options and access constraints. You’ll likely encounter costs for moisture barrier work, surface preparation, and controlled drying, alongside removal or encapsulation of mould-damaged substrates.
Eco-friendly materials can shift pricing, yet offer long-term durability and reduced environmental impact. Ventilation upgrades, such as heat recovery systems, may be essential in older structures, while ongoing monitoring ensures stability.
Accurate budgeting hinges on identifying hidden moisture paths, material resilience, and the feasibility of preserving original features during remediation.
Upfront Remediation vs Long-Term Prevention Costs
Balancing upfront remediation costs with long-term prevention expenses shapes the total price of damp and mould management.
You’ll weigh immediate corrective actions against sustained investments in ventilation, insulation, and moisture control to reduce recurrence.
This cost comparison informs budgeting decisions and guides strategies for durable, proactive prevention.
Upfront Remediation Costs
What upfront costs are involved in remediating damp and mould, and how do they compare to long-term prevention? You assess immediate fixes first, including inspection, moisture testing, and targeted remediation of affected building elements. Expect costs for professional assessment, containment, removal of mould-infested materials, and resealing or replacing damaged substrates.
Work latches to reduce relapse—surface coatings, sealants, and moisture barriers—are common, yet require precise application to be effective. You’ll also consider temporary accommodations if health risks are high or works disrupt daily life.
Budget for site safety, waste disposal, and post-remediation clearance testing. Incorporate household ventilation improvements and guarantee airtight detailing during repairs to lower recurrence risk.
Upfront outlays favor definitive correction, but you may still need monitoring to confirm lasting control.
Long-Term Prevention Expenses
Long-term prevention costs build on the upfront remediation work by prioritizing durability and ongoing control of moisture, rather than front-loaded fixes alone. You quantify this through lifecycle budgeting, balancing initial expenditure with anticipated maintenance, replacement cycles, and monitoring.
In a Historical building, embedded moisture pathways and historic fabric require targeted strategies that minimize invasive interventions while sustaining structural integrity. Priorities include continuous ventilation management, improved insulation with breathable, eco-friendly materials, and air quality monitoring to detect latent damp signatures early.
Maintenance plans should specify inspection intervals, performance thresholds, and repair protocols that avoid retrofits incompatible with heritage constraints. Cost awareness hinges on disciplined record-keeping, preventive replacements before failures, and selecting durable, low-embodied-energy components that align with conservation goals and regulatory requirements.
Cost Comparison Implications
Upfront remediation and long-term prevention impose distinct cost profiles that influence decision-making and risk management. You compare capital expenditure for immediate damp and mould removal against ongoing maintenance, monitoring, and renewal.
Upfront works deliver rapid risk reduction but may require repeated interventions if underlying conditions persist, elevating total lifecycle costs. Long-term prevention concentrates on design, ventilation, and material choices that reduce recurrence, potentially lowering annual spend though requiring upfront planning.
When evaluating options, weigh capital outlay, disruption, and time to return on investment. Historical building considerations, such as fabric sensitivity and preservation obligations, alter cost trajectories and permissible methods.
Eco-friendly materials can incur higher initial costs but may reduce maintenance needs and environmental impact over time. A balanced strategy optimizes durability, compliance, and total cost of ownership.
What Drives Damp and Mould Costs by Region
Regional costs for damp and mould treatment vary mainly with climate, housing stock, and local contracting rates. You’ll see regional climate shaping moisture levels, humidity patterns, and seasonal demand, which all influence service windows and pricing.
Building materials determine how easily moisture penetrates, how quickly problems recur, and which interventions are recommended, affecting both initial work and maintenance cycles.
Local contracting rates reflect competition, labor costs, and travel time, creating noticeable price dispersion between urban cores and rural areas.
Property type also matters: larger dwellings, detached homes, or period builds may require more invasive surveys, containment, and longer remediation plans.
When budgeting, compare regions for climate-related severity, material exposure, and typical contractor pricing to avoid surprises later.
Common Damp Causes That Raise Treatment Expenses
Damp and mould treatment costs increase when certain conditions consistently challenge building envelopes: persistent moisture intrusion, high humidity, and seasonal wetness create repeated remediation cycles and extended monitoring periods.
In this context, common damp causes that elevate expenses include moisture movement through walls and floors, insufficient ventilation, and permeable exterior finishes that allow rain ingress. You’ll also encounter historic building features such as solid walls with limited cavities, which complicate drying and moisture tracking.
Structural flaws—cracked render, failed damp-proof courses, and faulty flashings—allow repeated damp bursts that require staged repairs. Condensation from occupants’ activities or suboptimal heating patterns drive ongoing humidity management needs.
Addressing these factors early reduces repeated interventions, shortens remediation timelines, and stabilises long-term maintenance budgets. Moisture migration path tracing remains crucial for cost control.
How Damp Insurance Works for Homes
How does damp insurance work for homes? You’ll find that damp insurance is part of a broader home insurance policy, not a stand-alone remedy. Typically, cover hinges on policy terms and the cause of damp, with some policies excluding longstanding maintenance issues.
When you file an insurance claim, you must demonstrate sudden or accidental damage or a covered peril, and provide timely notification to your insurer. If approved, the claim may fund assessment costs, remediation work, and related safety improvements, subject to policy coverage limits and deductibles.
Insurers often require professional reports, moisture surveys, and compatible contractor work to meet technical standards. Be aware that pre-existing conditions or negligence can limit coverage, so understanding exclusions is essential for accurate expectations.
Hiring the Right Trades: Quotes, Surveys, and Timelines
When you’re hiring the right trades for damp and mould work, start by gathering multiple quotes, scheduling surveys promptly, and mapping a clear remediation timeline.
You’ll compare engineer-led assessments, trade qualifications, and scope documents to verify coverage of moisture source control, mould remediation, and finished surface treatment.
Prioritize trades with verifiable mould resistance expertise and proven track records in Historical architecture where preservation limits invasive work.
Require written method statements, risk assessments, and scheduling commitments that align with occupancy needs and weather windows.
Check for clear milestones: damp proofing, drying-out phases, and post‑flooding monitoring.
Confirm warranties specify material performance and service continuity.
Document decisions, maintain transparent communication, and confirm contingency allowances for unexpected moisture findings.
Budgeting a Damp and Mould Remediation Project
Budgeting a damp and mould remediation project starts with a clear cost framework that separates remediation, containment, and finishing works.
You should identify cost drivers—materials, labour, equipment, permits, and testing—and build in a contingency plan to cover unknowns and scope changes.
Plan for realistic timelines, define milestones, and document assumptions so you can adjust budgets as discoveries occur.
Budgeting For Remediation
Effective budgeting for damp and mould remediation starts with a clear scope and a realistic cost baseline. You establish required interventions, timelines, and pass/fail criteria, then quantify labour, materials, testing, and containment.
Use unit costs from reputable suppliers and adjust for property type, location, and condition. Historical trends help you anticipate seasonality, demand fluctuations, and price drift, while regulatory policies influence required standards, reporting, and permits, shaping both capex and opex.
Build a contingency budget, typically 10–20%, for unexpected moisture sources or equipment delays.
Separate costs into remediation, monitoring, and post-treatment verification to avoid double counting.
Document assumptions, sensitivity analyses, and funding milestones to facilitate stakeholder alignment and progress tracking, ensuring your plan remains actionable, auditable, and compliant throughout execution.
Cost Drivers To Know
Cost drivers in damp and mould remediation hinge on site-specific conditions, scope depth, and regulatory requirements; these factors shape labor hours, material choices, and sequencing. You’ll gauge moisture sources, material loads, and access constraints to forecast crew size and schedule milestones.
Material costs reflect diagnosis outcomes, containment needs, and substrate remediation, with prioritised sequencing to minimise rework. Historical trends influence pricing volatility in labour markets, consumables, and equipment rentals, so you should build a defensible budget with sensitivity analysis for worst‑case weather or supply delays.
Cultural impacts affect resident expectations, accessibility, and timing constraints, meaning communication plans must align cost allocations with consent processes and notification requirements.
Document risk-adjusted allowances for permits, waste disposal, and decontamination cycles to prevent overruns. Maintain traceable justifications for every cost category to support audit readiness.
Contingency Planning Tips
Contingency planning in damp and mould remediation starts with identifying the highest-risk cost drivers and building buffer where uncertainties loom. You map potential overruns in materials, labour, disposal, and access constraints, then assign a realistic contingency percentage based on project size and site conditions.
Track indoor humidity targets and how deviations affect drying times, equipment needs, and rework. Your plan should include staged approvals to prevent scope creep and a defined change-control process for cost adjustments.
Specify ventilation systems performance requirements, including filtration, air changes per hour, and maintenance intervals, since delays here cascade into extended treatment windows.
Establish a buy-ready list of interchangeable materials to reduce lead times.
Finally, document monitoring milestones, trigger points for re-budgeting, and a clear communication protocol with stakeholders.
DIY vs Professional: When to Tackle It Yourself
If you’re weighing options, know that some damp and mould issues are safe to tackle yourself, while others require professional intervention. You’ll assess risk by moisture level, substrate type, and air quality.
Superficial surface mould on non-porous walls may be removed with appropriate PPE and household cleaners. For persistent mould, or growth within porous materials, stop and call a certified contractor.
DIY fixes suit cosmetic repairs and limited interior decoration, such as repainting after treatment, provided you control humidity and resolve the underlying cause. Don’t attempt structural remediation or insulation work without expertise.
Document processes for future maintenance, and confirm product labels meet UK standards. When in doubt, prioritise safety, and schedule a professional assessment to prevent reglazing or recontamination.
From Diagnosis to Drying Out: Typical Timelines
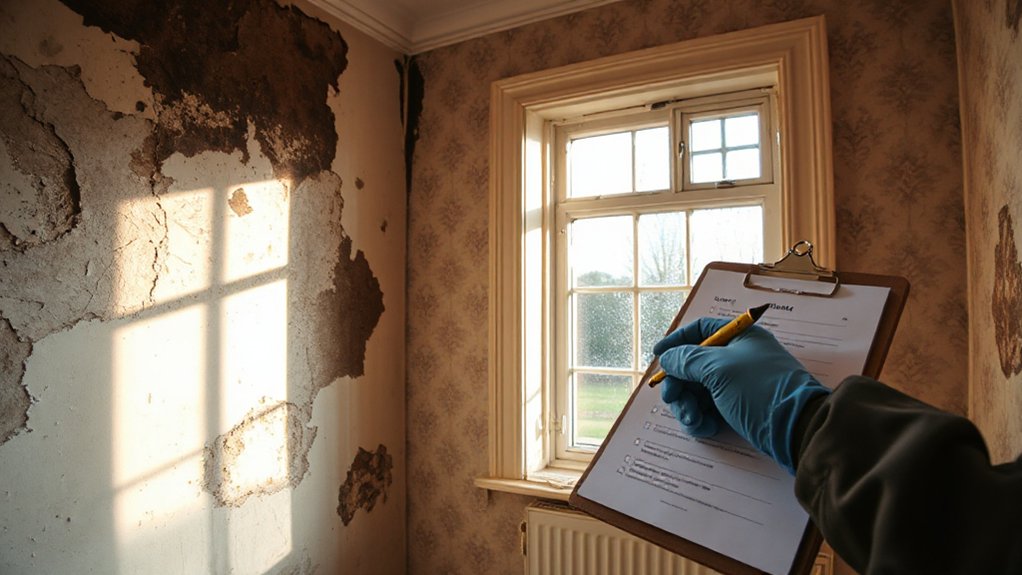
Diagnosing damp snaps you to a defined timeline: initial assessment, confirmation of moisture sources, and documenting conditions before action.
Once action starts, drying and remediation proceed within a structured window to minimize recontamination and material damage.
We’ll outline typical durations for each phase so you can calibrate costs and scheduling accurately.
Diagnosis to Action Timeline
When damp and mould are suspected, the path from diagnosis to drying out follows a structured sequence: initial assessment, moisture mapping, remediation planning, and execution, with each step time-bound to minimize further damage.
You move from confirmation to prioritized actions, aligning targets with observable indicators and risk profiles. Historical trends inform the choice of interventions, while building materials influence detection methods and containment needs.
Initial assessment yields a defect map and urgency rating, guiding moisture mapping to quantify affected zones. Remediation planning translates findings into action—timelines, tasks, and responsibilities—so execution proceeds without delays.
Critical milestones are defined for rechecks and seasonal considerations, ensuring progress remains trackable. You document decisions, monitor for recurrence, and adjust measures to preserve structure and indoor air quality.
Drying and Remediation Window
The drying and remediation window spans from validated diagnosis to restored conditions, with clearly bounded milestones that translate moisture findings into targeted actions. You establish measurable criteria for dryness, including surface moisture limits and air humidity targets, before initiating remediation.
Next, you deploy ventilation systems to reduce indoor vapor pressure, balancing airflow with occupant comfort and mould prevention. Simultaneously, moisture barriers are installed to halt behind-wall transfer and recontamination during demolition and cleaning.
Drying proceeds in phased stages: containment, extraction, dehumidification, and continuous monitoring. You re-check with moisture meters and infrared surveys, confirming stabilization across substrates.
Any persistent damp spots trigger recalibration of dehumidification rates or targeted repairs. Restoration completes when mould risk indicators stay below threshold and air quality meets guidelines, ensuring sustained, post-remediation safety.
Practical Tips to Reduce Future Damp and Mould Costs
What practical steps can you take now to lower future damp and mould costs? Start with a baseline assessment of indoor air quality and identify moisture hotspots, such as kitchens, bathrooms, and basements.
Improve ventilation quality by ensuring operable windows, functional extractor fans, and continuous background ventilation in high-humidity areas.
Use moisture barriers and insulation upgrades to reduce condensation on cold surfaces; seal leaks in roofs, plumbing, and walls promptly.
Regulate indoor climate with consistent temperature and humidity targets, using dehumidifiers only when needed.
Implement a maintenance schedule for gutters and damp-proofing, and promptly address any mould growth with appropriate cleaning agents.
Document interventions for future reference, as traceable measures support cost control and accurate risk forecasting.
Regular monitoring of indoor air quality remains essential.
Frequently Asked Questions
Can Damp Costs Vary by Property Age and Construction Type?
Yes. You’ll see damp costs vary by Property age and construction type, because older builds and certain structures respond differently to moisture. You consider how Property age and construction type influence remediation methods, materials, and labor for accurate budgeting.
Do Energy Bills Affect Damp Treatment Cost Estimates?
Yes, energy bills can influence damp treatment cost estimates, since higher heat losses require more moisture control measures and ongoing damp prevention steps, increasing insulation, ventilation upgrades, and monitoring needs.
How Does Landlord Vs Tenant Responsibility Impact Costs?
The theory holds that costs shift with who’s responsible. You’re affected by tenant responsibilities for minor issues, while landlord obligations cover major damp remediation. You pay if fault lies with you; landlords absorb structural or habitability-related costs.
Are There Grants or Loans for Damp Remediation?
Yes, you can access financial assistance through government schemes and grants for damp remediation. Check eligibility, apply to relevant programs, and document property needs; contributions may cover assessments, remediation, and prevention, enabling you to manage costs effectively.
What Is the Typical Insurance Excess for Damp Claims?
Short answer: typical excess varies, but you’ll usually pay between £100–£250; check your policy. You’ll navigate insurance policies and claim processes, ensuring you understand deductibles, documentation requirements, deadlines, and timing for damp-related claims.
Conclusion
Dealing with damp and mould is a cost-driven, multi-step process. Start with accurate diagnosis, then combine remediation with long-term prevention to curb recurring expenses. For example, a midsize UK terrace with rising moisture used a professional survey, fixed condensation sources, and upgraded ventilation, cutting annual PPM costs by a third within two winters. Budget for contingency, insulation, and monitoring, and weigh DIY vs. pro help by risk and skill. Thorough planning minimizes future claims and sustains healthier homes.