To create a spa-style bathroom in a semi-detached home, you’ll start by defining calm goals, selecting calming neutrals and tactile textures, and choosing moisture-smart materials that stay durable in tight spaces. Plan a layout that maximizes light and keeps the footprint efficient, then layer lighting, anti-fog mirrors, and smart accessories for lasting ambience. With a clear budget and a practical timeline, you’ll craft a serene retreat—and you’ll want to keep going once the core choices are in place.
Key Takeaways
- Plan a serene layout with wall-hung fixtures, a compact shower niche, and a deep soaking tub to maximize space in a semi-detached home.
- Select calming neutrals (beige, warm gray, ivory) and tactile textures (stone-look tiles, matte finishes, linen textiles) for visual calm.
- Choose moisture-smart materials (cement board, porcelain tile, moisture-rated plywood) and sealant finishes with satin/semi-gloss for durability.
- Layer lighting with ambient, task, and accent sources; use mirrors and reflective surfaces to boost perceived space.
- Integrate smart features (dimmable lighting, anti-fog mirrors, quiet diffusers) and follow a 3-step plan: define scope, budget, and schedule.
Define Spa-Style Goals for a Semi-Detached Bathroom
To define spa-style goals for a semi-detached bathroom, start by detailing the exact experiences you want: tranquility, warmth, and quiet spa rituals that fit your daily routine.
You identify core outcomes: a luxury spa feel, a controlled relaxation ambiance, and predictable performance metrics.
Translate these into measurable targets: lighting scenes at dawn and dusk, moisture management, sound dampening, and air quality standards.
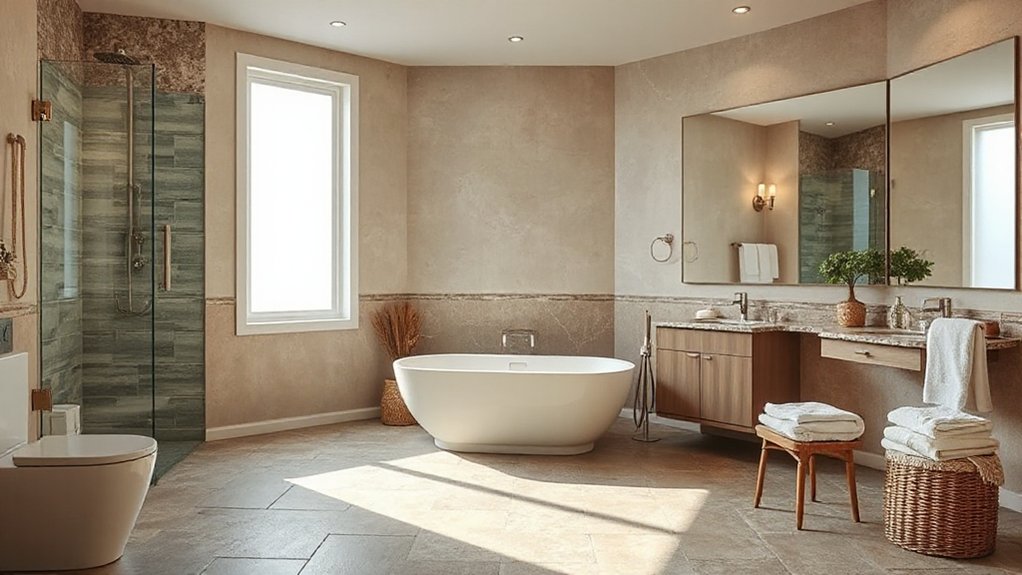
Map spatial priorities: a compact shower niche, a deep soaking tub, and a wall-hung vanity for clean lines and easy cleaning.
Specify materials that endure humidity, maintain color fidelity, and support tactile calm.
Align budget, timeline, and procurement steps with these goals to ensure project efficiency and consistent design rigor.
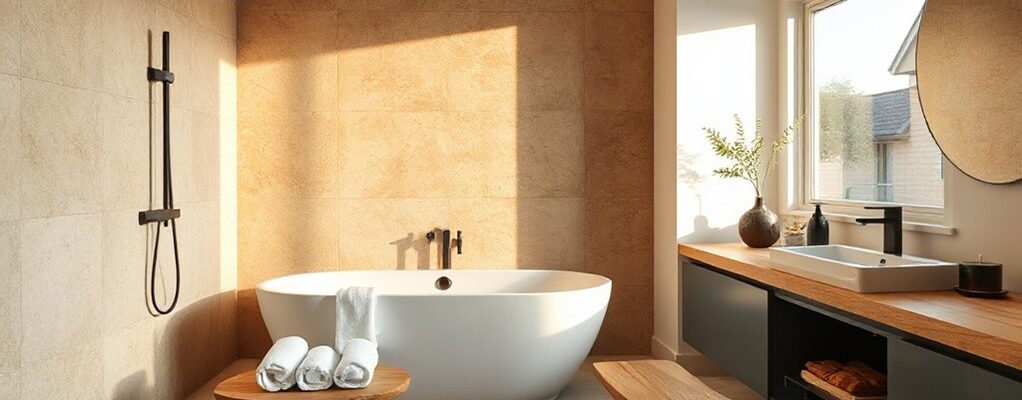
Choose Calming Neutrals and Textures You’ll Love
Calm neutrals set the backbone for a spa-inspired bathroom, balancing warmth and cleanliness while letting textures do the storytelling. You select a restrained palette—soft beiges, warm grays, creamy whites—to create visual calm and timeless appeal.
Pair these neutrals with tactile textures: linen towels, stone-look ceramic, matte-finish tiles, and wood accents to invite touch and subtle contrast. Prioritize durable, easy‑care materials where moisture hits most.
Introduce Aromatherapy blends through understated diffuser reeds or diffusers to sustain calm without overpowering the space.
Incorporate Aromatic lighting with warm, dimmable fixtures and layered sources—LED strips under cabinets, wall sconces, and a central ceiling light—to enhance depth and mood while maintaining practicality.
Keep finishes cohesive, ensuring edges and corners read clean, intentional, and timeless.
Select Moisture-Smart Materials for Durability and Ease
Prioritize moisture-resistant materials that stand up to humidity and spills, focusing on tile, cement board, and high-quality backing for long-term stability.
Choose durable surface options with low porosity and proven stain resistance, ensuring easy maintenance and minimal sealing needs.
Look for finishes and coatings that are simple to clean and withstand daily use, aligning with your project timeline and budget.
Moisture-Resistant Materials
What moisture-smart materials best resist humidity while keeping maintenance minimal and performance predictable? You’ll choose panels, boards, and fasteners with low water absorption, high vapor resistance, and proven抗-mold performance.
Opt for cementitious or porcelain-inspired tile backings, moisture-rated gypsum, and epoxy or polyurethane sealants that endure weekly dampness without swelling.
Select paints and coatings labeled for bathrooms with a satin or semi-gloss finish to repel splashes while simplifying cleaning.
For cabinetry and shelving, use moisture-resistant MDF or plywood with sealed edges and UV-cured topcoats.
In all cases, prioritize consistent edge detailing, tight joints, and proper vapor barriers behind walls.
Monitor humidity control and mold prevention through regular, protocol-driven checks and timely resealing, especially in corners and under vanities.
Durable Surface Selection
Durable surfaces count from day one: choose moisture-smart materials that resist humidity, bear daily use, and stay low-maintenance. You’ll prioritize surfaces that balance resilience with cleanability, aligning with both Eco friendly alternatives and Budget friendly options. Focus on long-term performance without aesthetic compromise.
- Select composites and vitrified tiles with low porosity for reduced staining and easy wipe-down.
- Prefer solid-surface or sealed stone in high-traffic zones to minimize maintenance cycles and lifetime repairs.
- Favor water-resistant finishes on wood-look planks or panels to keep warmth without warping.
Implementation tips: verify warranty language, test slip resistance, and confirm color consistency across batches. Choose materials that simplify repairs, support quick turnover, and maintain spa-like calm for years.
Easy-Clean Finishes
When you choose finishes that resist moisture and wipe clean, you set the foundation for long-term ease of maintenance in a spa-style bathroom. Pick moisture-smart materials that endure humidity and daily use without staining or warping. Prioritize sealed porcelain, glass, and solid-surface countertops, paired with epoxy or UV coatings on wood to prevent wear.
Size-limited grout lines reduce mildew traps and simplify maintenance. Select eco-friendly fixtures to minimize impact while maximizing performance, and guarantee finishes are easy to wipe, dry, and re-seal.
Favor minimalist decor to keep surfaces simple and reachable for regular care. Plan progressions between wet and dry zones with consistent material logic, so cleaning routines stay swift and predictable, saving time without compromising durability or vibe.
Light and Layout Ideas to Make a Small Bath Feel Open
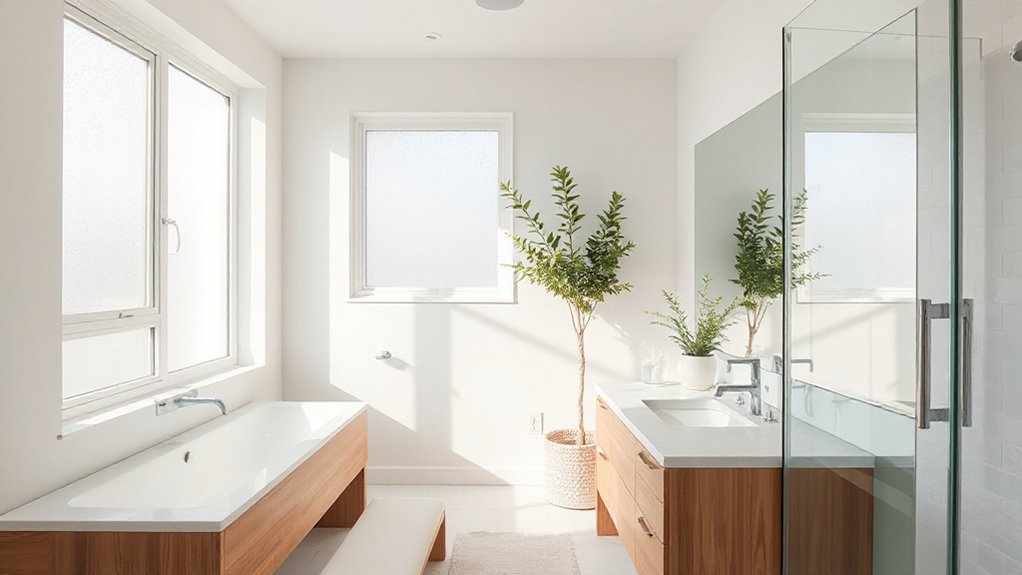
A small bath can feel instantly brighter and more expansive when lighting is layered and the layout minimizes visual clutter. You’ll gain depth with a mix of ceiling, task, and mirror lighting, plus strategic placement to avoid shadows in corners. Use light colors and reflective surfaces to bounce light, while keeping lines clean and fixtures compact.
Color palettes and Lighting options work together to create perceived space and calm.
1) Layered lighting plan: ambient, task, and accent to sculpt the room.
2) Mirror and glass: maximize reflection, reduce visual clutter, and widen sightlines.
3) Layout efficiency: wall-hung fixtures, clear zones, and a sliding door or pocket entry to save floor space.
Elevate the Retreat With Smart Accessories and Finishes
Smart accessories and finishes can elevate the retreat without cluttering the space. You’ll optimize the spa feel with precise choices that read as deliberate upgrades, not decor clutter.
Integrating smart lighting lets you shape mood and task zones without fuss, while dimmable, tunable whites save energy and support morning routines.
Pick finishes that endure humidity and wipe clean easily—matte ceramic, sealed wood, and stainless hardware with minimal seams.
Opt for a compact sensor mirror with anti-fog tech to streamline morning routines.
When selecting aromatherapy diffusers, choose quiet, whisper-quiet models and refillable cartridges for low maintenance.
Place a single, well-ventilated station for salts, oils, and towels near the shower niche.
This approach balances luxury with proven, repeatable efficiency.
Plan, Budget, and Kick Off a 3-Step Spa Bath Makeover
Plan a focused three-step spa bath makeover by defining goals, establishing a budget, and launching a disciplined kickoff. You’ll map outcomes, cap costs, and set a clear timeline to prevent scope creep. The approach blends Eco friendly fixtures with Smart lighting to maximize impact without waste, keeping team alignment tight and decisions fast.
- Define scope and priorities: pick two must-haves, one nice-to-have, and a contingency.
- Set a lean budget: itemize core trades, fixtures, and durable finishes; reserve 10–15% for surprises.
- Launch execution: schedule suppliers, approvals, and weekly check-ins to track progress and adjust quickly.
With precision planning, you’ll execute efficiently, reduce downtime, and realize a spa-grade bath that reads cohesive, calm, and sustainable.
Frequently Asked Questions
How Long Does a Spa-Style Bathroom Makeover Take in a Semi-Detached Home?
A typical spa-style bathroom makeover in a semi-detached home takes about 2 to 4 weeks, depending on scope and trades. You’ll streamline by scheduling trades back-to-back and ordering luxury fixtures early.
You’ll want durable water protection, precise tiling, and efficient, low-dust work. Plan for 1–2 days of final adjustments.
While you renovate, install soundproofing solutions and upgrade ventilation. You’ll stay on track by daily progress checks and clear, shop-ready orders.
Which Moisture-Prone Areas Need the Strongest Finishes First?
Begin by noting: the walls and floors closest to the shower, tub, and toilet are your strongest targets. You’ll want ventilation systems and waterproof coatings prioritized first in those moisture-prone zones.
Then extend protections to vanity areas and cabinetry with guarded seals.
Prioritize waterproof coatings on shower enclosures, tub surrounds, and backsplashes.
Guarantee efficient, well-vented airflow to prevent condensation, and seal joints meticulously for ongoing durability.
Can a Small Bath Support a Rainfall Showerhead Setup?
Yes, a small bath can support a rainfall showerhead setup if you design thoughtfully. Check the plumbing, guarantee adequate headroom, and reinforce studs if needed.
Use compact, lower-flow Rain Shower units and water-efficient fittings to keep pressure steady. Prioritize luxury fixtures where possible, but balance with water efficiency to avoid waste.
Plan drainage and waterproofing thoroughly, and confirm local codes. This approach delivers style, performance, and project efficiency in tight spaces.
What Are Budget-Friendly Ways to Implement Spa Textures Without Remodels?
You can evoke spa textures on a budget by layering textiles, lighting, and surface finishes without full remodels. Think luxury materials like pebble mats, plush towels, and woven baskets paired with soft, warm lighting to mimic stone and wood.
Use high end fixtures you already own or thrifted accents, polished chrome, matte blacks. Be precise: micro-textures, subtle patterns, and strategic placement act as symbols of calm, signaling luxury through deliberate, efficient choices.
Which Lighting Temperatures Best Enhance a Spa Ambience?
You’ll want warm-to-neutral color temperatures, around 2700–3000K, to maximize relaxation and keep skin tones accurate.
For a spa ambience, choose layered lighting: ambient, task, and accent, with a consistent color temperature to avoid jarring shifts.
Aim for lighting ambiance around 3000K for comfort, while adding dimmable controls to modulate intensity.
Use CRI 90+ for true colors, and guarantee shadows are soft.
This precise setup delivers calm, functional, and efficient ambience.
Conclusion
You’ve mapped a serene spa retreat that fits a semi‑detached layout, with calm neutrals, textures you can feel, and moisture-smart choices that stay durable. With smart lighting, anti-fog mirrors, and a deep tub, you’ll enjoy a spacious, tranquil feel even in a small bath. Keep the plan lean, budget tight, and timelines tight. Think of this makeover as threading a needle: precise, purposeful, and effortlessly elegant, stitching calm into daily routines. Your retreat awaits—steady, stylish, and superbly efficient.