
You can transform a room in a day with a clear plan and high-impact tasks. Start by setting a realistic weekend timebox and picking finishable tasks (30–90 minutes each) that deliver visible results, like a quick paint refresh, brighter lighting, or a slim storage upgrade. Use DIY shortcuts, budget hacks, and track progress with green/amber/red dots. Document costs and outcomes for future upgrades, and stay prepared for quick recoveries if setbacks pop up as you push ahead. You’ll uncover more practical steps as you continue.
Key Takeaways
- Plan one-day projects with clear deliverables, prioritizing high-impact tasks that finish within a few hours.
- Use a weekend timebox: 30–90 minute blocks, track progress with green/amber/red markers.
- Target quick-win upgrades: paint refreshes, hardware updates, and lighting improvements.
- Document criteria, costs, and deadlines to ensure accountability and repeatable results.
- Combine organization and efficiency: declutter, optimize storage, and seal surfaces for lasting impact.
What One Day Home Projects Deliver (and How to Pick Yours)

One-day home projects deliver quick wins that boost function and mood without derailing your schedule. You’ll gain momentum by choosing tasks with clear, tangible outcomes, not grand, sprawling efforts.
Start with DIY inspiration that aligns to your needs: tighter storage, brighter lighting, or simpler routines. Prioritize projects by impact and effort, then map them to your week.
Use project prioritization to rank options: high impact, low complexity first, then medium squeezes for gaps. Choose tasks you can finish in hours, not days, to preserve your energy and motivation.
Decide criteria before you swing a hammer: cost, time, disruption, and benefit. Document expected gains and deadlines to stay accountable.
Finally, commit to one to three feasible targets and execute with focus.
Set a Realistic Weekend Plan With a Timebox
To set a realistic weekend plan, start by timeboxing each task to specific blocks—even short ones like 30 to 90 minutes. You divide the workload, assign fixed start and end times, and commit to finishing one objective before moving on.
Prioritize high-impact tasks, don’t over-allocate, and build in buffer for shifts. Use DIY shortcuts to streamline setup and minimize fuss, and apply budget hacks to keep costs predictable.
Track progress with a simple progress marker—green for completed, amber for blocked, red for impassable—so you stay in control. End your day with a quick review: adjust for next weekend, document what worked, and document what failed.
You’ll gain momentum, confidence, and measurable outcomes—quietly powerful.
Quick Paint Refresh: Color Wins in a Day
You can see how a fresh coat transforms a room fast, with a bold or soft color setting the mood in hours. Start with quick prep steps—wipe, patch, and protect—so your new color goes on smooth and stays clean.
Pair colors thoughtfully to boost contrast or harmony, and you’ll finish in a day with a noticeable, usable result.
Fresh Coat Impact
A fresh coat can transform a room in hours, and a quick paint refresh proves color wins in a day. You take charge by selecting a bold paint color and matching it with smart brush types to speed the job while keeping edges sharp and coverage solid.
You’ll finish faster by planning one consistent stroke pattern and avoiding overloading the brush. You apply even coats, let each dry, and test a small area before a full rollout.
You stay deliberate, precise, and efficient, delivering a room that feels revitalized with minimal downtime.
- Choose a single bold paint color to unify the space
- Pick brush types that suit your surface and finish needs
- Use controlled, deliberate strokes for clean lines and even coverage
Quick Prep Steps
First, prep matters: a quick, organized setup saves hours. You start by clearing the workspace and protecting floors, furniture, and outlets. Gather essentials: primer, paint, brushes, rollers, trays, and a mood-friendly temperature window. Do a fast dust wipe, then tape edges and seal gaps to prevent bleed-through.
Decide on a few high-contrast, bold or neutral choices to maximize impact with minimal coats. For DIY safety, keep respirators, gloves, and good ventilation within reach, and store solvents away from heat.
Material selection matters: choose a durable, low-odor formula for fast coverage and cleanability. Label cans for touch-ups, mark the date, and test a small patch.
Finish with a quick wipe-down, then you’re ready to paint and win the day.
Color Pairing Tips
Color pairing can make or break a quick paint refresh. You’ll choose colors that energize spaces, not confuse them, so you act with purpose and precision.
Start with a dominant paint palette that supports your room’s light and mood, then add accent hues for depth and contrast.
Keep values balanced: light walls, darker trims, and one bold feature to anchor the room.
Test swatches in multiple lighting moments to confirm consistency, not guesswork.
- Choose a dominant paint palette that enhances natural light and architectural lines
- Use accent hues sparingly to highlight focal features and architectural details
- Test swatches at different times of day and in adjacent rooms to ensure cohesion
Upgrade Lighting for Instant Brightness
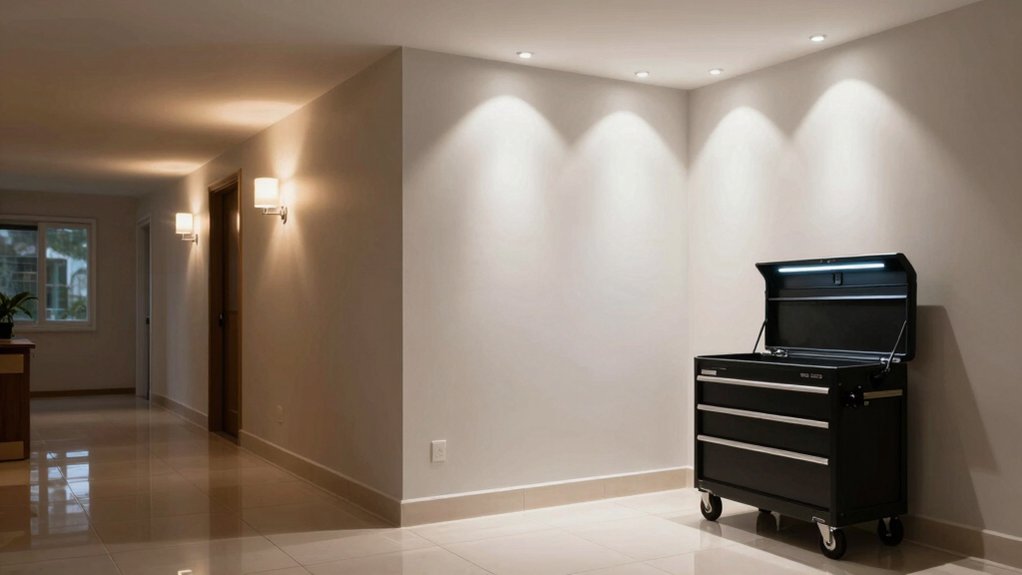
Upgrading lighting for instant brightness starts with a quick assessment: which rooms feel dim or rely on outdated fixtures? You’ll pinpoint underlit zones, then prioritize upgrades that punch up visibility without wasting power.
Begin with lamp placement: position floor lamps near dark corners, and place table lamps to illuminate work surfaces and entryways. Swap harsh bulbs for brighter, cooler tones where you need focus, and use consistent color temperature to reduce eye strain.
Install light dimmers on primary fixtures to control mood and energy use, enabling instant brightness when needed and softer light for evenings. Choose energy-efficient LEDs with high lumen output and long life.
Tighten trim at sockets, replace aging switches, and test all connections for stability and safety. Your space becomes instantly brighter, more functional, and ready for action.
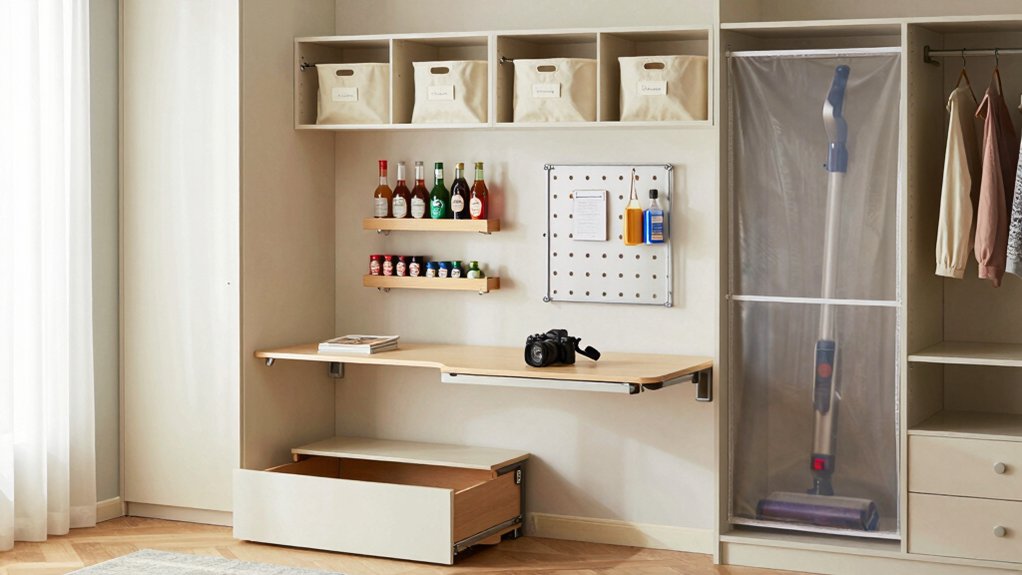
Budget-Friendly Smart Shelving Makeovers
Ever wondered how to transform cluttered shelves into smart storage without blowing your budget? You’re about to execute budget-friendly upgrades that deliver real control. Pick modular shelving you can reconfigure, label aggressively, and pair with clear bins so you see everything at a glance.
Use smart shelving ideas that maximize vertical space, then add affordable automation controls like motion-activated lights and a simple charging dock to keep devices ready. Keep movement deliberate: customize depth with risers, install strong brackets, and secure units to walls for safety and confidence.
You’ll finish with a clean, efficient look that feels premium without the price tag.
- Modular units and adjustable shelves
- Clear bins, labels, and risers for visibility
- Motion lighting and a compact charging station
Kitchen Edge Edges: Quick Finishing Touches
Edge finishing sets the tone, so start with a tight plan: choose edge finishing tips that suit your cabinet material. Then test quick trim alternatives like overlay beads or micro bevels before committing.
Aim for a seamless look by aligning your edges with the door face and selecting a matching profile or a subtle contrast.
Keep it practical: pick one finish method, apply it cleanly, and evaluate the result from several angles to confirm a polished, long-lasting outcome.
Edge Finishing Tips
Are you ready to finish kitchen edges quickly and cleanly? Edge finishing tips empower you to seal seams, smooth progressions, and elevate every surface with confidence. You’ll apply trim detailing concepts to create crisp lines, durability, and a polished look that lasts. Stay decisive: prep, measure, cut, caulk, and seal with intent. This approach keeps waste minimal and results precise, so you can move through your project with authority.
- Use a sharp utility knife to score and trim edges, then sand lightly for a flawless stride.
- Apply a precise bead of caulk, smoothing with a fingertip or damp tool for clean trim detailing.
- Choose a compatible sealant and finish to match your cabinet and countertop tones for lasting edge protection.
Quick Trim Alternatives
Quick Trim Alternatives offer fast, clean finishes you can implement without a full edge overhaul. You’ll restore sharp lines and a refreshed kitchen look in hours, not days.
Start with PVC or high-mendergauge edging for tight, durable borders that resist heat and moisture. If you crave warmth, choose veneer strips glued and pressed for a seamless passage; they’re affordable and reversible.
For a green angle, opt for sustainable materials like bamboo or recycled-content laminates, and verify certifications before purchasing.
Cut precisely, mask adjoining surfaces, and clamp firmly to prevent telegraphing. Smooth with a self-adhering trim and a light pass of fine sandpaper to remove ridges.
Prioritize DIY safety: goggles, gloves, and a dust mask. You’ll finish strong, with a professional edge finish you can trust.
Seamless Look Ideas
Seamless look starts with careful edge preparation and smart finishing choices that hide seams and create a continuous, integrated appearance. You’ll align surfaces, trim edges flush, and choose edge profiles that vanish against backsplashes and countertops, delivering a clean, professional finish. Then you lock it in with concealed fasteners and seamless caulking that resists wear and moisture, keeping your kitchen edges razor-sharp.
- Use decorative accents to emphasize flow without breaking lines, drawing attention to cohesive progressions
- Plan furniture arrangements so islands, tables, and seating create one uninterrupted, functional rhythm
- Apply matching sealant and edging across all joints for a unified, durable surface
These steps empower you to execute a precise, high-impact finish that looks engineered, not patched.
Bathroom Boosts You Can Finish in Hours

If you’re short on time but want a visible bathroom upgrade, focus on quick wins that don’t require major renovations. You can instantly sharpen appeal with vanity styling that looks tailored and intentional—swap hardware, add a frameless mirror, and layer lighting for depth.
Next, optimize bathroom storage to reclaim counter space and order. Install slim shelves above the toilet, add a medicine cabinet, or mount hooks at eye level for towels and robes. Declutter surfaces, then group essentials in labeled baskets for discipline.
Choose cohesive finishes: matte black, brushed nickel, or warm brass. Use a bold mirror or a floating vanity to punch up the room’s perception of space. Finish with fresh towels and a simple greenery pop for lasting impact.
Swap Doors and Hardware for an Instant Room Transform
Doors and hardware are a small change with big impact. You can transform a room in hours by swapping doors and updating hardware, making the space feel new without a full remodel. A door swap tightens sightlines, while a hardware update adds instant personality and control.
- Choose doors with clean profiles and solid cores for quiet operation
- Mix finishes to highlight hardware and architectural style
- Install with minimal tools, aligning hinges and strike plates perfectly
This quick swap improves flow, light, and perceived height, and it’s budget-smart, not vanity-driven. You’ll notice improved acoustics as you close doors, plus easier access to closets and rooms.
Plan for a color-coordinated hardware set to harmonize with trim and fixtures. Door swap and hardware update deliver maximum impact with minimal downtime.
Declutter and Organize: Create Space Now
Start by clearing cabinets to remove what you don’t need, so you can see what truly matters. Clear mind comes when you only keep essentials. Then plan what to store and where.
Maximize vertical space with smarter, accessible storage. Choose simple, smart storage solutions to keep everything organized.
Clear Cabinets, Clear Mind
Clear cabinets and a tidy closet aren’t just aesthetics—they free up space for what you actually use. You’ll gain control as you prune, sort, and label, turning chaos into momentum. Use mindfulness techniques to notice what you reach for daily, then decide what stays. This isn’t about perfection; it’s about mental clarity and smarter choices that power your day.
- Audit quickly: keep only what serves a routine, then place it within easy reach
- Group by function: utensils, tools, tech, and progression items for instant access
- Label boldly and consistently: boundaries reinforce discipline and prevent backsliding
Maximize Vertical Space
Maximize vertical space by treating walls as usable storage. You regain control by choosing high-impact storage solutions that keep daily essentials within arm’s reach. Start with a quick declutter: remove what you never use, then categorize remaining items by frequency.
Install wall-mounted shelves at eye level for easy access, and anchor brackets to studs for durability. Use vertical organizers, slim cabinets, and magnetic strips for tools and metals.
Think in layers: shallow hooks for small items, deeper shelves for bulkier gear, and tall units for seasonal gear. Label everything so you return items to their homes instantly.
Keep surfaces clear by designating a dedicated drop zone near entry points. With vertical organization, you move faster, stay focused, and protect precious space.
Smart Storage Solutions
Smart storage begins with a quick declutter and a clear plan for what you actually use. You’ll reclaim shelf space, then categorize by frequency and destination. Choose modular bins, label boldly, and stack with confidence to maximize every inch.
Clear the clutter, set boundaries, and watch clutter transform into order that lasts. This approach turns any corner into a garden oasis and an outdoor retreat vibe, even indoors, so you control the flow of daily life.
- Declutter first, then sort items by use and location
- Use modular, labeled containers to maximize visibility and access
- Create dedicated zones for everyday items and high-demand tools
This system is practical, concise, and powerful—you call the shots.
Smart Storage Solutions for Small Spaces
From the moment you start, smart storage for small spaces hinges on maximizing every inch with clear, practical solutions. You train your space by choosing versatile furniture arrangement that serves dual purposes, like a bed with drawers or a coffee table with hidden compartments.
Install wall-mounted shelves to keep floors clear, and use vertical space for rapid access to daily essentials. Opt for stackable containers, labeled for speed, so you never search longer than a moment.
Embrace compact, modular units you can reconfigure in minutes. Let indoor gardening rise up the wall or sit on slim rolls without crowding pathways.
Every inch earns you power—organized, accessible, and ready for action.
Easy Vent Hood and Appliance Upgrades
Start with Vent Hood Basics to gauge sizing, venting, and noise levels before you buy. Then compare Appliance Upgrade Tips to match efficiency, compatibility, and cost, so you pick smart replacements.
Plan a One-Day Installation to bundle steps, prep tools, and quick fixes for a smooth upgrade.
Vent Hood Basics
Vent hood basics: upgrading your system is simpler than you think. You’ll power through the essentials with a practical mindset, focusing on performance, not fluff. Start with sizing for your stove and room, then choose a vent hood that suits your cooking pace.
Plan duct routing for maximum efficiency and minimal resistance, and seal connections to prevent leaks. Regular vent hood maintenance keeps airflow strong and odors under control, so you stay ahead of buildup and downtime.
- Verify correct size and CFM for your stove and kitchen layout
- Optimize duct routing and seal every joint for peak efficiency
- Schedule quick maintenance checks to sustain performance and safety
Appliance Upgrade Tips
Upgrading appliances is easier than you think, especially when you tackle it in small, practical steps. You’ll focus on quick wins: replace an underperforming vent hood with a model that excels at airflow and filtration, and choose efficient units that fit your space.
Prioritize appliance efficiency by selecting ENERGY STAR-rated devices and sizing them to your load. Don’t overlook smart tech; Wi‑Fi-enabled controls let you monitor usage, set schedules, and optimize performance from anywhere.
Measure vent hood ducting, outlet availability, and clearance before buying, then install only what you can manage in a single day. Keep cables neat, connections tight, and test operation at full power.
Upgrade with purpose, and you’ll gain speed, control, and cleaner air.
One-Day Installation Plans
One-day installation plans make easy vent hood and appliance upgrades practical by focusing on quick wins, smart measurements, and straightforward installation steps. You’ll move fast, cut waste, and stay under budget with precise, actionable moves. Plan first, measure twice, drill once, then test. This approach delivers real results today, not someday.
- Prioritize high-impact upgrades and installable components for instant value
- Use DIY inspiration to tailor layouts, choosing compatible models and protecting existing wiring
- Track costs with budget tips, sourcing sales, and bundling tasks to minimize downtime
Stay disciplined, stay sharp, and document every step so future upgrades stay simple. You’ll feel empowered by the efficiency, the clean lines, and the confident results you’ve earned.
Grout, Tile, and Backsplash Refresh in a Day
If you’re tackling a grout, tile, and backsplash refresh in a day, you can transform a space with practical, straight-to-action steps. Start with grout sealing to lock in color and resist stains, then move to tile cleaning to reveal crisp lines.
Scrub grout with a stiff brush and a bleaching solution, rinse, and let dry to prevent residue. Wipe tile surfaces with a microfiber cloth and a non-abrasive cleaner for shine without scratches.
Reseal high-traffic grout joints after drying for lasting protection. Remove old caulk, apply fresh, precise lines, and smooth with a finger dampened in water.
Replace or refresh backsplashes using painter’s tape for clean edges. Finish by inspecting for missed spots, touching them up, and sealing one final time if needed.
Power and precision, done.
Energy-Saving Tweaks You Can Complete Fast
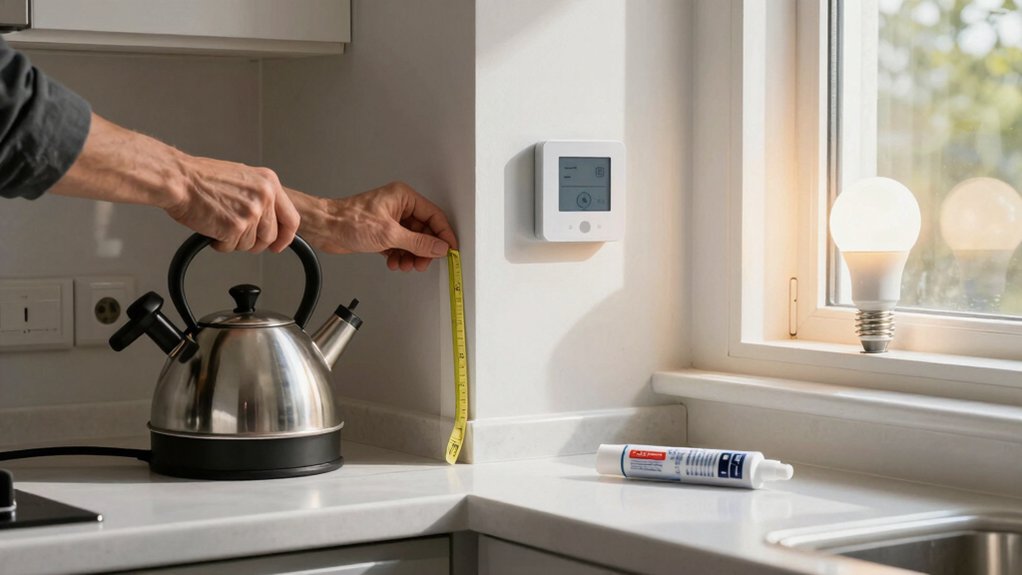
You can cut energy use fast with a few simple tweaks that fit into any day. You’ll gain immediate impact by targeting heat loss and idle power, then measuring results so you stay in control. Start with quick insulation checks and seal gaps around doors and windows, and consider upgrading to better home insulation where it counts.
Add a smart thermostat to optimize heating cycles and snap off power to unused devices with smart plugs. If you’re ready for longer-term gains, review solar panels options for peak efficiency and future payoff.
- Seal gaps and boost attic and window insulation for fast gains
- Install a smart thermostat and smart plugs to cut standby power
- Explore solar panels as a scalable, high-impact upgrade
Budget-Friendly Tools That Pay for Themselves
Maximize your savings from the tweaks you already know by picking tools that pay for themselves quickly. You want payoff fast, so choose budget tools that cut waste and boost efficiency.
Start with a high-ROI staple: a versatile cordless drill, plus durable bits, so you can complete multiple diy hacks without swapping gear. Add a quality measuring laser for precise cuts, minimizing scrap and rework.
A compact heat gun or multi-tool accelerates finish work on trim, cabinets, or weatherstripping, delivering rapid results. A reliable spotlight or headlamp extends productive hours without fatigue.
Look for energy-efficient, reusable blades and accessories that survive formaldehyde-free dust and grime. With smart purchases, you convert every project into ongoing savings, maximizing power and control over your budget tools.
Avoiding Common One-Day Pitfalls (and How to Recover Quickly)
One-day pitfalls can derail a project fast, so spot the risks early and build in quick recovery steps. You stay in control by recognizing DIY pitfalls before they derail you, then design a fast project recovery plan that keeps momentum. Track time, materials, and surprises the moment they appear, and don’t let scope creep steal your yield.
If a tool fails or a measurement looks off, switch tactics immediately and document the fix for future reference. Prioritize actionable steps, not excuses, so you stay efficient and confident.
- Identify a single fail-safe for each critical step to ensure immediate recovery
- Create a 15-minute buffer for surprises and recheck measurements twice
- Maintain a concise recovery log to accelerate future DIY pitfalls avoidance
Planning Your Next Weekend Project: A Practical Starter Kit
Planning your next weekend project starts with a practical starter kit you can grab and go. A focused kit keeps you in motion, prevents delays, and means you waste no time chasing missing bits.
Build it around two core goals: power through tasks quickly and stay under control. Include a reliable drill, a set of essential bits, measuring tools, a utility knife, and a decent flashlight.
Add safety items: gloves, eye protection, and a dust mask.
For budget planning, list every item, compare prices, and set a hard cap before you shop. Prioritize multi-use tools to expand capabilities without bloating cost.
Prepare a quick workspace plan, map exits, and label cords.
Finally, review safety precautions aloud, so you execute with confidence and precision, not hesitation.
Conclusion
You can conquer your clutter and craft cozy corners with confidence. Pick practical, doable tasks, and pace your plan with a precise timebox. Tackle a quick paint refresh, tweak lighting, and style smart shelving for instant impact. Budget smart, swap shortcuts for safety, and skip soggy surprises by spotting pitfalls early. Stay steady, stock supplies, and celebrate small wins. With a disciplined, dashing approach, delightful homeowners’ hacks become everyday wins you can repeat.