Re-screening your patio door or window is a quick fix that stops drafts and blocks more bugs. Start by gathering a tape measure, utility knife, spline roller, and replacement screen material. Inspect the frame for tears, bends, or corrosion, then remove the old screen and clean the opening. Measure precisely, choose a durable material, and install with even tension. Finish with a snug spline and light sealant for weatherproofing. For more tips, you’ll find expert steps ahead.
What You’ll Fix by Re-Screening Your Door/Window
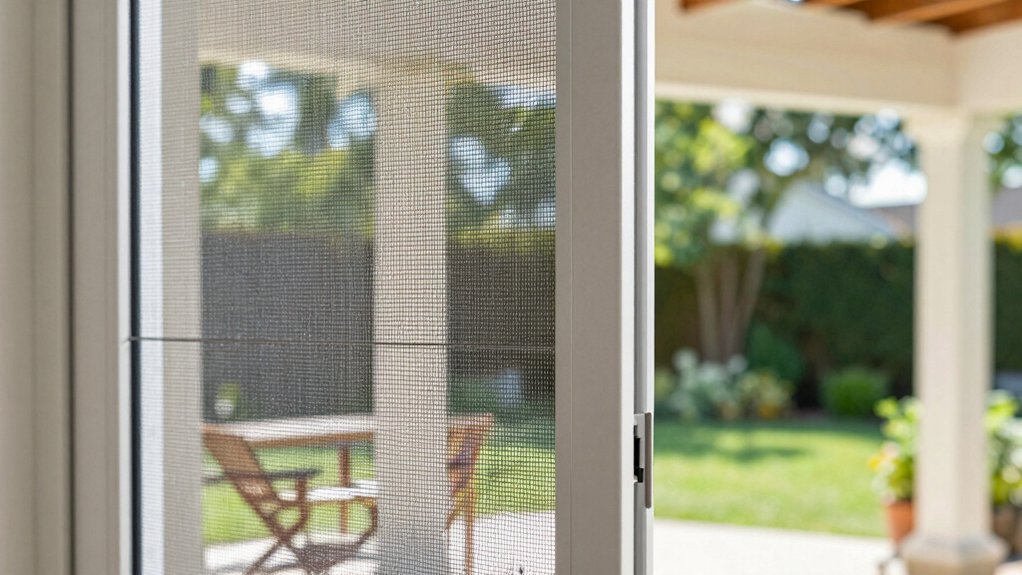
Re-screening your door or window fixes a few common problems in one step. You’ll restore tight contact with the frame, stop drafts, and improve overall comfort without major renovations.
By re-screening, you reinforce screen durability, so wear and tear won’t compromise visibility or airflow. Small gaps and loose edges vanish, reducing dust intrusion and chilly spots.
You’ll also regain confidence that the opening functions smoothly, with easier locking and better alignment. Importantly, re-screening enhances insect prevention; a fresh, intact mesh blocks flies, gnats, and mosquitoes more effectively than a patched or sagging screen.
The result is a calmer, safer space you’ll want to use daily, with less worry about pests or sudden screen failures. This simple fix delivers lasting value and peace of mind.
Gather Exactly What You’ll Need for the Job
Gather the right tools first, so you’re not hunting mid-project. Measure the frame accurately and note any odd sizes. Then source replacement screens that match those specs.
Having everything on hand upfront keeps you efficient and avoids costly delays.
Gather Necessary Tools
To re-screen a patio door or window efficiently, assemble only what you’ll actually use: a tape measure, utility knife, a screen spline roller, a spline cutter, replacement spline, new screening mesh, scissors, sharpening tool, pliers, and a small hammer.
- A dependable utility knife and sharp scissors for clean cuts
- Spline tools (roller and cutter) to ensure snug, even tension
- Replacement spline and fresh screening mesh for a durable seal
- Basic pliers and a small hammer for quick tweaks and seating
Having these on hand supports screen cleaning and pest prevention, keeps the project tight, and minimizes returns.
You’ll feel confident, knowing you’ve chosen the right tools for a precise, lasting fit. Belonging grows when the job goes smoothly.
Measure Space Accurately
How will you guarantee a precise fit? Begin by measuring the doorway or window opening carefully. Note both width and height at multiple points—top, middle, and bottom—to catch any sag or bow. Use a metal or vinyl tape measure for accuracy, and record measurements in inches with decimal precision.
Check for warps in the frame and note any deviations that could affect the screen. Gather enough material to accommodate corners and overlaps, including extra for cuts and mistakes. Consider your screen mesh type and whether you’ll trim flat or bevel edges.
Account for frame materials and fasteners you’ll reuse, ensuring the new screen sits evenly without gaps. With clear measurements, you’ll avoid wasted material and achieve a proper seal.
Source Replacement Screens
Once you know the opening’s size and shape, assemble exactly what you’ll need to replace the screens.
- screen frame or spline, compatible with your door or window
- replacement screen mesh (pet- or UV-rated if needed)
- spline roller and extra spline for a secure seal
- scissors or utility knife, pliers, and a clean workspace
You’ll feel confident knowing you’re prepared for screen repair, minimizing delays. Gather materials in your project area, and double-check compatibility with your framing. This prep supports bug prevention by ensuring the new mesh sits evenly and seals tightly.
Keep tools organized so you can work efficiently and avoid rework. With the right source replacement screens, you reduce gaps and prevent tiny invaders from slipping through, reinforcing a sense of belonging in a well-maintained home.
Inspect for Torn Screen and Frame Damage
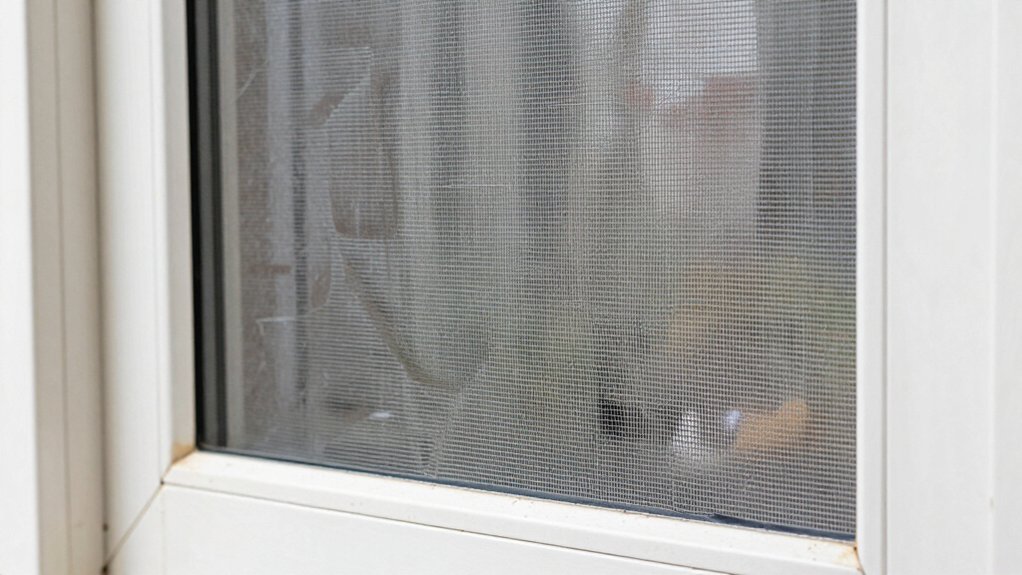
Begin by inspecting the screen mesh and frame for any tears, holes, or gaps. Then check the edges and corners for loosening or warping. You’ll look for screen tears that undermine protection and frame damage that signals weakness.
If the mesh pulls or sags, the seal isn’t reliable, and bugs can squeeze through. Inspect the frame for bends, cracks, or loose joints, especially at corners where stress concentrates.
Tighten screws or nailing strips as needed, and replace torn segments promptly to prevent accelerated wear. Note any corrosion on metal frames or warping from moisture.
A sound frame supports consistent tension, keeps the mesh taut, and maintains a true opening. Address issues now to preserve functionality, reduce drafts, and strengthen your sense of home.
Remove Old Screen and Prep the Opening
Carefully remove the old screen and prep the opening for a new one. You’ll clear debris, inspect the frame edge for nicks, and wipe away dust so the new screen sits flush. This step is about prep opening, not overhauling the structure, so you stay focused and intentional.
Keep your rhythm steady as you work, and you’ll feel confident in the fit that follows.
- Remove the screen frame gently, noting how it fits into the track
- Brush out dirt and wipe the channel clean for smooth material
- Check for corrosion or gaps at the lip and seal if needed
- Dry the opening thoroughly to prevent moisture issues
Measure Accurately and Choose Screen Material
Measure precisely by taking exact width and height of the opening, then add the recommended allowance for a tight fit.
Consider screen material options—fiberglass for affordability, aluminum for durability, or pet-proof polyester for strength—and pick one that matches your needs.
Guarantee the material you choose fits gaps snugly without sagging or binding to keep bugs out and airflow clear.
Measure Precisely
To measure precisely for rescreening, start by taking accurate door and window frame dimensions and choosing the appropriate screen material for the job. You’ll verify frame depth, groove width, and any obstructions so the screen fits cleanly and lasts.
- Measure height and width at multiple points, using the smallest dimension to avoid gaps.
- Record groove depth and screen spline size to ensure a snug seal.
- Check frame straightness and any warping that could affect durability.
- Confirm compatibility between screen mesh and frame durability for long-lasting protection.
With precise measurements, you ensure a seamless fit, reduce bugs, and project a confident, belonging-ready care for your home.
Screen Material Choices
Choosing the right screen material starts with your climate and how you’ll use the space. In tight, bug-prone areas, durability matters as much as visibility. You’ll weigh screen durability against airflow and light, then consider aesthetic options that fit your home’s character.
For sunny, hot zones, consider vinyl-coated fiberglass or aluminum mesh; they resist tearing and stretching while staying easy to clean. If you’re in high-wind or rural settings, look for tighter mesh counts that deter insects without sacrificing ventilation.
Pet-friendly homes benefit from sturdier fibers, reducing maintenance calls. Keep color and texture in mind so the material complements trim and siding.
Finally, confirm compatibility with the frame and warranty. Your choice should balance performance, look, and long-term value.
Fit For Gaps
A tight fit matters as much as the material you pick. When you measure, you’re ensuring a seal that lasts, not just a quick fix. Accuracy matters, so double-check height and width at multiple points.
Choose screen material with bug prevention in mind, and match it to your frame’s profile so it stays taut without sagging. Your goal is seamless screening that resists drafts and pests, not gaps you’ll notice later.
For door and window screens, a precise fit makes screen repair easier and longer-lasting. Stay consistent with the installation path, and don’t rush the stretch. Your home deserves dependable, clean airflow without inviting visitors.
- Accurate measurements at multiple points
- Align material to frame profile for tautness
- Prioritize bug prevention without sag
- Plan for easy screen repair future needs
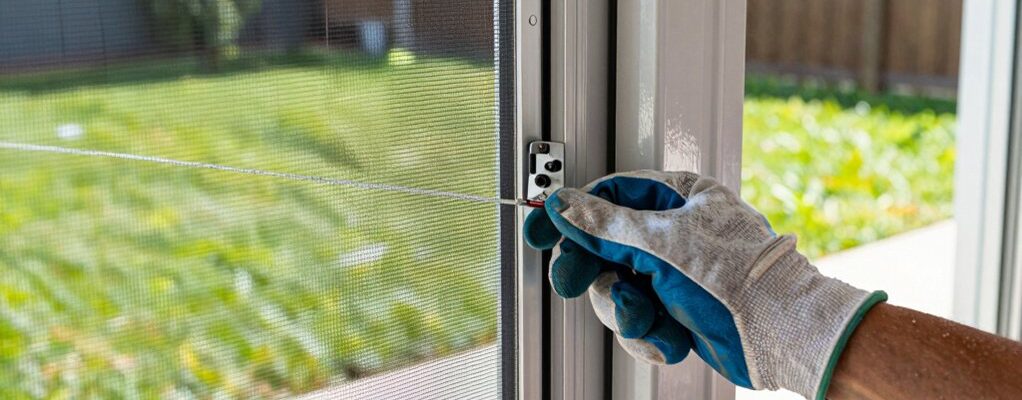
Install the New Screen Step by Step
Installing a new screen is straightforward: measure the opening, cut the spline and frame to fit, and tack the screen in place with a spline roller. You’ll set the screen evenly, avoiding wrinkles, then secure corners with steady pressure.
Check the frame for plumb alignment, then lightly tap the spline to lock it in. Don’t over-tighten; you want smooth fabric and proper tension without distortion.
As you work, focus on screen security—verify the spline sits flush and the corners stay sealed. For weatherproofing tips, apply light sealant at the frame edge where it meets the door or window; this minimizes drafts and moisture intrusion.
If you notice gaps after installation, reseat the spline rather than redoing the entire screen. You’ve got this—a snug, lasting fit.
Tension, Spline, and Finish the Frame
To finish the frame, set the screen with even tension and lock in the layout using the spline. You’ll manage tension adjustment so the mesh sits flat and true, then secure it without overbearing edges.
The spline installation should flow smoothly, pinching the mesh evenly into the frame groove for a neat seal.
- Achieve uniform tension across corners, avoiding sag
- Align spline guides with the frame to prevent gaps
- Press spline firmly but not so hard you distort the frame
- Inspect edges for a taut, wrinkle-free finish
This final touch solidifies your work, gives you clean lines, and keeps bugs out. You’ll feel confident, present, and part of a well-done job.
Maintain and Troubleshoot to Extend Life
Maintaining your re-screened patio door or window and troubleshooting common issues keeps performance high and life extended. You’ll protect screen durability by cleaning tracks, inspecting corners, and tightening any loose fittings before problems grow.
Regularly check for tears or sagging, and replace worn sections promptly to preserve pest prevention and airflow control. If you hear rattling or notice stiffness, lubricate hinges and rollers with a light, silicone-based lubricant, avoiding sprays that attract dust.
Keep the frame dry after rain, wipe away condensation, and reseal edges if you spot weathering. Address loose spline or frame misalignment fast, since small gaps invite pests and reduce durability.
Document maintenance steps, so future you stays proactive and the whole system remains integrated, reliable, and easy to live with.
Frequently Asked Questions
How Long Does a Re-Screen Typically Take?
A quick, confident flick of the wrist seals the scene: most re-screens take 20 to 40 minutes. You’ll notice screen durability matters, and re screening costs stay modest, especially when you value belonging and a clean, tight fit.
Can I Re-Screen With Standard Household Tools?
Yes, you can, using standard repair tools. You’ll align the screen frame, secure it, and trim excess. With patience, you’ll feel confident; this DIY approach keeps bugs out and helps you belong in home improvement.
Will the Process Keep Bugs Out Immediately?
Yes, it provides immediate bug prevention, though durability depends on material quality. You’ll block most gaps right away, but for lasting screen durability, guarantee proper tension and fit as you re-screen. You’ll feel confident and included.
What if the Frame Is Warped or Bent?
If the frame is warped or bent, you tighten around gaps by replacing the frame or sash, not re-screening alone. A warped frame, bent sash means bugs still slip in, so fix this first and maintain belonging.
How Often Should Screens Be Replaced or Repaired?
You should inspect annually and replace or repair as needed, since screen material wears, and frame durability declines with use. You’ll stay comfy and secure by choosing durable screens and promptly addressing any tears, gaps, or bent frames.