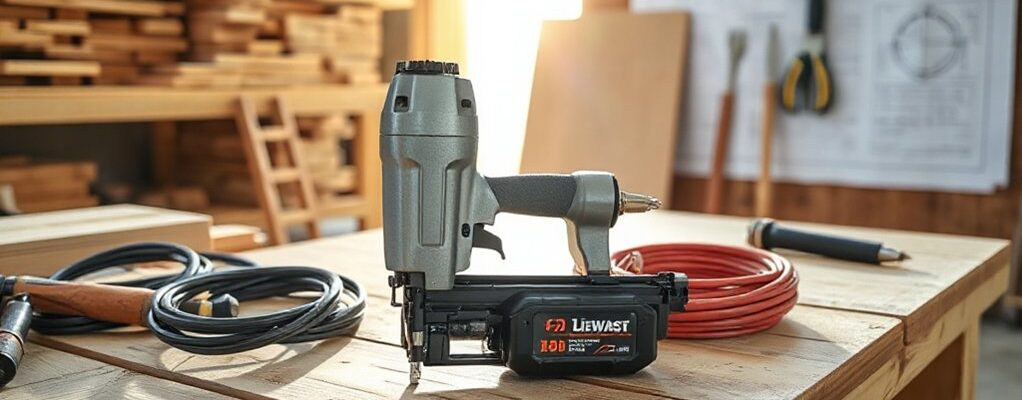
The best cordless nail guns for home projects balance power, battery life, and reliability, with models offering selectable firing modes, depth adjustment, and light, balanced design for overhead or long use. Prioritize a tool that handles common nails, swaps quickly between trim, decking, and framing, and works with spare batteries and a fast charger. Ergonomics matter for comfort, and optional anti-dry-fire and jam-prevention features keep you productive. For practical guidance on specifics, you’ll find actionable tips beyond basics.
Key Takeaways
- Choose models with selectable firing modes and depth adjustment for versatile trim, cabinetry, and decking work.
- Prioritize lightweight, well-balanced designs with comfortable grips for overhead or long sessions.
- Ensure battery efficiency and compatibility across tools, plus spare packs and fast-recovery chargers.
- Look for reliable jam clearance, anti-dry-fire safeguards, and easy reloads (top or side loading).
- Match nail type, coating, and length to your project materials and outdoor exposure needs.
How to Choose the Right Cordless Nailer for Home Projects
Choosing the right cordless nailer starts with your project type and workspace. You assess what you’ll build, the materials, and the gap length you’ll reach.
For home projects, prioritize speed, battery life, and reliability over fancy features. Look for a model with a selectable firing mode and depth adjustment so you can control pin or full‑pantage nailing without overdriving.
Consider weight and balance for overhead or long sessions, and verify compatibility with common fasteners. If you care about long-term value, weigh maintenance needs and available accessories.
Nail gun history informs durability expectations and future compatibility, while cordless technology keeps you moving without hoses or cords.
Choose a tool that matches your power needs, battery ecosystem, and upgrade path for expanding projects.
Nail Types and Fasteners: What You Need to Know
You’ll want to pick the right nails and fasteners for the job, since the tool’s performance hinges on compatibility and drive quality. Nail types and fasteners vary by material, coating, head style, and length, so you match the nail material to the work surface and environment.
For trim, consider thinner gauges to reduce splitting; for framing, use thicker gauges with stronger pull resistance. Coatings like zinc or ceramic improve corrosion resistance in moisture-prone spaces.
Drive depth must prevent protrusion or dimpling, so set your tool accordingly. Fastener gauge matters: higher numbers mean thinner shanks, which suit delicate materials but may limit shear strength.
Always consult manufacturer charts for recommended nail sizes and coatings, ensuring the fastener gauge aligns with both your material and the nailer’s drive system.
Battery Life and Charging: How They Affect Your Pace
Battery life directly determines how many tasks you can complete between charges, so you pace yourself by knowing your nailer’s run-time expectations and the charger’s recovery time. You’ll maximize throughput by choosing models with strong battery efficiency, matching tool power to the job, and planning work chunks around charging stations.
When you pause, switch to a spare pack or use a fast-recovery charger to minimize downtime. Consider chargers that stage multiple batteries and display real-time status, so you don’t guess your remaining run time. A well-balanced kit reduces interruptions and keeps you moving at a steady pace.
Efficient batteries and smart charging cultivate consistent performance without sacrificing control or speed.
Ergonomics First: Weight, Grip, and Comfort
Ergonomics matter because a comfortable nailer reduces fatigue and improves control over long sessions. When you pick a model, prioritize lightweight feel without sacrificing durability, so you can work longer without strain. An ergonomic design should place the trigger, grip, and balance where your hand naturally rests, minimizing wrist twist.
Grip comfort matters too: a textured, non-slip surface and a shape that fits your hand reduces slippage and improves precision.
1) Prioritize balanced weight distribution
2) Check trigger reach and grip contour for comfort
3) Ensure a solid, non-slip grip surface and low vibration
In practice, a well-balanced, comfortable nailer translates to steadier firing, cleaner joints, and faster progress on demanding tasks.
Depth Adjustment and Firing Modes You’ll Actually Use
You’ll want to set the depth so nails go below the surface without overdriving. Start with the basic firing modes you’ll actually use, like sequential and bump-fire, and tailor them to your project.
This helps you avoid splits, jams, and waste, while speeding up common tasks.
Depth Adjustment Essentials
Depth adjustment lets you control how deep fasteners sink into your material, which matters for holding power and avoiding damage. You’ll want precise depth control to ensure flush or slightly countersunk finishes without damaging the surface. Pair depth settings with solid drivers to prevent tear-out, bending, or nail heads sitting proud.
Focus on repeatable results across materials by testing on scrap before project work. Keep your finger on the trigger only when the line is ready, and verify depth after a few drives to confirm consistency.
1) Understand material density and set the depth accordingly.
2) Test on scrap to dial in nail depth before working on the actual piece.
3) Use a fastener starter or pilot to improve initial seating and accuracy.
Firing Modes You’ll Use
Firing modes you’ll actually use hinge on the job and the fastener type. In practice, you’ll switch between sequential, bump, and single-shot modes to balance speed and control.
Sequential firing keeps you deliberate, ensuring placement accuracy for trim or delicate trim heads. Bump or contact modes speed up framing tasks where timing isn’t critical but throughput is important.
For finish nails, select single-shot or sequential to prevent overdriving. Understanding adjustment features helps you tailor penetration and accuracy: set the depth to prevent dimpling, choose recessed or flush nails, and avoid over-penetration on soft substrates.
You’ll also use a quick-select lever or dial to lock preferred modes, then test on scrap. Mastering firing modes minimizes misfires, maximizes consistency, and leverages your tool’s true power.
Brad, Finish, or Framing: Which Gun Fits Your Project
Brad, finish, or framing guns each shine in different tasks, so your choice should match the job at hand. You’ll weigh brad’s thin profile and near-flush holds against finish guns for trim, and consider framing power for larger sheathing and studs.
We’ll compare brad vs finish fit and framing power to help you pick the right tool for your project.
Brad vs Finish Fit
When you’re choosing a nail gun for home projects, the Brad vs Finish decision comes down to the job’s size and the visibility of the nail heads. You’ll weigh precision against speed, since brads minimize visible head intrusion, while finish nails strike a balance between holding power and aesthetics.
For delicate trim or cabinetry, brads reduce sanding and fill; for medium moldings, finish nails grip securely with acceptable head visibility. Consider how nail gun ergonomics feel in hand and how cordless tool compatibility aligns with your battery ecosystem.
- Assess application scale and head visibility to decide between brad and finish.
- Test weight, balance, and trigger feel for sustained control.
- Confirm tool compatibility with your existing cordless batteries and accessories.
Framing Power Comparison
Framing work brings bigger nails and deeper drives, so choosing between brad, finish, or framing guns hinges on hole visibility, holding power, and the scale of the project.
In framing tasks, power matters more than finesse, so evaluate the gun’s driving force, cyclic speed, and recharge time. Framing power is the key metric for sinking 2-inch to 3-1/2-inch nails into dense lumber, ensuring knots don’t back out and fasteners seat flush.
Nailer durability matters too; choose a platform with robust housings, solid safety mechanisms, and dependable seals against dust. For long sessions, prioritize consistent hammering force and balanced weight to reduce fatigue.
Matching these traits to your project minimizes misfires and gaps, delivering reliable framing performance with professional results.
Magazines, Nails, and Protection: What to Compare
A cordless nail gun’s magazines, nails, and protection features determine how smoothly you can work and how reliably you’ll finish a project. You want a magazine that feeds consistently, compatible with common nail types, and easy to clear jams. Check capacity, refill speed, and side-loading versus top-loading access.
Examine nail types supported (length, gauge, coatings) and whether you can switch between staples or pins if needed. Protection features—anti-dry-fire, jam clearance, and adjustable depth—preserve fastener quality and tool longevity.
1) Magazine design and reliability
2) Nail type compatibility and versatility
3) Protection systems and user safety
Reliability, Warranties, and Brand Support You Can Trust
Reliability, warranties, and brand support matter as much as the tool’s specs because you rely on this equipment project after project. When you pick a cordless nail gun, look for proven cycle life and consistent performance under load. Check battery compatibility across models in the line so you don’t chase mismatches.
Favor brands with transparent failure rates and readily available spare parts. A solid warranty coverage should clearly state scope, duration, and repair paths, not fine print traps. Consider support channels: quick email responses, local service centers, and timely replacements.
Strong brand backing reduces downtime and protects your investment, letting you push hard on fasteners without second-guessing the tool’s resilience or the service you’ll receive.
Build a Starter Kit for Trim, Cabinetry, and Decking

Start by evaluating Trim and Cabinet Essentials to identify the core nails, fasteners, and gauges you’ll need for precise trim work and durable cabinetry.
Then match Decking Fastener Choices to your project material and environmental needs, so your outdoor work endures.
Use a Tool Compatibility Guide to ensure your cordless nail guns, brads, and pins work together smoothly for a clean, efficient kit.
Trim And Cabinet Essentials
When building a starter kit for trim, cabinetry, and decking, you’ll want a focused set of cordless nail guns that delivers steady performance across tasks. A small, capable kit speeds trim work, guarantees clean fastenings, and minimizes changes between projects.
Prioritize tools with reliable nail feeds, adjustable depth, and strong battery life to maintain pace.
- Finish Nailer with adjustable depth and rapid-fire mode for precise trim joints
- Brad Nailer for light molding, delicate trim, and clean, concealed fastenings
- Pin Nailer for tiny trim pcs and cabinet face details with minimal splitting
Remember nail gun safety and battery compatibility: check battery chemistry, charging time, and tool latch safety features to prevent misfires or drops.
Align choice with project scale and spare batteries to sustain performance.
Decking Fastener Choices
Decking fasteners matter as much as the nails you drive, so choose a kit that keeps boards flat, joints tight, and gaps minimal. You’ll want corrosion-resistant options like stainless or coated screws for longevity and clean, discrete finishes.
For a cordless setup, pair a dependable nail gun with fasteners sized for typical decking boards. Use ring-shell or smooth shank screws based on board type, and avoid overusing staples in high-traffic areas.
Keep a mix of lengths handy to bite through deck planks and into joists without splitting. Prioritize nail gun safety: wear eye protection, maintain control, and follow tool instructions.
Remember cordless power empowers you to work freely, but stability and accuracy matter most for a durable deck.
Tool Compatibility Guide
A sturdy starter kit for trim, cabinetry, and decking keeps you ready to tackle projects with the right tool-for-task pairings. By prioritizing compatibility, you guarantee power source reliability and optimum tool ergonomics, reducing fatigue and boosting precision.
Choose devices that share batteries and chargers to minimize downtime and clutter on-site.
- Select a main nail gun with interchangeable power sources (corded, cordless, or pneumatic) to adapt to job size and environment.
- Pair framing, trim, and finish tools that use common batteries and fasteners, sharpening ergonomics and reducing tool-switching time.
- Verify accessory compatibility (nails, magazines, and depth settings) across brands to sustain consistent performance and control.
Maintenance and Jams: Keep Your Nailer Performing
Regular maintenance keeps your cordless nailer from jamming and extending its life. You stay productive by following straightforward upkeep that minimizes downtime.
Start with a quick inspection of the magazine, driver blade, and seal around the o-ring—look for wear or debris and address it before use. Clean components with a dry brush or compressed air, then lubricate per the manufacturer’s spec to guarantee smooth cycling.
Keep nails the correct length and type loaded, avoiding overfeeds that stress the feed system. When jams occur, focus on jam clearing with deliberate, safe motions: remove the quick-release and clear obstructions, then reseat components and test dry-fire before resuming work.
Routine maintenance tips save time and protect performance, especially under demanding projects.
Safety Practices to Prevent Accidental Firing
To prevent accidental firing, always treat the nailer as live and follow a consistent safety routine before, during, and after use.
You’ll minimize risk by enforcing strict safety protocols that address potential accidental triggers and keep you in control throughout the project.
- Maintain a known-safe mode when not actively fastening; engage the trigger lock, remove the battery, and unplug if possible.
- Keep hands clear of the work surface and nozzle; only press when the contact tip is firmly engaged and aimed where you intend to drive a fastener.
- Inspect the tool before each session for damaged triggers, leaks, or obstruction, and address issues immediately.
These practices sustain precision, prevent misfires, and empower decisive, efficient performance.
Real-World Tasks and the Right Cordless Nailer for Them
Real-world tasks demand choosing a cordless nailer that matches the job, not just the tool you like. You assess the material, surface, and fixture density, then pick a model with the right drive depth, magazine capacity, and mallet style.
For framing, select a high-recoil, battery-powered option with consistent power and rapid-fire capability.
For finish work, prioritize a quieter, low-drive foot and precise depth control to avoid mushrooming.
For smaller trim, a compact nailer with a narrow nose improves visibility and accuracy.
Always follow nail gun safety, and keep batteries charged for uninterrupted workflow.
Consider trusted cordless tool brands for reliability and spare parts.
Matching the task to the tool reduces failures, enhances efficiency, and keeps projects moving toward solid, professional results.
Best Value Picks by Category (Budget Guide)
What’re the best value picks by category for cordless nailers, and how do they balance price with performance? You’ll want models that deliver solid cordless power without breaking the bank, prioritizing reliability, safety, and task-specific efficiency. These picks optimize bang for the buck, so you stay productive on budget projects while maintaining nail gun safety.
- Budget Framing Nailer — balances driving force with efficient battery usage, ideal for quick frames without compromise.
- Lightweight Finish Nailer — delivers smooth, precise results, maximizing cordless power while minimizing fatigue and downtime.
- Multi-Tool Combo Nailer — offers versatile speeds and depths, keeping costs down while covering common trim and molding jobs.
Conclusion
You’ll gain efficiency, consistency, and confidence with the right cordless nailer. You’ll save time, you’ll finish faster, you’ll avoid jams. You’ll compare battery life, you’ll weigh weight, you’ll check depth, you’ll test modes. You’ll maintain your tool, you’ll practice safety, you’ll prevent misfires. You’ll choose value, you’ll balance cost, you’ll match tasks. You’ll upgrade when needed, you’ll enjoy peace of mind, you’ll complete projects. You’ll nail it, you’ll move on, you’ll enjoy sturdy results.