Did you know you can gain usable space in a semi-detached home without moving walls or pulling permits for heavy structural work? You’ll assess load paths, exterior constraints, and local rules before you plan. Then you reconfigure interiors for flow, optimize storage, and use light, color, and materials to expand perception. The practical steps, risks, and cost-saving swaps wait just beyond the next section.
Feasibility First: Can You Add Space Without Major Structural Work?
Feasibility first means you determine whether you can add space without major structural changes. You assess load paths, existing framing, and support conditions to decide if minor interventions suffice.
Start with a quick survey of walls, foundations, and connections between paired dwellings, identifying shared elements and potential constraints.
Consider Historic preservation implications: locate any protected facades or architectural features that limit exterior alterations or require approvals.
Evaluate possible structural reinforcement options that stay within noninvasive limits, such as reinforcing studs, joists, or rafters, rather than removing bearing elements.
Document existing clearances, sprinkler or utility layouts, and drainage considerations to avoid compromising performance.
Compile a decision matrix to compare cost, disruption, and timeline, guiding whether to pursue lightweight extensions, mezzanines, or alternative strategies.
Reconfigure Interiors for Better Flow in a Small Semi-Detached Home
You’ll start with flow-driven space planning to identify how each area supports daily routines and shifts.
Reconfigure zones to create clearly defined living, dining, and work pockets that minimize wasted steps and bottlenecks.
Aim for proportional, scalable layouts that align with structural constraints while maximizing accessibility and comfort.
Flow-Driven Space Planning
How can you reconfigure interiors to improve flow in a small semi-detached home? You approach flow as a system, mapping zones and connections before repositioning walls or partitions. Start with a tight functional audit: identify choke points, door swings, sightlines, and traffic paths, then model options that minimize backtracking.
Prioritize continuous circulation loops: align primary living spaces with ancillary zones, ensuring doors don’t impede movement. Use 30–60 cm shifts to liberate corridor width, and favor linear layouts that reduce angular turns.
Integrate garden integration and outdoor lighting by extending destinations to exterior thresholds via consistent flooring, thresholds, and visual cues. Apply modular furniture, soffit-free ceilings, and hidden service runs to preserve clean lines.
Then validate with a physical or digital mock-up to confirm uninterrupted flow.
Zoned Living Areas Reconfiguration
Zoned living areas reconfiguration focuses on aligning spaces by function and traffic, so you can move fluidly between daily tasks. You’ll map each zone—cooking, dining, lounging, work—by peak usage and access constraints, then assign adjacent buffers to minimize cross-traffic. Use a clean sightline approach: guarantee visual access between core activities without creating bottlenecks.
Implement partial boundaries with furniture or low partitions to preserve openness while signaling distinct zones. Prioritize energy efficiency by locating active tasks near service cores (kitchen, laundry) and consolidating storage to reduce travel distances.
Consider historical preservation constraints when reconfiguring finishes or fixtures to maintain aesthetic continuity. Document measurements, tolerances, and load paths, then test flow with scaled routes, adjusting door swing, furniture footprint, and clearance for seamless operation.
Space-Saving Storage Hacks That Unlock Real Square Footage

You’ll explore hidden storage tricks, from recessed niches to under-stair compartments, that reclaim unused room without expanding the footprint.
Combine multi-use furniture with vertical space optimization to convert dead zones into functional areas.
This approach establishes a systematic framework for prioritizing accessible, scalable storage that adds real square footage.
Hidden Storage Tricks
Hidden storage can transform a compact semi-detached layout by turning underutilized spaces—like alcoves, eaves, and under-stair areas—into practical, accessible cupboards and niches.
You implement hidden compartments with precise framing, moisture barriers, and standardized shelving to maximize load capacity and ease of access.
Measure clearance first, then draft concealed panels that blend with walls, ensuring doors stay flush and resist door-swing interference.
For eaves, install shallow pullout trays and hinged lids that lock open for tool access, while stair voids accept vertical drawers aligned to risers.
Integrate secret nooks behind removable facades in bedrooms and hallways, maintaining fire-stopping integrity.
Label adjustments with a minimal hardware footprint, and verify accessibility across seasons.
Validate performance by load testing and routine inspections.
Multi-Use Furniture Ideas
A practical approach to multi-use furniture starts with identifying high-usage rooms and pairing each piece with multiple, accessible functions. You maximize surface area by choosing pieces that fold, nest, or stack, maintaining clear sightlines and foot traffic flow.
Prioritize furniture placement that creates distinct zones without overcrowding, using compact desks, wall-mounted tables, and ottomans with hidden storage to extend your usable footprint. Select modular seating that reconfigures for gatherings or daily tasks, and integrate liftable tops or bed-storage hybrids where appropriate.
Use decorative accents sparingly to signal zones without visual clutter. Guarantee hardware is durable and easy to operate, with smooth edges and unobstructed access. Document dimensions and weight limits for every piece to guarantee safe, repeatable transformations.
Vertical Space Optimization
Vertical space optimization focuses on expanding usable storage without expanding the building footprint. You’ll analyze ceiling height, joist spacing, and access points to reclaim underutilized areas.
Prioritize vertical storage solutions that leverage wall cavities, tall shelving, and overhead racks in utility rooms and garages.
Consider attic conversion as a defined pathway to usable living or storage space, ensuring proper insulation, ventilation, and entry access.
Implement stair or pull-down ladder systems with secure anchors for frequent use, balancing safety and practicality.
Use modular, stackable modules and adjustable shelving to adapt to changing inventory.
Seal gaps to prevent dust and drafts, and install lighting that highlights tall storage zones.
Document load limits and preference for lightweight, durable materials to maintain structural integrity.
Light, Air, and Color Tricks to Make Rooms Feel Larger
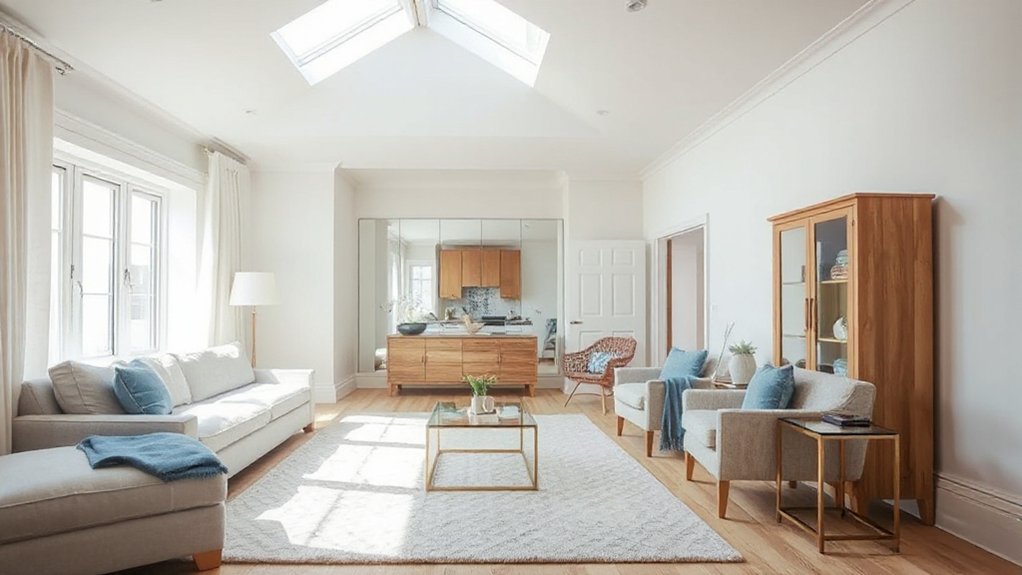
Digital light, air movement, and color choices are the core levers for making a space feel larger. You optimize layout by aligning windows and glazing with sightlines, then regulate daylight through controlled shading.
Implement cross-ventilation paths and ceiling height cues to reduce perceived confinement, while consistent surfaces reflect illumination evenly. Lighting design should prioritize high CRI, neutral white temperatures, and layered layers—ambient, task, and accent—to minimize shadow pockets.
Color psychology informs palette selection: cool neutrals expand, warm accents compress, and contrast is used sparingly to delineate zones without fragmenting flow. Reflective finishes and matte textures balance glare management.
Use dimming controls to modulate mood and perceived size, and document luminaire placement coordinates to guarantee reproducibility. This methodical approach yields measurable perceptual gains without structural changes.
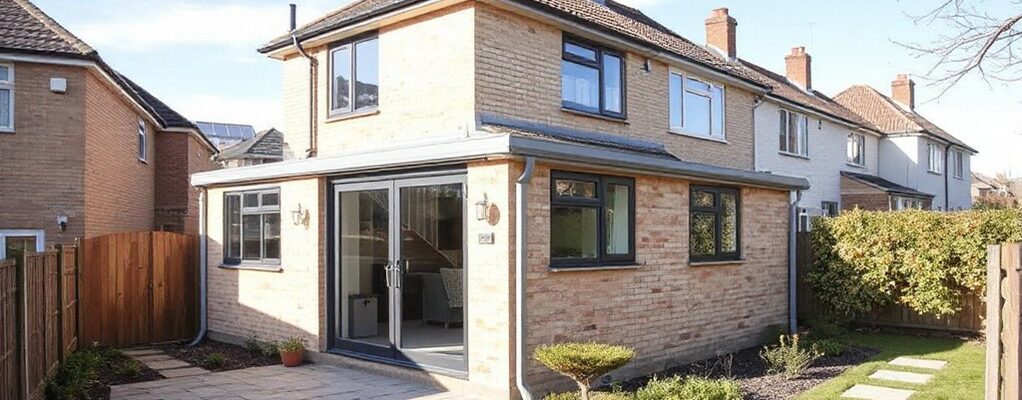
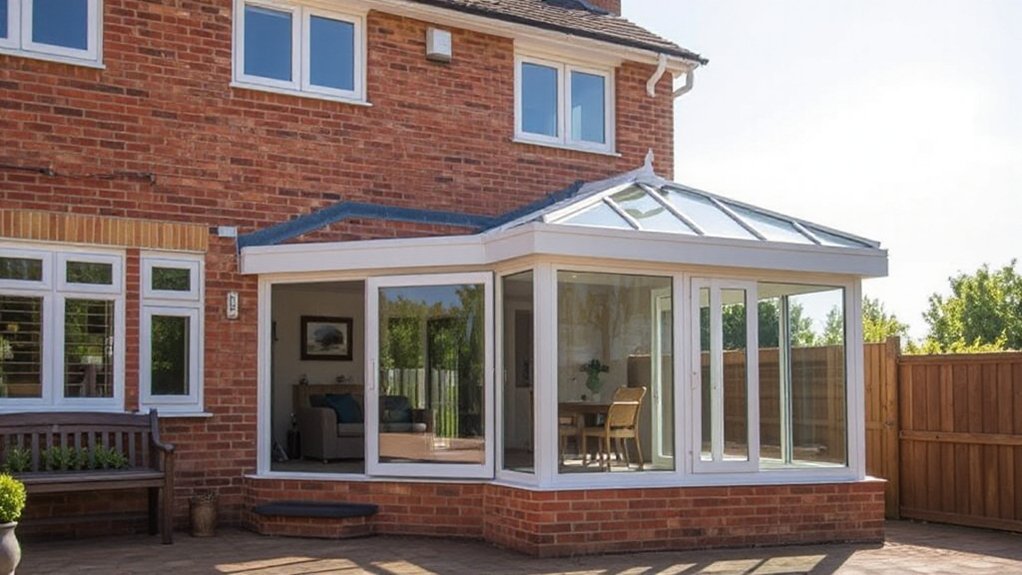
Budget-Friendly Extensions: What Works in Semi-Detached Homes
Budget-friendly extensions in semi-detached homes hinge on targeted scope, structural practicality, and cost-conscious detailing. You define needs precisely, then select retrofit approaches that minimize disruption and maximize value.
Prioritize single-zone extensions with simple load paths, modular framing, and non-load-bearing infill where possible. Favor flat or single-pitch rooflines to reduce structural risk and permit easier integration with existing eaves and guttering.
Garden integration is leveraged through clear sightlines, operable doors, and consistent material palettes to extend usable space without heavy joinery. Consider Solar panel options that fit within budget—surface-mount, low-profile arrays placed to avoid shading key spaces, paired with efficient storage or demand-driven microinverters.
Document permits, align with drainage, and schedule trades to limit site downtime while preserving exterior aesthetics. Maintain airtight detailing at the interface zones for long-term performance.
Quiet and Privacy Without Knocking Through Walls
To achieve quiet and privacy without knocking through walls, you should start by isolating sound paths at the source and along the most likely transmission routes. Identify equipment, activities, and surfaces that generate or transmit noise, then apply targeted measures.
Use robust door seals, acoustic panels, and masonry joints to interrupt airborne paths, and add mass or decoupling where walls contact floors. Consider ceiling seams, stair nosings, and shared floors for vertical transmission control.
Implement soundproofing techniques such as resilient channels, dense mineral wool, and floating floors where feasible, prioritizing high-traffic noise sources.
For exterior screening, deploy outdoor privacy screens to reduce visual exposure without impacting interior acoustics.
Guarantee gaps are sealed, and test with a simple decibel check after each modification.
Streamlining Plumbing, HVAC, and Wiring for Simpler Upgrades
Streamlining plumbing, HVAC, and wiring simplifies future upgrades by reducing the number of frequent intrusion points already planned for accessibility. You audit existing runs, map junctions, and identify chokepoints to minimize later disturbance.
Prioritize centralized access panels for plumbing and electrical splices, and group HVAC ducts with shared trunks where feasible. Plan for standardized components, such as modular manifolds and color-coded wiring, to speed replacements and diagnostics.
Tag circuits, zones, and temperatures during initial installation to support incremental changes without tearing walls. Choose high-visibility, durable piping materials and insulated ducts to lower maintenance needs and noise.
This approach enhances plumbing efficiency and enables cleaner wiring upgrades, while preserving structure. Document locations, clearances, and access routes to guide future renovations.
Exterior Tweaks and Landscaping to Boost Curb Appeal
Exterior tweaks and landscaping can immediately elevate curb appeal by shaping visitors’ first impressions and framing the home’s architectural features. You should assess sightlines from the street, prioritizing symmetry and functional clarity over ornament.
Implement garden pathways that guide foot traffic to entrances, ensuring non-slip surfacing and adequate width for accessibility. Choose materials common to the surrounding streetscape to maintain cohesion, and specify edging to reduce soil movement over time.
Establish focal points, such as a specimen tree or architectural accent, positioned to complement lines of the façade. Integrate exterior lighting to extend usability after dusk; use layered luminance—path, entry, and highlight lighting—while avoiding glare.
Schedule minimal maintenance tasks, like seasonal pruning and weed control, to preserve long-term curb appeal.
Planning Steps, Common Pitfalls, and a Practical Project Checklist
Planning steps for adding space to a semi-detached house begin with a precise scope and a practical sequence: define space needs, assess constraints (structural, legal, and site), and establish a measurable objective that guides design decisions.
You then catalog feasible interventions, evaluate load paths, and confirm daylighting, ventilation, and service runs.
Common pitfalls include scope creep, overreliance on temporary fixes, and underestimating maintenance costs. Mitigate these by verifying planning permissions, budgeting for contingencies, and coordinating trades early.
Develop a practical project checklist: obtain surveys, secure approvals, set milestones, and allocate resources.
Integrate garden landscaping considerations to preserve outdoor flow and ensure drainage.
Prioritize energy efficiency through insulation, airtight envelopes, and efficient systems to minimize long-term operating costs.
Document decisions for future inspections and potential amendments.
Frequently Asked Questions
Can Light Wells Improve Natural Light Without Structural Changes?
Yes, light wells can boost natural light without major structural work. You create shallow, well-lit shafts with reflective finishes, glazing, and grilles; you position openings to maximize sky exposure, ensuring glare control and uniform distribution of natural light.
Are Temporary Partitions Allowed for Testing Space Layouts?
Temporary partitions are often allowed for testing layouts, provided you comply with building regulations and landlord permissions. You’ll set up non-structural dividers, document measurements, and evaluate flow, ensuring you remove them promptly after testing.
How Long Does a Non-Structural Widening Attempt Take?
A non-structural widening typically takes weeks, not months, as you coordinate design, permits, and inspections. You’ll implement foundation reinforcement and roof modifications as needed, schedule surveys, and verify load transfers before finalizing adjustments.
Can Non-Load-Bearing Walls Create Flexible Zones Legally?
No—non load bearing walls cannot legally grant flexible zones. You create legal flexibility by designating spaces, complying with codes, and obtaining permits. You’ll use non load bearing walls to partition, not redefine zoning, without misrepresentation.
Do Heritage or Party-Wall Rules Affect Small-Space Upgrades?
Heritage restrictions and party wall agreements can constrain small-space upgrades. You assess applicable heritage guidelines, confirm team approvals, and secure party wall notices before proceeding, ensuring compliant design adjustments, documented deviations, and clear schedules for limited, non-invasive expansions.
Conclusion
You can add space without major structural work by reconfiguring, installing modular storage, and leveraging light and color. In fact, up to 30% more perceived space is achievable through intelligent layout and daylight tricks. You’ll avoid disruption by prioritizing non-invasive extensions and streamlined utilities. Methodically plan permits, budgets, and phased work, then test your flow with temporary layouts. Finish with exterior landscaping to extend the sense of space, while preserving structure and neighborly constraints.