
Condensation on windows happens when humidity meets a cooler surface, so your first move is to manage indoor moisture and boost surface temperatures. You’ll want a steady indoor RH around 40–50%, improve ventilation during cooking or showers, and seal leaks to reduce cold drafts. Start with a simple check of glazing gaps and consider a dehumidifier or lightweight heat source near problem panes. Curious about specific setup options that fit your home? We’ll cover practical paths next.
Understanding Window Condensation: What Causes It
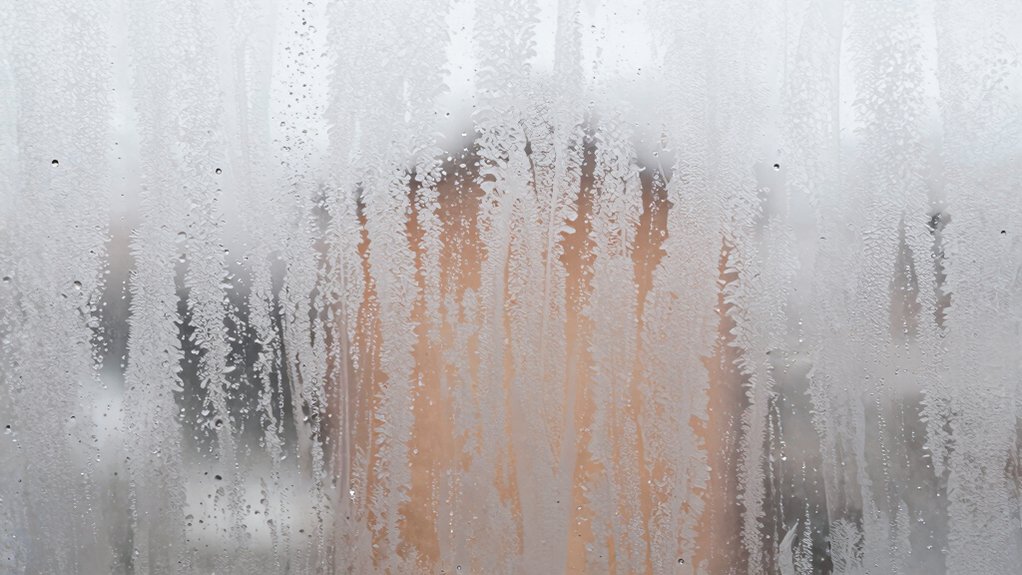
Condensation on windows occurs when moist indoor air touches cooler window surfaces, causing water vapor to change into liquid droplets. You’re observing a balance between humidity, temperature, and surface heat transfer.
Warmer air holds more moisture; when it contacts a cold pane, the air cools, drops below its dew point, and droplets form. The rate depends on indoor humidity, outdoor temperature, and window design, including frame materials, glazing, and seals.
Poor insulation or inadequate ventilation lets moist air linger near glazing, increasing condensation risk. Surface wetness can be seasonal, peaking in bathroom, kitchen, or laundry areas, or during rapid temperature shifts.
Condensation indicates humidity management opportunities, not just nuisance. By identifying sources, you can target controls that reduce moisture production and improve pane surface temperatures without compromising comfort.
Quick Fixes to Reduce Moisture Right Now
Humidity is already high enough to form droplets when it meets cold glass, so here are fast, practical moves you can implement now to cut moisture.
Start by lowering the indoor humidity to about 40–50% with quick dehumidification. Run a dehumidifier on continuous drain or emptying cycles; target a 2–5% drop per hour if needed.
Wipe misted surfaces with a microfiber cloth to remove condensate and prevent redisposition.
Increase surface temperature locally by turning up the thermostat or using a hair dryer briefly on windows, not the room.
Avoid adding moisture sources: postpone houseplants, laundry, and boiling without ventilation.
Seal obvious leaks around frames using weatherstripping or caulk.
Inspect window hardware for proper operation to minimize drafts.
Improving Indoor Ventilation for Better Airflow
Improving indoor ventilation enhances air exchange and reduces moisture buildup by diluting humid air and removing blooming contaminants. You should model airflow pathways, ensure balanced intake and exhaust, and minimize short-circuiting between zones.
Implement controlled ventilation with operable vents, and verify duct routing to prevent leaks and backdrafts. For naturally ventilated spaces, time window opening during mild external conditions optimizes exchange without overheating interiors.
Use fans strategically: place supply and exhaust units to create neutral pressure and avoid stagnant pockets. Screen openings to prevent debris ingress while preserving flow.
Monitor air changes per hour to meet occupancy and activity levels, adjusting as needed. Pair ventilation with minimized obstructions, regular filter maintenance, and prompt repair of leaks to sustain consistent air quality and reduce condensation potential.
Controlling Humidity Levels Throughout the Home
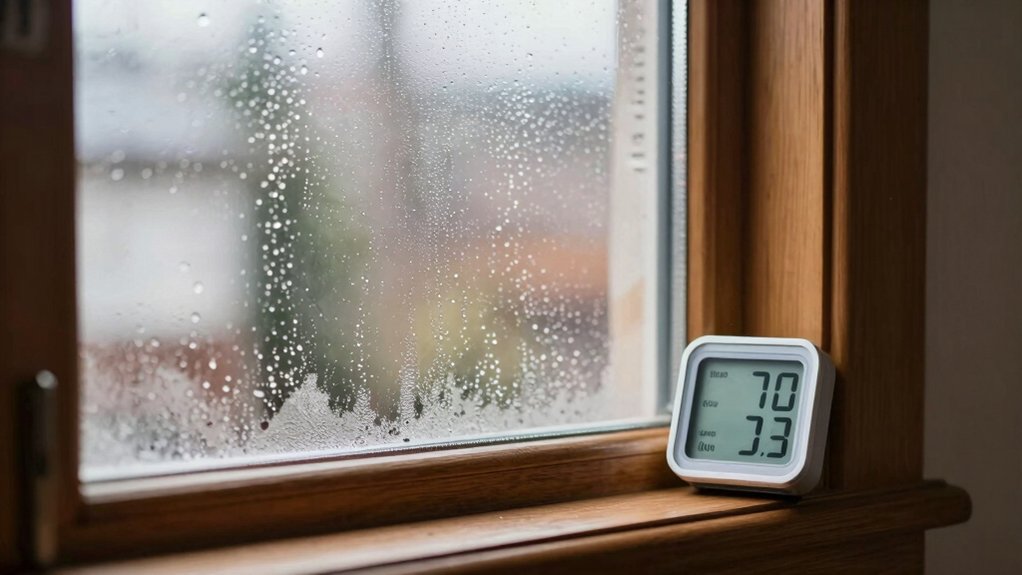
To control humidity effectively, monitor indoor moisture sources and set targets tailored to occupancy and activity. You’ll quantify sources like cooking, showering, laundry, and occupied spaces, then establish daily and hourly limits.
Use a hygrometer array or a smart sensor network to track real-time relative humidity (RH) and temperature, and compute dew-point estimates to anticipate condensation risk.
Maintain indoor RH between 40% and 60% where practical, adjusting for climate and occupants. Run exhausts during high-humidity tasks, and balance supply air to avoid over-ventilation.
Space planning matters: central bathrooms, kitchens, and laundry should have dedicated ventilation with intermittent boost modes.
Regularly calibrate sensors and review trends to detect moisture bursts, then implement targeted controls rather than broad, guesswork.
Insulation and Window Upgrades That Make a Difference
Even modest insulation upgrades and targeted window improvements can drastically reduce condensation risk by minimizing heat transfer and keeping interior surfaces closer to room temperature.
You should prioritize airtightness and continuous insulation around window assemblies, focusing on convex and sill junctions to reduce cold bridges. Use high-performance frames with low thermal conductivity and glass with low-emissivity coatings; double or triple glazing improves warm-side temperatures and reduces surface dewpoint.
Ensure proper installation to avoid gaps, compressions, or misalignment that create cold spots. Add interior and exterior weather barriers where appropriate, and consider insulating shutters or exterior glazing.
For retrofit projects, evaluate window U-values, solar gains, and edge-of-glass spacers; choose products that balance energy performance with moisture control, durability, and cost.
Practical Day-to-Day Habits to Minimize Foggy Glass
Foggy glass is usually a sign of persistent humidity near cold surfaces, so practical daily habits focus on controlling moisture sources and improving air exchange.
Track moisture loads by noting activities that release water vapor, like drying clothes indoors or boiling pasta, and minimize their duration. Use exhaust fans or range hoods during cooking, and open a window briefly after showering or when humidity spikes.
Maintain consistent indoor temperatures to reduce dew point swings; a small, steady difference is better than large fluctuations. Wipe surfaces only as needed and avoid over-cleaning with humidifying cleaners.
Use dehumidifiers in high-humidity rooms and place them where they can cycle air. Ensure furniture isn’t obstructing vents, curtains don’t seal windows, and air can move freely. Regularly inspect seals for minor leaks.
Bathroom and Kitchen Moisture: Targeted Solutions
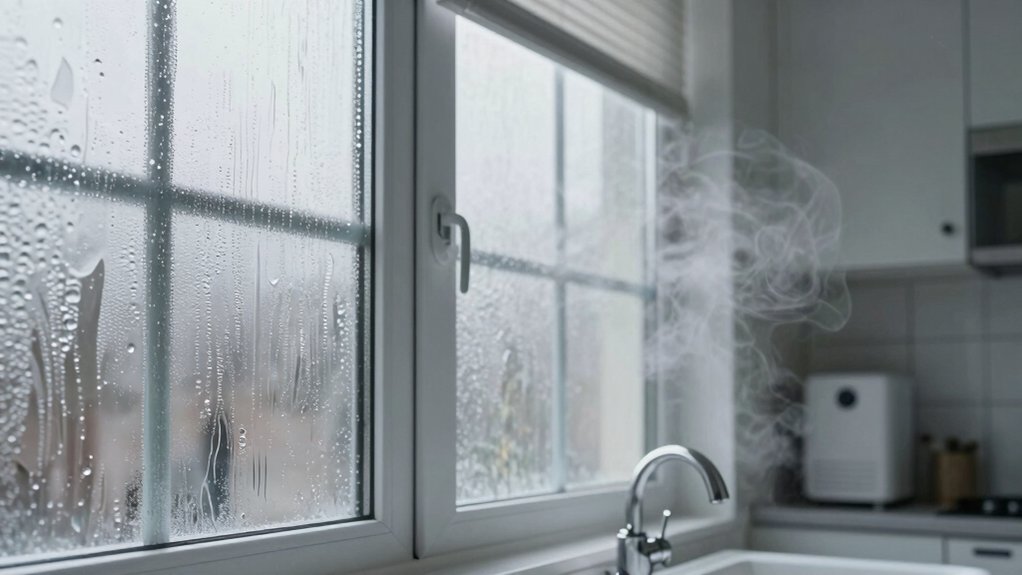
To reduce bathroom and kitchen moisture, you’ll target localized sources and employ timed ventilation alongside humidity control.
In the bathroom, use exhaust fans during showers and seal leaks around fixtures to minimize surface condensation.
In the kitchen, run ventilation while cooking and install windows to capture steam.
These targeted measures establish a foundation for continuous moisture management and guide subsequent room-specific optimizations.
Targeted Bathroom Moisture
Targeted bathroom moisture requires precise, immediate action because bathrooms generate high humidity from showers, faucets, and exhaust limitations. You’ll want a focused plan that minimizes vapor buildup and surface condensation.
Start by optimizing ventilation: use an appropriately sized exhaust fan rated for room volume, run it during and after showers for at least 15 minutes, and ensure ducting is short with minimal bends.
Seal latent leaks around fixtures and windows to prevent influx, and maintain stable indoor temperatures to reduce dew points.
Install humidity control where feasible, aiming for indoor RH around 40–50%.
Wipe down wet surfaces after use and consider moisture-absorbing materials in corners.
Regularly inspect caulking, grout, and seals; replace degraded components promptly to sustain effectiveness.
Kitchen Moisture Solutions
Kitchen moisture solutions require a focused, proactive approach that complements bathroom measures while addressing unique sources like cooking, dishwashing, and dish storage. You monitor humidity levels with a hygrometer and target 30–50% RH in kitchens during normal operation.
Use exhaust fans above stoves and dishwashers, running them during and after high-heat tasks to capture steam. Guarantee range hoods vent outdoors and are properly sized for airflow; cap placement near sinks should be minimized to reduce moisture pockets.
Drying racks and open storage reduce trapped humidity; keep doors and cabinets slightly ajar when feasible to promote air movement. Insulate cold surfaces, particularly exterior walls, to lower condensation risk.
Maintain routine cleaning to prevent mold growth and ensure vent ducts remain unblocked.
Seasonal Tips: Managing Condensation Across the Year
Seasonal humidity shifts affect when and how condensation forms on windows, so you’ll adjust strategies as the year changes.
Year-round ventilation tips keep air steady and moisture in check, regardless of outdoor conditions.
Seasonal Humidity Shifts
As seasons shift, humidity levels outside and inside your home change, which directly affects condensation. You’ll see higher indoor moisture during heating seasons and cooler air in transitional periods, altering vapor pressure and surface dew-point relationships.
Monitor outdoor humidity trends and indoor arrival rates from daily activities to predict condensation risk. In winter, expect elevated indoor humidity from cooking, showers, and drying; use exhaust fans and range hoods to constrain buildup.
Spring and autumn bring variable ventilation needs as outdoor dew points rise and fall, demanding targeted airflow adjustments and window-opening tactics.
Maintain a steady indoor relative humidity between 40% and 60% using desiccants, dehumidifiers, or dehumidification strategies when thresholds are approached. Regularly recalibrate humidity controls as temperatures shift.
Year-Round Ventilation Tips
Effective year-round ventilation minimizes condensation by balancing indoors and outdoors moisture loads; adjust airflow rather to match seasonal dew points and occupancy patterns. You should implement continuous background ventilation paired with targeted boosts during high-humidity periods.
Use a balanced ventilation system or intermittent exhaust with controlled intake to maintain indoor relative humidity around 40–60%, depending on activity. Monitor air exchange rates; avoid over-pressurization that pushes moist air into walls.
In winter, couple fresh-air inflow with frost-prevention strategies and use heat recovery when possible to conserve energy. In summer, increase exhaust or reduce intake during humidity spikes, and rely on dehumidification if needed.
Schedule regular filter maintenance, inspect seals, and verify duct integrity to preserve system effectiveness year-round.
Smart Tools and Tech for Ongoing Monitoring
Smart sensors and monitoring software provide ongoing visibility into window condensation, enabling you to detect rises in humidity, temperature differentials, and surface wetness in real time. You’ll deploy hygrometers, infrared thermography, and surface moisture probes at key panes and sills to map patterns across rooms.
Data dashboards translate readings into actionable metrics, such as dew point proximity, humidity load, and heat loss rate. Set threshold alerts for rapid humidity spikes or persistent dampness to trigger timely interventions.
System integration with HVAC or ventilation controllers allows automatic adjustments, while historical logs support trend analysis and retrofit planning.
Prioritize calibration, durable sensor housings, and secure wireless connections to maintain accuracy and reliability in varying conditions, ensuring ongoing condensation control through data-driven decisions.
Frequently Asked Questions
Can Plants Worsen Indoor Condensation Levels?
Yes, plants can slightly raise indoor condensation by transpiring moisture; guarantee proper ventilation, avoid overwatering, and monitor humidity. Use a hygrometer, aim for 40–60% RH, and space plants to improve air exchange and reduce condensation buildup.
Do Window Condensation Issues Mean Expensive Replacement?
Condensation issues don’t automatically mean expensive replacement. Identify moisture sources, evaluate seals, and monitor humidity. If insulation or framing is compromised, costs rise; otherwise, improvements like vents, dehumidifiers, and sealing can suffice without major repairs.
Are Anti-Condensation Window Films Effective Long-Term?
Yes, anti-condensation window films can help long-term, reducing interior surface humidity and dew. You’ll need proper installation, compatible glazing, and periodic maintenance; effectiveness varies with climate, ventilation, and film quality. Consider professional fitting for best, lasting results.
Should I Worry About Mold From Persistent Fogging?
Yes, you should monitor mold risk from persistent fogging. If moisture persists, address ventilation, reduce humidity, treat visible growth promptly, and consult a professional for mold assessment to prevent health issues and material damage.
Can Weatherstripping Alone Cure Chronic Condensation?
Yes, weatherstripping alone won’t cure chronic condensation. You’ll still need humidity control, ventilation, and source reduction. It reduces drafts, not moisture buildup; monitor indoor RH, run exhaust fans, and seal leaks to minimize repeated fogging.