Builders may push tiling over existing bathroom tiles for speed, but surveyors warn of hidden risks. You should assess substrate stability, moisture risk, and material compatibility before deciding. If the substrate shows delamination, moisture intrusion, or hollow tiles, stripping is wiser to protect longevity and warranty. Consider the tile system, primers, and backer board requirements, plus ongoing maintenance. A cautious, documented approach reduces failure risk; if you want to know precisely when to push ahead or pause, continue with the guidance.
The Shortcut Dilemma: When Tiling Over Tiles Seems Fast
The shortcut of tiling over existing bathroom tiles can seem appealing, but it’s not always the best choice. You must assess tile condition, substrate stability, and moisture risk before proceeding. Inspect for cracks, hollow spots, and loose sections; if present, adhesion may fail and void warranties.
Verify substrate compatibility with the new tile system, including approved primers and backer boards, as specified by manufacturers and code. Don’t assume thinset will bridge movement; lateral shifts can cause debonding or tile cracking.
Determine humidity exposure, especially in showers and wet areas, and ensure appropriate waterproofing details are integrated, not merely applied as an afterthought. Document statements, tests, and approvals in your project plan to support compliance and durability.
Why Builders Favor Quick Preps Over Demolition
Choosing quick preps over demolition is common in construction because it minimizes downtime, reduces dust and debris, and lowers risk to adjacent fixtures and finishes. You’ll notice that quick preps, like surface cleaning, patching, and careful priming, preserve existing tolerances and schedules.
Builders favor these steps when the substrate is sound, inspection standards permit, and permit authorities prioritize efficiency without compromising adhesion. Demolition introduces prolonged containment, waste handling, and potential moisture exposure that can trigger warranty concerns.
Regulatory guidance often requires documented surface condition, test patches, and moisture mitigation before tiling, so preps streamline approvals. You must assess substrate rigidity, mold risk, and drainage alignment, ensuring that chosen materials bond properly.
Informed decision‑making balances performance, safety, and accountability without unnecessary disruption.
The Surveyor’s Perspective: Risks That Are Hard to Seal
As a surveyor, you’ll identify risks that resist standard sealing approaches, from hidden moisture pathways to substrate inconsistencies that undermine bond integrity. You’ll note concealed moisture can migrate behind finished surfaces, exacerbating tile debond if not detected preemptively.
Structural substrates may show variable adhesion potential, including inconsistent plaster or backing boards, which weakens adhesive performance and voids warranties. You’ll evaluate movement and deflection risks in wet zones, where cyclic humidity shifts can induce microcracking or tile edge pops.
You’ll require confirmatory tests, not assumptions, and you’ll document tolerances mandated by applicable codes and manufacturers. You’ll communicate limitations clearly to clients, avoiding overpromise.
You’ll balance risk disclosure with practical remedies, emphasizing preparation accuracy, diagnostic proof, and compliant sealing strategies that respect the tile-over-tile constraint without compromising long-term integrity.
Assessing Substrate: Does Your Wall Actually Support a New Tile Layer?
You must evaluate substrate load capacity, ensuring the wall can bear the added weight of a tile layer. Assess wall structural integrity and address any weaknesses before proceeding, as compromised framing or support can lead to failures.
Verify moisture barrier suitability to prevent future substrate degradation and tile adhesion problems.
Substrate Load Capacity
Before applying new tile, verify that the substrate can support the added weight. Substrate load capacity isn’t a guess; it’s a calculation that guides safe installation. You’ll assess wall materials, adhesive mass, tile density, and any reinforcing elements. Use manufacturer specifications for tile and thinset, then apply load limits to your wall system.
Don’t assume capacity from appearance or previous finishes. Document substrate composition, thickness, and support framing, noting any decoupling or backing boards that modify load transfer. If embedded studs or lath aren’t on charts, treat the system as unsupported and seek a compliant design solution.
Ensure moisture exposure, thermal growth, and edge restraint are considered, as improper load handling can lead to cracking, debonding, or failure. Await professional confirmation when standards aren’t clearly met.
Wall Structural Integrity
Wall structural integrity determines whether your wall can support a new tile layer. You assess framing, stud spacing, and load paths to confirm suitability for added weight. Begin by verifying walls are plumb and square, with no bowing or significant cracks that signal hidden compromise.
Check existing substrate condition: sound, clean, dry, and free of loose material. Probe for moisture-induced decay or insect damage that could undermine adhesion. Ensure fastener compatibility and proper anchoring into framing, not only the surface.
Consider adjacent loads, such as cabinets or fixtures, that transfer onto walls. Don’t assume surface strength mirrors structural ability. If you detect weakness, consult a licensed professional for remediation before tile installation.
Document findings for compliance and future inspections, avoiding assumptions that could compromise safety or performance.
Moisture Barrier Suitability
Even so, moisture barrier suitability hinges on verifying that the substrate remains dry, stable, and compatible with a tile installation. You’ll assess drywall, cement board, or plaster for delamination, damp spots, or efflorescence, documenting findings before proceeding.
Use a moisture meter at multiple depths and locations, recording readings that meet or exceed manufacturer guidelines and local codes. If readings exceed limits, remediate the substrate or select an approved alternative system before tiling.
Verify substrate rigidity with a push test, and check for movement or deflection that could crack grout or tiles.
Confirm compatibility between adhesive, backer material, and the barrier layer, ensuring proper surface prep, cleaning, and priming.
Document all judgments, confirmations, and deviations to support a compliant installation.
Moisture Mastery: Anticipating Hidden Water Damage
Hidden moisture is the stealthy enemy in bathroom renovations, so anticipate it before you frame or tile. You assess all concealed areas, not just the visible surfaces, and you document findings for compliance. Begin with a robust moisture audit, using calibrated gauges and long-term monitoring where required by code.
Target potential sources: plumbing joints, condensate paths, and behind existing tile beds. You verify barrier continuity, confirm slope, and check for prior repairs that may compromise stability. You plan for redundancy: secondary drainage, vapor retarders, and proper substrate conditioning.
Avoid assumptions; evidence guides decisions. You communicate risks to stakeholders, set clear tolerances, and implement traceable remediation steps before framing. Finally, you recheck credentials, update schedules, and make sure records meet regulatory expectations.
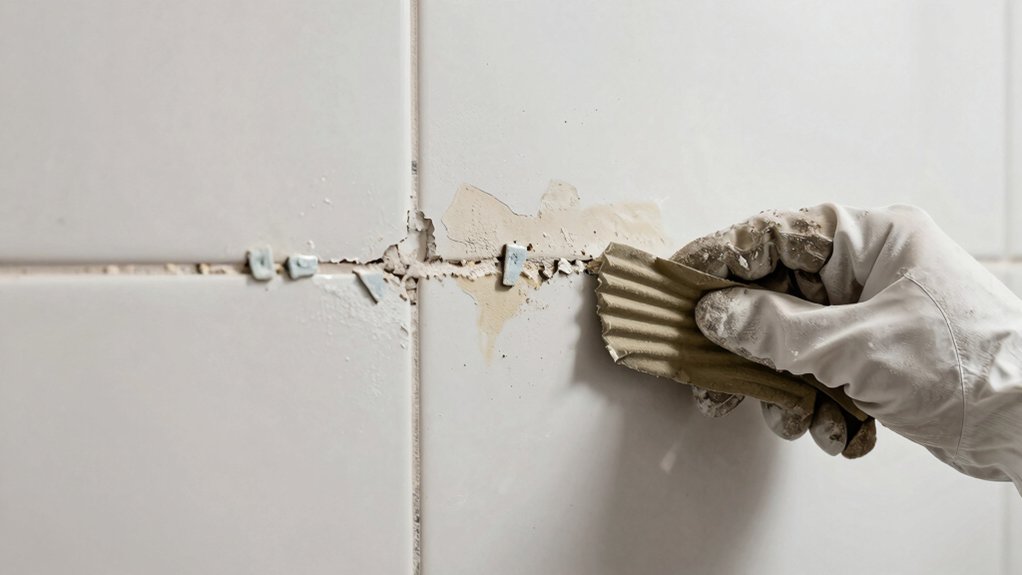
Adhesive and Surface Prep: What Standards Really Matter
Adhesive selection and surface prep standards matter because they determine tile adhesion, long-term performance, and moisture resilience. You must verify compatibility between substrate, adhesive, and tile, following manufacturer specs and local codes.
Surface prep requires clean, sound, and dry substrates; remove contaminants, fill voids, and create a uniform plane. Use primers only when specified, and avoid coatings that trap moisture or impede bonding.
Turn to performance data for open time, pot life, and cure conditions, and respect ambient temperature and humidity limits.
Document substrate assessments, material batch numbers, and installation receipts. Don’t substitute untested products or skip cure intervals.
Guarantee detailing at edges, corners, and transitions adheres to standard tolerances, enabling durable tile performance and minimized moisture-related failures.
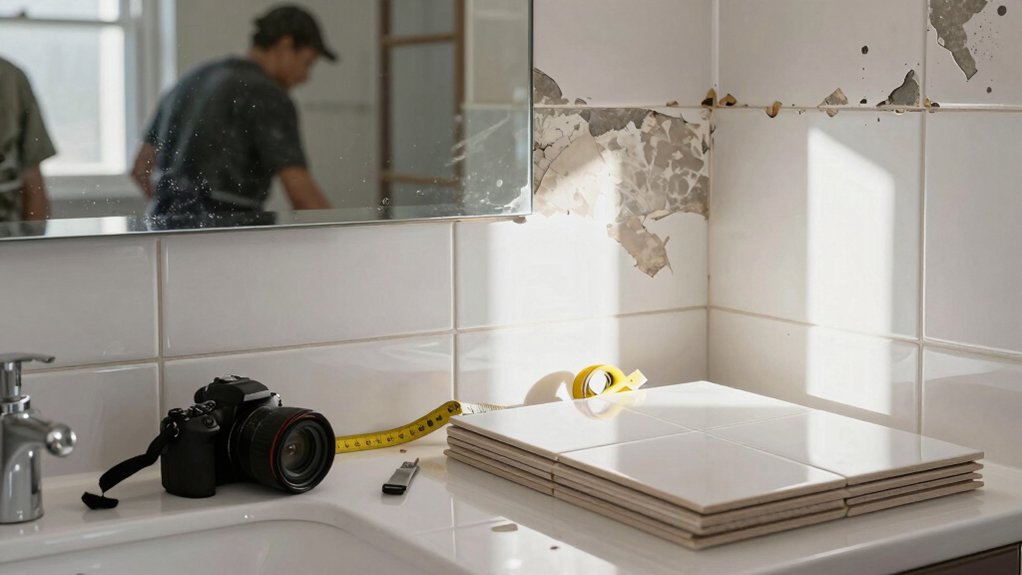
Typical Pro-Forma Scenarios Where Tiling Over Tiles Works
When evaluating whether tiling over existing tile is appropriate, you must weigh substrate condition, tile stability, and moisture exposure against product specifications.
In typical pro-forma scenarios, you’re examining consistent substrate adhesion, minimal flex, and controlled moisture movement. If the existing tile has solid bed attachment, uniform thickness, and no hollow sounds, you may proceed with a compatible, rated mortar and a compatible adhesive system.
Where waterproofing is already integrated and the substrate remains square, plumb, and dry, tiling over can meet performance targets. Conduct manufacturer-recommended surface tests, confirm warranty coverage, and document substrate history.
Avoid over-optimism; verify cure times, substrate primers, and project-specific movement joints. When criteria align, tiling over tiles becomes a compliant, defensible option.
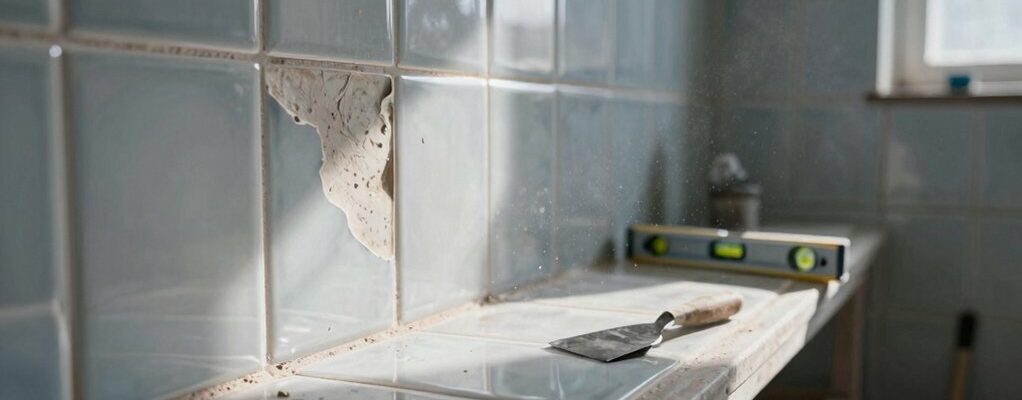
When to Strip: Clear Signals to Break With the Shortcut
Clear signals you should strip tile instead of tiling over again include evidence of substrate deterioration, persistent moisture intrusion, or loose, hollow sounds beneath existing tile. You assess structural integrity with care, documenting visible cracks, efflorescence, or crumbling backing. If plaster or substrate shows delamination, delamination, or rusting reinforcing, strip rather than cover.
Moisture meters, humidity readings, and prior leaks indicate risk you mustn’t ignore. Where adhesive failure or debonded tiles produce loud tapping or creaking under pressure, removal becomes the prudent course.
Regulatory guidance requires competent assessment before any overlay, ensuring substrate suitability and proper waterproofing. Preserve safety by avoiding shortcuts that compromise tile longevity or warranty.
Proceed only after confirmed substrate stability, controlled moisture conditions, and documented clearance for remediation and reinstallation.
Practical Checks to Do Before You Decide
Before you decide, verify material compatibility, ensuring your chosen tile and adhesive work with the existing substrate.
Next, assess subfloor integrity for gaps, settlement, or moisture damage that could compromise a tile install.
Finally, conduct a moisture risk assessment to confirm you won’t trap dampness beneath the surface over time.
Material Compatibility Checks
Material compatibility checks are essential before you settle on tiles or underlayment, because incompatible materials can cause premature failures. You’ll verify product labels, technical data sheets, and manufacturer guidance for adhesion, substrate compatibility, and moisture tolerance.
Cross-check mortar, thinset, and grout with tile porosity and backer board specifications; confirm liner and waterproofing systems align with tile formats and expected bathroom humidity.
Inspect substrate treatment requirements, cure times, and temperature ranges during installation windows. Consider compatibility with radiant-heat mats if present, and ensure movement joint placement matches system recommendations.
Don’t mix cementitious products with epoxy-based materials unless explicitly approved. Document limited warranties and performance thresholds, and retain supplier certs for future maintenance.
If any doubt remains, pause and consult the product technical support team.
Subfloor Integrity Review
Subfloor integrity is non-negotiable for a durable tile install, so you’ll perform a practical, step-by-step review before choosing underlayment or proceeding with tiling. Begin with a visual inspection for cracks, warps, boo-boos, or signs of moisture damage.
Measure flatness with a long straightedge or 4-foot level, noting high or low spots exceeding manufacturer tolerances. Check for delamination by tapping the surface; hollow sounds indicate compromised substrate.
Assess thickness uniformity and edge conditions where tiles will butt up. Verify existing fasteners aren’t protruding and that joists or panels are properly secured, aligned, and supported per code. Confirm substrate compliance with applicable standards and manufacturer requirements, documenting deviations.
If any defect is found, remediate or replace before proceeding. Only proceed when the subfloor passes the prescribed integrity criteria.
Moisture Risk Assessment
Moisture risk assessment is essential before deciding on underlayment or tiling, and it starts with practical checks you can do on-site. You’ll inspect for visible leaks, staining, and efflorescence around fixtures and seams.
Use a moisture meter on concrete slabs and studs to establish baseline readings, noting any spikes near plumbing or exterior walls. Check for hidden moisture by probing with a screwdriver or using a pinless meter in multiple locations, recording readings at 12-inch intervals.
Observe humidity conditions; prolonged high RH can indicate ongoing moisture movement. Review building history: prior water events, remodels, or failed waterproofing. Document ventilation performance and condensation patterns.
If readings are elevated or variable, consult a qualified waterproofing specialist before proceeding with any tile or underlayment plan.
A Clear Decision Framework: Balancing Cost, Durability, and Risk
A clear decision framework helps you balance cost, durability, and risk when tiling over existing bathroom tiles. Begin with defined criteria: structural soundness, moisture status, and substrate compatibility.
Next, quantify cost implications, including materials, preparation, and potential rework if failures occur.
Weigh durability targets against installation limits, noting tile, adhesive, and grout performance under bathroom conditions.
Assess risk through a probabilistic lens: failure modes, impact on warranty, and long-term maintenance demands.
Document required validations, such as moisture readings and substrate tests, and set pass/fail thresholds before work starts.
Decide contingencies for alternative strategies, like tile removal or surface preparation upgrades.
Conclude with a formal approval that links risk tolerance to project scope, schedule, and budget constraints.
Maintain traceable records for regulatory and warranty purposes.
Conclusion
You stand at a doorway, the old tiles a weathered map. If you tile over them, you’re patching a ship’s hull with duct tape—fast, but fragile beneath the surface. The surveyor’s seal is a lighthouse—steady, warning bright. Weigh the cost, the risk, the future damp. When moisture hides, shortcuts drown voices of caution. Strip when signs dictate it. Decide with discipline: durability first, cost last, and never ignore the harbor’s warning.