
The Annual Roof Inspection covers surface wear, flashing, drainage, attic conditions, and structural indicators. You’ll check shingle wear, curling, granule loss, and debris that trap moisture, plus edge flashing and seam integrity. Inspect valleys, gutters, and downspouts for blockages and proper drainage. In the attic, ensure vents are balanced, insulation is dry, and airflow isn’t obstructed. Look for moisture signs, leaks, sag, and roofline movement. By documenting findings, you’ll prioritize maintenance to extend life and prevent leaks—more details await.
What a Pro Looks for on the Roof Surface (and What You Can Spot)
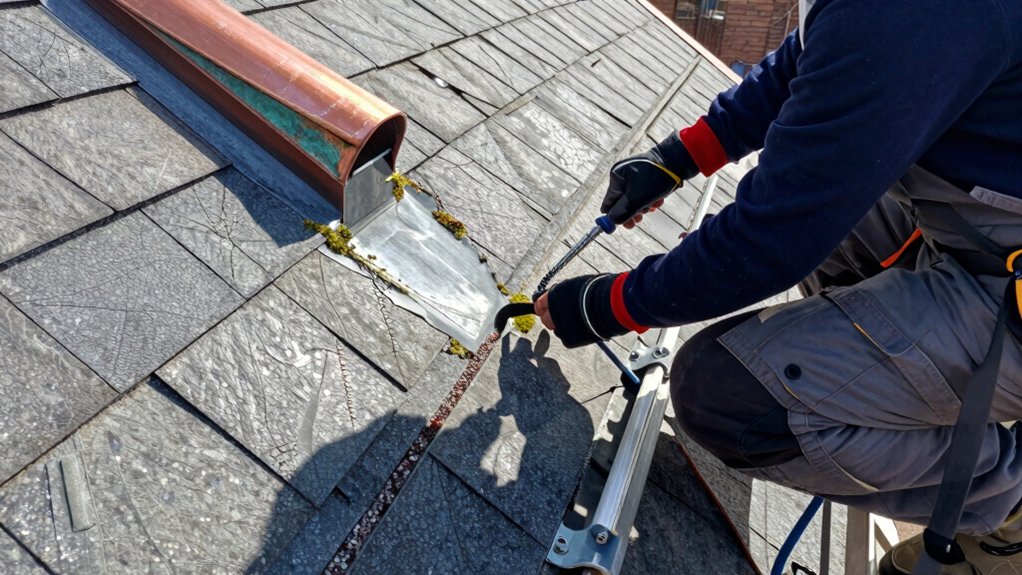
A professional roof inspection starts by scanning the surface for signs of wear and damage that can progress quickly. You’ll assess shingle condition at a glance, noting curling, cupping, cracking, or loose tabs that signal deeper issues. Move methodically across each plane, checking the surface texture for granule loss, slick patches, or grit gathering in valleys.
Your keen eye captures perched debris, moss, or algae that can trap moisture and accelerate deterioration. You verify the seam lines, edge flashing, and roof-to-wall progressions, ensuring seals remain intact.
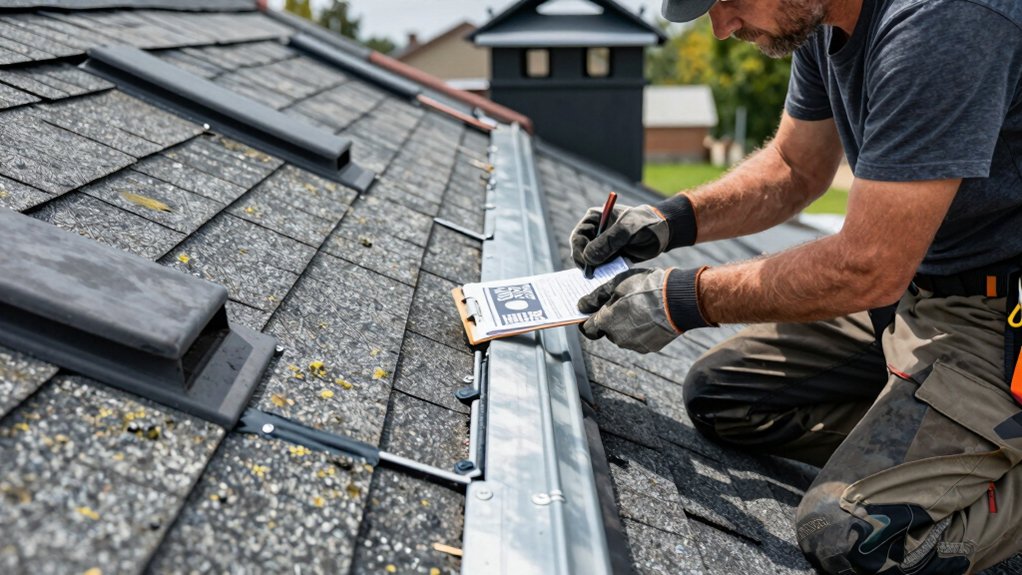
You listen for brittle, dry sounds when you press gently. You document irregularities with precise notes and photos, guiding the homeowner toward timely maintenance. Your approach builds confidence, belonging, and a proactive plan to preserve roof health.
Detecting Shingle Wear and Surface Deterioration
Detecting shingle wear and surface deterioration starts with a careful, eye-level scan of the roof. You’ll notice edges curling, tabs cupping, or granules filling the gutters, signs that shingles are aging or stressed. Look for dark spots, delamination, or any obvious cracking that compromises waterproofing. Color fading isn’t vanity—it signals material loss and UV exposure that hastens failure.
Inspect for loose shingles, lifted corners, or gaps along the ridges, which indicate wind damage or improper installation. Surface deterioration shows as brittle, chalky surfaces or soft, gummy patches when pressed gently.
Document every concern with notes and photos, flagging those that warrant a professional review. By identifying shingle wear early, you protect structural integrity and extend roof life, reinforcing a sense of shared responsibility and belonging.
Flashing, Valleys, and Gutters: Critical Drainage Signs
You should start by inspecting Flashing Integrity and looking for loose or cracked seals that could betray a leak. Valleys must be checked for hidden corrosion, debris buildup, and any signs of seepage along joints.
In gutters, confirm proper drainage, secure hangers, and watch for sagging sections or standing water that signals drainage issues.
Flashing Integrity Checks
Flashing integrity checks focus on the seals, joints, and crossings where roof planes meet vents, valleys, and gutters. You assess for deterioration, movement, and corrosion, because small flaws expand into leaks. Your goal is to confirm continuous protection where moisture travels, not to chase symptoms after the fact.
By inspecting fasteners, sealants, and metal-to-metal bonds, you spot flashing corrosion early and prevent costly repairs. You document vulnerabilities and prioritize timely resealing or replacement as needed. This discipline protects interior comfort and outdoor spaces you’ve earned through care.
- Seals and joints show signs of wear or damage
- Flashing around vents, valleys, and gutters appears intact or corroded
- Fasteners remain secure without loosening
- Corrosion absence confirms long-term integrity
Valley Leak Indicators
Valley leaks often reveal themselves where flashing, valleys, and gutters converge to channel water away from your roof. You’ll spot valley leak indicators by watching for dampness at joints, dark stained shingles, and sudden interior moisture near ceilings below these intersections.
Focus on how valley flashing inspection reveals gaps, lifted tabs, or missing sealant where metal meets seam. Look for granule loss along valley edges, hairline cracks in shingles, or algae growth signaling prolonged moisture exposure.
Be attentive to horizontal lines of staining that trace water flow during rain, not merely after storms. If you detect any seepage, corroborate with a close-up of flashing condition, gutter attachment, and valley lines.
Maintain consistency in inspections to protect roof integrity and reinforce your sense of belonging to diligent homeowners.
Gutter Drainage Signals
Gutter drainage signals reveal how well your system directs water away from the roof. You’ll spot issues in flashing, valleys, and gutters that disrupt water runoff and risk leaks. When drainage fails, you see pooling, overflowing gutters, or seepage at fasteners. Quick, decisive checks safeguard your home and community.
- Inspect flashing seams for gaps or corrosion that alter water runoff
- Check valley intersections for debris buildup or misalignment
- Examine gutter hangers and slope to ensure proper drainage
- Look for stains or mold signaling slow drainage and hidden leaks
A sharp eye here reinforces belonging—you’re part of a crew that defends roofs, families, and yards. Address problems promptly, document findings, and maintain consistent maintenance to preserve gutter drainage performance.
Attic Breathability: Vents, Insulation, and Moisture Clues
Your attic breathability starts with the vent condition and how well it moves air through the space. Check insulation moisture clues to see if condensation or damp spots signal hidden leaks or inadequate sealing.
Together, these indicators set the baseline for effective moisture control and overall roof health.
Attic Vent Conditions
Attic vent conditions are your first line of defense against moisture and heat buildup. When vents are blocked, insulation can trap humidity and lead to mold or wood rot. You’ll check airflow paths, confirm balanced intake and exhaust, and note signs of restricted venting.
Proper attic ventilation supports a safe insulation assessment and helps prevent cold gaps and excess moisture.
- Clear, unobstructed soffit and ridge vents
- Visible, intact screens and baffles
- Consistent airflow without hums or whistles
- Sufficient intake/exhaust balance for current climate
If you detect dampness, puffiness in insulation, or musty smells, document immediately. Your goal is reliable breathability, not guesswork, ensuring the attic remains a dry, energy-efficient space.
This focused check strengthens overall roof health and supports long-term comfort.
Insulation Moisture Clues
Insulation moisture clues reveal how well your attic breathes and where moisture hides. You’ll assess signs that point to vapor movement, condensation, and insulation effectiveness.
Start with visible stains, mineral buildup, or mold near vent chases and soffits. Then check insulation for damp spots or color changes that indicate moisture transfer. When insulation is consistently wet or compressed, its R-value drops and energy losses rise.
Look for a persistent attic vapor layer that could trap humidity, creating a breeding ground for rot and ice dam risk. Proper ventilation and a balanced intake/exhaust airflow pattern help prevent moisture buildup and maintain breathable conditions.
If you spot moisture clues, address airflow, seal leaks, and improve insulation to restore comfort and savings for your home.
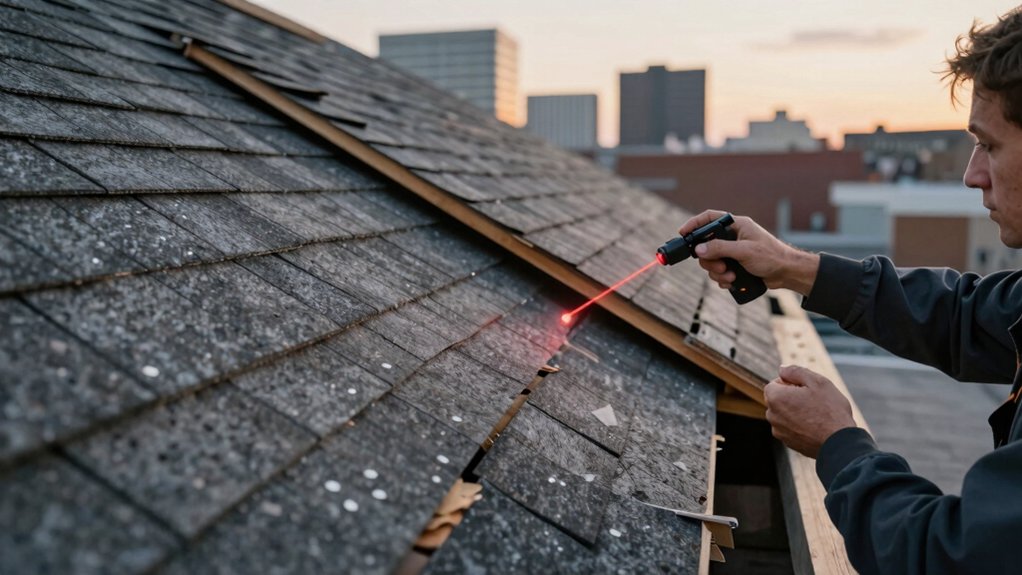
Storm Damage: Visible and Hidden Cracks
Storm damage often hides in plain sight: visible cracks can indicate structural stress, while hidden cracks in sheathing or rafters may threaten long-term durability. You’ll spot storm cracks and assess hidden damage by tracing cracks to their origin, noting pattern, width, and progression. Quick action prevents costly failures and preserves your roof’s integrity.
- Identify daylight gaps around vents or flashing that accompany cracking
- Inspect joints for hairline fissures signaling moisture intrusion or veneer failure
- Check rafters and sheathing for sustained bowing, and differentiate from normal seasonal movement
- Document changes over time to support timely repairs
Trust your trained eye: prioritize cracks that widen after storms, and treat hidden damage as seriously as surface evidence. Regular checks reinforce belonging to a well‑maintained home.
Structural Cues: Detecting Deck Shifts and Roof Sag
You’ll want to spot deck shifts and sag by noting door and window misalignment, uneven floors, and nails that pop or recess unevenly. Look for subtle bowing, cracked fascia, and doors that rub or stick as signs of structural stress.
Start with these indicators—deck shifts and sagging roof signs—to guide your inspection priorities and safety considerations.
Deck Shifts Indicators
Could deck shifts signal trouble before it’s obvious? Yes, they often foreshadow underlying issues. You’ll notice subtle changes in alignment, fastener tension, and deck movement that hint at structural stress. Stay vigilant, because early cues save costly repairs.
- Listen for creaks and popping as boards settle or loosen.
- Observe gaps widening between boards or railing posts.
- Check stair stringers and ledger connections for movement.
- Inspect flashing and joist ends where movement concentrates.
Approach deck shifts as a precaution, not a surprise. By tracking patterns over time, you can differentiate normal seasonal tweaks from concerning movement.
Prioritize secure fasteners, proper flashing, and credible professional evaluation when movement persists. Your goal is a stable, safe roof deck that supports daily routines and gatherings, reinforcing belonging through reliable shelter and confidence in your home’s structure.
Sagging Roof Signs
Sagging roof signs don’t just signal cosmetic trouble; they indicate structural stress that can threaten safety. You’ll notice sag in the deck, uneven door frames, or walls that lean slightly. Roof sagging isn’t merely a visual issue—it signals ongoing structural deformation that can worsen with time.
Assess every angle: look for bowed rafters, deflected joists, and noticeable gaps at joints. Inconsistent roofline indicates load shifting, often from moisture, improper framing, or poor connections. Don’t ignore nearby cracks or ripples in ceiling drywall; they echo deeper movement.
Address these cues promptly, documenting measurements and patterns to share with a professional. Your action protects occupants, preserves value, and reinforces belonging to a responsible, safety‑minded community.
Schedule an inspection, confirm load paths, and prioritize timely repairs.
Drainage and Water Control: Downspouts, Ice Dams, and Eave Leaks
Downspouts, ice dams, and eave leaks are common drainage and water-control issues that can damage a roof and interior if left unchecked. You’ll assess how water moves away from your home, verifying that roofs, gutters, and downspouts support proper drainage systems and consistent water flow.
Look for blockages, sagging gutters, and misaligned downspouts that redirect runoff toward foundations or walls. Check for ice dam formation at eaves, which signals insulation or ventilation gaps. Address inadequate seals and small leaks before they become significant.
- Ensure downspouts channel water well away from the foundation
- Clear debris to restore uninterrupted water flow
- Inspect insulation and attic ventilation for dam prevention
- Test for leaks around joints and flashing, sealing promptly
Estimating Remaining Roof Life: Life Span Milestones
Estimating remaining roof life hinges on recognizing clear life-span milestones and how your roof ages between them. You evaluate current condition against typical benchmarks: early wear, mid-life stress, and late-stage failure cues.
Your roof pitch influences exposure and drainage, shaping deterioration rates you’ll observe. As material aging progresses, you’ll notice aging shingle edges, faded granules, or fading color, signaling capacity loss.
Compare insulation backing, underlayment integrity, and fastener corrosion to manufacturer expectations for your specific system. Document when components reach quarter, half, and near-end-life markers, so you can forecast service intervals and replacement windows.
You gain confidence by aligning findings with historical performance, climate impact, and problem history. This approach helps you plan with certainty and maintain cohesive, long-term roof health.
Maintenance Priorities to Prevent Leaks and Save Costs
Regular maintenance focuses on preventing leaks before they start, because proactive checks save costly repairs later. You’ll prioritize rapid, repeatable tasks that stop problems before they escalate, including attention to solar panels and potential aesthetic damage that hints at underlying issues.
By planning around risk areas, you keep costs down and performance up, while preserving curb appeal.
- Inspect flashing and edges for loose joints that invite moisture
- Clean debris and ensure proper drainage to protect roof and interior
- Check solar panel mounts for corrosion or shifting
- Assess surface aging and minor cosmetic damage before it grows
This approach strengthens your roof’s resilience, reinforces your sense of belonging in a well-maintained home, and minimizes costly surprises.
Tools, Measurements, and Documentation Pros Use for Roof Inspections
A well-run roof inspection hinges on the right tools, precise measurements, and clear documentation. You approach with purpose: a reliable laser distance meter, a sturdy ladder, a digital infrared thermometer, and a drone for hard-to-reach angles.
You log findings succinctly, pairing photos with notes, and you timestamp each entry. Measurements focus on shingle condition, flashing integrity, and fastener patterns, staying consistent across elevations.
When evaluating roofing materials, you compare wear signs, granule loss, and moisture intrusion against manufacturer specs. Document weather impact, noting exposure duration, wind damage, and recent rain effects.
You reconcile data into a clean report, flagging risks and recommended actions. Your disciplined process reinforces trust, signaling attendees that you value accuracy, accountability, and informed decisions.
Frequently Asked Questions
How Often Should I Schedule a Professional Roof Inspection?
Answer: Schedule a professional roof inspection every year. Like a steady lighthouse, you guard your home’s harbor; monitor roof material and gutter condition, and you’ll keep belonging, safety, and clarity steady as storms loom.
Can I Identify Roof Problems From the Ground?
Yes, you can spot issues from the ground, but with caution. Look for shingle damage and gutter condition, noting sagging sections or visible wear, and call a pro if anything concerns you; you deserve reliable, confident protection for home.
What Tools Do Pros Use for Roof Inspections?
You’ll use a ladder, harness, camera, moisture meter, and a pry bar for safety and access. Your inspection checklist includes roofing materials, flashing, and seals, ensuring every detail aligns with a professional inspection checklist for confidence and belonging.
Is Attic Moisture a Sign of Roof Failure?
Attic moisture can signal roof failure; don’t ignore signs. Make certain proper attic ventilation to curb moisture intrusion, stop hidden damage, and protect your home’s fate. You’ll belong knowing you’re proactive, informed, and safeguarding your shelter.
How Accurate Is Estimated Remaining Roof Life?
Estimated remaining roof life isn’t exact, but you’ll get a reliable range. Consider roof age and material deterioration; these factors guide maintenance. You’ll feel confident when you know the estimate and how to plan replacements or repairs.