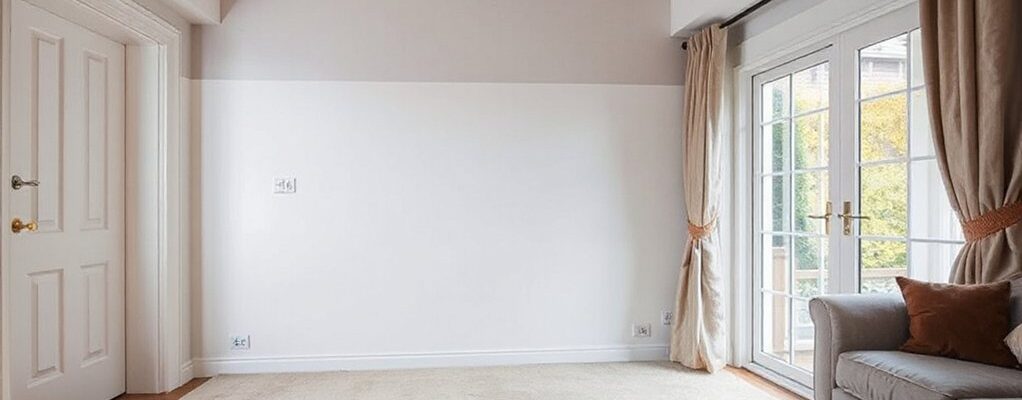
Like a quiet neighbor in a busy street, your home can feel calm even with a shared wall nearby. You’ll need a precise plan: seal every gap with acoustical sealant and weatherstripping, decouple walls and ceilings, and add dense materials to block noise, then verify airtightness and balance cost with performance. Start with targets and a practical path forward, because effective sound control hinges on disciplined execution across walls, floors, and ceilings. The next steps will guide you through concrete choices.
Identify Your Noise Problem and Goals

Identifying the noise you’re dealing with and defining your goals are the essential first steps. You’ll map problem sources, frequencies, and timing to target outcomes, then select effective interventions.
Start by categorizing noise types (impact, airborne, or structure-borne) and measure levels at typical listening points. Define acceptance criteria (dB reduction, preferred times, and acceptable leakage).
Prioritize treatments with proven effectiveness for your context and budget. For airborne noise between rooms, consider acoustic panels to optimize mid- and high-frequency attenuation where speech damage is most evident.
For channeling noise through doors or windows, evaluate soundproof curtains as a flexible fascia. Reassess after implementation to confirm goal attainment, adjusting priorities if needed.
Document results to guide potential future upgrades and guarantee sustained performance.
How to Choose Wall Sound Insulation
When selecting wall insulation, you should compare materials by density to control structure-borne sound transfer.
Consider air channel elimination to minimize sound pathways and reduce flanking noise between rooms.
Evaluate staggered stud techniques to disrupt vibration paths and improve overall isolation without adding excessive thickness.
Wall Material Density
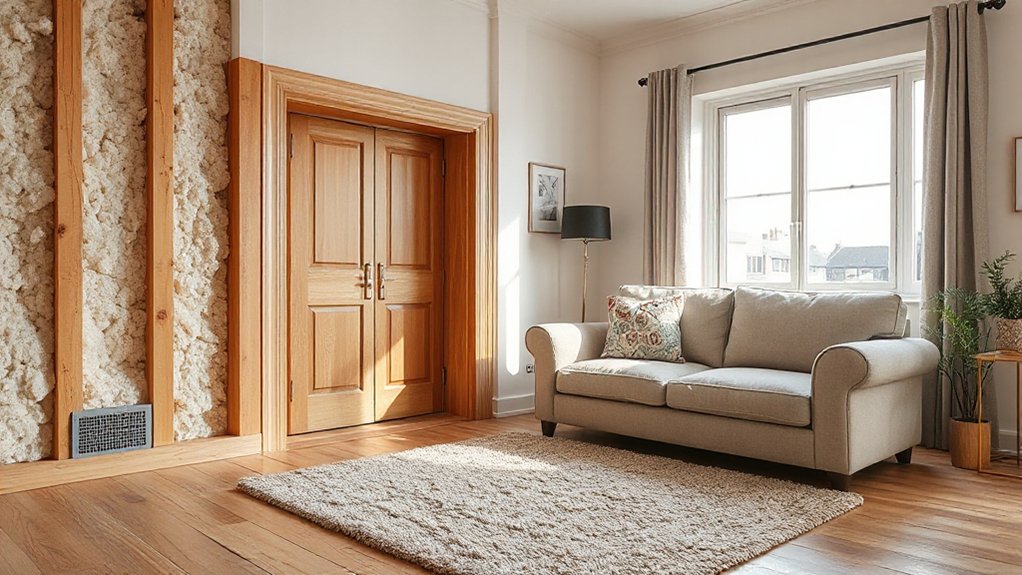
Wall material density is a primary lever for controlling airborne sound transmission between semi-detached homes. You should select wall assemblies with quantified density targets to meet your desired sound reduction index.
Higher wall density generally lowers transmitted sound, but consider practical trade-offs with structure, weight, and build cost. Prioritize materials that deliver consistent density across the full thickness and avoid heterogeneous stacks that create weak interfaces.
Material strength matters: choose mixes and supports that resist cracking or debonding under load, preserving acoustic performance over time. Combine dense layers with reliable connections to studs and plates to reduce flanking paths.
Use tested products with declared density values and confirm compatibility with existing sheathing and insulation. Measure, compare, and document density specs to justify your chosen wall system.
Air Channel Elimination
Air channels between wall components undermine airborne sound isolation, so the primary goal is to eliminate direct air pathways that facilitate pressure fluctuations. You should identify persistent cavities behind drywall, joist bays, and around pipe penetrations, then pursue continuous barriers that block pressure transfer.
Prioritize solid connections and sealants at joints, ensuring no gaps exceed a few millimeters at any boundary. Employ low‑permeability assemblies with properly aligned studs and backing to discourage noise pathways where segments meet.
Use gap‑filling materials that remain debonded under thermal cycling, and seal all penetrations with compatible acoustic sealant. Consider sprays or boards that enhance mass and damping in the critical low‑frequency range.
Verify effectiveness with simple test taps to confirm minimized air movement across the wall.
Staggered Stud Techniques
Staggered stud assemblies offer a practical path to提高 airborne isolation by decoupling gypsum board surfaces from the same wall plane. You’ll install offset studs so drywall panels attach to different structural lines, creating a continuous air gap that disrupts sound transmission.
Choose studs with uniform thickness and precise offsets to maintain a consistent decoupled layer. Use resilient channels or acoustic clips where appropriate, but verify they don’t undermine the staggered interface.
For effective Wall decoupling, maintain tight, staggered edges and seal all perimeter joints with gasket or low‑density caulk, avoiding direct gypsum gypsum contact.
Inspect for continuity of the decoupled cavity across the full wall height, especially at corners and openings. Confirm compatibility with existing framing, electrical boxes, and fire‑stopping requirements before proceeding.
Step-by-Step Floor Underlayment for Quiet Floors
To achieve effective floor sound isolation, begin with a clear plan for the underlayment installation and verify the substrate conditions before you start. You’ll select an appropriate underlayment type, thickness, and stiffness for your floor system, then confirm moisture levels and flatness.
Prepare joints and progressions per product data sheets, and assure fastener schedules align with the subfloor material. Installment steps include: clean, bed, and roll out or lay sheets, align seams, tape where required, and press firmly to eliminate voids.
For floor heating, choose conductive or compatible underlayment with adequate thermal transmission and minimal acoustic impedance. When finished, test for flatness and response, and document installation tolerances.
Before decorative finishes, verify compatibility, cure times, and warranty terms to preserve performance.
Ceiling Treatments for Lower Noise Transfer
Ceiling treatments for lower noise transfer focus on reducing airborne and impact sound pathways between adjacent spaces by selecting and installing materials that balance mass, stiffness, and decoupling. You’ll optimize ceiling acoustics by combining high-millimeter mass layers with resilient decouplers to interrupt vibration transmission.
Use resilient channels or staggered studs to decouple drywall from structural framing, then add a dense, low-porosity layer to dampen flanking noise. Consider floating ceiling assemblies for critical zones to further reduce flanking paths.
For practical installation, align panels and joints to minimize gaps, and guarantee airtight connections at penetrations. Soundproofing panels offer targeted broadband attenuation and easy retrofit potential, while keeping ceiling height manageable.
Prioritize material specs, installation tolerances, and proper sealing to achieve measurable noise reduction.
Seal Gaps to Improve Airtightness and Quiet
Seal gaps strategically to boost airtightness and reduce noise transmission. You’ll implement targeted sealing, maintain consistent gaps, and apply weatherstripping or sealant where drafts are present, room by room.
This approach prioritizes airtightness practices that yield measurable quiet gains across the property.
Seal Gaps Strategically
Strategically sealing gaps can drastically reduce drafts and airborne noise transfer between units. You’ll locate high‑risk interfaces—between studs, around penetrations, and at shared midline joints—and prioritize those with the greatest sound transmission class impact.
Use a combination of weatherstripping, acoustical sealant, and backer rod to create continuous barriers without restricting ventilation or door movement. Focus on gaps around window frames and floor penetrations, where even small openings boost flanking transfer.
Plan for dynamic movement: allow for seasonal expansion and door sag by selecting flexible, long‑lasting materials rated for acoustic and thermal performance. Consider window upgrades and flooring enhancements as complementary measures to maintain overall airtightness without creating stiffness that could transfer impact sounds.
Verify performance with simple blower‑door or trace‑gas checks after sealing.
Enhance Airtightness Practices
If you want meaningful airtightness gains, start by sealing the most impactful gaps around doors, windows, and penetrations, then verify the results with a simple diagnostic check.
You’ll adopt a methodical approach: identify sealants with proven performance, select appropriate gasket profiles, and apply continuous layers to eliminate thermal bridges.
Focus first on sill and frame joints, door thresholds, electrical outlets, and plumbing penetrations, ensuring proper compression and compatibility with existing ventilation systems.
Use weatherstripping where movement occurs and caulk where static leaks exist.
After sealing, perform a controlled blower door test or doorway fan measurement to quantify improvements.
Pair airtightness work with adequate thermal insulation to stabilize interior temperatures and minimize noise transfer, ensuring the system remains balanced without over-restricting airflow.
Quiet Room-By-Room Sealing
Ever wondered how room-by-room sealing can sharply cut noise while boosting airtightness? You’ll target perimeter gaps, electrical outlets, and HVAC penetrations with airtight seals, foams, and gaskets that stay durable over time.
Begin with a thorough seal plan for each room, prioritizing high-traffic or shared walls. Then test for air leaks using a simple smoke test or a handheld anemometer to confirm reductions.
Install door sweeps and weatherstripping on shared doors to minimize transit of sound and drafts.
For immediate acoustic gains, add soundproof curtains to windows and acoustic panels to walls where reflection is significant, ensuring proper mounting and covering critical junctions.
Reassess after sealing, re-tune with sealant touch-ups, and document results for ongoing optimization.
Add Resilient Channels and Decoupling for Isolation
To reduce sound transmission between sides of a semi-detached home, install resilient channels and decoupling methods to isolate drywall from the framing. You’ll create a channel layer that decouples the gypsum board from studs, reducing structure-borne vibration transfer.
Use resilient channels installed per manufacturer guidance, oriented horizontally, with correct fastener spacing to prevent rigid contact. Pair channels with decoupling techniques such as staggered-stud or double-stud assemblies where feasible, ensuring there’s no direct drywall-to-stud coupling.
Seal all gaps with acoustical sealant around perimeters and at drywall joints to maintain a continuous barrier. Prioritize consistent channel attachment and avoid over-tightening that short-circuits isolation.
After installation, test for drywall movement under sound pressure and adjust fasteners if you detect rubbed or hummed surfaces.
Budget-Smart Materials That Balance Performance
Budget-smart materials deliver solid sound reduction without breaking the bank by balancing performance, cost, and installability. You’ll target common weak points with proven, affordable options that can be deployed quickly.
Acoustic curtains act as a first line of defense, reducing mid-to-high frequency leakage at windows and doorways without invasive work. They complement existing walls when paired with dense lining or mass-loaded vinyl, optimizing sound transmission class upgrades per dollar.
For lightweight partitions, soundproof plants offer aesthetic dampening benefits and minor, incremental absorption, particularly for flutter echoes in living spaces; use as a supplementary measure rather than a primary solution.
Prioritize non-destructive installation, modular components, and manufacturer-tested ratings, ensuring compatibility with your existing structure, ventilation, and fire-safety requirements.
DIY vs Pros: Practical Decisions for Your Project
When deciding between DIY and hiring pros, you should assess the project scope, required certifications, and the potential risk to structure and occupants. You’ll compare complexity, timelines, and cost certainty, then map these to expected performance gains.
For straightforward tasks (e.g., sealing gaps, decoupling, or upgrading underlayment), a methodical DIY approach can be efficient if you strictly follow data sheets and local regulations.
For tasks involving structural modification, vibration isolation, or fire/sound ratings, pros guarantee compliance and quality control.
Consider interior decor implications and energy efficiency outcomes; professional work often yields repeatable results with minimized pass-through.
Decide who handles measurement, material selection, and QA checks. Document progress, verify warranties, and align decisions with long-term resilience rather than short-term gains.
Quick Wins and Long-Term Maintenance Plan
Quick wins set the momentum: address obvious gaps and test sound performance with targeted, low-effort tasks before committing to larger changes. You’ll establish a baseline by measuring existing airborne and impact noise levels, then prioritize interventions with the highest return on investment.
Practical, repeatable steps include deploying Acoustic curtains where service gaps align with window lines, and layering Floor rugs to dampen footfall and impact transmission on hard floors. Document results to track progress and guide decisions on longer-term fixes.
For maintenance, schedule periodic inspections of seals, joints, and radiators to prevent degradation that erodes performance. Establish a simple to-do calendar: quarterly checks, annual re-assessments, and a revision log for any changes in construction or occupancy.
This plan keeps performance calibrated and actionable.
Frequently Asked Questions
How Long Does It Take for Soundproofing to Show Real Results?
Soundproofing results begin within days to weeks, depending on material quality and installation. You should notice reduced impact noise first, with airborne noise improving as seams seal. Use soundproofing techniques and noise reduction strategies for consistent, measurable gains.
Can Neighbors Notice Improvements After Minor Upgrades?
Yes, neighbors may notice improvements after minor upgrades. You’ll reduce sound transmission, validate soundproofing myths, and confirm insulation durability; results depend on materials and installation. You’ll measure with testing, document durability, and report precise, solution‑oriented outcomes.
Which Materials Are Most Effective for Party Walls?
You should prioritize dense mass and decoupled assemblies; concrete blocks, mineral wool, and layered plaster provide strong party-wall performance. Material comparisons show gypsum board alone underperforms. Use noise reduction techniques like staggered studs and resilient channels for best results.
Is There a Guaranteed Decoupling Method for Existing Studs?
Decoupling is rarely guaranteed with existing studs; you must assess if structural modifications exist, then apply targeted decoupling techniques. You’ll need precise measurements, potential sistering, resilient channels, and compatible isolation to achieve reliable results.
Do Soundproofing Gains Affect Room Acoustics Inside?
Yes, soundproofing gains can alter room acoustics; you’ll notice changes in reverberation and clarity, affecting interior aesthetics. Consider cost considerations for absorptive treatments and decoupled assemblies, then optimize with calibrated materials to preserve intelligibility and bass response.
Conclusion
To clarify, you can dramatically reduce noise by sealing gaps, decoupling surfaces, and upgrading mass in key areas. Target shared walls with acoustical sealant and weatherstripping, install resilient channels, and use dense drywall or mass-loaded vinyl where it counts. Prioritize airtightness tests and proper underlayments for floors. Think of your home as a sound barrier you’re tuning—steady improvements compound, like stacking bricks of quiet until the noise fades away. Your quieter future starts now.