Identify top noise offenders and map their patterns to target interventions. Trace sound paths through shafts, corridors, and shared walls, then reinforce vulnerable zones with heavier doors, seal gaps, and add lightweight barriers where needed. Establish clear house rules, onboarding that sets expectations, and fair enforcement. Combine design choices—thicker walls, resilient floors, and decoupled finishes—with smart monitoring to track progress. Use tech alerts and feedback to refine plans and scale successful measures across the building. There’s more to optimize as you implement.
Identify the Top Noise Offenders in Mixed-Tenancy HMOS
In mixed-tenancy HMOs, the loudest culprits aren’t always who you’d expect. You’ll notice that recurrent disturbances often come from everyday activities rather than dedicated “noise” hotspots.
To identify the top offenders, observe patterns: timing, location, and frequency reveal who bears the greatest impact on tenant privacy and exterior noise exposure.
Quiet zones aren’t sacred; they’re just less obvious culprits—like shared kitchens during peak mornings or late-night hallway conversations that echo into rooms.
Track who consistently breaches quiet hours, then verify whether buffering measures exist or if behavior changes are feasible.
Prioritize residents whose routines create sustained disruption, and address it with clear, written expectations.
Accurate identification lets you target fixes without overreacting or compromising tenant privacy.
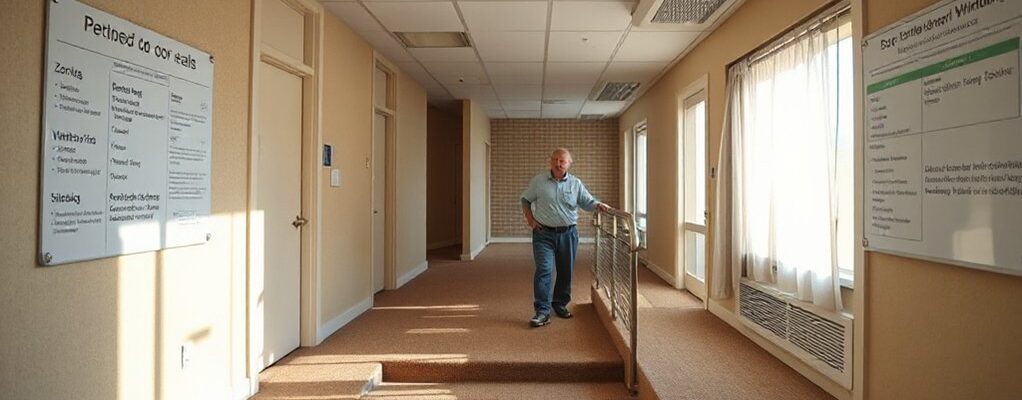
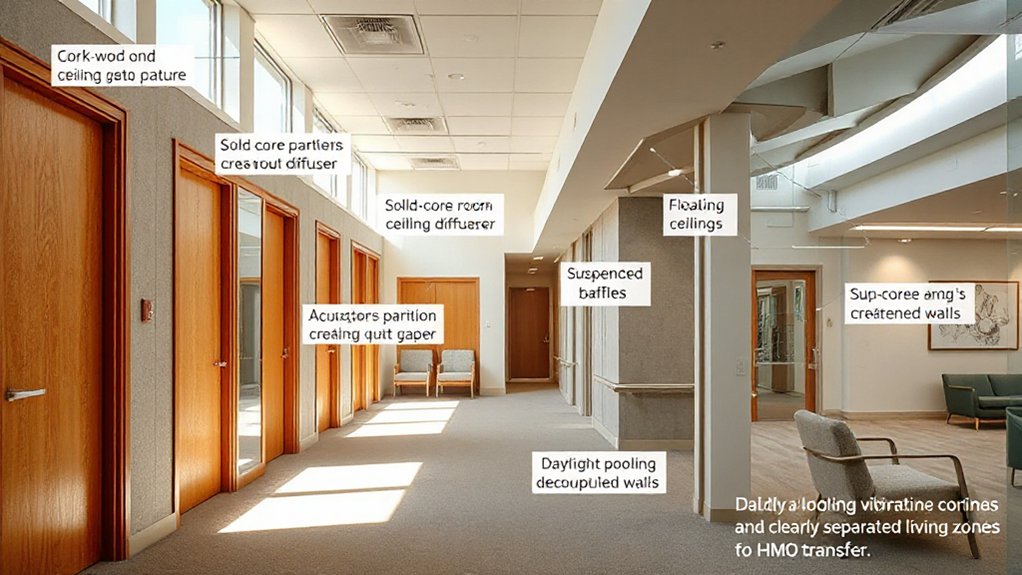
Map Noise Paths and Vulnerable Areas in the Building
Now that you’ve identified the top noise offenders, you’ll map how sound travels through the building and where it concentrates. Start with critical routes: shafts, stairwells, corridors, and shared walls. Trace audibility from each unit at typical hours to reveal echo paths and attenuation gaps.
Note mechanicals like boilers or ventilation fans and how they couple into ceilings and floors. Identify vulnerable areas where low-frequency energy lingers, such as basements, lofts, or apartments above common rooms.
Consider building ventilation and vertical stacks as potential corridors for sound transfer. Assess window placement and its effect on direct line-of-sight noise ingress.
Mark hotspots on a simple schematic, prioritizing improvements where sound is most likely to concentrate or re-radiate.
Set Clear Lease and House Rules for Noise
Clear lease and house rules set a predictable framework for behavior and accountability around noise. You establish concise expectations in writing, so tenants know what’s acceptable and what isn’t, reducing ambiguity and disputes.
Use specific hours for quiet periods, guidelines for communal spaces, and limits on amplified sound or late-night gatherings.
Tie rules to practical consequences, outlining steps for warnings, mediation, and, if needed, lease enforcement, so responses stay consistent and fair.
Communicate rules during onboarding and through periodic reminders, ensuring everyone understands how noise is measured and tracked.
Maintain open tenant communication channels to address concerns promptly, documenting issues objectively.
Regularly review rules in response to feedback and changes in tenancy, preserving a respectful, peaceful living environment for all.
Design Layouts to Minimize Sound Transfer
Consider how you arrange walls and corridors to curb sound transfer, starting with sound-reducing wall layouts between units and shared spaces.
Prioritize quiet-zone circulation design so bedrooms and study areas stay insulated from high-traffic areas.
This discussion helps you balance practicality with acoustic performance while keeping layouts efficient and adaptable.
Sound-Reducing Wall Layouts
Integrate soundproof barriers at shared boundaries, like thicker drywall, mass-loaded vinyl, or resilient channels, while ensuring joints remain airtight. Plan acoustic zoning so noisy activities stay away from sleeping zones, and use corridor walls as buffers whenever possible.
Avoid continuous gaps; seal penetrations with gaskets and caulk. Favor short, perpendicular connections between rooms to minimize long, straight transmission paths. Balance practicality with fire and structure requirements, verifying compatibility with existing layouts and occupancy patterns.
Quiet-Zone Circulation Design
To minimize sound transfer, design circulation routes that separate public from private areas and place quiet zones away from high-activity corridors. You map every path people use, identifying sound pathways across the building.
Prioritize vertical and horizontal separation, using staggered corridors and covered landings to break direct line‑of‑sight, which reduces noise bleed. Implement quiet-zone circulation by situating bedrooms, study rooms, and lounges along enclosed, low-traffic routes with solid doors and minimal shared thresholds.
Use acoustic stairs or staggered access to minimize footstep impact. Pair this with dedicated service routes that avoid resident spaces. Label routes clearly so residents avoid shortcuts through quiet zones.
Regularly review patterns, updating sound pathway mapping as tenancy shifts. This practical approach limits disturbance while preserving accessibility and safety.
Select Sound-Friendly Fixtures and Finishes

Choosing sound-friendly fixtures and finishes starts with material selection that dampens impact and echoes. You’ll prioritize materials with edge-to-edge mass and decoupled layers to minimize vibration transmission between units.
Opt for resilient flooring options with underlayment that reduces impact noise, and pair them with wall and ceiling finishes that absorb sound without sounding dead.
Select fixtures and fittings that resist impact and resist scratching, such as composite laminates and scrubbable paints. Consider concealed fasteners and soft-close hardware to reduce noise from everyday use.
Prioritize durability as a core criterion, balancing Soundproofing innovations with fixture durability to extend life and lower replacement needs.
Document installation tolerances and guarantee airtight edges around penetrations to preserve performance over time.
Apply Budget-Friendly Acoustic Treatments
You can start with budget-friendly acoustic treatments that make a real difference without breaking the bank. Try practical soundproofing strategies and lightweight material solutions that you can install quickly, measure for effectiveness, and adjust as needed.
This approach keeps costs low while delivering noticeable improvements in room-to-room noise control.
Budget-Friendly Acoustic Treatments
Ever wonder how to calm a noisy HMO without breaking the bank? You can start with budget-friendly tweaks that cut nuisance sound without expensive installs. Prioritize simple, movable solutions you can test quickly.
Soundproof curtains and acoustic panels offer immediate impact when placed strategically against common noise sources like doors, shared walls, and communal spaces. Choose dense, multi-layer fabrics for curtains and panels with high NRR or αw ratings for best results.
Install panels at door gaps, above headboards, and along shared walls where chatter and foot traffic travel most. Use a combination approach: dampen low-frequency thumps with heavier materials, while focusing panels where reflections cause intelligibility loss.
Reassess after a week, tweak placements, and document improvements for tenants.
Practical Soundproofing Strategies
To put budget-friendly acoustic treatments into action, start with a practical layout plan that targets the loudest sources—doors, shared walls, and common areas. You’ll prioritize mass and coverage where it matters most, then layer simple, reversible options.
Begin with door seals and sweeps to reduce gap leakage, then add solid door cores if feasible. Treat shared walls with calibrated mass using affordable drywall add-ons or decoupling methods, focusing on contact points near outlets and fixtures.
For ceilings and floors, opt for rug pads and performance underlayment where possible. Apply soundproof paint to high-traffic interior walls for a small, uniform gain without major disruption.
Finish key zones with acoustic curtains at high-traffic openings to dampen transient noise and improve perceived quiet. Regularly reassess gaps, vibrations, and occupant feedback to refine the plan.
Lightweight Material Solutions
Are lightweight materials enough to curb noise without busting your budget? Yes, when you choose targeted, easy-to-install options that deliver measurable results. Start with lightweight barriers at shared walls or ceilings where activity travels most. These panels don’t require heavy renovations and can be mounted with minimal disruption, yet they offer noticeable impedance to sound transmission.
Pair them with acoustic curtains in common areas and thin-wiber coverings on doors to damp chatter and footsteps without crowding your space. Prioritize modular, reusable solutions that you can relocate as tenancy changes.
Combine sealant strips along gaps and around outlets to reduce leaks. Together, lightweight barriers and acoustic curtains create a practical, scalable baseline for quieter HMOs while keeping costs predictable.
Manage Common Areas to Reduce Disruption
Managing common areas effectively can dramatically cut disruptive noise in HMOs. You’ll set clear usage rules, designate quiet zones, and enforce them consistently to prevent spillover.
Establish a simple access system so residents know when spaces are available and how to book, reducing spontaneous gatherings that spike sound levels.
Prioritize durable, easy‑to‑clean surfaces to minimize maintenance noise and implement regular checks for door gaps, squeaks, and creaks.
Encourage Community engagement by inviting residents to contribute suggestions and report issues through a straightforward channel.
Use noise monitoring to track patterns and verify which interventions work, then share results with occupants to build trust.
Pair these measures with rapid response to complaints, ensuring disturbances are addressed before escalation.
Keep documentation concise and accessible for everyone.
Schedule Noisy Activities With Notice Procedures

Schedule noisy work only after you’ve given residents clear notice and a defined time window.
Use a timed protocol that specifies when sounds will occur, how long they’ll last, and who to contact for adjustments.
This upfront notice helps residents plan and reduces complaints without slowing essential maintenance.
Schedule With Notice
When you schedule noisy activities in an HMO, you should establish clear notice procedures to minimize disruption for residents and maintain compliance with lease terms and local regulations. Create a standard notice template specifying the activity, date, start/end times, expected duration, and contact for concerns.
Deliver notices with ample lead time, then confirm receipt and provide a channel for adjustments if conflicts arise. Align schedules to reduce overlap with quiet hours and high-occupancy periods.
Document exceptions and rationale, and update tenants’ calendars accordingly. Use practical mitigation tactics, such as quiet meditation breaks for stress relief and, where appropriate, implement sound masking in common areas to dampen transient noises.
Regularly review procedures for fairness, consistency, and legal compliance.
Timed Noise Protocols
Timely notification is essential for noisy activities in HMOs, so you should establish a fixed protocol that starts the moment you plan the work.
Timed routines guide when you perform tasks, reducing surprise noise for tenants. Set clear windows for each activity and lock them into a calendar visible to residents.
Build in brief notifications before each step, stating the start time, expected duration, and potential disturbances.
Use scheduled check-ins to confirm ongoing comfort and adjust timing if complaints arise.
Keep modifications minimal and documented, with an appeal process if a window must shift.
Encourage feedback after noisy work concludes to refine the protocol.
This clarity minimizes conflict, preserves sleep, and sustains harmony across the property.
Implement a Practical, Low-Stakes Conflict-Resolution Framework

A practical, low-stakes conflict-resolution framework starts with simple, enforceable rules that everyone can follow without fear of punishment. You implement this by outlining clear expectations, neutral timelines, and transparent consequences that apply to all tenants.
Build buy-in through quick, calm conversations that emphasize problem-solving over blame. Prioritize Community engagement: invite residents to share concerns, set shared goals, and review the framework quarterly to stay relevant.
Establish a designated, accessible channel for informal disputes and anonymous feedback to lower barriers. Pair responses with consistent application, so rules feel fair, not punitive.
Integrate noise monitoring as a non-confrontational cue, not a weapon, to detect patterns and adjust behavior. Document actions, measure outcomes, and celebrate improvements to reinforce cooperation.
Track Noise Incidents With Simple Recording Templates
To keep noise concerns manageable, set up simple recording templates you and residents can use consistently. Use a single page per incident with fields: date, time, length, type of noise, location, people involved, action taken, and outcome. Keep entries factual, avoid judgments, and attach any evidence like screenshots or dates.
Review templates weekly to identify patterns, peak hours, and recurring hotspots. When you notice repeated disturbances near shared walls or late-night periods, flag them for targeted mitigation rather than broad accusations.
Maintain accessibility by offering paper and digital options. Track progress over time to quantify reductions in noise pollution and verify the effectiveness of implemented sound barriers.
Regularly summarize findings for stakeholders to reinforce accountability and inform future improvements.
Onboard Tenants With Explicit Sound Expectations
You set clear noise expectations from the start and document them so tenants know what’s acceptable.
Pair these expectations with concise onboarding messages and a quick checklist that reinforces behavior standards.
Keep the communication practical and bidirectional, inviting questions to guarantee everyone understands and commits.
Clear Noise Expectations
Provide concrete examples, like door slams, TV volumes, or late-night gatherings, and note any building-specific constraints. Emphasize personal responsibility: occupants must manage their own activities and use reasonable controls.
Introduce practical mitigations, such as personal soundproofing options and optional noise masking devices where appropriate, to reduce fault lines. Document expectations in the lease and an addendum, then acknowledge receipt in writing to guarantee alignment from the start.
This clarity prevents disputes and supports smoother tenancy handovers.
Onboarding Communication Best Practices
When onboarding tenants, start with explicit sound expectations embedded in the welcome packet and lease addendum, so people know the baseline from day one. You’ll set a practical framework by outlining acceptable times, quiet zones, and response timelines for noise concerns.
Use virtual onboarding to share videos or quick quizzes that reinforce policies, ensuring new tenants grasp expectations even before moving in. Pair this with personalized communication: address potential concerns from individual schedules and lifestyles, then tailor reminders to match each unit’s rhythm.
Provide a clear escalation path and documented contact points, so issues are resolved swiftly. Reinforce expectations during early check-ins and follow up with concise, actionable reminders, preserving landlord-tenant trust and reducing post-move disruptions.
Enforce Rules Fairly and Consistently
Enforcing rules fairly and consistently is essential to curb noise issues in HMOs. You set clear expectations, apply them uniformly, and avoid favoritism that breeds resentment. Create a written code of conduct outlining acceptable and unacceptable behaviors, with examples.
When a complaint arises, document details, reference the rule, and follow the same steps each time. This consistency reduces ambiguity and reinforces accountability for all tenants.
Communicate rules during onboarding and provide succinct reminders at regular intervals, ensuring everyone understands consequences and process.
Prioritize swift, proportional responses to breaches, avoiding overreaction or petty penalties. Focus on enforcement consistency over punishment, so tenants trust the system.
Invest in a single, simple process for reporting disturbances to maintain clarity and fair treatment, reinforcing rule communication across the building.
Leverage Technology to Aid Noise Control

Technology can streamline noise control by automating monitoring, reporting, and response. You’ll deploy smart sensors to detect persistent sound thresholds across common areas and bedrooms, enabling real-time alerts before disputes escalate.
Pair sensors with a centralized dashboard to visualize patterns, facilitating proactive interventions rather than reactive firefighting. Noise mapping then translates data into actionable zones, guiding targeted soundproofing or behavior reminders.
- Install discreet smart sensors at key contact points and common spaces
- Configure automated alerts for defined decibel thresholds and time windows
- Create noise maps to identify high-activity hotspots and trend changes
- Use data-driven prompts to residents, maintenance, and management teams for timely actions
Evaluate Results and Scale Successful Strategies
Evaluating results and scaling successful strategies starts with a clear, data-driven assessment: compare pre- and post-implementation metrics, verify that decibel thresholds held in target areas, and confirm reductions in resident disputes.
You’ll analyze noise event frequency, peak levels, and duration, then map improvements to specific interventions. Distill findings into actionable insights, prioritizing scalable actions with the highest impact.
If Innovative soundproofing yielded meaningful gains, plan phased rollouts across remaining units, preserving tenant comfort and building integrity. Measure tenant cooperation throughout, noting changes in reporting behavior and satisfaction scores.
Document cost implications, maintenance needs, and training gaps, so you can justify further investment. Use the results to refine guidelines, standardize processes, and accelerate deployment while maintaining transparency with residents and staff.
Frequently Asked Questions
How to Ensure Tenant Privacy During Noise Monitoring?
You protect tenant privacy by using localized, non-intrusive monitoring, ensuring data is anonymized and access-limited. Implement soundproofing strategies alongside clear disclosure and consent, and emphasize privacy safeguarding while reviewing noise data for actionable, respectful improvements.
What Legal Limits Apply to Noise in HMOS?
You’ll want to know that most jurisdictions cap residential noise at around 40–45 dB at night. Noise level regulations vary, and legal enforcement hinges on local bylaws and nuisance standards you must follow in HMOs.
How to Handle Noise Complaints From Quiet Hours?
Yes, handle noise complaints by documenting issues promptly and enforcing quiet hours consistently; implement soundproofing enhancements where feasible, and refine tenant communication strategies to explain expectations, remedies, and timelines, maintaining fairness and reducing recurrence.
Can Noise Control Conflict With Accessibility Requirements?
Yes, they can clash. You’ll face soundproofing challenges that can impede accessibility, so you’ll need practical compromises: prioritize accessible routes, install barrier systems, and balance thresholds, while leveraging unobtrusive acoustic treatments that don’t hinder mobility or compliance.
What Budget-Friendly Signs or Prompts Deter Noise?
You can deter noise on a budget with practical signage reminders and soundproof barriers where needed. Place concise, visible prompts by entrances, stairwells, and shared spaces, using sturdy materials and bright visuals to reinforce considerate behavior.
Conclusion
Think of your building as a busy orchestra. You’re the conductor, not the referee. By identifying loud instruments (top offenders), charting the hall’s acoustics, and setting clear score rules, you prevent discord before it starts. Align layouts, fixtures, and tenant expectations like sections tuning to the same pitch. Enforce fairly, use tech as a metronome, and measure results to scale what works. When harmony returns, the whole ensemble plays louder without shouting.