For home projects, pick a focused kit of fillers, epoxies, glues, and finishes chosen for grain match, bond strength, and weather resistance. Start with interior softwood fillers that color-match and sand cleanly, then use epoxy putty for gaps and movement resistance. Choose durable glues for joints and flexible, sandable primers and topcoats for seamless finishes. For outdoors, deploy exterior-grade, UV-stable systems. Ready to optimize your repair plan and results? You’ll gain more practical guidance ahead.
Key Takeaways
- Choose fillers that match wood type and finish, testing color and grain before full use to ensure seamless repair.
- Use epoxy resins with moisture resistance and flexible formulations to fill gaps and tolerate movement.
- Select structural glues with high shear strength for load-bearing joints and appropriate open time for precise bonding.
- Opt for sandable primers and flexible topcoats that minimize grain telegraphing and provide durable, even finishes.
- Prioritize exterior-grade, UV-stable coatings for outdoor repairs, with proper surface prep and curing per manufacturer guidelines.
Core Wood Repair Categories: Fillers, Epoxies, Glues, and Finishes
Core wood repair hinges on four fundamental product types: fillers, epoxies, glues, and finishes. You select fillers to match wood grain and fill voids, then use epoxies for strength and gap filling where structural integrity matters.
Glues bind parts with precision, ensuring joints resist shear and tension, while finishes seal and protect, delivering durability against wear. You evaluate each category by performance under load, moisture exposure, and sanding compatibility, forming a decisive repair timeline that keeps projects on track.
When you plan, you align product choice with expected stresses and seasonal conditions. You’ll document steps, monitor cure times, and verify color and grain matching to maintain seamless aesthetics.
This approach empowers you to complete repairs with reliability, clarity, and professional-grade results. wood grain, repair timeline.
Assessing Wood Damage: What You Need to Diagnose Before You Repair
You start by checking for moisture signs, since elevated dampness guides both diagnosis and repair approach.
Next, you identify the damage type—soft rot, cracking, swelling, or delamination—so you select the appropriate, compatible repair method.
This initial assessment sets your criteria for materials and techniques, ensuring you address the core issue before you repair.
Inspect for Moisture Signs
Moisture is the primary indicator of wood damage, so begin by identifying any signs of dampness, staining, or odor. You’ll confirm risk by tracing moisture paths and prioritizing actionable data over guesswork. Rely on precise checks to separate symptoms from root causes and guarantee you’re addressing the right issue.
- Inspect for active moisture sources, noting any water intrusion or leaks that could feed rot.
- Evaluate surface and sub-surface changes, including staining, softening, and warping.
- Use moisture meters to quantify relative humidity and wood moisture content across critical zones.
- Document environmental conditions and circulation patterns to predict ongoing risk and guide remediation decisions for durable repairs.
Determine Damage Type
Determining the damage type is the essential next step before repairs, because different wood injuries require distinct treatment. You identify whether damage is from moisture, rot, pests, cracks, or surface wear, so you choose the right method and products.
Inspect seasonality, density changes, and grain patterns to gauge depth and spread; use a knife, gauge, or flashlight to verify soft areas and dark discoloration.
Classify damage as superficial, structural, or compromised, then decide between stabilization, consolidation, filling, or replacement.
Your assessment informs tool choice, compatible fillers, and cure times, ensuring lasting performance.
Focus on wood safety during inspection and preparation, and select repair tools that deliver precise abatement without causing collateral harm.
This disciplined approach yields predictable results and professional-grade resilience.
How to Choose a Wood Filler: Interior Softwood vs. Hardwood
Interior softwoods and hardwoods differ in density, grain pattern, and expansion behavior, so choose a filler that bonds well and sands smoothly under expected moisture and heat conditions.
- Assess grain matching: pick a filler color close to the wood shade to minimize finish work and reveal the repair crisply.
- Choose filler color intentionally: for softwoods, lean toward warm, pale tones; for hardwoods, match richer hues to preserve character.
- Evaluate adhesion and shrinkage: select formulations with strong bonding for interior use and minimal post-application movement.
- Consider workability: prefer quick-drying, easy-smoothing mixes that sand true without gouging, ensuring a seamless transition.
Tip: test a small area for grain matching and color before committing, ensuring the final result meets your performance and aesthetic standards.
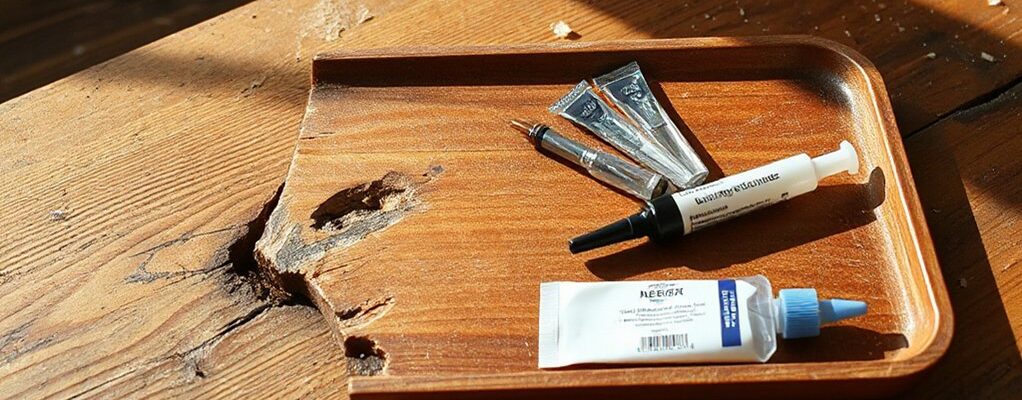
Epoxy Putty Options for Moisture and Movement Resistance
Epoxy putty options provide durable moisture and movement resistance for wood repairs, combining a two-part or pre-mixed formulation with high bond strength and minimal shrinkage.
You select resin-hardener systems or ready-to-use sticks that cure to a rigid, durable matrix.
Moisture barriers are achieved by filling gaps with low-porosity compounds able to resist water infiltration at joints, veneers, and end grain.
For movement flexibility, choose formulations that tolerate micro-expansion and contraction without cracking, preserving adhesion under humidity swings.
Surface prep matters: clean, dry, and roughen edges to maximize mechanical grip.
Apply with controlled pressure, shape before cure, and finish with compatible coatings.
These options deliver reliable performance in baths, basements, and exterior trims where moisture exposure and motion are constant challenges.
Durable Wood Glues: Structural and Non-Structural Fixes Compared
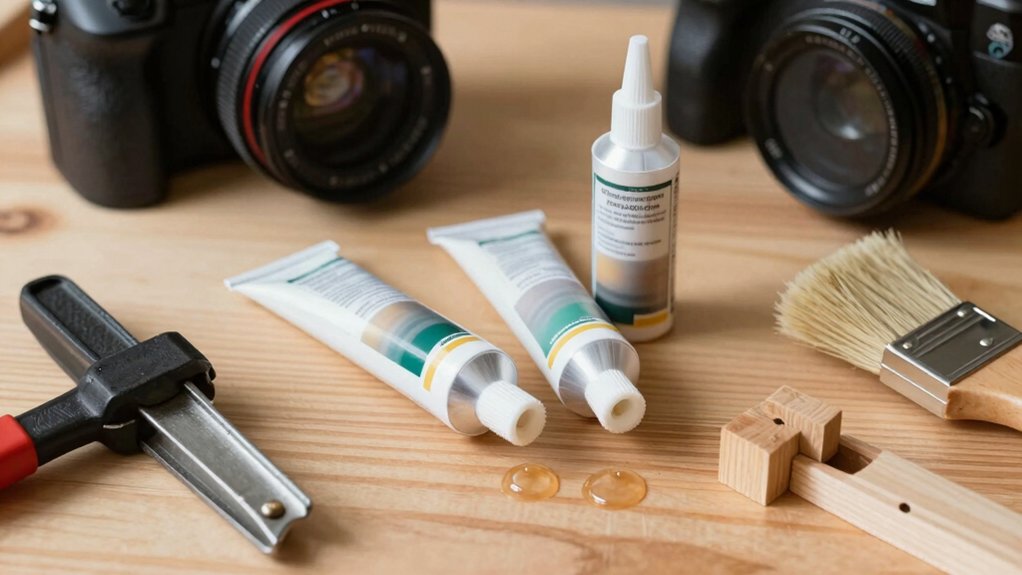
When you choose durable wood glues, you’ll weigh structural adhesive strength against practical gap filling needs to match the joint. Consider how water resistance levels influence long-term performance in both structural and non-structural fixes.
And where each adhesive excels under load. This discussion sets a baseline for comparing formulations across strength, gap fill, and moisture tolerance to guide component selection.
Structural Adhesive Strength
For structural repairs, adhesive strength matters more than sheer bond thickness: the glue must transfer load reliably between timbers under flexion, shear, and impact. You evaluate bonds by strength, not size, ensuring predictable performance in load paths.
Choose adhesives with high shear and impact resistance, compatible cure times, and proven bond durability across wood species. Consider how wood grain orientation and color matching influence perceived integrity, even when strength is primary.
- Target high shear strength and impact resistance, not just initial grab.
- Verify cure compatibility with your species and moisture conditions to avoid weak interfaces.
- Confirm long-term performance under flexion and vibration, not only static load.
- Assess color matching and grain continuity for a seamless, professional result.
Gap Filling Performance
Gap filling performance matters whether you’re using structural or non-structural wood glues, because gaps can compromise load transfer and weather resistance if not properly filled. You’ll evaluate adhesive viscosity, open time, and creep resistance to guarantee a tight, durable joint.
For wood defect remediation, choose a formula that expands minimally yet seals effectively, preventing micro-movements that undermine strength. Non-structural fixes demand fast setup and sandability to maintain workflow velocity, while structural repairs require controlled fill capacity and long-term dimensional stability.
Pay attention to repair timing; over-application slows work and under-application invites gaps. Cure temperature and clamping pressure influence final density, so align product choice with ambient conditions.
In all cases, verify complete adhesion before load introduction to sustain performance targets.
Water Resistance Levels
Water resistance is critical for both structural and non-structural wood glues, but the standards differ. You must evaluate bond durability under moisture exposure, substrate porosity, and long-term creep.
Choose glues that protect wood grain and preserve color matching while resisting UV and humidity cycles. Structural fixes demand higher moisture resistance, while non-structural repairs prioritize ease of gap sealing and clean finishing.
Match the adhesive to the environment to prevent failure, discoloration, or warping.
- Compare water resistance ratings (WRA/WFC) for structural vs. non-structural uses.
- Assess impact on wood grain integrity and color matching after curing.
- Consider moisture exposure scenarios (interior, exterior, seasonal).
- Verify compatibility with end-grain, movement, and finish coatings.
Stains and Finishes That Blend Repairs With the Wood Grain
Stains and finishes that blend repairs with the wood grain rely on color-matching techniques and grain-aware application to disappear visually. You choose products with controlled pigments and fine-tiber grain filters, then apply using add-on tools that respect texture and density.
To achieve seamless results, you start with grain matching as the foundation, aligning stain direction and tonal range to the surrounding timber. Color blending occurs through layered, translucent applications that preserve pores and growth rings.
You test on inconspicuous areas, calibrate shade, and adjust for UV exposure sites. Precision also demands quick-dry or slow-dry options to control halo effects.
When you finish, assess uniformity under natural light, ensuring the repair is indistinguishable from authentic grain.
Sandable Finishes and Primers for Seamless Blends
When aiming for seamless blends, choose sandable finishes and primers that create a uniform base for color correction and grain texture. You’ll control tone, raise grain with precision, and ensure stain blending integrates without gaps or halos. Use products engineered for sandability to minimize dust and maximize buildup consistency, enabling exact grain matching.
- Select a high-solids primer with fine leveling agents to reduce grain telegraphing and enhance adhesion.
- Opt for a flexible, sandable topcoat that accepts subsequent coats without cracking, preserving stain blending accuracy.
- Rely on compatible sealer and stain systems to balance color depth and grain depth in one pass.
- Implement dust-free applications and controlled curing to prevent lift, ensuring uniform finish and durable wear.
This approach delivers precise color correction and durable, seamless results.
Exterior-Grade Solutions: Weather-Resistant Options for Outdoor Wood
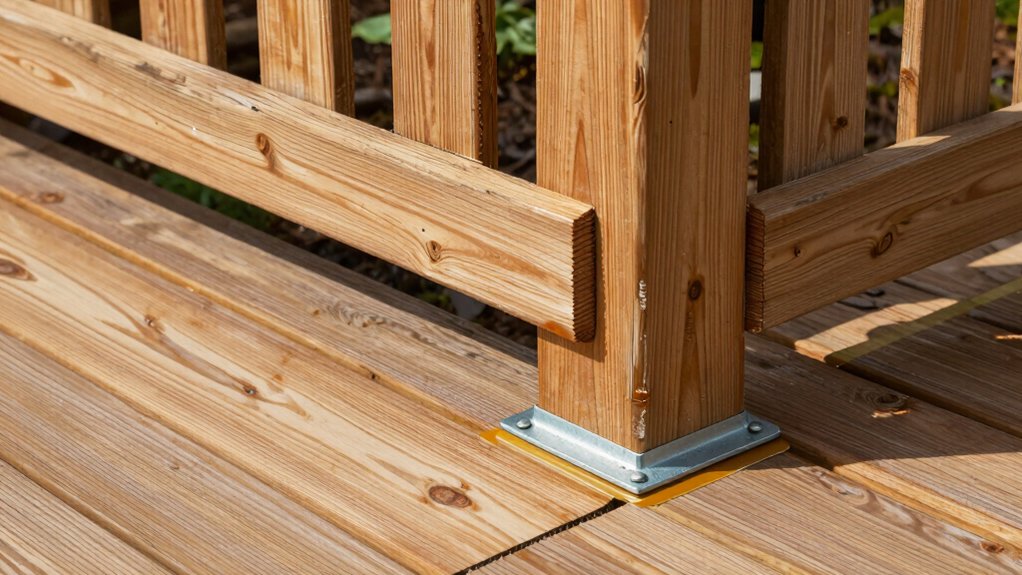
Exterior wood faces the elements, so choose weather-resistant coatings designed for outdoor exposure and UV stability. You demand durability, so select exterior-grade finishes built to endure rain, sun, and temp swings without cracking or peeling.
Focus on proven wood treatment and barrier formulations that resist moisture ingress while preserving natural character. For finish selection, prioritize systems that combine penetration, film protection, and mold resistance, limiting surface checking over time.
Color fastness and ultraviolet blockers extend service life without sacrificing restoration clarity. Opt for products labeled for exterior use, with clear compatibility notes for common species.
Apply in accordance with manufacturer guidance, maintaining proper surface prep and curing. Your goal: a resilient, low-maintenance exterior that remains visually stable and structurally sound.
Application Tips to Avoid Common Wood Repair Mistakes
Before you apply any repair, guarantee proper surface prep to maximize adhesion and longevity.
Then choose the right repair method for your material and defect, matching tools, filler, and finish to the job.
Skipping steps or mismatching methods invites failures, rework, and visible repairs.
Proper Surface Prep
Proper surface prep is critical to wood repair success: the substrate must be clean, sound, and properly abraded for adhesion. You secure a durable fix by controlling texture, density, and contaminants before any product contact. Focus on wood grain alignment and knot repair potential as you prep, ensuring uniform absorption and finish fidelity.
1) Debris removal: sweep, vacuum, and wipe with a mineral spirits–type solvent to reveal true surface condition.
2) Contaminant control: eliminate oils, tannins, and waxes; test for bleed and neutralize if needed.
3) Abrasion protocol: use progressive grits to create a uniform profile without gouges or furrows.
4) Drying and inspection: verify complete solvent evaporation, inspect for dust pockets, and re-sand high spots.
Proceed only after surface shows even sheen and ready adhesion baseline.
Choose Right Repair Method
To choose the right repair method, assess the wood’s condition, structural needs, and finish goals before selecting materials or techniques. Start by diagnosing damage type—crack, rot, veneer failure, or gouge—and estimate load implications.
Match repair method to severity: surface-fill for minor flaws, structural dowels or epoxy for compromised cores, and replacements for severely damaged sections. Prioritize material compatibility, moisture control, and long-term stability.
Avoid over-reliance on veneers or fillers that don’t bind; verify substrate readiness and coating compatibility after repair. Apply consistent backing, precise cuts, and appropriate curing times to prevent future gaps.
Be wary of wood repair myths and verify claims with evidence. Follow DIY repair tips that emphasize proper adhesion, alignment, and finish protection to ensure durable results.
Safety, Cleanup, and Long-Term Maintenance for Wood Repairs
Careful handling of wood repair products reduces exposure risks and guarantees lasting results; by following established safety protocols, you’ll minimize hazards during mixing, application, and cleanup.
You demand power, so precision governs every step. Adhere to safety precautions, inspect containers, and ventilate workspaces. Apply gloves and eye protection, and keep spills contained to simplify cleanup procedures. Store materials correctly to prevent deterioration and environmental impact.
Regularly review manufacturer data sheets for evolving guidelines and long-term maintenance needs to preserve bond integrity and finish quality.
- Follow safety precautions every time you work.
- Execute disciplined cleanup procedures after each session.
- Monitor for cure changes and surface aging.
- Schedule periodic maintenance checks to sustain performance levels.
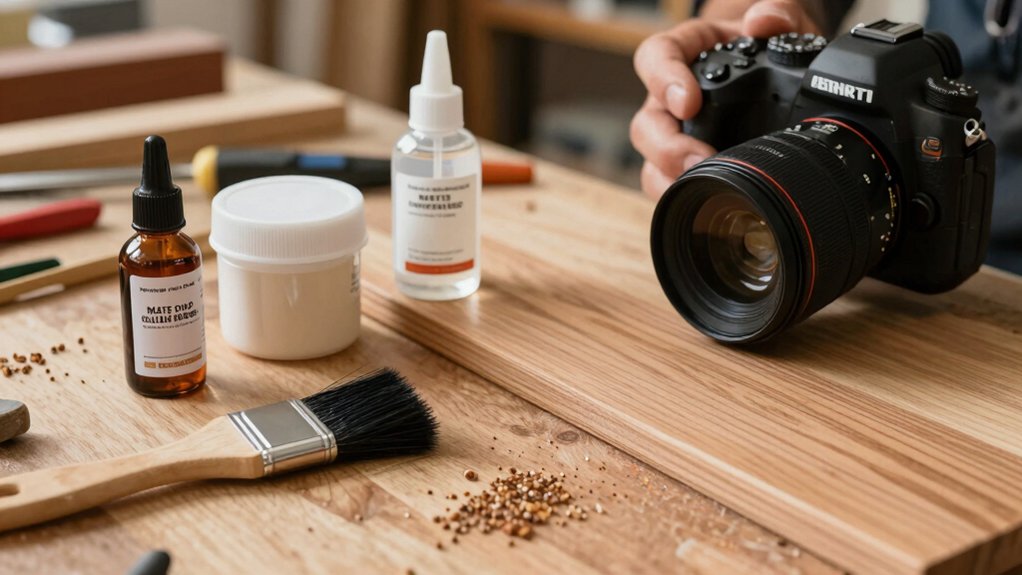
Building Your Wood Repair Toolkit: Choosing Based on Project Type
Choosing the right tools hinges on your project type, so select components that match the job’s scale, material, and repair method. Build a focused toolkit by prioritizing essentials: a sharp saw, chisels, scrapers, micro-files, a quality rasp, patches, wood filler, and a reliable clamp set.
For small defects, carry a fine-tiller or rot repair epoxy; for larger repairs, include epoxy putty and reinforced patches. Align abrasives to material type and desired finish, from sanding sponges to hand planes.
Emphasize woodworking safety with PPE and dust control, and plan tool maintenance routines—clean, sharpen, and store after every session. Your toolkit should enable precise, repeatable results, minimize waste, and support scalable workflows for future projects.
Maintain discipline in selection to sustain performance and longevity.
Conclusion
In the end, your project breathes again the moment you match the fix to the fault. Picture a grain that’s learned to sing once more as fillers fuse, epoxies seal, and glues bind with quiet certainty. Visualize a flawless finish shedding water like a leaf, a hinge that holds its voice, and joints that won’t waver. With the right blend of tools and technique, your repaired wood stands resilient, ready for years of use.