You might be surprised how often a squeak starts with a loose fastener, a coincidence that nails the problem to one spot. Start by locating the exact source, then choose a practical fix—tighten screws, insert shims, or apply adhesive along seams. Gather a drill, screws, shims, and a pry bar, and work carefully with the power off. If the noise won’t quit, there’s a reason to push further—and a method that could require more time or a professional touch.
Key Takeaways
- Identify squeak sources by testing suspect areas, marking spots, and rechecking to confirm locations before repairs.
- Inspect for loose boards, gaps, or fasteners, and address underlying moisture or structural movement affecting the floor.
- Use appropriate fasteners and shims, driving screws into joists and reseating panels to stop squeaks.
- Apply wood glue, filler, or adhesive along seams and edges, then re-tighten fasteners in a crisscross pattern.
- For temporary relief, add non-permanent padding or lubricants, plus area rugs, while monitoring results for a longer-term fix.
Diagnose and Decide: How to Find the Squeak and Pick the Right Fix
Start by pinpointing where the squeak is coming from. You’ll listen, press, and test—mapping suspect areas before you touch anything. Walk each room slowly, note soft spots, creaks with weight, and changes when you jump or shift.
Use a flashlight to spot gaps, warps, or loose panels that reveal thin gaps behind trim. Consider common causes like floor insulation gaps or subfloor moisture, which alter how boards rub or lift.
Decide on a fix by testing underlayment and joist alignment, not just the surface sound. Prioritize fixes that address structural movement first, then surface comfort.
If moisture is detected, address ventilation and humidity before sealing. Choose a method that minimizes future movement, and document your observations for the next steps.
Tools and Materials You’ll Need for Floor Squeaks
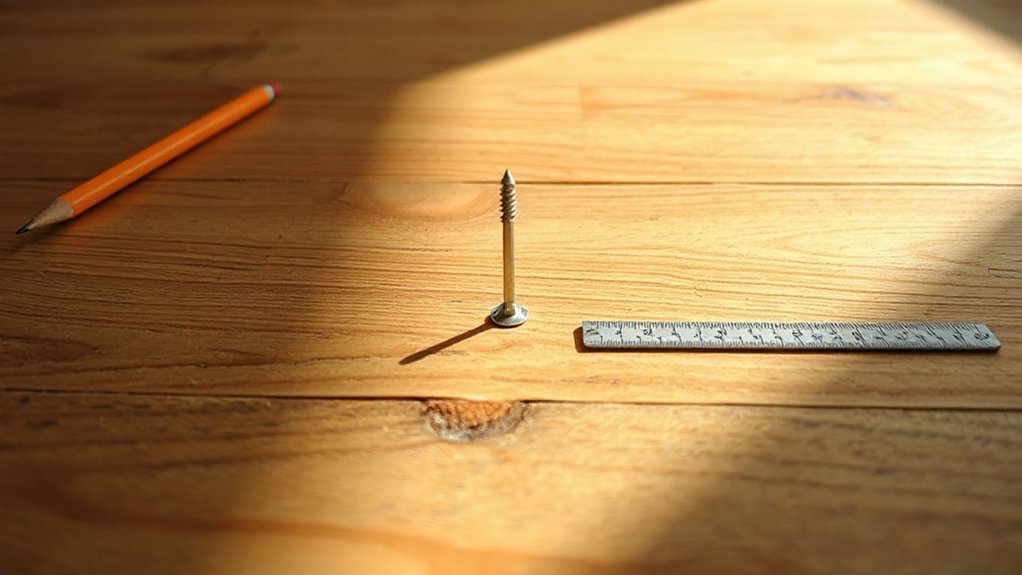
You’ll need a focused kit of tools and materials to tackle floor squeaks efficiently. Gather a tape measure, screwdrivers, a drill, a pry bar, and basic fasteners, plus shims, wood glue, and nails or screws suited to your floor type.
This starter list keeps you prepared to assess, access, and secure joists, planks, and subfloor areas without wasted steps.
Essential Tools List
To tackle floor squeaks effectively, gather the essential tools and materials before you start. You’ll need a tape measure, pry bar, hammer, and a utility knife for careful plank access.
Add a drill with bits, a countersink, and a screwdriver set to secure loose boards. Keep a square, level, and stud finder for alignment checks, plus shims and a mallet to adjust height without damage.
Have sanding paper, wood filler, and a wax stick or lubricant for quieting movement. Bring a pry bar pad to protect finishes.
For finishes, select a compatible floor finishing approach and storage for cleanup. Decorative inlays aren’t part of this phase, but plan placements later.
This list supports precise repairs without overextending scope.
Materials For Fixes
With the right tools and materials in hand, you’re set to address floor squeaks efficiently. Gather a basic kit: a flat pry bar, screw gun, countersink bit, and a drill with sharp bits. Have green-board screws or deck screws, wood filler, and matching wood glue on hand.
For access, keep a utility knife, chisel, and stud finder to locate joists and framing. You’ll also want a light hammer, measuring tape, and dust mask for safety.
Choose fasteners suited to your subfloor and joists, then plan around flooring styles you have, whether plywood, oak, or engineered planks. If your floor has decorative finishes, test a hidden area first.
Seal any gaps with compatible filler to maintain a clean, durable surface.
Safety First: Protect Your Space Before You Start
Before you crack open a squeaky floor repair, protect your space and yourself first. Clear the work area of pets, kids, and loose items, and create a minimal, well-lit zone to minimize hazards. Turn off the room’s power if you’ll be near outlets, screws, or exposed wiring, and wear sturdy shoes with good grip. Lay down a drop cloth or plastic to catch debris, and keep a trash bin handy. Guard flooring aesthetics by removing decorative items nearby to avoid scratches.
Inspect for hidden moisture or leaks, and address them before any tool use. Gather essential materials, such as floor insulation materials and a small flashlight for low-light spots. Safety first guarantees cleaner, faster, and more precise repairs.
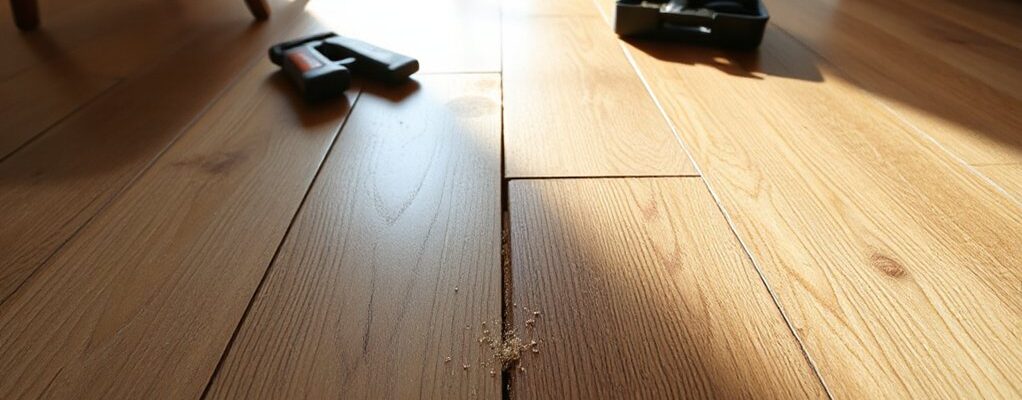
Locate the Exact Squeak: Step-by-Step Diagnosis
Pinpoint the exact squeak by methodically testing each area of the floor. You’ll locate the sound by separating floorboards, then walking the room slowly to reproduce the squeak. Start at the center of the room and work outward, marking trouble spots with a pencil or painter’s tape.
Press firmly on suspected boards, then step off and re-test, noting whether the noise changes with weight or motion. Listen for changes near joint lines, nails, or fasteners, and check adjacent panels for loose edges.
Consider floor insulation as a factor if the squeak alters with temperature or humidity. When you identify a culprit, document its location relative to decorative finishes, so you can address it without disturbing the aesthetics.
Proceed to targeted fixes in the next step.
Quick Fixes for Squeaks in Wooden Subfloors
Quick fixes can quiet squeaks fast without major overhaul. You’ll start by locating the audible source and isolating it from the rest of the subfloor. First, clean the area so you can see fasteners and joints clearly.
If the squeak comes from nails, drive the nail slightly deeper with a nail-set to compress the subfloor, then countersink and dab with wood filler.
For loose boards, insert a length of wood shims behind the subfloor near the joist and secure with screws, not nails.
Lubrication isn’t a long-term fix for wood, but you can rub powdered graphite into the seam to dampen noise temporarily.
Consider Flooring trends and eco-friendly materials when choosing replacements for future upgrades to reduce squeaks.
Tighten Squeaky Hardwood Floors: Plank-Level Fixes
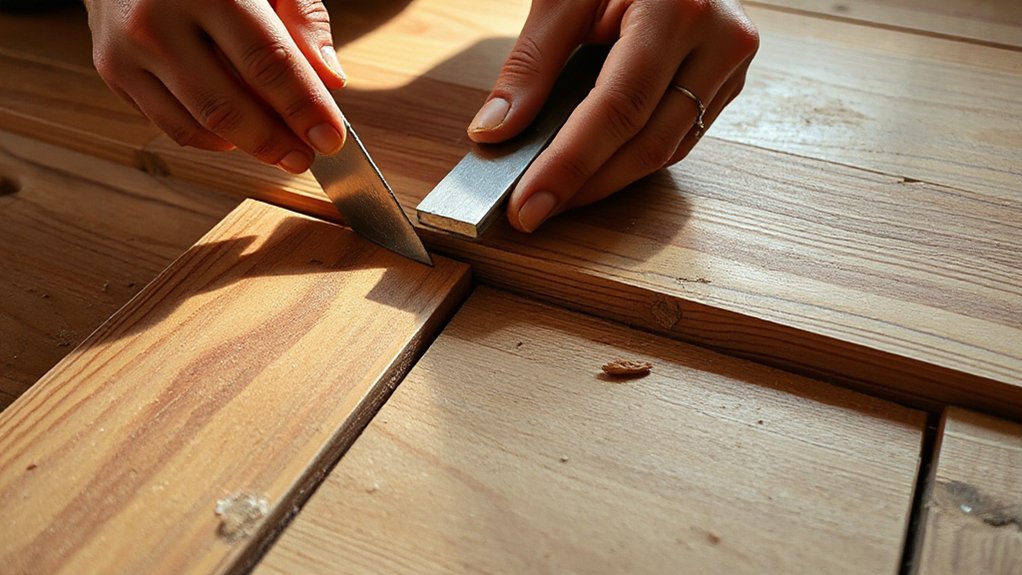
Plank-level squeaks are most often caused by movement between individual hardwood boards, so start by locating the exact plank pairs that rub or flex.
Once you’ve pinpointed them, drive the problem area with a thin shim oricate between the boards at the tongue-and-groove seam. If you see gaps, insert a matching wood shim cut to fit; tap gently to seat the shim and minimize movement.
Check the entire floor section for any looseness, re-seating nails or fasteners as needed without over-tightening. Wipe away dust to prevent debris from causing further creaks.
After tightening, test walkability and note any remaining noise. This approach preserves flooring aesthetics and decorative finishes while restoring quiet, stable planks.
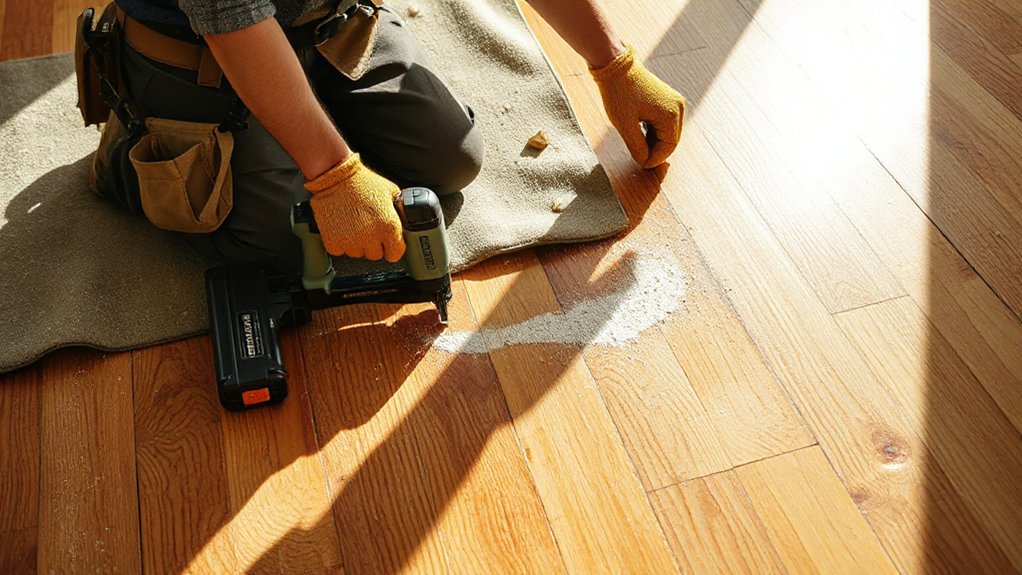
Squeaks Over Joists: When to Use Screws
When squeaks run across joists rather than between boards, screws become a targeted fix. You identify the squeak path by pressing along flooring edges and listening for movement over each joist.
Remove carpet where you must, exposing floor insulation and subfloor along the joist run.
Drive screws perpendicular to the boards, sinking heads just below the surface to clamp the board to the joist without tearing insulation.
Space screws about 8 to 12 inches apart where you hear the creak, then recheck by walking the area.
If the squeak persists, add a second screw in line with the first, ensuring the screw bites into solid wood, not hollow subfloor.
Keep notes on timing and locations for future maintenance.
Loose Floorboards: Tighten or Shim Approaches
If you’ve got loose floorboards, you can tighten them or shim beneath them to restore a solid feel without a full floor replacement. Begin by locating the squeak, then remove obstructing items or trim to expose the boards.
Check for nail pops or loose fasteners; drive each nail or screw snugly without tearing the wood grain. For tighter action, insert thin shims (card or wooden wedges) under high spots, working gradually and testing after each adjustment.
Use shims on the subfloor only if you must; avoid compressing the entire plank. Re-fastening with finishing nails can help, but countersink them slightly and fill afterward.
Consider flooring aesthetics and historical restoration standards before altering original materials, choosing discreet fasteners and compatible finishes to maintain integrity and appearance.
Squeaks in Plywood Subfloors: Patching and Re-Fastening
Start by patching any loose subflooring to create a solid base, then re-fastens the plywood edges to restore their grip.
Next, secure the panels so seams don’t ride up and your squeaks vanish as you walk.
You’ll maintain a quiet floor by focusing on precise patches, edge fasteners, and consistent panel seating.
Patch Loose Subflooring
Small gaps or movement in a plywood subfloor cause squeaks, so start by locating the loose sections and marking them for re-fastening. You’ll re-secure using screws or ring shank nails, driven at a diagonal pattern to pull the subfloor flat without splitting.
Space fasteners about 6 to 8 inches apart along each seam, and drive them flush just beneath the surface. If you encounter gaps wider than 1/16 inch, insert a pinch block or filler to maintain uniform adhesion.
After fastening, test for smoothness by walking the area. Recheck any high spots and add fasteners as needed.
Consider floor insulation and decorative finishes later in the project, ensuring the subfloor remains flat and solid for a clean, lasting result.
Re-Fasten Plywood Edges
Edges of the plywood subfloor can loosen after the main sections are fastened, so focus on securing those border seams to stop squeaks. Begin by inspecting all edge joints for slight gaps. If you find gaps, slide a thin wedge or pull-back shim under the seam to press it tighter against the joist.
Re-fasten with ring-shake nails or evenly spaced screws along the border, every 6 to 8 inches, ensuring they penetrate solid wood. Don’t overtighten, which can crush fibers and create more noise.
Check adjacent panels for bowing and re-seat as needed. While you work, consider floor insulation where gaps exist to minimize future movement.
Use appropriate subfloor materials and confirm all fasteners sit flush, then test by walking gently across the area.
Secure Squeak-Free Panels
To quiet squeaks, inspect each plywood panel for loosened seams and gaps, then patch and re-fastening as needed.
Begin by locating creaky grooves, then brush away dust and debris for a clean surface.
Apply construction adhesive along seam lines, not across faces, to avoid stiff spots.
Place wood shims under lifted edges to seat panels flush with joists, tapping gently with a mallet.
Re-tighten screws or nails in a crisscross pattern to distribute load evenly, avoiding overdriving.
Wipe excess glue before it dries.
Check for stability by walking the area; repeat steps if new creaks appear.
If you’re adding floor insulation or decorative flooring later, ensure panels remain even to prevent future squeaks and maintain a solid, quiet subfloor.
Watch for Wires and Pipes: Avoid Damage
Before you start prying or drilling, check for live wires and plumbing that could be hidden beneath the floor. You’ll inspect joists and access points, looking for electrical boxes, gas lines, or vent runs that could be disturbed.
Use a stud finder with live-wire detection and shut off the relevant circuits before touching any concealed paths. Gently probe with a thin tool to confirm nothing unexpected sits under the boards, then proceed with care.
If you encounter insulation or joist blocking, bypass it rather than forcing a hole. Maintain floor aesthetics by planning your cutouts to minimize visible gaps and preserve decorative finishes.
Document any hazards for later repair, so you avoid rework and keep the project clean, safe, and precise.
Do Adhesives Help? Quieting Options Explored
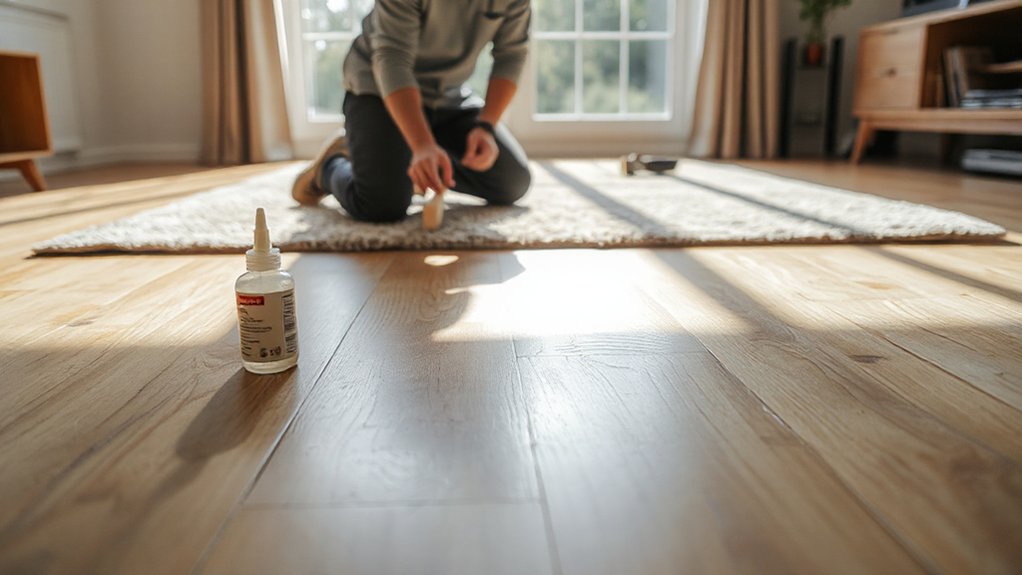
Adhesives can play a meaningful role in quieting a squeaky floor, especially when you’re dealing with loose boards or gaps that loosen under load. You’ll start by selecting an adhesive type suited to wood joints and the floor’s substructure.
For pounded boards, use a fast-acting wood glue with good gap-filling ability. If you’re anchoring shims, consider adhesive types that remain pliable enough to accommodate minor movement without hardening into a brittle crack.
Apply a thin bead along the joint, then clamp or press the board to seat it fully. Test bonding strength by stepping carefully and checking for residual movement.
If noise persists, reapply where gaps are evident, ensuring a solid, continuous contact. Track performance, and adjust technique as needed for durable quiet.
Expansion Gaps and Seasonal Shifts: Addressing Movement
Seasonal temperature and humidity shifts cause expansion gaps to open and close, so you should plan for movement rather than fight it. You’ll observe boards moving with the seasons, which can create new creaks if you ignore gaps.
Inspect the floor edge and underlayment for consistent spacing, then adjust seasonal gaps before problems escalate. Use a thin shim under loose boards, targeting high-traffic areas first, while avoiding forcing boards together.
Control moisture in the subfloor environment by air-drying damp spots and using a dehumidifier in humid months. Maintain a steady indoor climate, and reseal edges after seasonal changes to keep gaps predictable.
Document movement patterns, then schedule periodic checks. This approach emphasizes seasonal expansion awareness and moisture control to minimize squeaks.
Pro Techniques: Structural Screws and Metal Plates When Needed
Structural screws let you pull subfloor sections tight without large gaps.
Place metal plates over high-friction joints to distribute load and reduce squeaks.
Then run screws in a cross pattern for even pressure.
Use targeted pressure redistribution techniques to neutralize movement and prevent future creaks.
Structural Screws Used
Have you ever wondered why structural screws beat traditional fasteners for squeaky-floor repairs? Structural screws offer repeatable, clamp-like power with precise thread engagement, reducing the chance of loosening over time.
Use bugle-head or underlayment-friendly variants to minimize surface intrusion, and drive with steady, perpendicular pressure to avoid cam-out.
For subfloor-to-joist connections, predrill where necessary to prevent splitting and ensure clean seating, then tighten to manufacturer-recommended torque.
Keep fasteners aligned with joists to maximize pull-through resistance and minimize movement that causes squeaks.
When reinstalling finish materials, consider furniture arrangement to avoid high-traffic, edge-loaded zones that stress repaired areas.
Note how carpet installation and smooth transitions influence load paths and long-term stability, guiding screw placement decisions for durable results.
Metal Plate Placement
Want extra bite on suspect joints? You’ll apply metal plate placement only after a solid squeaky floor diagnosis.
Position plates over the joint area where boards flex or creak, aligning with underlying framing. Use a thin, corrosion-resistant plate and drive structural screws at the plate corners, not through the boards. Pre-drill to avoid splitting, then seat screws flush with the plate surface.
Check that the plate sits flat, without lifting edges, and tape or caulk to seal against dust intrusion. Re-test by walking the area; if sounds persist, reassess the joint and consider additional plates or alternative fasteners.
Document each fix for future reference, ensuring your method remains consistent and repeatable across similar squeaky floor diagnosis scenarios.
Pressure Redistribution Techniques
Pressure redistribution uses targeted fasteners to shift load away from a stressed joint. You’ll place structural screws to bite into solid framing, then add metal plates where joints show movement or grain orientation conflicts.
Start by locating high-load nodes under squeaks and mark their centerlines. Drive screws at a shallow angle to grip both plate and wood, avoiding predrilled weak points.
Use plates to bridge gaps across joists or into ledger connections, maintaining a snug, even distribution of pressure.
Check floor insulation and moisture control before closing cavities; worn insulation can shift load and reintroduce noise.
Recheck screws after a few days of use and tighten as needed. Document any persistent creaks, as lingering movement often signals hidden voids or settled subfloor.
Temporary Solutions for Renters: Quiet Now, No Long-Term Changes

Temporary solutions for renters should focus on quick, non-destructive fixes that reduce noise without committing to permanent changes. You’ll act fast by locating the squeak’s source beneath your rug or floorboard and testing gentle interventions.
Step one: add thin shims or adhesive padding between the subfloor and joist at the exact squeak location, pressing firmly to reduce movement.
Step two: loosen and re-tighten nearby fasteners if safe, avoiding wall damage.
Step three: apply non-permanent lubricants (silicone spray on the joint, not on finished surfaces), then walk to confirm quieter results.
Step four: place area rugs or motion-damping pads to dampen vibrations without altering flooring aesthetics or decorative finishes.
Track improvements, document what worked, and avoid any permanent floor alterations.
Long-Term Care: Maintenance Habits to Prevent Squeaks
Long-term care for squeaky floors means building a routine that prevents movement before it starts. You’ll establish a once-a-month inspection schedule: test high-traffic zones, tighten loose fasteners, and reseal joints as needed. Keep a simple checklist noting creak sources, timid fixes, and consistent outcomes.
Use eco-friendly materials for any repairs or upgrades, prioritizing breathable sealants and low-VOC finishes to protect floors without harming indoor air. Maintain humidity between 35% and 50% to minimize wood expansion and contraction.
Apply preventive lubrication only to areas showing movement, avoiding oversaturation that can attract dust. When refinishing, select aesthetically cohesive finishes, aligning with room style while preserving floor integrity.
Document routines, adjust seasonal needs, and curb squeaks before they emerge.
When to Call a Pro: Signs You Need Expert Help
There are clear warning signs that you shouldn’t DIY a squeaky floor fix: persistent creaks that span multiple rooms, sounds louder than usual, or a wobble that affects stability. If you encounter structural looseness, shifting subfloor, or suspect hidden damage, pause and call a pro.
You’ll want a specialist who can assess joists, fasteners, and the underlayment without creating more issues. Expect a professional to determine whether repairs involve fastening, shim adjustments, or subfloor replacement, while protecting decorative finishes and keeping aesthetics intact.
They’ll also address vibration isolation and load-bearing concerns to prevent recurring noise. If you notice inconsistent results after a home fix, or if safety feels compromised, seek expert help promptly to avoid costly, repetitive fixes.
Prioritize precise workmanship over DIY shortcuts.
Frequently Asked Questions
Can Squeaks Indicate Hidden Structural Damage?
Yes, squeaks can hint at hidden damage, but they don’t guarantee it. You assess structural integrity by checking joists, subfloor, and fasteners, looking for looseness, cracks, or movement; address any hidden damage before finishing repairs.
Are Rubber Boots or Mats Effective for Squeaks?
Yes, rubber mats can help with light squeaks, but they won’t fix structural causes. Place rubber mats over high-traffic areas and guarantee floor padding beneath is intact; this reduces movement and dampens noise more effectively than mats alone.
Do Temperature Changes Worsen Floor Squeaks Quickly?
Yes, temperature effects can worsen floor squeaks as materials expand and contract. You’ll notice floor expansion during heating and shrinking when cooling, so monitor joints, secure loose boards, and recheck fasteners to minimize rapid squeaks.
Will Library Silence Be Damaged by Quick Fixes?
Sure—quick fixes won’t damage library silence; you’ll just mask it briefly. You’ll notice library noise fades as you apply methodical, practical steps, balancing precision with irony, and you’ll avoid worsening the squeak through careful, deliberate actions.
How Long Should Temporary Fixes Last Before Re-Evaluation?
Temporary fixes last a few days to a couple of weeks; re-evaluate if squeaks persist. For durable results, implement flooring maintenance steps and squeak prevention measures, then monitor changes, adjusting fasteners and lubrication as needed.
Conclusion
You’ve got this. With careful diagnosis, you’ll pinpoint the squeak and choose the right fix, from tightening fasteners to shim placement. Gather your tools, protect the space, and methodically apply each step, rechecking as you go. For stubborn creaks, reseat the flooring or add fasteners, and don’t hesitate to call a pro if you suspect structural issues. Think of the floor as a guitar—adjust the strings, and the melody of quiet will return.