You’ll notice a coincidence: your tiny bathroom already hints at a smarter layout. Start by prioritizing wall-hung fixtures and pocket doors to free floor space, then zone wet, dry, and prep areas for smooth flow. Think compact, footprint-friendly vanities and tall, slim storage to maximize capacity without crowding. With smart lighting and recessed storage, you’ll see how small tweaks transform the room—and there’s more to uncover that can keep the vibe calm, coordinated, and truly functional.
Foundational Principles That Visually Expand a Small Bathroom
When you’re designing a small bathroom, the goal is to draw the eye through the space rather than trap it in a corner. You’ll focus on foundations that make every square inch read as larger. Start with light, neutral colors and reflectivity—pale walls, gloss tiles, and a frameless mirror to bounce light.
Use vertical lines—tall cabinetry, narrow niches, and stacked storage—to draw the gaze upward. Prioritize bathroom ventilation and moisture control to keep surfaces crisp and free of haze, which preserves perceived depth.
Choose a clear floor plan with integrated fixtures and a floating vanity to create uninterrupted floor space. Align outlets, shelves, and shower hardware for a cohesive rhythm that visually expands without clutter.
Subtle, well-placed textures add interest without crowding the room.
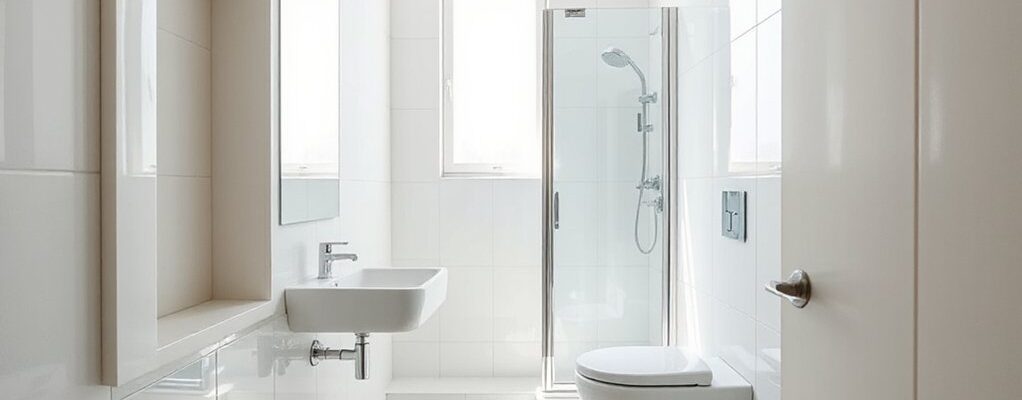
Prioritize Wall-Hung Fixtures to Save Floor Space
Using wall-hung fixtures frees floor space and creates a cleaner, more open feel. They also elevate storage options on the wall, helping you keep essentials within easy reach.
The streamlined look enhances practicality and aesthetics while making the bathroom look larger.
Wall-Mit Fixtures Save Space
Are you maximizing space without sacrificing style? Wall-mit fixtures let you reclaim floor area without dulling design. You’ll appreciate how wall fixtures streamline layouts: a compact basin paired with a wall-mounted faucet creates a clean line and easy cleaning underfoot.
Choose wall fixtures with slim profiles and concealed hardware to keep surfaces uncluttered. Opt for wall-hung vanities or toilets to visually expand the room and improve accessibility for cleaning or future swaps.
Consider integrated storage within the wall unit to keep essentials tucked away, preserving the open feel. When selecting lighting, keep it close to fixtures to avoid shadows and emphasize vertical lines.
This approach delivers a practical, aesthetic, space-saving strategy you can implement today.
Elevate Storage With Wall-Hung
Wall hung fixtures maximize sightlines and make cleaning easier, creating a calmer, more deliberate vibe. Choose compact, gravity-defying vanities or cabinets that tuck neatly under mirrors, offering hidden storage without crowding the room.
Pair with wall mounted toilets or bidets to reclaim square footage without sacrificing function. Opt for open shelves above sinks to display daily essentials while maintaining order.
Use wall hung furniture with soft edges and unified hardware for a cohesive look. Space saving furniture should feel deliberate, not crowded, and always anticipate future needs.
Streamlined Look, Open Floor
Streamlined looks come from keeping the footprint airy, so prioritize wall-hung fixtures that free floor space and draw the eye upward. You’ll gain a sense of openness without sacrificing function.
Choose wall-mounted vanities with slim profiles to keep essentials accessible yet uncluttered, and pair them with compact, wall-hung toilets to maximize floor area for movement.
Use vertical storage cleverly—recessed niches and tall cabinets keep bath items out of sight and eyes focused upward.
Establish a cohesive color scheme to enhance the perceived space; light neutrals with subtle contrast feel breathable, while bold accents create depth.
Add decorative accents that stay lean—sleek mirrors, minimal hardware, and understated lighting.
This approach delivers a calm, practical, and stylish bath that reads larger than its footprint.
Use Tall, Slim Storage for Maximum Capacity
When you’re maximizing a small bathroom, tall, slim storage is your best ally, because it stacks function without stealing floor space. Vertical storage keeps detergents, towels, and cosmetics neatly organized, so you waste less time hunting items.
Choose slim cabinets that tuck beside a sink or narrow wall, letting you reclaim countertop and toe-kick area for daily tasks. Install adjustable shelves inside to accommodate varying products, and opt for doors with mirrors to double as a vanity.
Consider deep, pull-out drawers for easy access to lower shelves, reducing clutter. Wall-mounted options free floor space, enhancing flow and cleanliness.
Finish with a cohesive palette and minimal hardware to preserve a calm, curated look.
Pocket Doors: Seamless Entry Without Swing Space
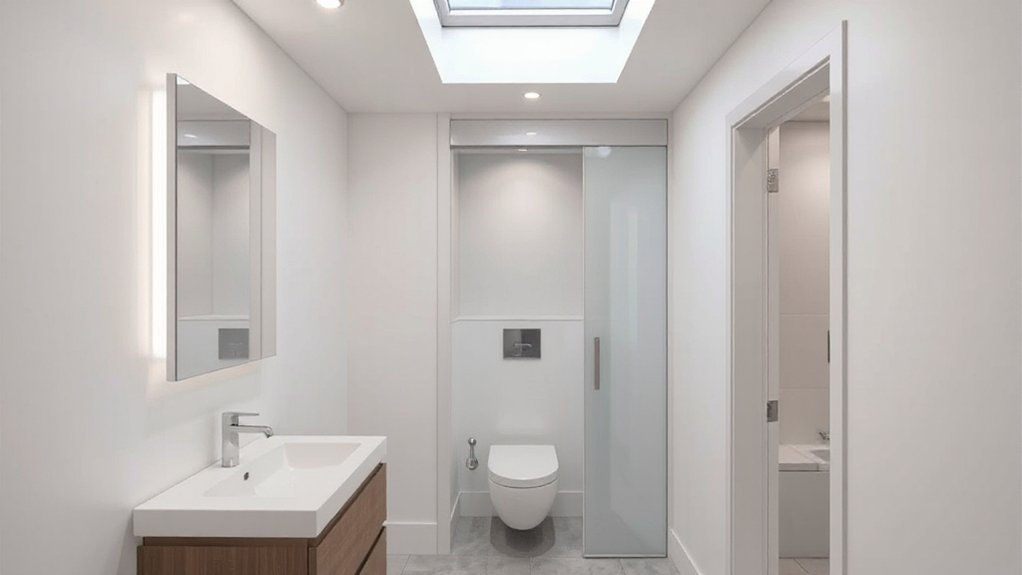
Pocket doors keep a small bathroom airy by tucking the entry out of the way, so you gain usable wall and floor space without sacrificing privacy or style. You’ll enjoy a seamless entry that feels integrated with the room, not separate hardware.
Choose a lightweight, solid-core material for quiet operation and durability, then finish with a matte or glossy tone that matches your fixtures. Track systems should be smooth and unobtrusive, minimizing protrusion into the room.
Pocket doors emphasize clean lines and can be paired with soft-close hardware to avoid jostling doors in tight spaces. When selecting designs, consider translucency or frosted glass for privacy without sacrificing light.
Create Smart Zoning With Corner Nooks and Built-Ins
Corner nooks and built-ins layer smart zoning into a small bathroom, turning underused corners into functional zones for storage, seating, or a compact vanity. You leverage these areas to keep essentials at hand without clutter, creating distinct zones for dry, wet, and prep tasks.
Corner nooks can hold towels, baskets, or a slim seating ledge, while built-in shelves provide staggered storage that breathes with the room’s proportions. Choose shallow depths and softly rounded edges to preserve clearance, and pair with toe-kick lighting for visibility without glare.
Maintain a cohesive look by matching finishes to your fixtures, hardware, and vanity hardware. The result is a calm, organized space that reads as larger, performance-forward, and intentionally designed for daily routines.
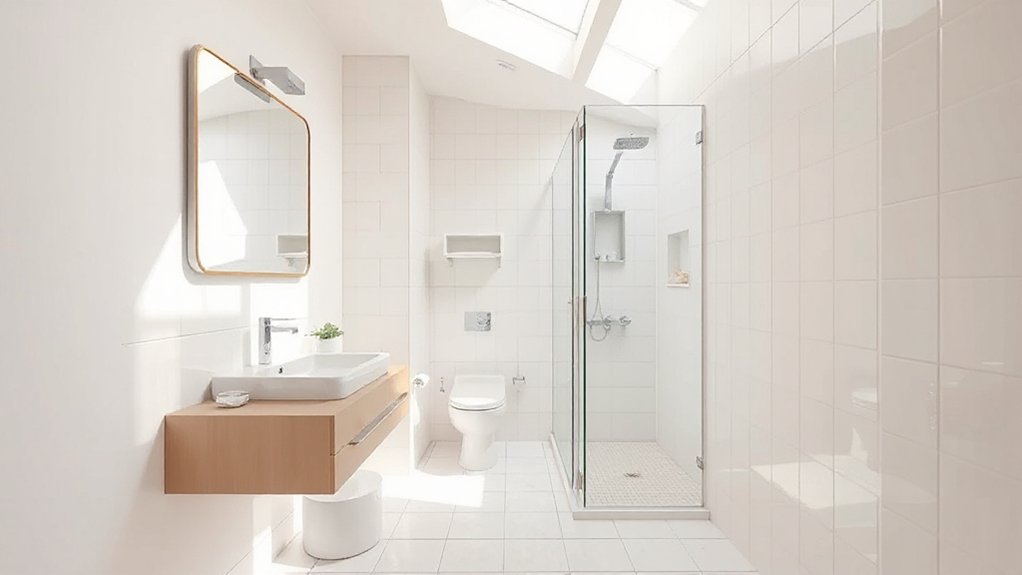
Floating Vanities: Balance Height, Depth, and Clearance
Floating vanities can balance height, depth, and clearance to maximize small-bathroom flow. When you choose a vanity that sits off the floor or wall-mounted, you create a busier visual plane that reads cleaner and taller.
Target a height that suits your posture and daily routines, keeping enough knee space beneath for comfort. A shallow depth minimizes footprint while preserving storage insight; you’ll still store essentials without crowding the room.
Consider a slim countertop overhang to lengthen sightlines and add a touch of elegance. Pair with open shelving or a drawer layout that prioritizes frequently used items at reachable levels.
With thoughtful proportions, bathroom height feels consistent and the space breathes.
Recessed Plumbing for a Cleaner, Calmer Bath
To create a calmer bath, recessed plumbing hides unsightly pipes within the walls, giving the space a seamless, uncluttered feel. You’ll gain a tidier silhouette and easier surface cleaning when pipes are tucked away, not interrupting sightlines.
Plan routes behind solid backing or within soffits, prioritizing bathroom fixtures you actually use daily. This approach supports minimalist fixtures, letting clean lines and simple shapes dominate without visual competition.
Choose compact valves and concealed connections to preserve wall continuity, enhancing perceived space. Consider access panels smartly placed for maintenance, so you don’t sacrifice practicality for aesthetics.
Light Colors and Reflective Surfaces to Expand Visually
Light colors and reflective surfaces bounce light across the room, making a small bathroom feel brighter and more expansive. You’ll notice airy whites, soft beiges, and cool blues that visually widen walls and ceilings, reducing perceived clutter.
Choose matte finishes for walls and glossy accents for fixtures to balance warmth with shine, preventing glare. Color psychology suggests calmer, lighter palettes encourage perceived space, while reflective decor—polished tiles, glass shelves, and mirrored cabinets—amplifies light without crowding.
Keep tones cohesive to avoid jarring contrasts; unify hardware finishes for a streamlined look. Emphasize verticals: light walls with pale trim draw the eye upward, increasing ceiling height perception.
Limit busy patterns; subtle textures preserve depth. This approach yields a calmer, more expansive bathroom without sacrificing function.
Strategic Mirror Placement for Depth
Strategically placed mirrors can create instant depth in a small bathroom. You’ll boost perceived space by pairing vertical and horizontal mirrors to multiply light paths, avoiding heavy frames that chunk the room.
Place a tall mirror opposite a window or bright fixture to bounce daylight across surfaces, widening the sense of scale.
Mirror symmetry matters: balance one large panel with two smaller panels for a cohesive rhythm that guides the eye without clutter. Consider a frameless design for a seamless, reflective effect that reads spacious.
Use reflective tiles around the vanity or backsplash to echo the mirror’s glow, reinforcing depth without adding bulk.
Keep distances comfortable; avoid over-mirroring, which can feel busy or disorienting.
Luxurious, Space-Saving Shower Options
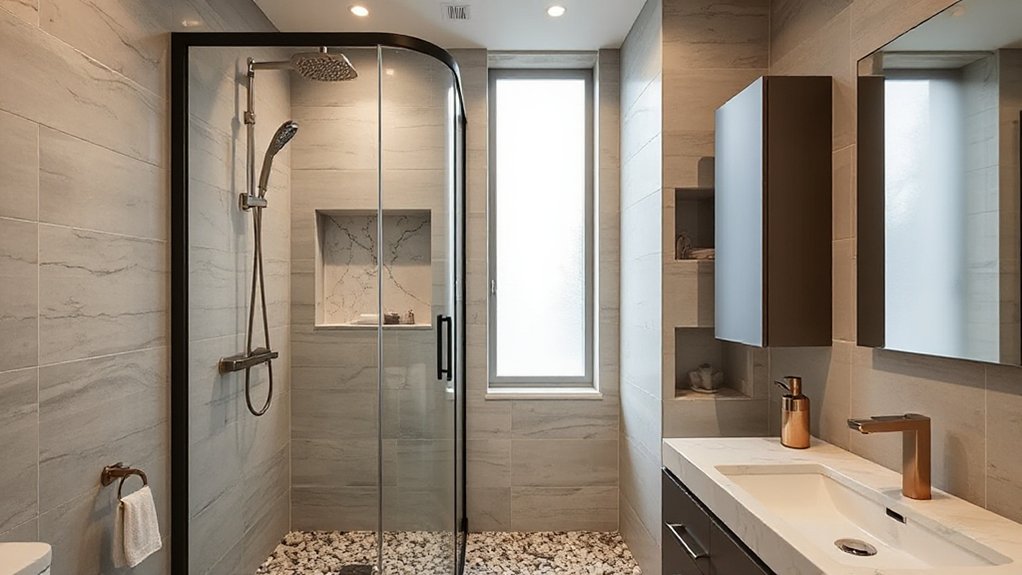
Why settle for a cramped shower when you can redefine luxury in a compact footprint? In small baths, choose a shower enclosure that reads as a premium detail, not a compromise.
Opt for a frameless glass panel to visually expand the space, and install a single, efficient shower valve to minimize clutter.
Prioritize luxurious rainfall settings that feel spa-like without bloating the footprint, and pair them with a wall-mounted thermostat for precise control.
Space-saving fixtures, like recessed shelves and a slim drain, keep everything tidy while maximizing clearance.
Consider a curved or recessed corner unit to soften corners and avoid angular dead zones.
Finish with neutral tiles and a subtle trim to maintain calm, cohesive aesthetics.
Niche Shelving and Recessed Alcoves in Showers
Niche shelves give you targeted storage that stays out of the way while you shower.
Recessed alcoves enhance the look with clean lines and reduce clutter, boosting the shower’s aesthetic without stealing space.
This setup also improves storage efficiency, letting you keep essentials organized and within easy reach.
Niche Shelves Benefits
You can’t beat niche shelves for keeping essentials close at hand in a shower. Niche shelving adds storage without stealing square footage, so your shower stays sleek and functional.
Recessed alcoves reduce clutter by housing soaps, shampoos, and razors in dedicated spots, freeing shower ledges for a clean, open feel. The key is thoughtful placement: near the showerhead for easy reach, at an accessible height, and away from the direct spray of water to reduce water spotting.
Decorative niches offer a subtle design cue, elevating the space with texture and material contrast while remaining practical. Choose durable, water-resistant materials and simple hardware to keep maintenance minimal.
Together, niche shelving and decorative niches optimise efficiency, style, and flow in small bathrooms.
Recessed Alcoves Aesthetics
Recessed alcoves elevate shower storage from functional to refined by pairing utility with textural depth. You’ll enjoy clean lines that shrink visual clutter while adding architectural interest.
Recessed alcoves feel like built-in furniture, not boxes, so they blend with tile, grout, and fixtures for a cohesive look. When planning, target even spacing and accessible heights to maximize daily use.
Consider materials that echo your shower’s finish for aesthetic integration—polished stone, ceramic, or matte tile with a sealed edge. Lighting matters too: soft LED strips inside alcoves illuminate bottles without glare.
Use shallow shelves for essentials, deeper pockets for shampoo, and a corner niche for a bar of soap. The result is organized, calm, and timeless, reinforcing a strategic, stylish bathroom rhythm.
Shower Storage Efficiency
A smart shower storage plan blends function with form by pairing niche shelving and recessed alcoves to maximize space and keep daily routines effortless. In this setup, you place essentials at arm’s reach without crowding the shower line, so it stays clean and efficient.
Niche shelves should be shallow enough to prevent water pooling, and alcoves must align with your shower schedule to minimize cross-traffic. Choose materials that resist humidity and match the tile or paint theme for a cohesive look.
Plan for adjustable baskets or hooks inside the niches to accommodate daily needs. Consider Showerhead types and water-saving fixtures to cut your daily usage while maintaining comfort.
Finally, keep the layout logical: soap, shampoo, and tools grouped by function for seamless, clutter-free routines.
Dual-Use Furniture: Folding Seating and Laundry-Ready Storage
Dual-use furniture combines form and function, letting your small bathroom stretch farther with folding seating that tucks away and laundry-ready storage that keeps essentials organized and off the floor. You’ll gain surface area for daily tasks without sacrificing style, because these pieces act as design anchors as well as helpers.
Choose compact stools or benches with integrated bins or a slim valet shelf that flips to reveal a laundry basket. Prioritize eco-friendly fixtures and materials, so every hinge, textile, and finish feels responsible.
Add vintage accents through hardware, legs, or a retro color palette to elevate the space without adding bulk. This approach stays practical, aesthetic, and strategic, delivering clutter control, easier routines, and a cohesive, timeless look.
Smart Layout Frameworks: U-Shape and L-Shape Workflows
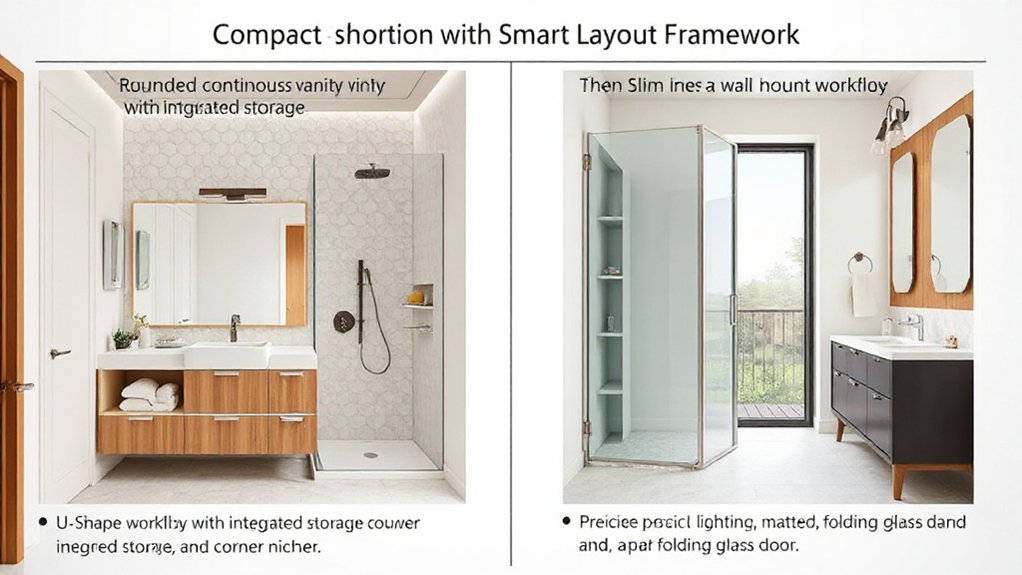
A U-shape layout guides your sinks, toilet, and shower into a cohesive workflow, keeping traffic smooth and lines short.
An L-shape optimizes corner space, freeing up a walkable zone while boosting storage and accessible surfaces. These frameworks help you tailor small-bath routines around the three points—U-Shape Layout Flow, L-Shape Space Optimizers, and efficient Workflows For Tiny Baths—without crowding the room.
U-Shape Layout Flow
A U-shape layout streamlines workflow by placing the sink, stove, and fridge on three connected walls, forming a practical corridor that supports smooth, uninterrupted movement. You move efficiently between zones, keeping essentials in reach while preserving open floor space for a compact, restful feel.
This configuration emphasizes function without sacrificing style, blending compact storage with deliberate sightlines. Choose enduring surfaces and clean edges to maintain clarity in a tight footprint. Vintage fixtures add character, while streamlined cabinetry preserves a coherent flow.
Artistic tiles punctuate the backsplash or accent wall, creating focal points without clutter. Prioritize corridor width, proper lighting, and accessible drying or cleaning zones to sustain practicality.
With purposeful zoning, the U-shape delivers both efficiency and a calm, cohesive aesthetic.
L-Shape Space Optimizers
This layout emphasizes L shape efficiency: everything you need lands along two perpendicular axes, reducing wasted steps and visual clutter. Corner optimization maximizes usable space, tucking fixtures into edges while preserving a comfortable center corridor.
Choose compact, wall-mounted vanity and corner basin options to maintain openness. Use cohesive materials and a restrained color palette to reinforce a unified, expandable feel.
Prioritize easy maintenance, adequate lighting, and accessible storage to sustain long-term practicality and aesthetic appeal.
Workflows For Tiny Baths
Smart layouts for tiny baths optimize workflows by pairing U-shape and L-shape patterns with clear task sequences. You design around zones: wet, dry, and storage, so every move feels deliberate rather than awkward.
In a U-shape, you sweep from sink to shower to toilet, keeping water, towels, and tools in reachable proximity.
An L-shape streamlines traffic by anchoring main tasks to two perpendicular walls, reducing cross-traffic and arranging a compact vanity corner.
Prioritize quiet, efficient operations with access to Eco friendly fixtures that minimize steps and maintenance.
Material choices stay lightweight and durable, supporting rapid cleaning and reconfiguration.
Add Vintage accents for character without clutter, then refine with consistent pedestals, slim shelves, and hidden cords.
Your tiny bath becomes calm, functional, and stylish.
Zoning With Rhythm: Define Wet and Dry Areas
In a small bathroom, clear rhythm comes from smart zoning: separate wet and dry zones so moisture, steam, and towels don’t collide with towels and mirrors. You define wet zones where water flows—shower, tub, and vanity—using resilient materials, proper drainage, and sealed edges.
Dry zones stay calm, with cabinetry, countertops, and towels kept away from spray zones to preserve reflectivity and cleanliness. Use color contrast to guide the eye: a darker shower wall against lighter floors creates instant orientation, while consistent trim ties the space together.
Focus on decorative accents that reinforce the zone logic: a rinse of metal hardware, a woven basket, and a single, purposeful rug. This strategic separation yields efficiency, comfort, and a polished, cohesive feel.
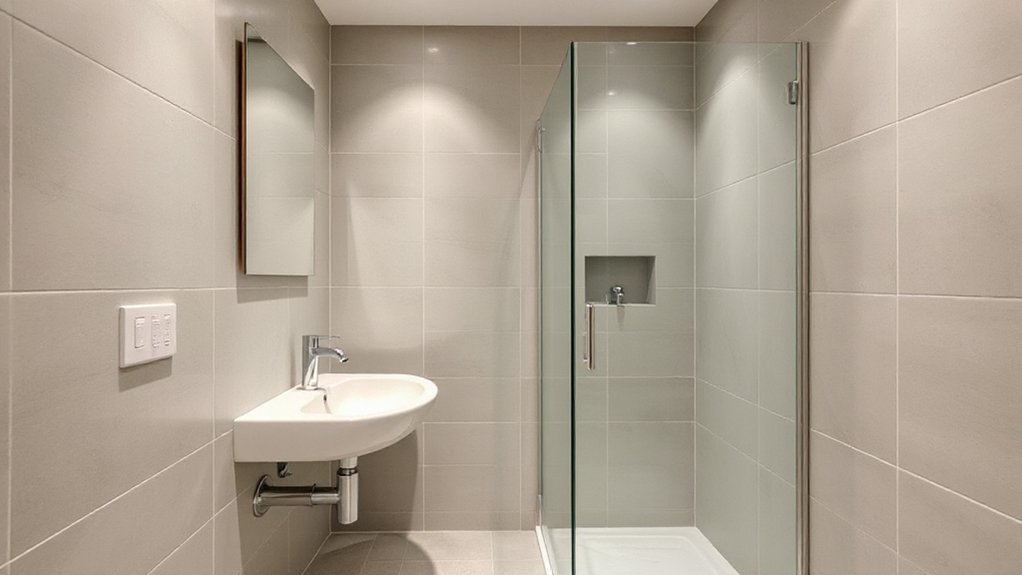
Frameless Glass to Reduce Visual Clutter
Frameless glass helps reduce visual clutter by letting sightlines flow uninterrupted from wall to wall, so the space feels larger and calmer. You gain a unified look that makes your bathroom feel more expansive without busy frames or heavy borders.
Choose clear panels for showers and partitions to preserve light and transparency, or opt for frosted sections only where privacy is essential. Rail-free doors and minimal hardware minimize interruptions, keeping lines clean and cohesive.
Maintain consistent finishes—polished chrome or satin nickel—across fixtures to reinforce order. Install hinges and seals that disappear, so openings feel seamless.
Clean surfaces regularly to preserve the glass’s clarity, reinforcing a calm, open atmosphere. With frameless glass, visual clutter subsides, and practical space planning becomes easier.
Hidden Storage Ideas Behind Doors and Panels
Hidden storage behind doors and panels keeps your small bathroom sleek while boosting usable space. You’ll hide everyday clutter with clever solutions that don’t interrupt style. Think recessed medicine cabinets that glide on soft-close hinges, or slim pantry panels that swing to reveal narrow shelves.
Use hidden compartments within vanity doors for cords, brushes, or spare towels, keeping surfaces clear. Panel concealment works well for laundry hampers tucked behind a hinged panel, or a shaving kit hidden behind a mirror shadowed by a frosted backing.
Opt for magnetic strips inside doors for small metal items, and install pull-latches for a clean, uninterrupted facade. Prioritize accessibility, durability, and moisture resistance to maintain a tidy, serene bathroom atmosphere.
Footprint-Friendly Vanity Sizes and Alternatives
Opt for footprint-friendly vanity sizes to maximize floor space without sacrificing function or style. In small baths, you’ll benefit from wall-mounted or slim profile vanities that keep the floor visible, creating a sense of openness.
Choose a compact width (12–24 inches) for powder rooms or consider a corner unit to tuck into awkward nooks.
When evaluating vanity height, aim for a comfortable stance that won’t crowd knee space under the sink, especially if you’re tall or short.
For durability and ease, select sink materials that resist moisture and scruff, such as porcelain or solid surface, which wipe clean without showing wear.
If you need more storage, pair a shallow vanity with wall-mounted cabinets or open shelving above, preserving counter space while maintaining visual calm.
Lighting Scenes That Visually Widen the Space
Layered lighting, careful mirror and glass uses, and tuned color and brightness work together to visually widen a small bathroom.
You’ll emphasize diffuse ceiling light, add a couple of well-placed task lights, and pair a large mirror with reflective surfaces to multiply perceived space.
Start with clear contrasts and balanced brightness to highlight depth, not clutter.
Layered Lighting Techniques
Layered lighting is your secret to making a small bathroom feel bigger, because you can shape brightness at different depths and eliminate harsh shadows. With layered lighting, you combine ambient illumination, task light, and accent accents to command space without clutter.
Place a soft ceiling glow for even base, then layer task lighting near mirrors and vanities to reduce glare and widen perceived depth. Add subtle cove or toe-kick lighting to carve architectural edges without overpowering the room.
Dimmers let you shift mood from bright prep to cozy unwinding, while strategically located wall washers highlight textures and color without flattening the scene. Choose fixtures with a cohesive finish to maintain visual flow, and guarantee wattages balance for all layers.
This approach maximizes perception of space without sacrificing function.
Mirror And Glass Effects
Mirrors and glass surfaces amplify light and expand perception without adding physical bulk, making a compact bathroom feel airier. You leverage reflective planes to double available daylight, using strategically placed mirrors opposite windows or doors to bounce brightness across tight layouts.
Glass shower enclosures keep sightlines open, while frameless edges minimize visual clutter. Pair these with polished chrome or brushed nickel hardware to enhance the shimmer without overpowering the room.
Vintage fixtures introduce character without sacrificing modern efficiency, so choose compact sinks and fixtures with clean, simple lines. Artistic mosaics as a backsplash or niche accent add texture and depth, drawing the eye without crowding walls.
Keep grout tones light and consistent to preserve an uninterrupted flow and a sense of spaciousness.
Light Color And Brightness
Choosing the right light color and brightness can instantly widen a small bathroom, so aim for a soft, neutral spectrum and ample ambient light that fills every corner. You’ll prefer color harmony across fixtures, walls, and accents, letting cool whites or warm neutrals blend without harsh contrast.
Pair bright general lighting with task lights at mirrors to reduce shadows while maintaining a spacious feel. Use dimmable options and scene settings to adjust mood without clutter. Brightness control should be intuitive, ideally accessible from the door or near the vanity.
Avoid overly saturated tones that trap glare; instead, choose finishes that reflect light softly. This strategic approach keeps the space practical, airy, and visually balanced while supporting clean, minimalist decor.
Budget-Friendly Upgrades With Big Gains
Start small with upgrades that deliver big returns: swap out dated hardware, reface cabinet fronts with a fresh coat of paint, and replace a tired vanity light with a bright, energy-efficient option. You’ll gain perceived space and a contemporary feel without a full remodel.
Focus on budget-friendly swaps that punch above their price, like upgrading faucets, adding a slim backlit mirror, or installing open shelving for airiness. Introduce character with vintage fixtures and bold patterns in towels, mats, or a shower curtain, keeping the core palette light to maintain brightness.
Plan strategically: target high-visibility zones first, then layer in texture with affordable accessories. Compact storage solutions—pull-out organizers or tiered baskets—reduce clutter and visually expand the room while preserving style and function.
Maintenance-Friendly Finishes for Longevity
You’ll start with durable surface materials that resist wear, so your bathroom keeps its feel after years of use. Choose low-millimeter porosity finishes and easy-clean features to cut maintenance time without sacrificing style.
This approach sets a practical, aesthetic foundation for longevity in a small space.
Durable Surface Materials
Natural stone offers a timeless, tactile premium feel, but require proper sealing and routine upkeep to sustain its beauty.
Quartz surfaces deliver consistent color and strong stain resistance, making cleaning quick and predictable.
For high-traffic zones, consider solid-surface options that resist scratches and are easy to repair.
Light-toned materials brighten compact rooms, while matte or subtle polished finishes hide water marks better than ultra-gloss options.
Edge details matter: rounded corners reduce chipping risk, and integrated backsplashes minimize seam buildup.
Prioritize sealed seams, non-porous cores, and professional installation to maximize durability over time.
Low-Millimeter Porosity Finishes
Choose materials with controlled pore structures to tread a fine line between grip and smoothness, so surfaces don’t feel chalky or slick. Consider color and texture as part of the strategy: lighter tones reveal dirt sooner, while subtle textures hide minor marks.
For daily care, employ a simple routine and non-abrasive cleaners to protect surface permeability over time. Porosity finishes enhance durability without sacrificing aesthetics, aligning with compact bath goals.
When planned thoughtfully, you gain lasting resilience and a confident, low-friction routine. Porosity finishes support practical, lasting beauty.
Easy-Clean Maintenance Features
When choosing finishes for a small bathroom, prioritize easy-clean options that resist staining and grime while staying tactile and safe. Easy-clean maintenance features keep upkeep quick and frustration-free, so you can enjoy the space instead of scrubbing it.
Opt surfaces with tight grout lines or seamless coatings to reduce dirt traps, and choose non-porous or glazed finishes for effortless wiping. Favor materials that age well with minimal care, like durable composites or sealed stone that resist water marks.
Eco-friendly materials can meet performance without tradeoffs, and you can layer thoughtful details, such as matte textures for grip and light-reflective surfaces to brighten compact rooms.
Pair modern practicality with vintage accents for character, while selecting finishes designed for longevity.
Frequently Asked Questions
How to Measure for Optimal Door Swing Clearance in Tiny Baths?
To guarantee proper door clearance, measure door swing space before layout changes, and account for handle protrusion. Use measurement tips like hinge-to-wall distance, door thickness, and clearance for a full swing in tight baths.
Which Fixtures Maximize Perceived Space Without Sacrificing Storage?
You should choose compact fixtures and slim storage, maximizing perceived space without sacrificing function. Opt for wall-mounted sinks, slim profile cabinets, and recessed niches; these practical, aesthetic choices feel strategic, keep lines clean, and balance storage with openness.
Can Curved Showers Beat Square Corners for Flow?
Yes, curved showers can flow better than square corners, guiding water softly along edges and opening space. You’ll notice the curved advantages create a calmer feel, while curved shower advantages boost aesthetic appeal and practicality for your layout.
How to Prioritize Essential vs. Luxury Space-Saving Features?
Prioritize essential storage first, then add luxury fixtures as accents. You’ll streamline daily use, keep surfaces clear, and still elevate your bath’s feel. Choose sleek, space-saving essentials, then layer in luxe touches for a cohesive, practical sanctuary.
What Lighting Layers Make a Small Bathroom Feel Larger?
Ambient lighting plus natural illumination secretly expand a small bathroom, creating depth. You layer task lighting near mirrors, soft uplights, and dimmable accents to feel larger, practical, and aesthetically strategic while you move freely.
Conclusion
Imagine a bathroom that feels bigger because every inch earns its keep. By choosing wall-hung fixtures, tall slim storage, pocket doors, and smart zoning, you turn tight spaces into fluid layouts. Small changes—corner nooks, compact vanities, and thoughtful lighting—create roomy vibes without a renovation overload. Want to see the difference before you commit? Picture a clutter-free, sunlit room where foot traffic glides, and storage is tucked away, not towering over you.