
Like a hinge that still holds, your kitchen can swing toward modern with smart, low-cost updates. You’ll spot dated hardware, tired cabinets, and mismatched lighting, and you can fix them step by step. Start with a realistic plan, swap in sleek pulls, add under-cabinet LEDs, and refresh colors with a bright, cohesive palette. Tiny decor and quick-surface tweaks finish the look. Curious how to map the moves without a full reno? Keep going.
What a Modern Kitchen Upgrade Costs Actually Look Like
If you’re upgrading a dated kitchen, you’ll see costs break down into three main areas: cabinets and hardware, appliances, and surfaces.
In this section, you’ll get a clear snapshot of typical ranges and practical takeaways. Appliance upgrades tend to define the outlay: midrange models with energy savings can run a few thousand dollars, while premium brands push higher. Decide on essential features—quiet motors, smart controls, consistent finishes—to avoid overpaying for extras.
Cabinets and hardware influence price most, but you can reuse framing if possible and swap doors for a refreshed look. Surfaces impact durability and upkeep; quartz or solid-surface options balance cost and resilience.
Plan your Kitchen layout first, then align appliance choices and surface upgrades to fit the space and your budget.
How to Identify Dated Elements You Can Refresh Fast
Start by walking through your kitchen with a critical eye, focusing on what reads dated rather than worn. Identify quick-refresh targets that don’t require a full overhaul.
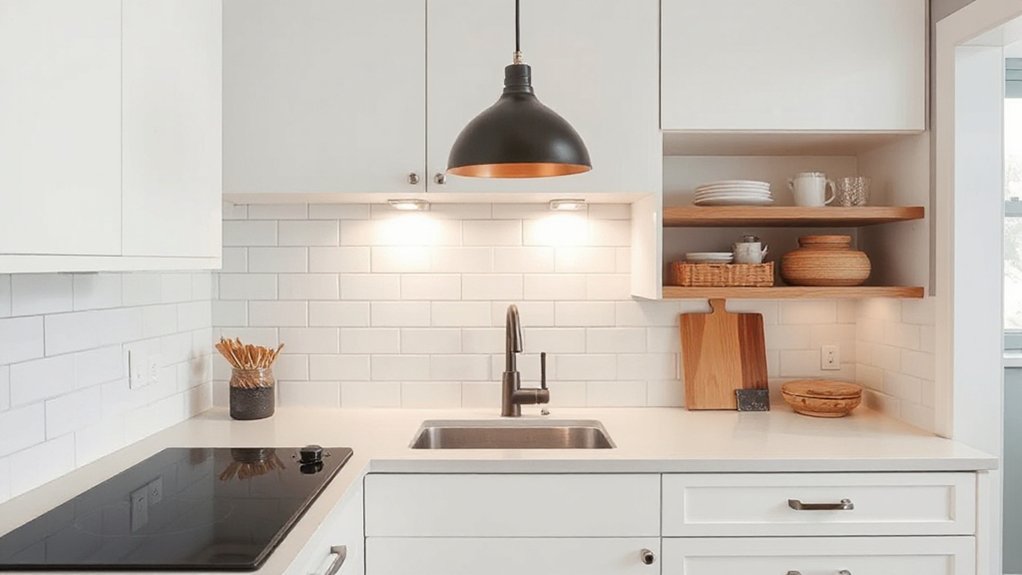
Begin with hardware: swap out cabinet pulls and door knobs for streamlined, modern options in brushed metal or matte black. This alone can transform the feel without changing layout.
Look at lighting: replace ornate fixtures with clean, functional fixtures or LED strip accents under cabinets for better task lighting.
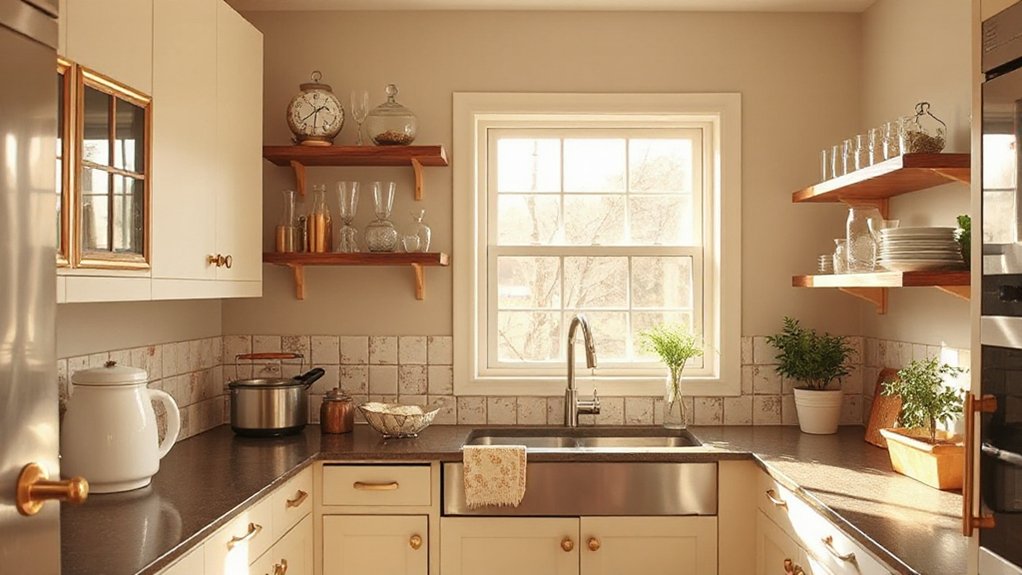
For style cues, note vintage appliances that still work; consider keeping them in place for character, but pair them with modern panels or smart-adapter trims to fade the contrast.
Refresh caulk, grout, and splash areas; a fresh seam of tile or quartz counters quietly pulls the room together.
Budgeting and Timeline: Set Realistic Plans Up Front
Set a realistic budget and timeline before you start any work. Start with a simple baseline: list must-haves, nice-to-haves, and non-negotiables.
Allocate funds for labor, materials, and a contingency—about 10–15% for surprises.
Create a calendar with milestones: demolition, rough-in, installs, and finish work, then back-schedule from your target completion date.
When budgeting, consider cost-drivers like vintage appliances and how you’ll source parts or alternatives; plan for potential delays if authentic pieces aren’t available.
Decide on a reasonable pace so you avoid rushed decisions.
Track progress weekly, adjusting as needed to prevent scope creep.
If you choose classic color schemes, map usage and maintenance costs early to prevent rework later.
Budgeting and timelines set expectations, minimize stress, and keep your project focused.
Reframe Color: Brighter Palettes for a Modern Feel
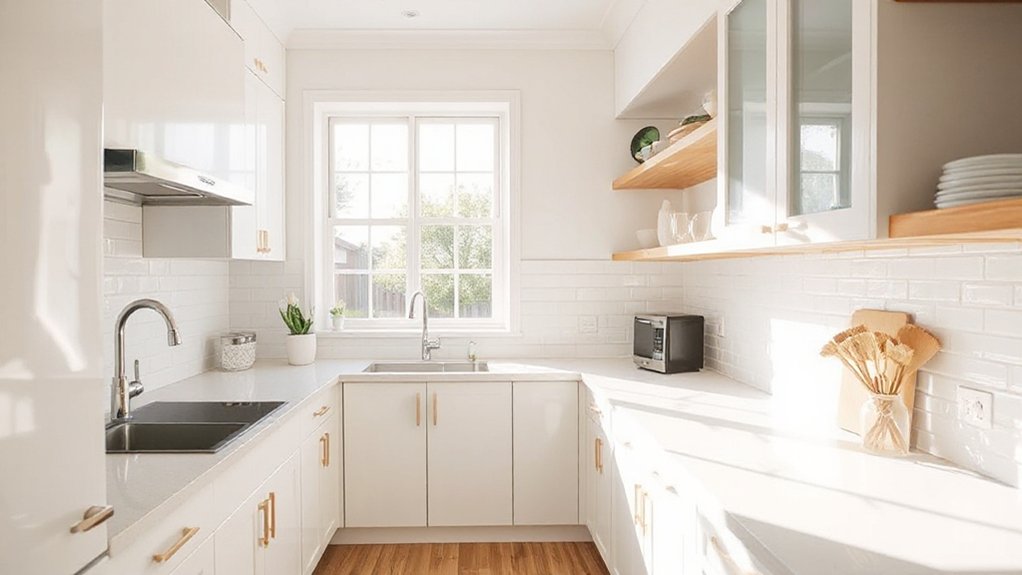
Bright, modern kitchens lean on light and energy. To reframe color, choose brighter palettes that reflect the space you want: airy walls, crisp accents, and a cohesive mood.
Start with color psychology in mind: cooler neutrals feel spacious, warm whites invite coziness, and pale blues or greens add calm. Limit loud hues to a single feature area to avoid visual clutter.
When selecting paint finishes, prefer eggshell or satin for walls to balance sheen and durability, and consider a washable matte for splash zones.
Test large swatches in natural light across different times of day.
Pair brighter walls with thoughtfully chosen cabinetry touches, textiles, and lighting to maintain a modern feel without overhauling fixtures.
Keep your palette intentional and scalable for future updates.
Update Hardware for an Instant Facelift
Updating your kitchen hardware instantly changes the look—no major construction required. Start by swapping outdated pieces for modern finishes.
Choose handles that balance style with grip comfort. Pair functional, easy-to-use hardware with a cohesive metal or matte finish to pull the whole space together.
Swap Outdated Hardware
Swapping outdated hardware is a quick, cost-effective way to give your kitchen an instant facelift. Start by inventorying what you have: drawer pulls, cabinet handles, and appliance latches.
Choose a cohesive finish—brushed nickel, matte black, or brass—so everything reads as intentional rather than random. Measure hole spacing before you buy; most modern kits fit common 3-inch centers, but verify. If you’re unsure, keep a few extra screws on hand and use adjustable mounts.
Prioritize high-traffic areas: drawers and the pantry door first. Pair new handles with clean, aligned installation to avoid wobble.
For a little personality, mix vintage appliances and eclectic accessories nearby, but maintain a unified metal tone. This small update boosts perceived value without major disruption.
Recheck alignment after a test opening.
Mix Modern Finishes
Mixing modern finishes can dramatically refresh your kitchen without a full redo. Start by selecting hardware that mirrors your preferred vibe, then mix metals for depth. Pair matte-black pulls with brushed-nickel knobs to create contrast and visual interest.
If you want a softer touch, opt for satin brass accents against pale cabinet fronts. Keep it cohesive by repeating a single shape—barrel, D-shaped, or square—across all pieces.
Consider contrast in textures too: a glossy faucet or matte cabinet hardware can elevate the look without overhauling installations. Introduce a small dose of vintage charm with a vintage-inspired pull, or anchor a contemporary scene with a minimal handle in a bold finish.
The result is an eclectic mix that feels purposeful and refreshed.
Install Functional Handles
Consider a consistent finish across all drawers and cabinets to create cohesion. Check cabinet hinges compatibility when swapping; soft-close options reduce noise and wear. Avoid overly large hardware on small spaces to prevent crowding.
Pre-assemble or dry-fit hinges and pulls before final mounting to prevent mistakes. Tighten screws firmly, but avoid overtightening, which can strip threads. Finish with a quick wipe to remove fingerprints and dust for an instantly polished result.
Refresh Cabinets: Paint, Stain, or Veneers on a Budget
You’ll weigh paint versus stain to decide how bright or cozy you want the cabinets. Consider veneer for quick updates, but know its pros and cons before committing.
We’ll cover budget-friendly finishes, so you can choose the best option for your project.
Paint Versus Stain Choice
If you’re invigorating dated cabinets on a budget, choosing between paint, stain, or veneers comes down to look, durability, and prep.
Paint finishes create a uniform, modern vibe and hide flaws, but require thorough sanding, priming, and a durable topcoat for longevity.
Stain options preserve wood grain, deliver a warmer tone, and often demand less maintenance, yet they reveal imperfections more easily and may need more careful prep.
Consider cabinet usage: high-traffic kitchens benefit from paint’s wipeability, while low-use spaces can lean into stain for character.
Prep matters more than the product: fill, sand, and clean surfaces well before any coating.
If you want consistency with surrounding woodwork, test samples on a few doors.
Decide first on your preferred look, then match durability.
Veneer Pros and Cons
Veneers offer a budget-friendly way to refresh cabinets without a full teardown, but they come with trade-offs you should weigh. You’ll gain cost savings and a quick update, but veneers aren’t a cure-all for every cabinet.
Consider durability: veneer durability depends on substrate quality and how you’ll use the space. High-traffic kitchens demand a tougher topcoat and meticulous maintenance.
Veneer application is precise work—peel-and-stick types won’t tolerate heavy use, so confirm you opt for proper adhesion and sealing.
Expect moisture and heat sensitivity near sinks and ranges; improper sealing can peel or warp.
If you’re aiming for uniform grain and color, veneers deliver consistency; but you’ll need skilled installation or professional help for lasting results.
Weigh long-term upkeep against upfront savings before committing.
Budget-Friendly Finish Techniques
Refresh cabinets on a budget by choosing a finish that fits your kitchen’s use and style: paint for a clean, like-new look; stain to highlight wood grain; or veneers to update texture without a full tear-out.
Start with prep: clean, sand, and repair to guarantee adhesion. If painting, use a bonding primer and semi-gloss finish for durability under kitchen wear.
For stain, test on a hidden area to confirm color and sheen; seal with a compatible topcoat.
Veneers cost less than full cabinetry replacement but require precise alignment.
Consider color and grain that complement countertop materials and backsplash designs to unify the space.
Save by focusing on upping contrast where it matters most (island, uppers, or lower cabinets) and skipping hardware changes unless needed for grip and update.
Budget-Friendly Countertops and Backsplashes
Prioritize durability and ease of maintenance so you won’t dread upkeep. Install self-adhesive backsplashes or peel-and-stick tiles for a quick, mess-free refresh, and pair with solid-color countertops to keep the space cohesive.
If you’re short on time, consider a semi-permanent option, like removable contact paper or bonded surface overlays, which you can swap later.
For character, weave in vintage accents—think vintage appliances or classic fixtures—while keeping modern, wipe-clean surfaces. This approach gives you a fresh feel without compromising practicality or budget.
Layered Lighting for Mood and Function
Layered lighting starts with a clear plan: combine task lighting, ambient light, and accents to shape mood and function. Use planned dimmable options and balance task zones with general illumination so you can cook, chat, and entertain without glare.
We’ll cover basics, how to balance task and ambient, and practical dimming calibrations as you implement.
Layered Lighting Basics
Layered lighting isn’t just about brightening a room; it’s about creating zones for tasks, ambience, and accents that work together.
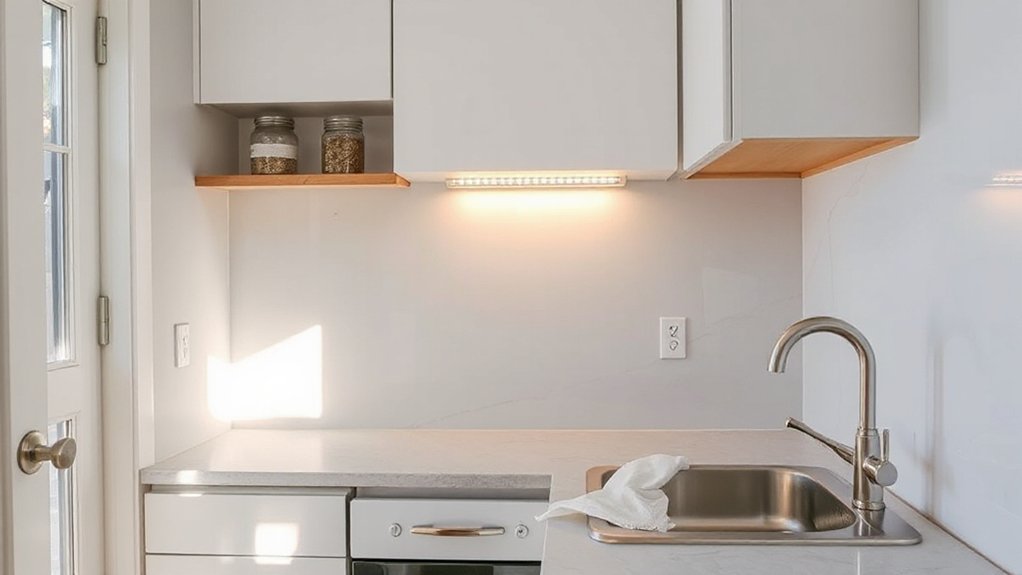
In a modern kitchen, layer three core elements: ambient, task, and accent lighting. Use a dimmable ceiling fixture for even illumination, plus under-cabinet LEDs to illuminate counters without glare.
Choose task lights with focused beams for chopping and reading recipes, and place them where you work most.
Add accent lighting to highlight architectural features or glassware—think small rail lights or warm-to-neutral tones.
Keep color temperature consistent across layers for cohesive mood.
Install controls that let you switch layers independently, so you can shift from bright prep to soft evening vibes without a full rewire.
Layered lighting supports a modern kitchen with practical, adaptable comfort.
Task And Ambient Balance
Balancing task and ambient lighting is about lighting what you actually use while keeping the room comfortable for everything else. In your kitchen, layer a bright task layer near counters and stove, with cool, crisp light for accuracy.
Add ambient lighting overhead or cove lighting to soften shadows and set the mood during meals or cleanup. Use dimmers or multiple switches so you can scale intensity without changing colors.
Choose a single color temperature within the range of 2700–3000K for color harmony, avoiding jarring shifts between zones. Keep under-cabinet lights directional to reduce glare on surfaces.
Test the setup by cooking a few common tasks, then tweak angles and brightness. Prioritize lighting atmosphere that supports flow, not clutter, and ensure switches are reachable.
Dimmable Calibrations Tips
Dimmable calibrations let you tailor mood and function without clutter. Start by mapping zones: ceiling task lighting over prep, under-cabinet LEDs for workflows, and a dimmable central fixture for ambience.
Use bulbs with a single color temperature for all fixtures to avoid jarring shifts. Install compatible dimmers or smart switches to support lighting control across zones.
Set practical presets: bright for cooking, soft for dining, and a night-light level for late steps. Favor smooth dimming without flicker; test fixtures before committing wiring.
Label controls clearly and group them logically on a single wall plate or app. If you use smart lighting, guarantee routines coordinate with routines from your other devices.
Regularly recalibrate after bulb changes for consistent output.
Smart Storage Tweaks to Shrink Clutter
To shrink clutter, focus on smart storage tweaks that maximize every inch of your kitchen. First, invest in shallow drawers and organizers that divide utensils, lids, and cooking tools.
Use vertical dividers inside cabinets to store trays and baking sheets upright, freeing shelf space.
Install pull-out baskets for under-sink, pantry, and corner cupboards to prevent items from getting buried.
Add a magnetic strip for knives and metal tools, keeping counters clear.
Use labeled, stackable bins in the pantry to group snacks, grains, and snacks by category, so restocking is quick.
Hang a pegboard above the counter for frequently used gadgets.
Regularly purge unused items to maintain clutter control and sustain a kitchen that feels refreshed, organized, and efficient.
Open Shelving: Display or Hide? Pros, Cons, and Tips
Open shelving can brighten a kitchen and make it feel more open, but it’s not a one-size-fits-all solution. You’ll decide whether to display or hide items based on routine use and maintenance.
If you prefer a cleaner look, group similar items, keep essentials within arm’s reach, and limit decorative pieces to one shelf’s worth. For display organization, rotate items seasonally and use uniform dishes to minimize visual clutter.
If you cook daily, keep frequently used pots and bowls on open shelves; otherwise, store infrequently used pieces in cabinets.
Pair open shelves with closed storage to maintain balance and reduce dust. Consider labeled storage jars and shelf liners for protection.
Hidden storage behind cabinet doors complements open spaces, preventing overwhelm while preserving accessibility.
Quiet Tech Upgrades That Boost Efficiency
Quiet tech upgrades can quietly change how your kitchen runs, especially after choosing open shelving or closed storage. You’ll benefit from smart gadgets that streamline tasks without a full remodel.
Start with a smart faucet that inventories water usage and offers touchless control to reduce waste and mess. Pair it with an induction cooktop that pulls power efficiently and cools quickly, lowering noise and heat buildup.
Prioritize appliances with noise reduction features, like quiet dishwashers and insulated ranges, to keep conversations uninterrupted.
Implement smart lighting that adjusts brightness by time of day, saving energy and improving visibility for prep.
Finally, use a centralized smart hub to automate routines, so the kitchen works in sync, effortlessly.
Durable Surface Refreshes That Look Premium
Durable surface refreshes not only elevate your kitchen’s look but also withstand daily use. Start by choosing countertop materials that balance durability with your style: quartz for low maintenance, solid surface for seamless seams, or high-pressure laminate for budget-friendly resilience.
Pair with a backsplash style that enhances practicality and personality—think subway tiles for timeless appeal or large-format panels for fewer grout lines. Keep color and texture cohesive with your cabinetry to avoid visual clutter.
Install edges and seams that reduce snag points in busy zones, especially around sinks and ranges. Use protective finishes on high-traffic areas and consider matte rather than glossy sheens to hide fingerprints.
Finally, plan for simple, wipeable surfaces and easy-to-clean grout lines to keep the look premium over time.
Floor-Impact Upgrades You Can Do Fast
You can get a fast floor upgrade with a quick refresh and smart material picks that stand up to kitchen wear. Consider durable options that install fast, like peel-and-stick tiles or stocked vinyl planks, so you can finish in a weekend.
We’ll cover quick-install upgrades, practical material choices, and how to keep costs low without sacrificing look.
Quick Floor Refresh
Sprucing up your floor without a full reno is about targeted, fast upgrades that make a big impact. You can refresh look and feel with minimal disruption by choosing bold runner options, peel-and-stick tiles, or a high-contrast area rug placed near the sink and work zones.
If you opt for vinyl planks or tiles, choose waterproof varieties for longevity. Keep connectivity seamless with matching trim and grout colors.
Quick cleaning and a fresh seal on grout can revive dull patterns without replacing flooring. For a compact upgrade, pair your floor refresh with thoughtful kitchen accessories that draw the eye upward, and simplify daily routines with smart Pantry organization.
A focused approach yields noticeable results in days, not weeks.
Durable Material Picks
When you’re upgrading floors fast, start with materials that stand up to traffic and spills while keeping installation simple. Choose durable options like luxury vinyl plank or laminate with a tight wear layer, or porcelain tiles set in a straightforward grid. These materials resist moisture, scratches, and heavy footfall, so you won’t chase repairs weekly.
For speed, pick snap-lock or click-together systems that don’t require grout or adhesive in many setups.
Prioritize Eco friendly materials when possible, such as recycled content planks or low-VOC finishes, to cut indoor pollution.
If you want character, blend in Vintage inspired designs with patterns or textures that mimic wood or tile without sacrificing durability.
Finish with trim that seals edges and keeps spills from seeping underneath.
Quick-Install Upgrades
Upgrading floors quickly means choosing solutions you can install with minimal mess and downtime. For fast floor-impact upgrades, consider peel-and-stick vinyl planks that snap together with no glue, letting you refresh look without a full install.
If you want a similar stone or tile vibe, opt for laminate options with realistic textures and a simple click-lock system.
For a vintage touch, you can balance practicality with style by adding vinyl sheets in neutral tones or groutable vinyl tiles that mimic porcelain.
To preserve space, choose lighter shades that brighten the room and reflect light.
Finally, pair the new floor with vintage charm accents and classic fixtures to create a cohesive update without major disruption.
Small Decor Moves That Unify the Look
Small decor moves can pull a dated kitchen together without a full renovation. You’ll focus on cohesion, not overhaul, by selecting a unifying palette and repeating motifs. Start with a restrained color scheme—two neutrals plus one bold accent—that you carry across cabinetry, hardware, and textiles.
Opt for artistic accessories in similar finishes to create a deliberate rhythm, whether matte black, brushed brass, or warm brass. Group items into small vignettes to reduce clutter and guide the eye.
Use Vintage vignettes strategically: a grouped display of vintage-inspired jars, a retro timer, and a classic cookbook stack can anchor shelves. Swap mismatched hardware for uniform pulls to reinforce continuity.
Finish with coordinated textiles—mitts, towels, and a rug—that echo your chosen palette.
Quick-Win Checklist to Stay on Track
To stay on track, use a quick-win checklist that keeps momentum without derailing your plan. Start with clear priorities: list the top three upgrades that deliver the most impact per dollar. Allocate a realistic budget window for each item and set a firm completion date. Budget planning should include a 10–15% contingency for surprises.
Move to material selection: pick durable, easy-to-clean finishes that align with your style and budget. Verify measurements, gauge installation ease, and confirm delivery times before purchasing.
Schedule tasks in logical order to avoid rework, and pair tasks that can run concurrently. Track progress with a simple, shared checklist you and any helpers can update daily.
Review weekly, adjust budgets, and celebrate small wins to stay motivated.
Frequently Asked Questions
How to Prioritize Upgrades for Maximum Impact Fast?
Prioritize changes that yield visual impact fast: swap dated finishes for bright, neutral tones, upgrade lighting, and refresh hardware. Focus on vintage fixtures and the most used zones. You’ll see a noticeable upgrade with minimal disruption and cost.
Which Small Changes Make the Kitchen Feel High-End?
Upgrade with bold cabinet hardware and chic lighting fixtures; you’ll instantly elevate the feel. Swap pulls, add pendant lights over the island, and optimize under-cabinet LEDs. You’ll notice a more polished, high-end kitchen in days. Groovy.
Are There Budget Risks With Cosmetic-Only Updates?
Yes, there are budget pitfalls and cosmetic risks. You’ll save upfront, but minor fixes can look uneven if you skip compatibility checks, finishes, or lighting. Plan a cohesive palette, test samples, and budget for contingencies to avoid gaps.
How to Measure ROI on Quick Upgrades?
You’ll estimate ROI by timing improvements and tracking value shifts; start with lighting upgrades and appliance enhancements, then measure energy savings, resale appeal, and speed-to-market. You’ll quantify costs, compare with perceived gains, and adjust your plan accordingly.
What Mistakes to Avoid During a Rapid Refresh?
Avoid overdoing it: plan color coordination, pick cohesive hues, and avoid clashing finishes. Prioritize lighting enhancements with layered sources, measure glare, and install dimmers. Don’t rush expensive fixtures; test samples, keep receipts, and adjust before finalizing details.
Conclusion
You’re the compass guiding a kitchen’s rebirth. Picture a sunrise: hardware as the first glow, paint as the hopeful horizon, and LED strips as the steady daylight. Each detail is a stepping stone, a symbol of intention turning clutter into clarity. With a few smart swaps, you’ll trade wear for wow—storage becomes a clear path, surfaces reflect confidence, and color cues pull the room into the now. Stay practical, stay focused, and watch your space rise.