If your garden stays soggy, you can fix it by starting with a quick check of your soil and site. You’ll want to test drainage, add compost to improve structure, and loosen compacted soil. Create simple outfalls like shallow trenches or swales to redirect water, and make certain slopes exceed 1% so water flows away. Then, keep your system clear and permeable with regular maintenance. Ready to map your plan and start the improvements?
Key Takeaways
- Identify and mark low spots and clear debris to improve existing drainage channels and prevent water buildup.
- Create shallow ditches or simple swales to direct water toward outlets, drains, or low-lying areas.
- Install perforated pipes with gravel (French drains) to move excess water away from soggy zones.
- Improve soil structure with organic amendments and light aeration to boost infiltration and reduce compaction.
- Monitor moisture and adjust practices seasonally to prevent continued soggy conditions and root stress.
Why Your Garden Drains Poorly and Why Fixing It Matters
Poor drainage in a garden leads to soggy soil, stunted plant growth, and longer-term damage to your landscape. You’ll see pools that linger after rain, anaerobic soil conditions, and root stress that reduces yields and vigor.
The core cause often lies in soil composition: heavy clay retains moisture, while compacted layers restrict air and drainage. Sand improves texture only with proper organic matter, so you may need amendments to balance structure and porosity.
Another critical factor is the water table; if it sits near the surface, even well-structured soil can stay wet.
Understanding these elements helps you plan targeted actions, prioritize aeration and organic inputs, and prevent repeated waterlogging.
Correctly addressing soil composition and groundwater interaction keeps plants healthier and your landscape resilient.
Quick Drainage Fixes You Can Do This Weekend
If your yard has soggy patches after a rain, you can start improving drainage this weekend with a few practical steps.
Locate low spots and mark existing drainage channels, then clear debris that blocks flow.
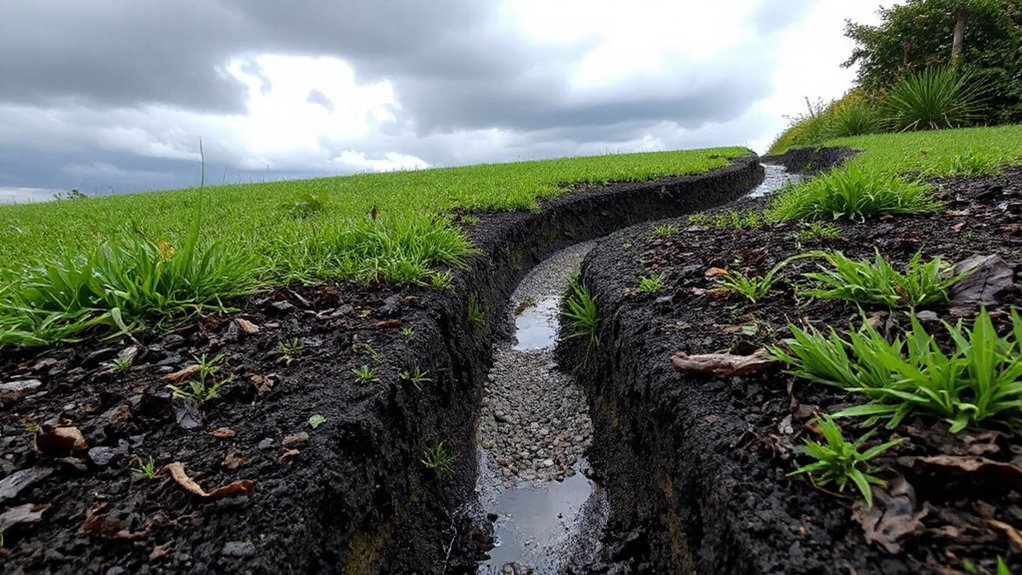
Dig shallow, temporary ditches to guide water toward a designated area, avoiding sensitive roots.
Create a simple swale if you can, shaping a shallow trench that slows runoff and directs it toward a drain or low-lying turf.
Examine the water table in nearby areas; if it’s high, avoid oversized fills that trap moisture.
Install permeable mulch or gravel around problem spots to encourage infiltration, not puddling.
Finally, install a short, above-ground drainage channel to vent excess water away from foundations and walkways.
How to Test Your Soil and Site for Drainage Problems
To assess drainage issues, start by observing how water behaves after a rain. Then test soil texture and compaction to determine why it pools.
You’ll examine soil composition by feel: sandy drains faster, clay holds moisture, loam balances. Use a simple ribbon test to gauge texture and a penetrometer or a fingernail test to estimate compaction.
Dig a 12-inch deeper hole and check for perched moisture, noting how long water remains. Consider the water table: a high water table means surfaces stay wet after rain, skewing drainage readings.
Compare site elevation and slope to identify low spots. Record layers: organic matter, mineral soil, and any perched zones.
Use these observations to plan appropriate next steps for improved site drainage.
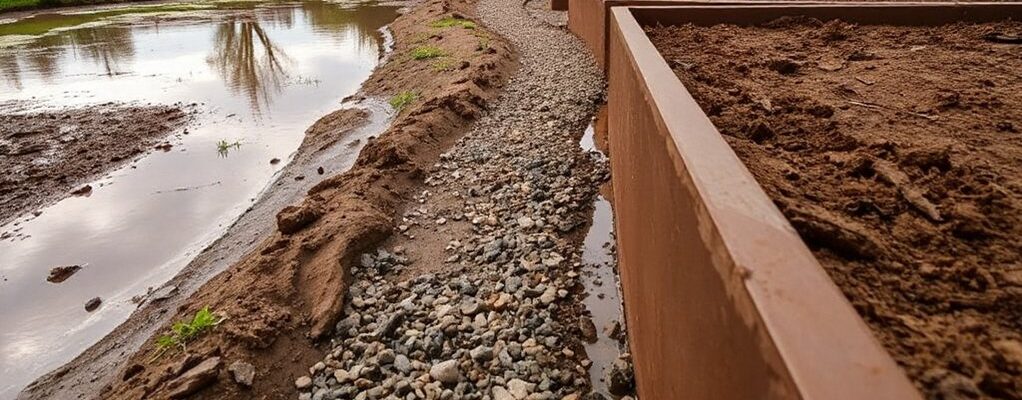
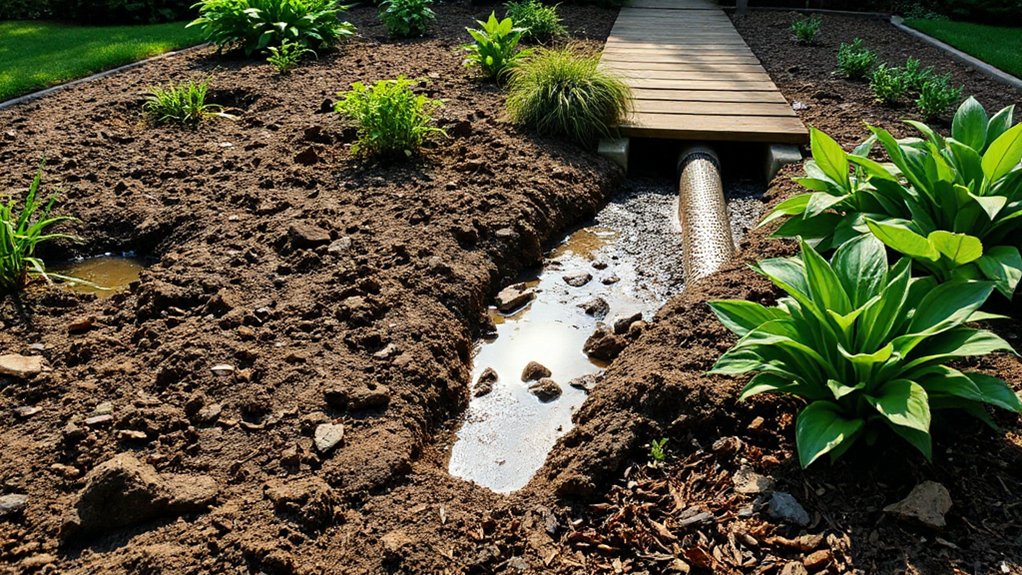
Targeted Drainage Solutions: Trenches, French Drains, and More
Trenches and French drains offer practical, targeted ways to move excess water away from problem zones. You plan trench depth to suit soil type, run it along low spots, and connect to a visible outlet or dry well.
Use perforated pipe or aggregate core to surround the pipe, then cover with gravel and a permeable surface layer to prevent clogging.
French drains work similarly but are often narrower and routed where surface grading isn’t enough.
Position drainage barriers at boundaries to redirect water toward collection points without pooling in beds.
Confirm slopes exceed 1% so water flows freely.
Permeable surfaces near pathways minimize runoff, while keeping beds clear of obstruction.
Regular inspection keeps pipes clear, preventing blockages that defeat the system.
Keep Soil Breathable: Structure, Amendments, and Practices
Healthy soil breathes when it stays loose, well-structured, and alive; you’ll maintain that balance by focusing on structure, amendments, and practical practices.
You should prioritize soil structure: avoid compaction, crack open the surface with light cultivation, and mulch to preserve porosity.
Regular soil aeration is essential; use pitchforks or a tiller to create spaces, especially after rain, to restore gas exchange and drainage.
Apply organic amendments to feed soil life and improve texture: compost, leaf mold, or well-rotted manure, worked in lightly.
Avoid excessive organic matter that clogs pores; mix amendments evenly to retain air.
Monitor moisture, adjust practices seasonally, and stagger amendments to prevent temporary suffocation of microbes.
Keep pathways clear of plant residue that blocks airflow and drains promptly.
Plant and Landscape Choices That Prevent Waterlogging
When choosing plants and designing the landscape, pick species that tolerate wet soils and heavy rainfall, so you won’t fight drainage every season. Favor native plants that are adapted to local moisture patterns; they establish quickly and require less irrigation while surviving flood conditions.
Group plants with similar water needs to minimize root stress and simplify maintenance. Use hydrological-aware placement: place water-tolerant varieties on low-lying beds and avoid compacted zones.
Introduce permeable paving where movement occurs; this reduces runoff and helps water infiltrate rather than pool. Choose mulch around perennials to conserve moisture without creating soggy pockets.
Install raised beds or shallow depressions with well-draining soil, ensuring good aeration. Finally, plan borders and focal points to channel excess water toward safe outlets.
Long-Term Maintenance: Seasonal Checks and Tweaks for Steady Drainage
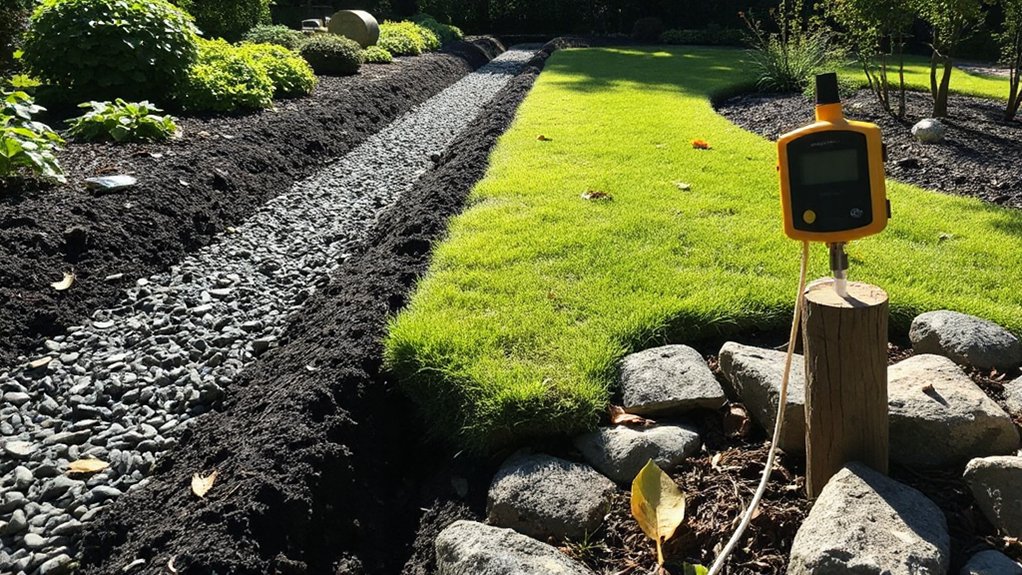
Seasonal checks keep your drainage reliable, so plan a quick inspection each season for clogs, sediment buildup, and slope issues.
Make small tweaks now—adjust grate heights, regrade where necessary, and prune vegetation that roots into drains—to maintain steady flow.
Stay proactive: note patterns after rain, then clamp down on problems before they escalate.
Seasonal Drainage Checks
Have you mapped how water flows through your garden at different times of year? Seasonal drainage checks keep your system predictable. You’ll catch hidden problems before they worsen, and you’ll adjust routines to fit changing weather.
- Inspect outlets and swales after heavy rain to confirm clear paths and prevent backups.
- Revisit the watering schedule to verify plants aren’t overloading the soil near the garden pond.
- Test soil moisture at varying depths to confirm drainage meets root needs across seasons.
- Schedule light, proactive maintenance tasks before wet seasons begin to avert sudden floods.
Regular notes help you act quickly, preserving lawn health, bed structure, and drainage longevity.
Tweaks For Steady Drainage
To keep drainage steady year-round, implement seasonal tweaks that fine-tune flow paths, outlets, and soil behavior as weather shifts.
Start with drainage barriers where clogging debris collects, creating predictable channels that direct water away from vulnerable beds. Test after heavy rains, noting any pooling and reroute via temporary channels or widened swales.
Install moisture barriers along borders to limit evaporative losses and maintain soil moisture balance, especially in sandy spots.
Adjust outlet positions to match root zones and seasonal growth, ensuring discharge remains clear and unobstructed.
Elevate low spots slightly in spring and reseed compacted paths in fall to sustain infiltration.
Schedule minor reseeding, mulch refreshes, and valve checks between seasons to preserve momentum and prevent stagnation.
Reassess yearly, documenting improvements for next cycle.
Frequently Asked Questions
How Do I Know if My Water-Logged Area Is Septic-Related?
If you notice persistent, foul odors, unusually lush patches, or gurgling drains, your water-logged area might be septic-related. Start with a Septic system inspection and a Drainage diagnosis from a licensed pro.
Check for wet spots away from irrigation, damp basements, or slow toilets.
Look for high groundwater, surface pooling after rain, and septic tank maintenance records.
If problems align, address both the septic system and drainage to prevent future floods.
Can Drainage Improvements Affect Nearby Foundations?
Yes, drainage improvements can affect nearby foundations if you don’t plan properly. When you improve drainage, you should study soil conditions, monitor load paths, and avoid directing water toward foundations.
Use soil aeration techniques and precise landscape grading to prevent hydrostatic pressure. Make certain downspouts channel water at a safe distance, and consider a drainage plan that distributes flow evenly.
Regularly inspect for erosion or clogs that could compromise foundations over time.
What Are Signs of Persistent Underground Drainage Issues?
Persistent underground drainage issues show when you notice soggy patches that won’t dry, gurgling drains, and drains that back up after rain. You’ll also see soil compaction around the late-season wet spots, and water pooling that persists despite surface grading.
Look for sagging or warped foundations nearby. Inspect underground pipes for leaks or breaks, and test with a professional camera if needed. These signs point to deeper drainage problems requiring action.
Are There Inexpensive, Chemical-Free Ways to Improve Drainage Quickly?
Yes—there are inexpensive, chemical-free options you can try quickly. Natural remedies and DIY solutions can help loosen surface water and improve soil structure fast.
Start by aerating packed soils with a fork, then amend with organic matter like compost or mulch.
Create shallow trenches or implement swales to redirect runoff.
Use raised beds sparingly where feasible.
Regular light watering and compost tea boosts biology, accelerating drainage improvements without chemicals.
How Often Should I Re-Test Soil After a Rainfall Event?
After a heavy rainfall, re-test soil about 24 to 72 hours later, once the surface dries and you can work the area again.
Start with soil testing to check moisture and nutrient shifts.
In a real case, a homeowner found drainage improved after two tests within a week.
Use rainfall monitoring to plan future tests, especially after storms.
Track results, adjust amendments if needed, and repeat after each major rainfall event for accuracy.
Conclusion
You’ve met the soggy foe head-on, like a homeowner armed with a shovel and a stubborn umbrella. Picture your yard as a tiny country, with swales as border walls and French drains as bustling transit hubs, all diverting rain to freer pastures. Skip the swampy ambushes: aerate, amend, and maintain. When the seasons change, run quick checks—clear debris, verify slope, swap soaked mulch for airflow. Drainage, finally, becomes part of your landscape’s daily routine.