
You’ll start by defining clear goals for open-plan living in your bungalow, focusing on sightlines, natural light, and flow. Assess how every zone supports everyday use, then map routes that feel intuitive yet private. Choose cohesive materials and layered lighting to unify spaces, while built-ins and hidden storage keep clutter at bay. A phased renovation keeps costs manageable, but the real test comes as you test layouts and acoustics—the next step could redefine your entire home.
Key Takeaways
- Define clear objectives for sightlines, daylight, and circulation to anchor furniture without crowding pathways.
- Assess space with precise measurements and plan zones using flexible screens or bookcases for privacy.
- Design cohesive sightlines and flow by aligning primary corridors, daylight access, and 36–42 inch wide clear paths.
- Build a cohesive material palette with 2–3 core hues, matching finishes, and integrated appliances for continuity.
- Plan layers of lighting, zoning for daily routines, and phased budgeting to balance cost, disruption, and function.
Define Your Open-Plan Goals for the Bungalow
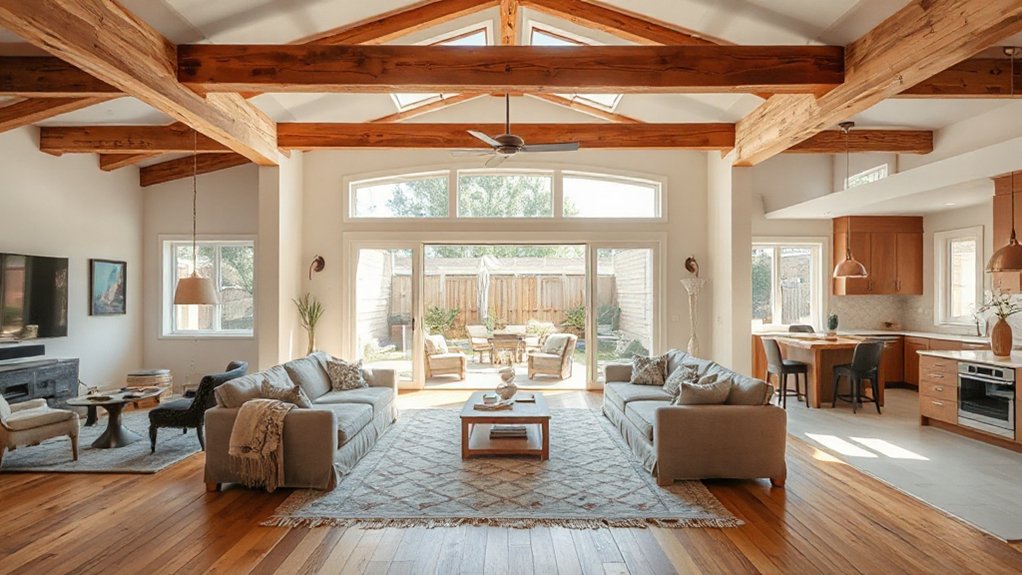
Prioritize sightlines, natural light, and functional circulation to minimize clutter. Decide on a central focal point that anchors furniture placement without crowding pathways.
Establish scale rules: airy ceilings, low-profile pieces, and intentional vertical accents to prevent compression. Consider acoustics early; plan for acoustic solutions that curb echo and noise transfer between zones.
Assign roles to each area, then test flows with quick sketches or furniture mockups. Your goals should drive decisions, ensuring a cohesive, adaptable space that supports maintenance, socializing, and daily routines.
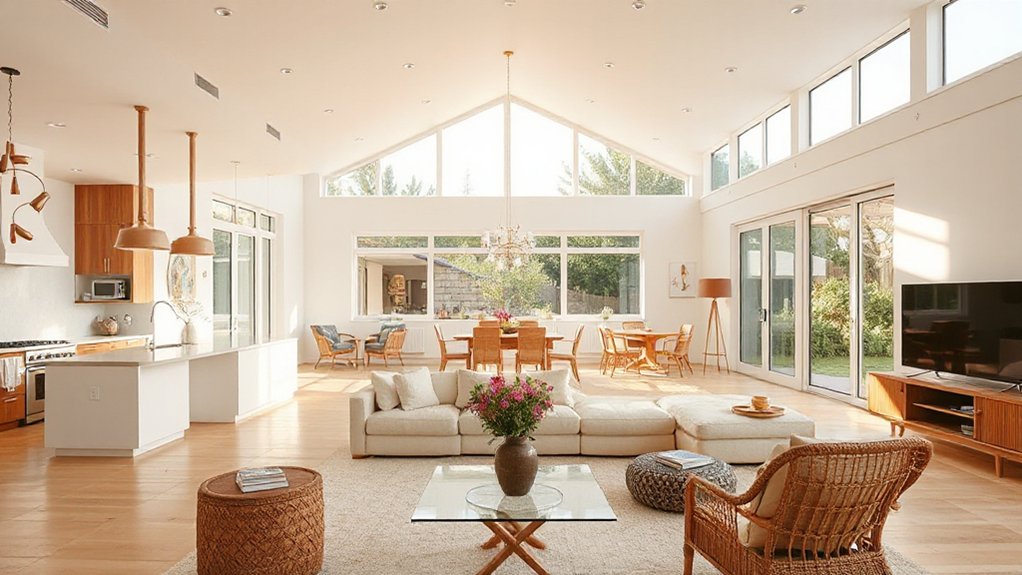
Assess Space and Zone for Open-Plan Living
To assess space for open‑plan living, start by taking exact measurements of each room and noting doorways, windows, and built-ins that will shape traffic and sightlines.
You’ll map where furniture can anchor zones without crowding aisles, then identify natural separation points. Space division becomes your primary tool; use architectural cues like soffits, fireplaces, or ceiling treatments to hint zones without walls.
Consider ceiling height, floor finishes, and lighting to reinforce function, not just form. Your zoning strategies should prioritize fluidity: a joined kitchen, dining, and living area with clearly defined, yet approachable, boundaries.
Plan storage along perimeter edges to reduce clutter within the core. Finally, verify that access to exits and daylight remains straightforward, adaptable for future needs.
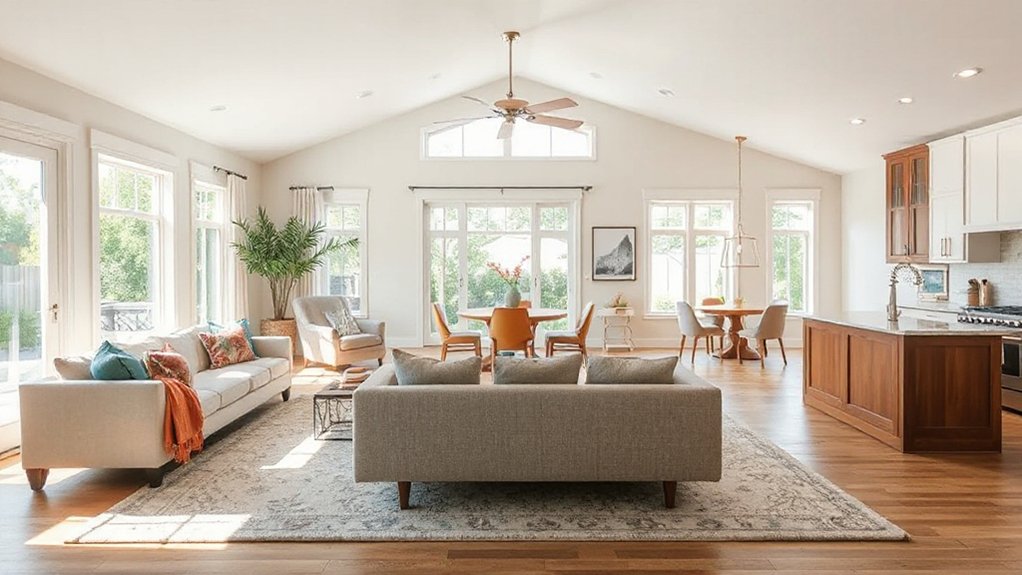
Plan Sightlines and Flow to Improve Harmony
Sightlines guide how you move and what you notice, so map them first to choreograph harmony across the open plan. You aim for visual sightlines that connect key zones without forcing detours. Begin by outlining primary corridors: kitchen to living area, dining to lounge, entry to main spaces. Prioritize sight exposure to daylight and focal points, not clutter.
Then, design for spatial flow: identify bottlenecks, ensure at least one clear path from every seat to the exit, and maintain comfortable width with 36–42 inches between furniture clusters. Use low partitions or shelving to guide sight and movement while preserving openness.
Validate each sightline with eye level checks and line-of-sight tests from major seating areas, adjusting furniture placement to sustain calm, cohesive circulation.
Select Cohesive Materials and Finishes
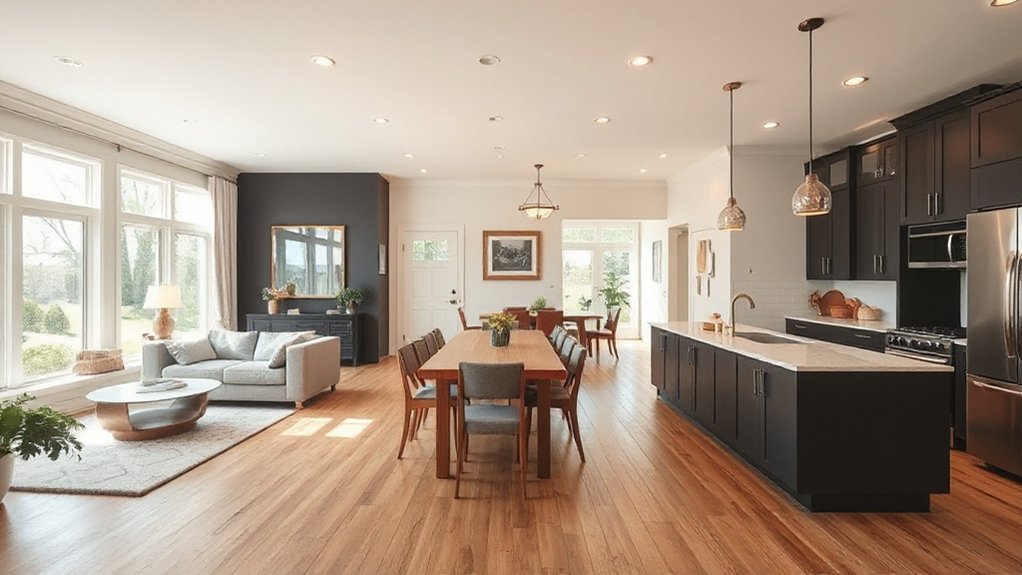
Choose a cohesive material palette that ties zones together, balancing color, texture, and durability. Consider how finishes relate across floors, walls, and built-ins so you get a unified fabric rather than a patchwork.
Start with a few core materials, then layer contrast and texture intentionally to maintain interest without fragmentation.
Material Palette Coordination
Balancing material choices across a bungalow demands a deliberate, cohesive palette that unifies spaces while allowing individual rooms to breathe. You’ll balance warmth and restraint, prioritizing material compatibility and color coordination to avoid visual dissonance.
- Pair natural wood with stone accents for texture variation without clashing tones.
- Use a shared base material (e.g., ash or oak) across floors and cabinetry for continuity.
- Limit palette to 2–3 core hues, then introduce subtle contrast through finishes.
- Match metal accents (hardware, fixtures) to the overall color story.
- Consider lighting color temperature to preserve material integrity and tone.
This approach keeps open-plan zones fluid, yet distinctly legible, guiding movement and focus while maintaining refined cohesion.
Finishes and Texture Harmony
Smart material and finish choices anchor an open-plan bungalow, so pick cohesive textures that read as one story. You drive harmony by selecting materials with compatible grain, tone, and sheen, then use them consistently across walls, floors, and cabinetry.
Prioritize texture as a unifier: a single material can appear in multiple forms—concrete-look tiles, oiled oak, or microcement—creating texture contrast without visual chaos. Balance tactile experiences: rough stone against smooth plaster, matte versus satin surfaces, warm wood with cool stone.
Consider material durability for high-traffic zones, especially in kitchens and living areas, choosing products that resist wear and wipe clean easily. Establish a restrained palette to prevent fatigue, then reintroduce subtle accents through hardware, textiles, and upholstery to reinforce unity.
Plan Lighting to Maximize Brightness and Warmth
Think through layered ambient lighting to set the mood while keeping the space bright and welcoming.
Use brightness zoning to tailor light levels to different activities without overlighting, so spaces feel open yet intimate.
Choose color temperatures that balance warmth and clarity—cooler task light for focus, warmer layers for cozy gathering.
Layered Ambient Lighting
- Use dimmable fixtures to modulate mood enhancement and brightness.
- Install soffit or cove lighting for even, diffuse general light.
- Add task lighting at work zones without clipping shadows.
- Incorporate accent lights to sculpt textures and focal points.
- Choose a cohesive color temperature to unify spaces.
You’ll coordinate color temperature and intensity to support daily routines while elevating mood enhancement.
With layered ambient lighting, you control atmosphere as you move between living, dining, and kitchen zones, avoiding harsh contrasts.
Precision matters: map each area, select compatible fittings, and pre-plan switches.
The result is a bright, welcoming open plan that feels intentional, not cluttered.
Brightness Through Zoning
How can you maximize brightness and warmth across distinct zones without sacrificing flow? Plan lighting by function and sightlines, not just fixtures. Map daily routines to zones: living, dining, kitchen, and work areas, then allocate light layers that rise with activity.
Use bright, diffuse ceiling light for general coverage, supplemented by task lighting at counters and desks, and warm accents near seating. Consider glazing crossings and keep sightlines open to preserve perceived space.
Select fixtures with dimming controls to shift mood from bright daytime to intimate evenings. Use natural light strategically: position seating to chase daylight without glare, and install sheer window treatments to soften brightness while maintaining privacy zones.
Ensure wiring supports zoning zones future upgrades without rewiring.
Warmth With Color Temperature
Warmth starts with color temperature that feels inviting, not harsh. You’ll plan lighting to blend brightness with coziness, using warm-white tones to create a welcoming flow across open spaces.
Consider how color psychology influences mood: lower Kelvin for intimate meals, higher for daytime tasks, and transitional hues to guide movement.
Balance fixtures so light supports furniture arrangement without glare or crowding. Dimmed layers—ambient, task, accent—keep spaces flexible for living, dining, and work.
Use warm sconces near seating clusters and under-cabinet LEDs to soften edges. Choose finishes that reflect warmth without yellowing.
Color temperature should complement wood tones and textiles, reinforcing a calm, unified feel throughout the bungalow.
- Color psychology guides mood and brightness
- Layer ambient, task, and accent light
- Align fixtures with furniture arrangement
- Dimmer controls for flexibility
- Warm finishes for cohesion
Integrate Storage Without Clutter
Smart storage is your backbone when redesigning for open-plan living: it keeps sightlines clean while giving you flexible space for daily life. You’ll prioritize built-ins over freestanding pieces, because integrated units reduce visual clutter while increasing function.
Plan concealed storage behind doors, panels, and toe-kicks to hide essentials without compromising flow. Use decorative shelving as intentional displays, not accidental clutter; curate a rotating selection of books, bowls, greenery, and tech hides.
In kitchens, choose appliances with integrated panels and pull-out drawers that align with wall lines. In living zones, opt for storage benches and slim media niches that camouflage cords.
Finally, color-matched finishes and hidden hardware create seamless texture, so openness remains intact while every item has a purpose.
Budget Smartly With a Phased Renovation Plan
A phased renovation keeps you in control of cost, timeline, and disruption, so you can move toward open-plan living without debt or overwhelm. You’ll allocate work into stages, prioritizing high-impact changes first and deferring niceties until later. Begin with structural or layout tweaks that liberate space, then address finishes as you accumulate budget. Track every dollar against a clear milestone so you stay solvent and focused.
Choose cost-effective upgrades that deliver the most value per dollar, and document savings from each phase to inform the next. Commit to sustainable material choices where possible, balancing longevity with upfront cost. This disciplined, strategic approach minimizes risk and maximizes momentum, so you smoothly shift to an airy, connected home.
- Define stages with exact deliverables and budgets
- Prioritize structural changes first
- Use cost-effective upgrades for big impact
- Audit materials for durability and reuse
- Schedule reviews to adjust scope and funding
Avoid Common Open-Plan Pitfalls and Troubleshooting
Open-plan living sounds liberating, but without guardrails you’ll quickly undermine flow and comfort. To avoid common pitfalls, map zones clearly: designate work, dining, and relaxation with subtle cues like furniture placement, rug boundaries, and ceiling variations.
Prioritize privacy concerns by using movable screens or tall bookcases to create intimate corners without closing off spaces completely. Address acoustic challenges with layered sound control—soft flooring, upholstered furnishings, and focused ceiling treatments reduce echoes and improve speech intelligibility.
Plan storage along sightlines to minimize clutter that disrupts cohesion. Select multipurpose pieces that flex with your needs, then test traffic flow during a dry run.
Finally, document a troubleshooting checklist: reroute wiring, test lighting scenes, and adjust acoustics after occupancy to preserve harmony.
Frequently Asked Questions
How Can I Reconfigure Load-Bearing Walls Safely?
To reconfigure load-bearing walls safely, you must involve a structural engineer and obtain permits first. They’ll confirm structural support needs and design appropriate elements like beams, posts, or reinforced joists.
Don’t remove any wall until you have approved temporary bracing and a clear plan. Coordinate with your contractor to schedule wall removal and beam installation carefully.
Structural support will transfer loads, so maintain continuous bearing paths and address electrical or plumbing conflicts before finishing.
What Is the Best HVAC Approach for Open Spaces?
You should adopt an HVAC setup that maximizes comfort across open spaces with zoning systems and smart thermostats. Start with a central, efficient air handler and strategically placed supply vents to avoid drafts.
Use zoning to tailor temperatures by area, and connect smart thermostats for adaptive control and occupancy-based adjustments.
Prioritize airtight seals, proper humidity management, and easy maintenance access. This approach delivers precise comfort, energy efficiency, and responsive, intuitive operation.
How Do I Choose Furniture Layouts for Flexibility?
Did you know flexible furniture boosts room utility by up to 40%? You should choose layouts that maximize flow and adaptability.
Start by zoning into multipurpose zones, then place flexible furniture to reconfigure without walls. Use modular sofas, nesting tables, and movable screens to create intimate nooks or open gatherings.
Prioritize sightlines, easy access, and clearance for traffic. You’ll design spaces that flex with your needs, while preserving style and comfort.
Which Acoustic Solutions Reduce Noise Transfer Effectively?
You should use soundproofing materials like mass-loaded vinyl, acoustic panels, and insulated drywall to cut noise transfer effectively. Plus, strategically placed noise barriers can be used to shield private areas.
Start by sealing gaps around doors and windows. Then add floor and ceiling treatments that dampen reverberation.
Choose materials with high STC ratings, install them in walls between rooms, and pair with soft furnishings.
You’ll achieve quieter, more defined zones without sacrificing openness.
How Can I Maximize Natural Light Without Glare?
Did you know natural light can boost productivity by up to 23%? You maximize it by thoughtful window treatments and skylight positioning.
You’ll reduce glare by choosing diffusers, anti-glare coatings, and strategically placed skylights that avoid direct sun.
Align living zones to existing windows, use light-reflective finishes, and install shading that you can adjust seasonally.
You’ll feel brighter, calmer, and more focused with a calibrated, glare-aware daylight plan.
Conclusion
You’ve mapped goals, tested flows, and chosen cohesive finishes, turning a bungalow into a living canvas. With phased renovations, smart storage, and layered light, you’ll enjoy open sightlines without sacrificing privacy. Stay strategic: refine zones, test furniture, and monitor acoustics as you go. This isn’t just renovation; it’s a future-proof redesign that grows with you—like a well-traised rope that keeps your home’s heart intact even as rooms unfold.