You may not realize how much space a single alcove can hold when you’re thoughtful about depth, lighting, and hardware. Start by mapping priorities and flow, then sketch built-ins that hug walls and corners without crowding foot traffic. From here, you’ll see how hidden compartments and full-height cabinets can blend vintage charm with modern organization, paving the way for practical details that keep your bungalow uncluttered. Ready to scope out what fits where?
Key Takeaways
- Assess items and zones: catalog stored goods, prioritize by use and size, then group into functional zones for built-ins.
- Plan layout for flow: map high-traffic paths, place shallow units along corridors, deeper bays in living spaces.
- Choose vintage-friendly materials: use textured finishes and budget options like plywood, thermofoil, or melamine to maintain cohesion.
- Optimize small-space wardrobe: full-height runs, adjustable shelves, mirrored doors, and recessed lighting for illusion of space.
- Add hidden and finishing touches: integrate hidden compartments, decorative niches, and period hardware to blend bungalow charm.
Identify Storage Priorities for a Bungalow
When identifying storage priorities for a bungalow, start by listing every item you need to store and where it currently goes. You’ll map priorities by usage, frequency, and size, then group items into zones.
Begin with daily essentials, seasonal items, and infrequently used pieces. Note current access points, door swing, and ceiling height to determine viable storage options.
Prioritize items you touch most: coats, cleaning supplies, and cables, then household linens and paperwork. Consider future needs, like family growth or redecorating, to avoid overstuffing.
Plan for flexibility with adjustable elements. Integrate Custom shelving where vertical space exists and place heavy items at lower levels for safety.
Emphasize Closet organization to streamline retention, retrieval, and maintenance while keeping traffic clear and spaces breathable.
Plan Layout to Maximize Flow and Alcoves
To maximize flow and create useful alcoves, start by mapping high-traffic paths and sightlines from entry points to key zones. Then place built-ins where they enhance circulation, not hinder it. Align storage lines with doors and thresholds to minimize detours and keep sightlines open.
Use shallow, tall units along corridors to preserve width while increasing capacity, and reserve deeper bays for living areas or bedrooms where you’ll benefit most from integrated storage. Plan alcove lighting at eye level to brighten work surfaces and prevent shadows; let lighting cue progressions between zones.
Incorporate creative shelving in corners and along walls to soften angles and add function without bulk. Finalize layouts with clear access to windows, switches, and vents to maintain practicality and polish.
Choose Materials That Fit Vintage Charm and Budget
Choosing materials that deliver vintage charm without breaking the bank starts with a clear palette: mix affordable, time-worn-looking finishes with durable basics.
You’ll prioritize surface textures that read as aged yet clean, like distressed veneers, matte lacquers, and subtly grained laminates. Pair these with solid core options that resist daily wear, so your built-ins stay practical long term.
For Vintage materials, swap in low-cost reclaimed-look panels and hardware that echoes midcentury or craftsman details without high prices.
Consider Budget options such as prefinished plywood, thermofoil, or melamine with edge banding for durability and easy maintenance.
Always test color and sheen under room lighting, then seal high-traffic faces to prevent wear.
Align materials with overall color story to keep cohesion and timeless appeal.
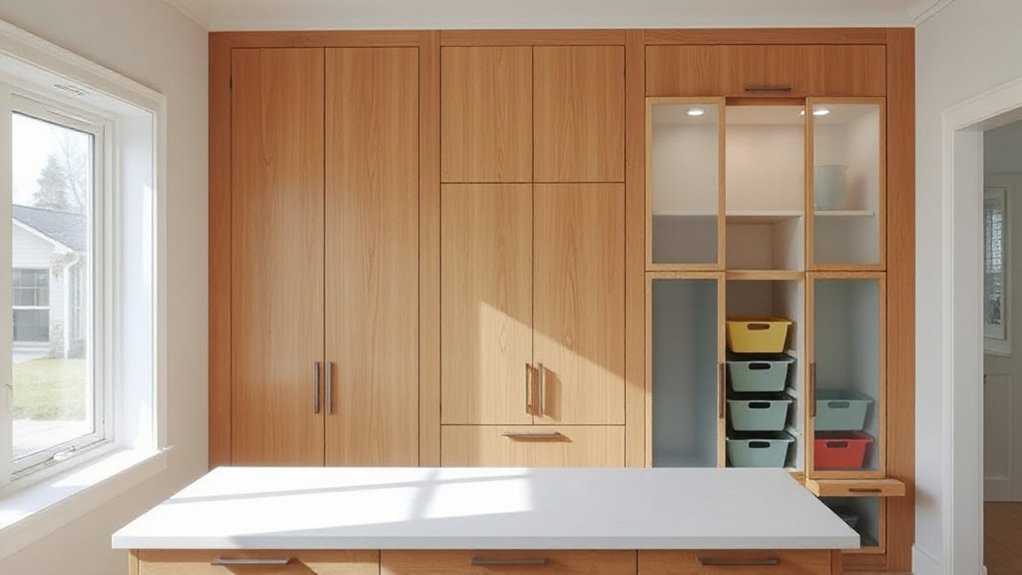
Built-In Wardrobe Ideas for Small Spaces
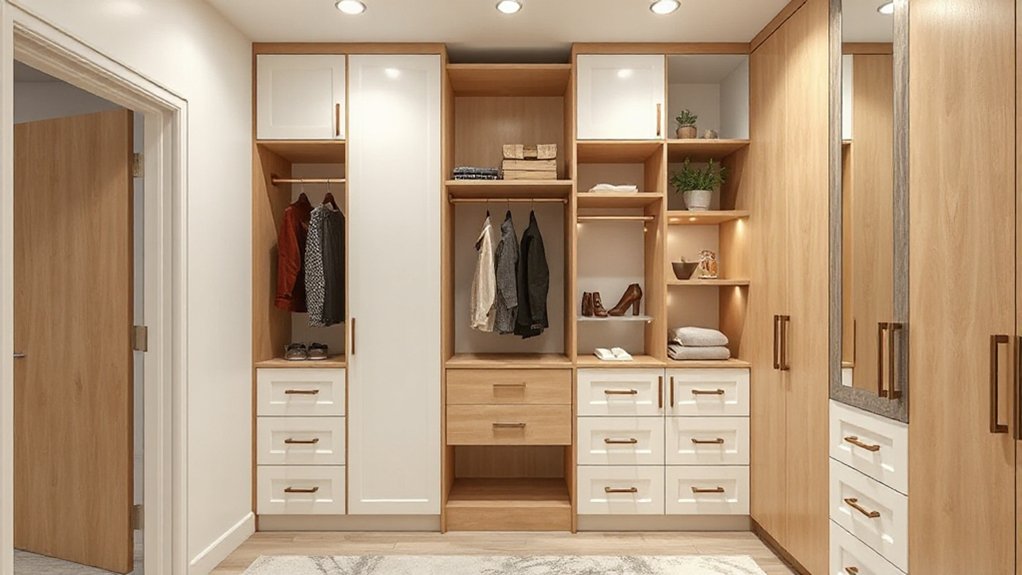
Need smart storage that fits small spaces without feeling crowded? Built‑in wardrobe ideas for compact rooms should maximize capacity without bulk. Start with wardrobe runs that use full height, then install adjustable shelves to adapt to seasonal changes.
Use slim, open racks for easy access to frequently worn items and keep folded pieces on labeled baskets to reduce clutter. Incorporate a combination of hanging bays at varied heights to accommodate long coats and short tops.
Opt for mirrored doors to visually expand the space and improve light. Prioritize space saving fixtures like recessed lighting, pull‑out drawers, and corner organizers that minimize wasted area.
Focus on Closet organization principles for a tidy, efficient wardrobe that stays practical and polished.
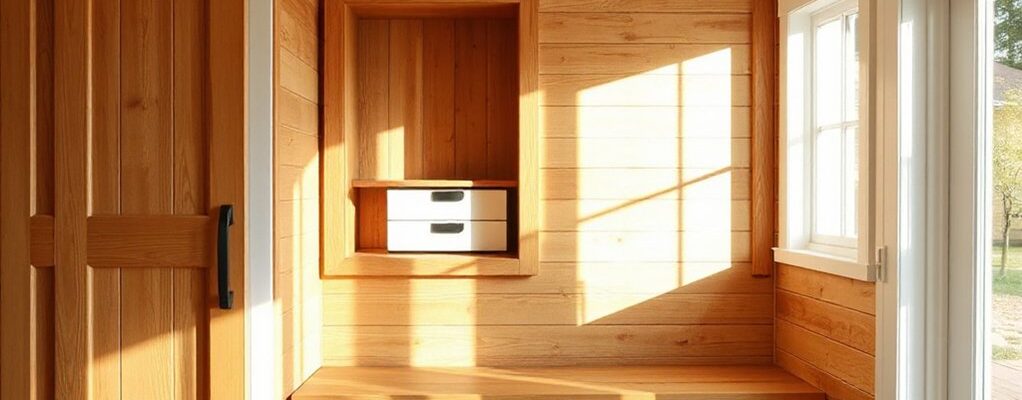
Hidden Storage Ideas to Keep Rooms Clutter-Free
Hidden storage can transform cluttered rooms into calm, functional spaces without sacrificing style. You’ll hide everyday essentials in plain sight with smart placements and clean lines. Look for hidden compartments integrated into seating, under stairs, or behind raised panels to reclaim floor space without visual noise.
Use decorative niches to showcase guests’ items or seasonal decor, keeping clutter out of sight yet accessible. In bedrooms, opt for bed frames with pull-out drawers and a headboard shelf for smaller belongings.
In living areas, choose ottomans and coffee tables with concealed storage. For entryways, build a bench with a lift-top compartment and a slim wall niche for keys and mail.
Prioritize sturdy mechanisms, soft close, and consistent finishes to maintain a cohesive look.
DIY vs. Pro: When to Hire and What to Expect
If you’re weighing DIY against hiring a pro, start by matching your own skills to the project scope, timeline, and overall safety.
Consider your budget in three parts: materials and tools, potential mistakes, and any permits or inspections that can affect timing.
We’ll break down when to hire, what to expect from each path, and how to plan a realistic schedule.
When to Hire Pros
Deciding when to DIY and when to hire a pro hinges on scope, safety, and budget. You’ll know you should hire when structural changes, electrical work, or permitting are involved, or when precision matters for daily use.
If scope is light—non-load-bearing shelves, cosmetic cabinet refinishing—you can handle it yourself. Expect pros to deliver consistent finishes, code compliance, and faster turnaround, with warranties.
Consider your priorities: furniture placement and lighting enhancements may guide whether you DIY or contract.
- Assess load/structural requirements before planning
- Choose a pro for electrical, plumbing, or bearing walls
- Align timing with project milestones and permits
- Clarify expectations for finishes, timelines, and warranties
Budgeting and Timing
If you DIY, expect lower upfront costs but longer timelines and a steeper learning curve. For pro work, get a detailed timeline planning document with milestones, inspections, and any lead times for custom cabinetry or built‑ins.
Budget buffers for surprises are smart in both cases. Compare quotes, warranties, and post‑installation support. Track progress with a simple checklist and adjust as needed.
Decide early whether safety risks or complexity push you toward a professional, and align your plan with your budget and schedule.
Finishing Touches to Blend With Bungalow Style
To blend built-in storage with a bungalow’s charm, start with pieces that echo the home’s natural materials and simple lines. You’ll want finishes and profiles that feel handcrafted, not showroom perfect, so the changeover remains seamless.
Use decorative accents and color coordination to tie the system to the room’s mood, avoiding visual clutter. Keep hardware understated and period-appropriate to preserve the era’s feel.
Balance openness with enclosed storage to maintain the airy vibe.
- Choose knobs and pulls that reflect vintage hardware
- Use a muted palette and wood tones that echo the house
- Integrate open shelves with closed cabinets for texture
- Add small decorative accents to mirror other rooms
Frequently Asked Questions
How Do I Budget for Built-In Storage in a Bungalow?
You should start with a clear budget target, then map costs to priorities. Decide how much you’ll spend on storage organization features you actually use, like built‑ins in living rooms or bedrooms, and leave a contingency for install surprises.
Break the total into categories: cabinets, hardware, finish, and labor. Plan for about 10–15% extra for overruns.
Track every purchase, compare quotes, and adjust. Stay disciplined: prioritize essentials, monitor spillover, and refine your budget plan as you go.
What Are Lightweight, Durable Materials for Vintage Storage?
Like a well-tuned instrument, you’ll notice how lightweight, durable materials shine.
For vintage wood and reclaimed metal, you’ll want boards that are quarter-sawn and mill-safe, plus powder-coated frames for longevity.
You’ll mix vintage wood with reinforced joints and lightweight aluminum accents.
You’ll prioritize load-bearing tested fasteners and sealed finishes to resist wear.
You’ll assemble with precision, keeping everything modular for easy future tweaks, and you’ll enjoy sturdy, stylish storage that ages gracefully.
Can Built-Ins Affect Ceiling Height or Room Proportions?
Yes, built-ins can affect ceiling height and room proportions. If you choose floor-to-ceiling units, you’ll gain storage but may feel boxed in unless you add negative space and proper lighting.
Opt for soffits or recessed shelves near the ceiling to maintain airiness. Use ceiling integration with slim profiles, and keep openings wide to preserve space perception.
Balance tall storage with lower cabinets, and align color and materials to enhance the illusion of height.
Which Lighting Options Best Highlight Built-In Features?
Absolutely—the best options are recessed downlights and track lighting to keep the ceiling clean while you highlight details. Use custom lighting for focused spots and guarantee even spill.
Place accents at eye level on built-ins, shelves, and under cabinets to emphasize texture. Combine directional accent placement with soft ambient fills so textures pop without glare.
You’ll get crisp, balanced illumination that breathes life into your space.
Are There Zoning or Permit Considerations for New Built-Ins?
Yes, there are zoning or permit considerations for new built-ins. You should check local zoning restrictions and understand permit application processes before starting.
Depending on your area, built-ins affecting plumbing, electrical, or structural elements may require plans, inspections, and code compliance. You’ll likely need to submit sketches, material details, and installation methods.
Reserve time for reviews, and address any conditions promptly to avoid delays. Coordinate with your contractor to guarantee smooth approvals.
Conclusion
As you close the project, you’ll walk a hallway of calm, where every shelf gleams like a stored secret. Imagine drawers that sigh shut, alcoves lit with warm glow, and corners that whisper “built-in, not bulky.” Your bungalow breathes easier, clutter tucked behind vintage hardware and hidden niches. You’ll stand amid organized spaces that feel timeless, practical, and polished—a quiet frontier where form meets function, and every inch finally serves you. Your home, beautifully maximized and thoughtfully settled.