A step-by-step guide to building your own raised garden bed puts you in the driver’s seat from the start. You’ll pick a sunny spot, plan dimensions, and choose durable materials that last. With simple framing, proper drainage, and a thoughtful soil mix, you’ll set up a productive bed that’s easier on your back and your plants. Ready to map out your layout and gather supplies? There’s more to take into account before you lift a board.
Key Takeaways
- Plan bed size, depth, and sun exposure, selecting 4×8 ft (12–18 in depth) as a common, practical option.
- Choose durable materials (untreated cedar, redwood, or recycled composites) and avoid treated lumber for safety.
- Build a level frame with exterior screws, corner braces, and a bottom barrier if pests or weeds are a concern.
- Elevate on a leveled base, ensure proper drainage, and position near water for easy irrigation.
- Prepare a rich soil mix with compost and amendments, then plant per seasonal timing and mulch to conserve moisture.
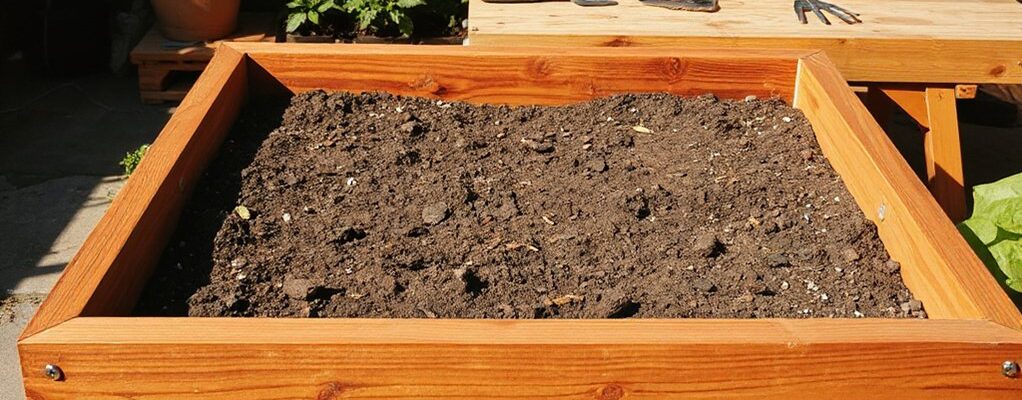
What a Raised Bed Is and Why It Helps Your Garden
A raised bed is a contained, elevated garden plot built above the surrounding soil. You’ll use this setup to improve drainage, warm the soil earlier in the season, and reduce soil compaction.
In practice, you gain better control over where your roots grow and how your plants access nutrients. You’ll also see clearer soil structure, making watering more efficient and weeding simpler.
Garden aesthetics matter: neat edges and uniform materials create a tidy, inviting space that fits your yard’s style.
For pest control, the contained design helps deter some ground-dwelling pests and eases barrier installation around the bed.
Plan Your Raised Bed: Size, Location, and Sunlight
Think about how big your bed should be and where it fits in your yard, so you can work comfortably and reach every edge.
Place it where it gets plenty of sunlight, but consider afternoon shade if you grow heat-loving crops.
Decide on a practical location first, then fine-tune size and layout to match your space and goals.
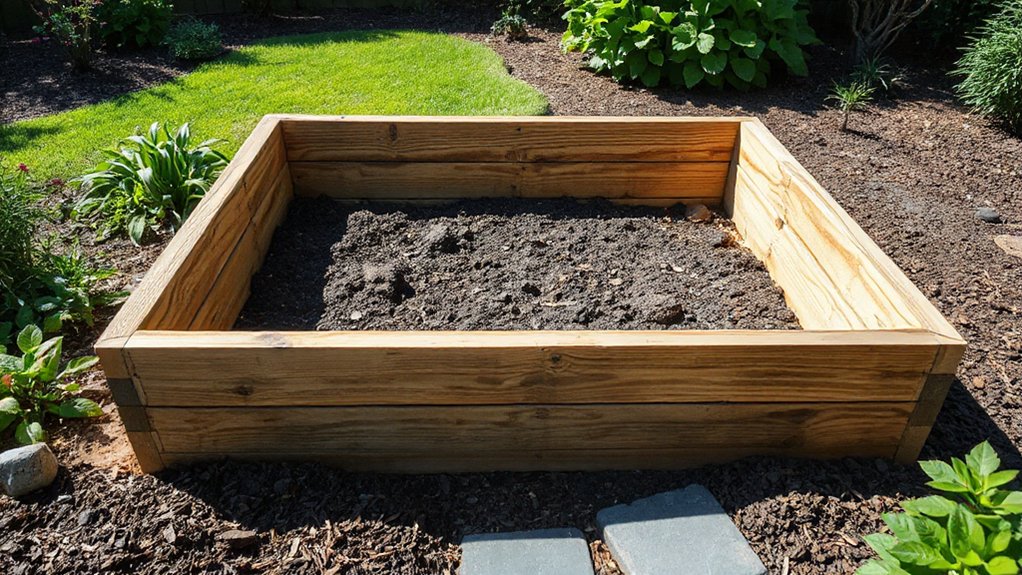
Bed Size Considerations
How big should your raised bed be? Start with a practical size that suits your space and your gardening goals. A common inch-to-foot guideline is 4 by 8 feet, which keeps movement within reach from all sides and reduces soil compaction.
If you’re short on space, go for 4 by 4 feet or even 3 by 6 feet—still easy to tend.
Depth matters too: at least 12 inches for most vegetables; 18 inches for root crops like carrots, parsnips, and beets.
Consider accessibility: you’ll want to stand comfortably and avoid stepping on the soil, which helps prevent soil erosion.
Plan for pest control by using solid, rot-resistant materials and a secure, pest-resistant frame.
Always leave room for future expansion if needed.
Sunlight and Location
Choosing the right spot is as important as the bed size. You’ll want full sun for most vegetables, about 6 to 8 hours daily, and a nearby water source for easy irrigation. Avoid areas shaded by trees or buildings, which stunt growth.
Consider slope and drainage; a gentle grade prevents puddling after rain. Place the bed where airflow discourages fungal issues but isn’t exposed to strong winds that damage stems.
Think about accessibility: you’ll reach from all sides, with tools close at hand. Plan for future expansion or companion plantings nearby.
Monitor garden pests early by observing daily. If you spot trouble, implement pest control measures promptly and with minimal disruption to your crops.
A well-sited bed boosts yields and simplifies maintenance.
Choose Materials That Last and Save You Money
When you’re choosing materials for a raised bed, durability and cost matter most: look for rot‑resistant, treated or naturally long‑lasting options that won’t break the bank in a few seasons.
Start with untreated cedar or redwood if you can, or choose composite boards designed for outdoor use.
Recycled plastic bricks or concrete blocks offer longevity with minimal maintenance.
Avoid pressure-treated lumber containing chemicals that could leach into soil; if you must, line the interior with a barrier.
For price balance, consider prebuilt kits or repurposed materials that are still solid.
Plan for proper drainage, and seal edges to reduce wear.
Integrate garden decor thoughtfully, and keep pest control in mind with sturdy, affordable materials.
Build a Sturdy Raised Bed Frame: Tools and Techniques
With the right tools and techniques, you can build a sturdy raised bed frame that lasts for years. Start with a plan: measure your space, decide on dimensions, and choose lumber that resists rot.
Use galvanized screws and exterior-grade wood to prevent corrosion and guarantee longevity. Cut four straight boards for the perimeter and add internal corner braces for rigidity.
Drill pilot holes to avoid splitting, then assemble on a flat surface with a level to keep your bed true. Consider a bottom barrier to deter pests and weeds, and seal joints with weatherproof sealant.
For garden aesthetics, pick a uniform wood tone and add a simple trim. Kept clean and inspected, your frame supports healthy soil and pest control friendly planting.
Elevation and Drainage for Raised Beds
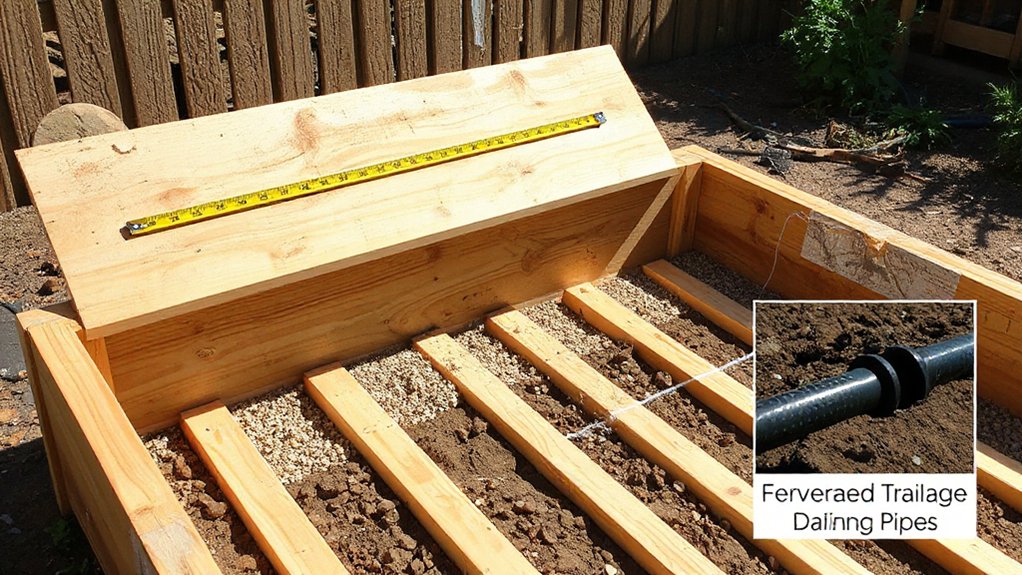
Elevation and drainage are essential for a healthy bed, so start by lifting your plot off the ground enough to promote airflow and prevent waterlogging. Elevation reduces soil compaction and helps roots access oxygen, while drainage prevents soggy sections.
Use a solid, level base—gravel or compacted mulch—under the frame, then guarantee the bed sits a few inches above soil grade. Install a bottom barrier if you’re concerned about weeds, but allow air channels to circulate.
Consider sloped sides or a slight incline to guide excess moisture away. For garden aesthetics, align height with nearby beds and pathways to look intentional.
For pest prevention, create raised edges that deter ground-dwelling critters. Regularly inspect seams and fasteners to maintain proper drainage and structural integrity.
Mix the Right Soil: Compost, Topsoil, Amendments
To get your bed off to a strong start, combine compost for richness with topsoil for structure, and add targeted amendments to tune pH and nutrients.
I’ll show you what each component contributes and how much to mix for your plant choices.
Let’s outline the basics of compost fundamentals and amendments essentials so you can tailor your soil mix with confidence.
Compost Fundamentals
Compost is the backbone of healthy soil, and mixing it correctly with topsoil and amendments sets the stage for thriving plants. You’ll combine finished compost with nutrient-rich topsoil to form a balanced base, then add small amounts of organic amendments as needed.
Think about texture: a crumbly, moist mix that drains well supports root growth without becoming soggy. Include worm composting as a practical, continuous source of microbes and nutrients; vermicompost enriches the soil with beneficial organisms.
Plan your compost bin design to manage moisture and aeration, ensuring airflow and easy turning. Use a simple, accessible setup that fits your space and budget. Keep the mix even, avoid excess bins, and monitor moisture to maintain a steady, plant-friendly environment.
Amendments Essentials
Amending your soil starts with the right blend: compost for biology, topsoil for structure, and targeted amendments to tune nutrients and texture. You’ll mix in amendments to address your bed’s specific needs, not guess at them.
Start by testing your soil or noting deficiencies, then choose amendments accordingly. For texture, add compost to improve crumb and drainage, while topsoil provides bulk and anchorage for roots.
Use organic fertilizers sparingly to fuel growth without burning delicate roots, applying them according to label directions. Focus on the soil microbiome; healthy microbes access nutrients and boost resilience.
If drainage is an issue, incorporate mineral amendments like gypsum or pumice as needed. Keep amendments gradual, recheck soil health after a few weeks, and adjust to maintain balanced pH and structure.
Fill the Raised Bed: Step-by-Step Layering Process
Layering your bed starts with a base that drains well and won’t compact. You’ll fill in layers that form a stable, fertile core while keeping roots happy.
Begin with a coarse, brown material like shredded leaves or straw to improve structure and drainage.
Add a thin, moisture-retentive layer of composted kitchen scraps, garden soil, or well-rotted manure, keeping it evenly spread.
Alternate between carbon-rich bulking agents (dry leaves, cardboard) and nitrogen-rich amendments (grass clippings, compost) to balance nutrients.
Maintain a comfortable depth, allowing space for roots to grow downward.
As you layer, monitor for pests and aeration—air pockets matter.
Finally, top with a light mulch to shield young plants.
This approach supports garden aesthetics and pest control goals while keeping gardening simple and efficient.
Planting Guide: Selecting Plants for Raised Beds
When selecting plants for your raised bed, start with your climate, space, and sunlight to match plant needs with your site.
Consider soil mix basics and how it supports root growth, drainage, and steady moisture for healthy transplants.
Plan your planting by season and varieties that fit together, using compatible maturity times and spacing to maximize yield.
Plant Selection Basics
Choosing the right plants for a raised bed starts with understanding your space, climate, and soil, then matching varieties that fit those conditions and your goals. You’ll prioritize compact or quick-maturing varieties that maximize sun, drainage, and airflow.
Begin with a simple plan: group herbs, leafy greens, and flowering accents to simplify maintenance and succession planting. For an herb garden, pick compact varieties like basil, thyme, and chives that thrive in containers and beds alike.
When selecting plants, consider days to maturity and your local frost dates, so you can stagger harvests and extend the season.
For color and pollinators, choose flower choices such as calendula or marigold that won’t overwhelm edible crops.
Rotate families yearly to reduce pests and soil fatigue, keeping beds productive and inviting.
Soil Mix Considerations
A good raised-bed soil mix starts with a balanced blend that drains well yet holds moisture, so your plants get steady water without sitting in soggy ground. You’ll want a base of garden soil or composted matter mixed with organic components that improve structure.
Aim for a fluffy texture that roots can penetrate easily, not a dense mass. Include components like compost, aged manure, and coconut coir or sphagnum peat to enhance moisture retention without oversaturation.
Consider soil composition to guarantee proper aeration and drainage, then adjust with perlite or coarse sand if you notice compaction.
Track nutrient balance by offering balanced inputs and avoiding excessive nitrogen early in the season.
Test soil periodically and amend as needed to support steady growth across your selected plants.
Seasonal Planting Tips
In spring, pick cool-season greens, radishes, and peas, then shift to warm-season tomatoes, peppers, and beans as soil warms. Use succession sowing to extend harvests: plant every two to four weeks for continuous yield.
In summer, mulch to conserve moisture and reduce weeds, while providing shade for delicate seedlings during heat waves.
In fall, select hardy crops like kale, spinach, and garlic, and prepare beds for winter by clearing debris and adding composting techniques to recycle nutrients.
Monitor pests early and apply targeted, organic controls as needed—integrating pest management with healthy plant vigor.
Keep a simple planting calendar handy to guide annual decisions.
Maintenance, Watering, and Seasonal Care
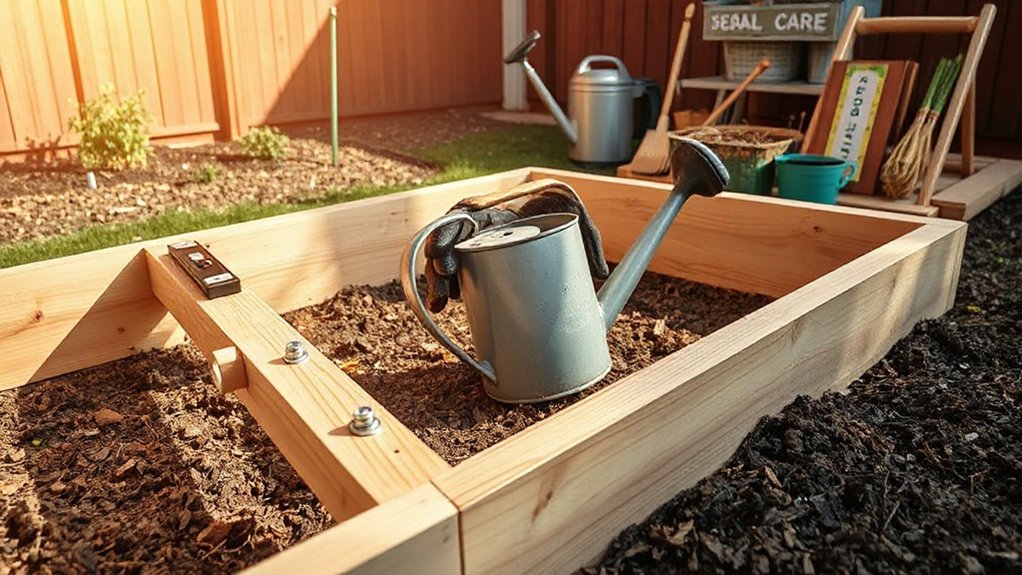
Keeping your raised bed productive means regular upkeep.
To keep moisture steady, water deeply but infrequently, aiming for about 1 inch per week and adjusting for heat or wind. Mulch after watering to conserve moisture and suppress weeds.
Check soil—bright, crumbly texture means it’s healthy; crusty surfaces indicate dryness or compaction. Mulching also helps prevent nutrient runoff.
For pest control, inspect leaves weekly for pests or disease and remove affected sections promptly.
Practice crop rotation so you don’t exhaust the soil or invite pathogens; rotate crops by family each season and replace worn-out compost.
Refresh edges annually and repair any loose boards to maintain structure.
In hot spells, shade or water early morning to reduce stress on plants.
Monitor drainage and adjust watering accordingly.
Troubleshooting Common Issues and Budget Smart Tips
When things aren’t growing as expected, a quick, systematic check helps you pinpoint what’s off and fix it fast. First, inspect moisture: inconsistent watering wrecks root health, so adjust your watering systems to deliver even, deep soakings.
If leaves curl or scorch, verify drainage and soil mix; amend with compost and build organic matter for resilience. Next, look for pests and diseases; small, daily scouting saves big losses—hand-pick obvious intruders and use targeted pest control methods before spraying.
Rotating crops and using mulch reduce stress and suppress weeds. Budget-smart tip: reuse materials when safe, repair leaks rather than replacing hoses, and keep a simple maintenance log.
With steady checks and proactive tweaks, your bed stays productive and cost-efficient.
Frequently Asked Questions
How Deep Should a Raised Bed Be for Root Crops?
For root crops, aim for about 12 to 18 inches of soil depth in your raised bed to support robust root development. Soil depth matters for growth, so guarantee easy penetration and avoid compacted layers that hinder root development.
Can I Build a Raised Bed Without Tools?
Did you know 70% of gardeners improvise tools? You can build a raised bed without tools by using sturdy, stacked boards and gravity. It boosts garden aesthetics, aids pest control, and remains simple for you to assemble.
Are Plastics or Metals Safer for Beds?
Plastic safety matters for beds, but metals offer greater durability. You should weigh chemical leach risks with plastics and corrosion with metals, choosing materials that suit your garden’s depth, climate, and safety preferences for a durable, safe raised bed.
Which Mulch Best Prevents Weed Growth Long-Term?
Mulch types that offer long-term weed suppression include dense, shredded hardwood or pine needle layers; they shade soil and smother roots. You’ll guard beds by layering thickly, maintaining moisture, and reapplying annually for ongoing weed suppression.
How Often Should I Rotate Crops in a Raised Bed?
You should rotate crops in a raised bed every year. This improves soil health through soil aeration and reduces pest pressure for next season, helping with pest control while keeping nutrients balanced. Adjust timing based on crop family and space.
Conclusion
Ready to get growing? You’ve learned how to plan, build, fill, and plant a raised bed that lasts. By choosing durable materials, a solid frame, and proper drainage, you’ll save money and time in the long run. Keep your bed watered, mulched, and fed with the right nutrients, and watch veggies thrive. Can you picture fresh-picked produce right from your doorstep, season after season? Start small, stay steady, and enjoy the rewarding garden you’ve created.