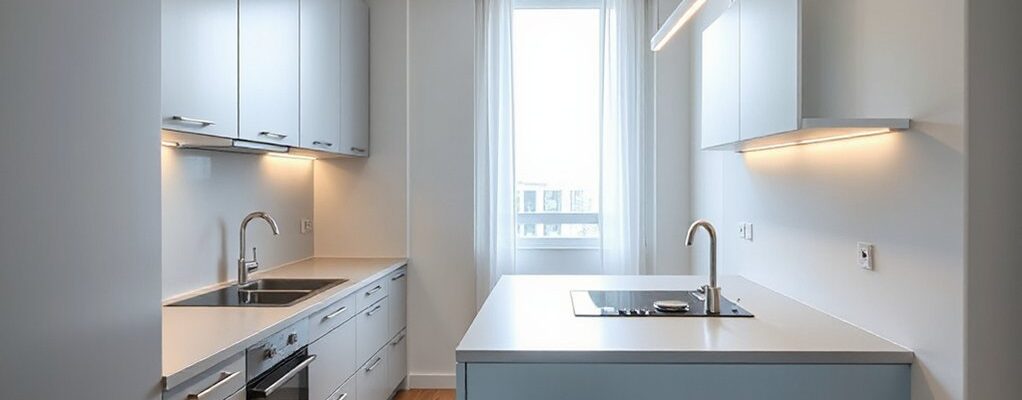
In a one-bedroom flat, your galley kitchen can feel twice as spacious if you align appliances in a straight line and keep the work triangle tight. You’ll want smart storage, corner solutions, and light-reflective surfaces to avoid crowding. The trick is balancing efficiency with style, so you’ll want to weigh island options and lighting layers carefully. Start with a practical layout, then see what quirks your space throws at you as you push to optimize every inch.
What Makes a Small-Kitchen Layout Work in Flats: Core Criteria
A small-kitchen layout in flats works best when it maximizes efficiency from the start: every inch should serve a purpose, and traffic should stay smooth. You prioritize clear zones: prep, cook, and cleanup must flow with minimal steps.
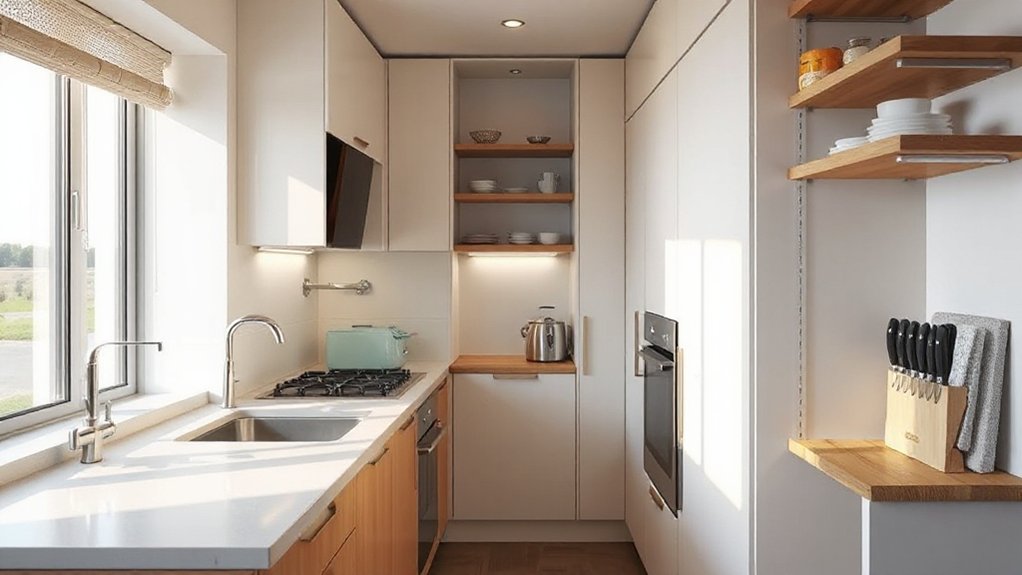
Compact counters demand smart storage—pull-out organizers, wall rails, and toe-kick drawers keep surfaces clear.
Kitchen ventilation should be practical and quiet, guaranteeing fumes escape without cluttering sightlines.
Plan appliance placement to minimize distance between sink, stove, and refrigerator, forming a small work triangle that actually saves time.
Choose compact, multi-tasking appliances and integrated panels for a seamless look.
Lighting matters—undercabinet and ceiling layers reduce shadows and improve safety.
Finally, measure doorways and appliance widths to prevent jams and guarantee comfortable maneuvering.
Galley vs. Corridor Kitchens: Which Fits Your Space?
If you’re choosing between galley and corridor layouts, start by weighing galley efficiency options like counter-to-counter flow and smart storage along every inch.
In a corridor kitchen, focus on optimizing kitchen flow with clear work zones and accessible prep spaces so movement stays smooth.
Your space, your priorities—we’ll compare how these setups handle footprint, storage, and everyday usability to help you decide.
Galley Efficiency Options
When deciding between galley and corridor kitchens, you’ll weigh efficiency, space, and workflow. In galley layouts, optimize with two parallel runs and a clear work triangle, keeping frequent tasks near appliance placement for quick progression.
Shorten steps by grouping prep zones with a pull-out trash, a compact prep counter, and a wall-mounted magnetic strip for utensils. Use slim, tall storage to maximize cabinet depth without crowding; tuck small appliances into a dedicated drawer or pantry to cut clutter.
Favor continuous, uncluttered countertops across both sides to enhance movement. For aesthetics, lean into Kitchen decor that emphasizes light, bright finishes and reflective backsplashes to amplify space.
Prioritize intentional appliance placement—dishwasher near sink, range near hood—to streamline efficiency and keep the galley feeling open.
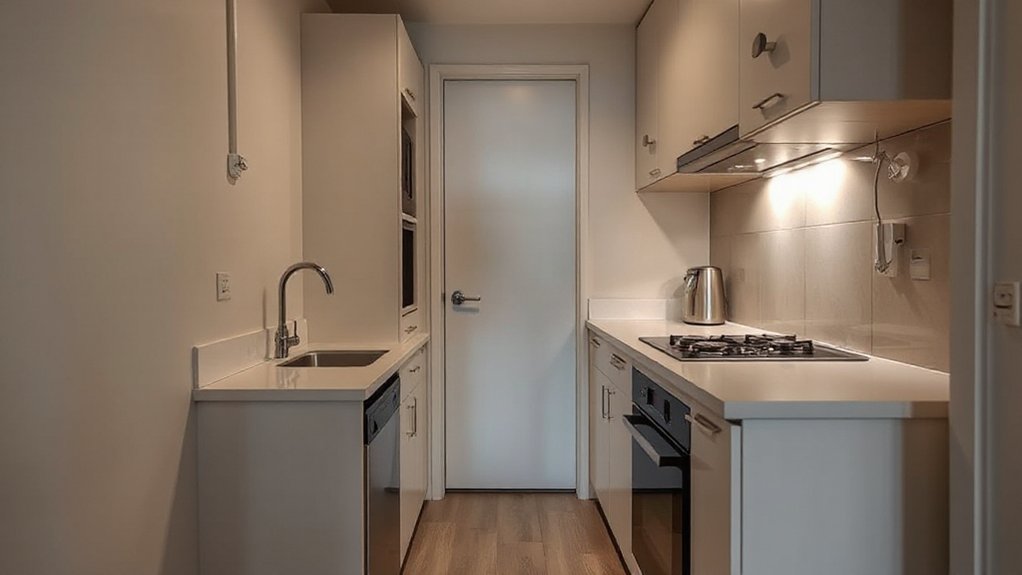
Corridor Kitchen Flow
Corridor kitchens streamline movement by turning a single, narrow footprint into a controlled, efficient workflow. In these spaces, your stove, sink, and fridge align in a single file, so you can work with minimal steps and no wasted motion.
If you’re choosing between galley and corridor layouts, think about door placement, traffic patterns, and cabinet access from both ends. Corridor kitchen flow favors compact, linear storage—pull-out organizers, tall pantry units, and shallow depth counters keep everything within reach without crowding the room.
For small flats, space-saving corridors can feel surprisingly open when you use light colors, mirrored backsplashes, and under-cabinet lighting. Prioritize clear zones for prep, cleanup, and cooking to maintain a smooth, barrier-free rhythm.
Refining the Kitchen Work Triangle for Small Spaces
Let’s sharpen the kitchen triangle for tight spaces by prioritizing triangle efficiency tips that cut waste and improve reach.
Align your work zones so the fridge, sink, and stove form a smooth arc, minimizing steps and avoiding bottlenecks.
Use practical space optimizations like compact storage, pull-out organizers, and countertop decluttering to keep the triangle responsive and stylish.
Triangle Efficiency Tips
To squeeze the most from a small kitchen, refine the work triangle by prioritizing distance, clearance, and access. You’ll maximize flow by placing the fridge, sink, and stove in a near-triangle layout, then fine-tune distances to avoid backtracking.
Keep the path clear; allow at least 36 inches of offset space for doors and drawers to swing free. Use vertical storage to reduce clutter on counters, and choose compact, multi-use appliances to preserve work surfaces.
When choosing updates, consider vintage appliances for style without sacrificing efficiency, and look for Eco friendly materials that are durable and easy to clean.
Install under-cabinet lighting to brighten task zones without adding clutter, and favor drawers over doors for quicker access to frequently used items.
Work Zone Alignment
Smart work zones hinge on deliberate alignment: place the primary tasks—prep, cooking, and cleaning—in distinct, smoothly connected areas that minimize movement and backtracking in tight spaces.
You’ll refine the kitchen work triangle by mapping routes between sink, stove, and fridge, aiming for unobstructed paths and quick access.
Prioritize logical appliance placement to reduce cross-traffic; situate the fridge near prep but away from the main cooking line to avoid bottlenecks.
Store frequently used tools near their tasks, so you don’t chase pans or bowls around.
Choose countertop materials that resist spills and are easy to clean, supporting rapid workflow.
Keep surfaces clear of clutter at every turn, and use vertical storage to maintain open work zones without sacrificing storage.
Streamlined alignment supports faster, calmer, more enjoyable cooking.
Practical Space Optimizations
Practical space optimizations tighten the kitchen work triangle in small spaces by rethinking placement and flow. You’ll keep prep, cooking, and cleanup zones close, but avoid crisscrossing paths.
Start by locating the fridge, sink, and stove in a compact triangle with 4–7 feet sides for efficiency.
Use vertical storage to free counter space, and choose shallow, pull-out organizers for corners.
Prioritize easy access to frequently used tools and ingredients, so you waste fewer steps.
Consider multi-functional elements: a fold-down counter, a portable island, or a compact breakfast bar.
Decorative accents add character without crowding, while durable materials withstand daily wear.
Material durability matters as you select countertops, cabinets, and flooring, ensuring longevity and low maintenance in tight layouts.
Corner Storage and Dead Zones: Turning Gaps Into Usable Space
Corners shouldn’t waste space. In tight kitchens, you can convert gaps into usable storage with smart corner storage and thoughtful dead zone utilization.
Start by installing shallow, rolling trays in corner cabinets so every inch of cabinet depth is accessible without extra bending.
Use carousels or bi-fold doors to keep items visible, minimizing rummaging.
Add vertical solutions: slim pull-out spice racks,
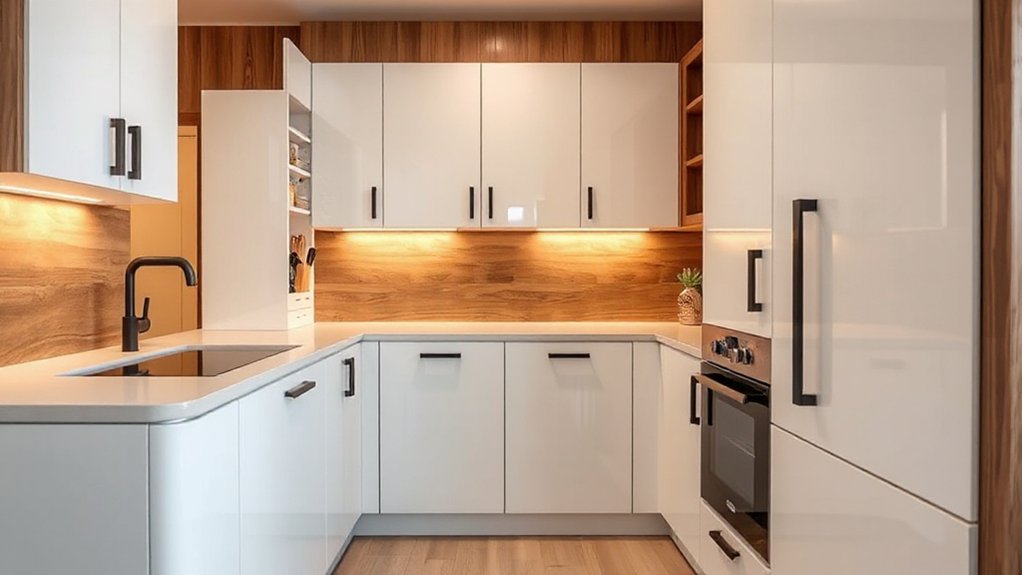
Smart Island Ideas for Compact Footprints
If you’re tight on space but still want a functional hub, a compact kitchen island can anchor workflows without crowding the room. Smart island ideas focus on multi-functionality: a slim profile with integrated prep space, seating on one side, and hidden storage on the other.
Choose compact kitchen islands with narrow footprints and rounded corners to minimize obstruction. Prioritize adaptable surfaces—drop leafs, extendable counters, and notch-free edges—to reconfigure for cooking, dining, or cleanup.
Consider built-in tech like USB charging ports or a small under-counter fridge tucked beneath, preserving counter space. Materials should resist scuffs and be easy to wipe, reinforcing longevity.
Finally, pair your island with task lighting and a reflective backsplash to visually expand the footprint.
Integrated Appliances and Vertical Storage Strategies
Integrated appliances and vertical storage aren’t afterthoughts; they’re the backbone of a sleek, space-efficient flat kitchen. You optimize layout by choosing Appliance integration to hide clutter and create clean sightlines, letting you use every inch without visual chaos.
Aim for drawers and cabinets that align with work zones, not random gaps. Vertical shelving becomes your ally for daily essentials, freeing counters while keeping reachability high.
Install tall pantry modules beside fridge walls to minimize traffic in narrow corridors. Use integrated panels on dishwashers and ovens to extend cabinet run seamlessly.
Layer storage with adjustable heights, pull-out trays, and slim pullout organizers for spices and cans. Prioritize consistency in hardware and finishes to maintain a cohesive, modern look under tight ceilings.
Lighting, Color, and Surfaces That Visually Enlarge a Tiny Kitchen
You’ll start by using light-reflective surfaces to bounce daylight around, making the space feel larger.
Pair bright color schemes with simple patterns and sleek finishes to keep the look airy and cohesive.
Use strategic space lighting to highlight work zones without clutter, so every inch reads as part of an open, practical kitchen.
Light Reflective Surfaces
Natural light is your best ally in a small kitchen: use light-reflective surfaces to bounce it around and make the space feel larger. You’ll boost perception with glossy or matte-finish backsplashes, light countertops, and mirrored accents that echo the room’s lines.
Choose surfaces that are easy to clean and resistant to fingerprints, so your kitchen aesthetics stay crisp. White, pale neutrals, and soft greiges expand visuals without shouting.
Consider glass cabinet doors to showcase what you already own while adding depth. Stainless steel hardware or chrome fixtures reflect light without dominating the scene, keeping the space streamlined.
Use subtle, strategic patterns and minimal texture to avoid busy clutter. Reflective surfaces amplify light, improve mood, and visually enlarge a compact layout.
Bright Color Schemes
Bright color schemes can visually expand a tiny kitchen by pairing bold accents with light, airy bases. You’ll use color blocks deliberately: pale cabinets with a brighter island, or white walls contrasted by a saturated backsplash.
Color psychology guides you to choose hues that feel uplifting and calm, not overpowering, so opt for soft greens, blues, or warm neutrals as foundations. Apply paint techniques that maximize space perception—thin, continuous color on walls, and a high-gloss finish on cabinetry to reflect light.
Introduce one or two bold accents for depth, keeping surfaces sleek and unbroken to avoid cluttered visuals. Finish with reflective surfaces and smart storage accents.
This approach yields a brighter, more open mood without sacrificing practicality.
Strategic Space Lighting
Wondering how strategic lighting can make a tiny kitchen feel larger? You can shape perception with layered lighting and color temperature.
Use bright, cool whites overhead to erase shadows, then add warm task lighting under cabinets to highlight work zones without crowding counters.
Integrate reflective surfaces—glass, high-gloss backsplashes, and polished metals—to bounce light and open the space visually.
Position lights along sightlines to avoid glare, and install dimmers for flexibility during cooking and dining.
Consider decorative accents like pendant clusters or minimal fixtures that don’t overwhelm.
Ventilation solutions should remain discreet, with vent hoods that blend into cabinetry or vanish behind decorative panels.
Balance light with color and texture to keep the kitchen feeling airy, efficient, and stylish.
Open-Plan Flats: Practical Zoning for Flow
Open-plan flats hinge on clear zones that guide flow without breaking the open feel. You design a soft, visual divider—area rugs, shelving, or a slim island—that marks kitchen, dining, and lounge without sealing them off. Prioritize sightlines so you always feel connected yet organized.
Focus on kitchen ergonomics: bring the prep zone near the sink and range, keep counter space trim and usable, and guarantee seating points don’t obstruct traffic. Use appliance placement to create efficient triangles, minimizing steps between tasks.
Choose compact, multi-use pieces that add function without crowding. Lighting should layer: task over counters, ambient for gatherings, and subtle accents to define zones after dark.
Finally, keep clutter low and transitions seamless to preserve the airy vibe.
Budget-Friendly Layout Tweaks That Maximize Movement
To maximize movement on a budget, start with simple, strategic shifts that don’t overhaul the space. You can reconfigure with portable or wall-mounted pieces to free floor space without major renovations.
Prioritize clear sightlines by relocating appliances or opting for compact, dual-purpose tools that reduce clutter. Use decorative accents sparingly to delineate zones without crowding them; a color accent on a slim cart or shelf gate creates visual flow while staying affordable.
Optimize ventilation solutions by choosing under-cabinet hoods or window vents that improve air exchange without bulky equipment.
Install task lighting along work zones to guide movement and minimize missteps.
Keep bases elevated for easier cleaning and occasional rearrangement, letting you adapt as needs evolve.
Small tweaks, bigger rhythm.
How to Evaluate and Adapt Layouts to Apartment Quirks
You’ll start by mapping your apartment’s quirks—awkward corners, fixed appliances, uneven light, and limited storage—so you can spot real constraints before rethinking layouts.
Next, assess traffic flow: guarantee walkways stay clear between prep, cooking, and cleanup zones. Prioritize based on how you actually live, not just how the space looks.
Adapt layouts by reimagining appliance placement—swap fridge or oven positions if doors clash with counters or doors swing into walkways. Consider modular storage solutions that fit odd nooks and vertical space.
When evaluating, test lighting with task scenes to avoid dim corners.
Finally, translate insights into kitchen decor that feels cohesive: choose finishes and accents that unify the layout while keeping surfaces easy to clean and maintain.
Frequently Asked Questions
How Can I Measure Door Clearances for New Layouts?
To measure door clearances, start with a tape measure, record width and swing arc, then test clearance at typical furniture positions. Follow measurement guidelines, noting hinge doors and handles. Guarantee at least 36 inches of passage for comfort.
What’s the Best Sink Size for Tiny Kitchens?
For a tiny kitchen, a 16–18 inch sink fits best; you’ll gain prep space without crowding. Choose a compact faucet and plan Sink installation with ample clearance to keep counters usable and your workflow smooth.
Are There Universal Design Standards for Small Kitchens?
There aren’t universal design standards for all small kitchens, but you should prioritize efficient appliance placement and smart storage solutions. You’ll maximize usability by aligning zones, choosing compact equipment, and embracing modular, trend-aware storage that adapts over time.
How to Conceal Clutter in a Compact Kitchen?
Like a whispered legend, you hide clutter by embracing hidden storage and minimalist design. You optimize every inch, use vertical shelves, pull-out organizers, and sleek fronts, keeping counters clear, essentials accessible, and the space feeling calm, practical, and trend-aware.
Can I Retrofit Electrical Outlets in Tight Spaces?
Yes, you can retrofit in tight spaces. Plan electrical safety first, then smart Outlet placement to maximize usability. Use slim panels, shallow boxes, and label circuits. Hire a pros for code-compliant wiring, testing, and safe, clutter-free operation.
Conclusion
In tiny kitchens, savvy layouts save steps and space, yet clutter-free surfaces spark calm. Galley efficiency clashes with open-plan openness; bright colors clash with moody shadows. The trick is balancing function and vibe—precision with flexibility. Think compact islands that don’t block flow, smart corners that feel roomy, and lighting that widens the room rather than shrinks it. You aim for order that looks effortless, rather than order that feels engineered. Practicality and style, side by side, make small flats irresistibly usable.