Modernizing a 1990s family home is about boosting function, brightness, and safety without erasing its flow. You’ll layer lighting, pick durable finishes, and use reflective surfaces to open spaces, then target kitchens and baths with clever storage and quick upgrades. Insulation and sealing cut bills, while smart layout tweaks preserve the original character. Stay practical: know when to hire pros and how to source the right materials, because the right mix keeps comfort and charm evenly balanced as you go.
Key Takeaways
- Preserve functional 1990s zones with flexible layouts, clear traffic flow, and scalable storage to keep an adaptable vibe.
- Brighten spaces using layered lighting, reflective surfaces, and cohesive 2700–3000K color temperature for better flow.
- Update kitchens with smart storage, compact appliances, cohesive hardware, and restrained color palettes to modernize efficiently.
- Refresh interiors with 2–3 neutrals plus one bold accent, rearranged furniture, updated textiles, and decluttered surfaces.
- Work with licensed professionals for safety-critical updates, plan a cohesive color palette, and maintain a detailed renovation log.
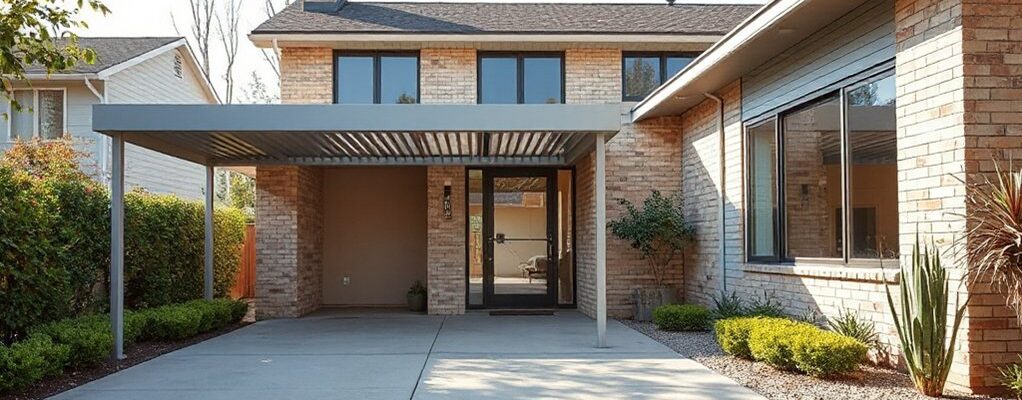
Why the 1990s Layout Still Works Today
The 1990s layout still works because it prioritizes clear, functional zones you actually use daily. You’ll notice the open flow separates living, dining, and kitchen areas without forcing long corridors, so everyday routines stay efficient.
Traffic patterns stay intuitive, minimizing bottlenecks when you’re juggling work, kids, and meals. Vintage charm shows up in built-ins, wood tones, and laminate accents that age gracefully, offering texture without clutter.
Nostalgic decor provides warmth without overwhelming the space, letting modern accents breathe. You gain predictable sightlines for safety and supervision, plus easy rearrangement for gatherings.
If you value practical design, the format supports flexible furniture placements and subtle zone cues, keeping the home timeless while you modernize around enduring cores.
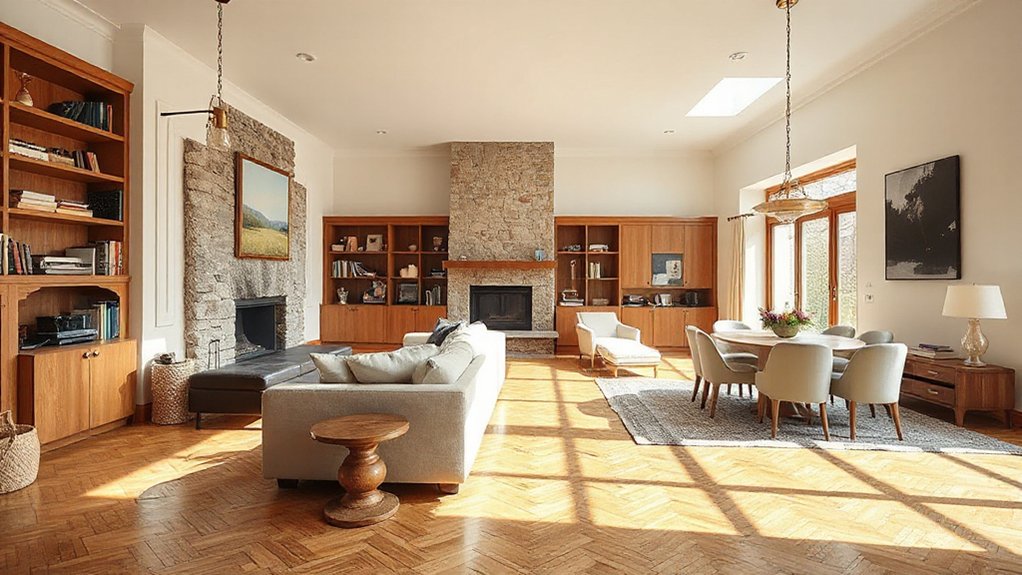
Brighten and Streamline: Lighting for Better Spatial Flow
You’ll start by layering ambient light across rooms, so every corner reads evenly without glare. Use zoned brightness control to adjust mood and function as you move through spaces, from kitchens to living areas.
Consider reflective surface strategies—foil or gloss finishes, mirrors, and light-colored walls—to amplify natural daylight and create a cohesive, open feel.
Layered Ambient Lighting
Use ceiling luminaires to foster even ambient glow, wall sconces to enhance depth, and task lamps at desks, counters, and reading nooks. This approach reduces hot spots and creates flexible zones for everyday life.
Keep color temperature consistent—aim around 2700–3000K for cohesion and comfort. Coordinate finishes with furniture arrangement so shadows land on seating and work surfaces, not behind them.
Favor warm whites that complement upholstery and wood tones, preserving a calm, modern vibe while you maintain clarity and efficiency.
Zoned Brightness Control
Use occupancy sensors to auto-adjust during peak hours, avoiding glare when you’re dining or unwinding. Create a corridor glow that guides traffic without overpowering adjacent rooms, and place task lights where you actually need them, not where they’re easiest to install.
Smart technology ties scenes to routines, so mornings feel efficient and evenings feel calm.
For outdoor lighting, map zones along entryways and pathways, balancing security with subtle curb appeal, and verify weather-rated controls hold up year round.
Reflective Surface Strategies
Reflective surfaces can amplify brightness and broaden space without adding clutter. In this approach, you pair practical choices with steady, stylish results.
Start with mirrored accents at eye level—entryway console, cake shelves, or cabinet doors—to bounce natural light without overwhelming the room. Position lighting to reflect off polished surfaces, boosting perceived depth during evening hours.
Glass decor should be lean: a clear coffee table, slim display bowls, and transparent shelving that almost disappears from sight. Use frameless or slim-framed mirrors to minimize visual weight, ensuring lines stay clean and continuous.
Avoid busy patterns on nearby textiles; instead, let glass and mirror elements carry the brightness. Finally, test sightlines from main seating to windows, adjusting angles for maximum flow and minimal glare.
Insulate, Seal, and Save: A Practical Thermal Upgrade
Are you ready to shrink bills and boost comfort by tightening up your home’s thermal envelope? You’ll start with a measured plan: block drafts, then fatten up insulation where it counts.
Focus on thermal insulation in attic and walls, using high-R batts or blown insulation and rigid foam where needed. Seal gaps with airtight sealing methods—chemically backed sealants, weatherstripping, and door sweeps—so steady warmth don’t leak out during cold snaps.
Check windows for leaks and consider secondary glazing or tight-fitting films to reduce condensation and heat loss without a full remodel.
Prioritize ventilation that preserves air quality while minimizing energy escape, such as a controlled exhaust or mechanical ventilation with heat recovery.
Track improvements with a simple bill-and-comfort metric to stay on target.
Kitchen Refresh on a Budget: Storage Hacks and Modern Helpers

If you’re revitalizing a 1990s kitchen on a budget, start with smart storage that frees counter space and streamlines daily routines. Use vertical racks, pull-out trays, and a slim, modular pantry to maximize every inch without a full remodel.
Consolidate often-used tools in a shallow drawer insert and label bins for quick access. For appliances, consider affordable appliance upgrades like a compact microwave drawer and energy-efficient dishwasher, focusing on performance rather than size alone.
Update the room’s feel with a restrained paint color on cabinets or walls to brighten without clashing with existing hardware. Finish with cohesive hardware and open shelves that display essentials.
Small changes, well-planned, yield noticeable momentum toward a refreshed, functional kitchen.
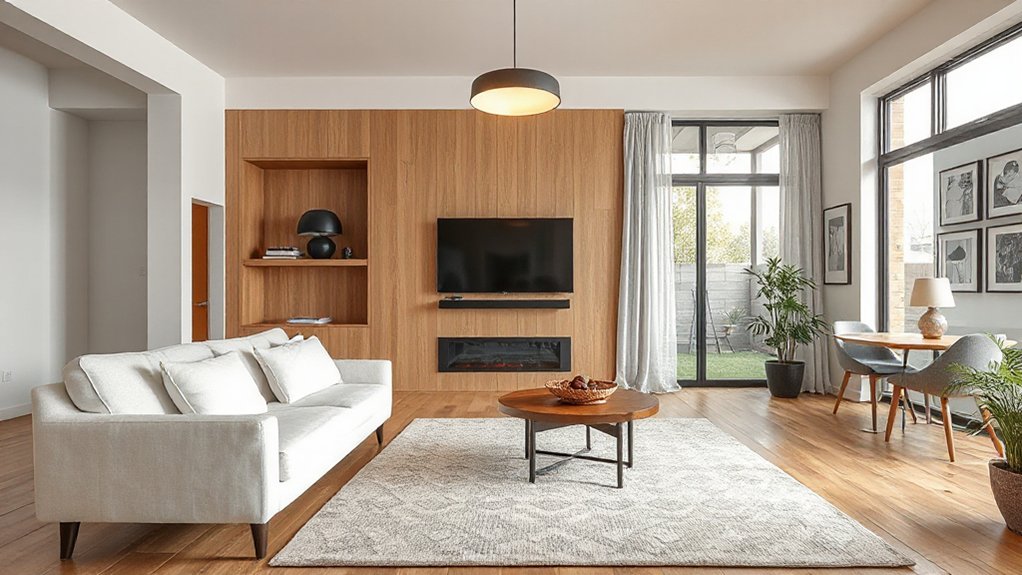
Flexible Living Zones That Still Feel True to 1990s Character
Flexible zones let you keep 1990s character while tightening flow and function.
Think open paths that still read as distinct areas, with careful sightlines and softly defined boundaries that preserve 1990s roots and vintage touches.
Plan for zoned spaces that adapt to daily life, balancing character with modern practicality.
Flexible Zones Preserve Character
Flexible zones can preserve the 1990s character while embracing modern living by combining open sight lines with clearly defined use areas. You’ll purposefully separate functions without collapsing the era’s feel, using room division cues like built-in shelves, partial screens, and low-profile partitions.
Think open plan views for social flow, paired with defined areas for dining, study, and play, so spaces breathe yet stay coherent. Install adjustable screens or sliding panels to reclaim privacy when needed, preserving original rhythm and sightlines.
Materials should echo the period—warm woods, muted textiles, brick or panel contrasts—while modern lighting and drywall finishes keep it fresh. Practical tips: choose scalable furniture; preserve key architectural details; and map daily routines to zone boundaries for effortless shifts.
Flowing Layouts, Vintage Touches
Flowing layouts are the backbone of a 1990s home that feels current: you blend open sightlines with clearly defined zones so social flow stays intact while private nooks remain usable.
You prioritize flexible furniture arrangements, letting a living area morph from entertaining hub to quiet reading spot without reconfiguring walls.
Keep traffic clear around key functions—kitchen, dining, and lounge—so movement feels natural, not forced.
Introduce vintage charm through calibrated accents: a retro light fixture, a wood veneer cabinet, or a patterned rug that nods to nostalgia without shouting.
Use layered textures and muted tones to unify spaces; avoid clutter that blocks sightlines.
This approach keeps nostalgic decor tasteful, functional, and timeless, supporting modern living while honoring 1990s character.
Zoned Spaces, 1990s Roots
Zoned spaces keep the 1990s character intact while adapting for today’s needs by clearly defining functions without locking you into a rigid floor plan. You’ll separate activity zones with purpose-built cues—traffic flow, sound control, and sightlines—so gatherings feel cohesive without chaos.
Use partial walls, open shelving, or low partitions to visually divide living, dining, and play areas while preserving in-room dialogue. Color palettes anchor each zone, reinforcing function while maintaining architectural heritage.
Consider a muted main palette with accent tones for zones that require focus, like a study or homework nook. Scalable storage and flexible furnishings let you reconfigure for growing families or entertainment needs.
Document how each zone serves daily routines to sustain the 1990s vibe as you evolve the home.
Durable Finishes That Age Gracefully and Look Good
Durable finishes that age gracefully start with materials and textures you can live with day in, day out, so you don’t have to redo rooms every few years. You’ll want hard-wearing surfaces that tolerate daily wear, easy cleaning, and minimal fading.
Choose midweight paints, low-sheen sheens, and stain-resistant fabrics for high-traffic zones. For surfaces, opt for quartz or solid-surface counters, porcelain tiles, and sealed wood floors that age evenly.
Texture matters: textured walls add interest without showing every fingerprint, while softer textiles hide wear. Incorporate vintage fixtures for character without compromising longevity.
Balance is key: combine durable neutrals with a few durable accent tones, and plan for easy upkeep. This approach keeps spaces cohesive, functional, and stylish as trends evolve.
Quick DIY Tweaks That Move the Needle Fast
Small, fast wins can amplify the impact of your updates without overhauling rooms. You’ll target quick, visible shifts that feel intentional, not invasive.
Focus on color palette tweaks and strategic furniture placement to refresh flow, lighting, and perceived space.
- Swap in a cohesive color palette: pick 2–3 neutral bases with 1 bold accent to unify rooms.
- Reposition key furniture for better sightlines and conversation zones.
- Swap hardware and light fixtures for modern finishes that read as current.
- Update textiles (curtains, cushions, rugs) to reinforce the palette and tone.
- Declutter surfaces to improve perceived space and ease of cleaning.
When to Hire Pros and How to Source for 1990s Homes
Deciding when to hire pros and where to source for a 1990s home hinges on a clear cost-benefit view and reliable materials guidance. Prioritize projects that impact safety, structure, and long-term value first. You assess structural updates, electrical upgrades, and plumbing fixes before cosmetic tweaks.
When you hire, vet licenses, warranties, and portfolios, and seek clear timelines with milestone payments. Sourcing should balance quality with budget: ask for product spec sheets, local supplier availability, and documented lead times.
For layout, plan furniture arrangement to maximize flow and sunlight, then align a cohesive Color palette that supports your targeted finishes. Don’t overlook ventilation, acoustics, and energy efficiency.
Keep a running log of costs, decisions, and suppliers to streamline future renovations.
Frequently Asked Questions
How Can I Preserve 1990S Charm While Upgrading Privacy?
You can preserve 1990s charm while boosting privacy by pairing period details with smart, discreet upgrades. Install window treatments like layered drapes plus cellular shades for light control without bulk.
Choose landscaping options that shield from street view—tall hedges, privacy screens, and textured fences—while keeping sightlines open from upper floors.
Add layered lighting and tasteful hardware to maintain character.
Use smart glass or frosted panels in key rooms for modern privacy without sacrificing style.
Which Paints Best Suit 1990S Exteriors Without Changing Style?
Paint your exterior like a well-tired vinyl record: classic, but with a modern bite. You should choose paints that keep 1990s charm intact, focusing on durable, low-gloss finishes and colors that echo era accents.
For exterior hues, go with muted earth tones and showroom-safe greens or blues. Consider Vintage windows and Retro lighting accents to maintain authenticity.
Use high-quality acrylic eggshell or satin for longevity, and test sun exposure first to avoid fading.
Are There Budget-Friendly Eco-Friendly Upgrades for Retro Homes?
Yes, there are budget-friendly eco-friendly upgrades for retro homes. Start with solar panels on sunny roofs to cut electricity costs, and pair them with a simple monitoring app.
Improve comfort with green insulation, sealing gaps, and breathable insulation materials.
Prioritize smart thermostats, LED lighting, and low-flow fixtures.
Reuse salvaged doors or windows where possible, and choose recycled or sustainably sourced finishes.
These steps stay practical, cost-conscious, and aligned with current energy trends.
How Can Zoning Affect Resale Value in 1990S Layouts?
Open floorplans can boost appeal, but zoning regulations strongly shape resale value in 1990s layouts. You’ll attract buyers by showing flexible use safely within setback and use rules, or by documenting permitted alterations.
If you maintain logical flow, maximize daylight, and avoid oversized additions that violate codes, you’ll protect value. Stay current on setbacks, parking, and use rights; thoughtful reconfigurations often yield higher offers while keeping compliance airtight.
What Are Low-Impact, Reversible Updates for Walls and Floors?
You can implement low-impact, reversible updates for walls and floors by choosing temporary finishes that protect surfaces. Try peel-and-stick wall textures with bold, breathable textures, and swap in removable wallpaper or fabric panels for a reversible look.
For floors, use interlocking vinyl or engineered flooring with low adhesive, then swap out when needed. Focus on floor patterns that hide wear, and maintain clean lines to preserve resale value.
These updates stay practical, trend-aware, and easily reversible.
Conclusion
In short, you modernize with purpose, you optimize with care, you upgrade with restraint. You brighten to reveal space, you streamline to improve flow, you insulate to save. You refresh with smart storage, you update with durable finishes, you tailor zones to fit daily life. You blend modern tech with timeless layout, you balance style with practicality, you plan for comfort, you plan for longevity. You create a home that feels current, yet firmly yours.