Take a studio you know, where daylight floods the living area and a slim sofa mirrors the window line. You’ll see how a cohesive, light palette and reflective surfaces create depth, while multi-functional pieces keep clutter at bay. The trick is in subtle zoning, not walls, plus storage that vanishes from sight. Want to know exactly which moves soften boundaries and boost flow without sacrificing style? The next steps lay out practical tweaks you can apply tonight.
Why Tiny Studios Feel Small: and How to Open Them Up
Tiny studios feel small because every square foot counts against you, and the eye reads walls that abruptly end at narrow boundaries. You tighten perception by exploiting architectural illusions: think continuous sightlines, hidden storage, and color moments that pull the eye along.
Ceiling height matters more than it might appear; you exaggerate it with vertical finishes, tall doors, and streamlined shelving that travels upward. Choose a restrained palette to avoid competing planes, letting lighter tones above midline give the illusion of air.
Define zones with subtle shifts in texture rather than bulky partitions, so openness remains intact. Proportions govern rhythm: keep furniture slender, legs exposed, and negative space intentional.
When you control scale and alignment, the space reads expansive even as it stays compact.
Light up a Small Space: Natural Daylight and Layered Artificial Lighting
Natural daylight anchors the room’s scale, while layered artificial lighting offers flexible mood and task zones without overpowering the space.
You’ll balance brightness, color temperature, and shadow to reveal depth and prevent flatness. Use a mix of ambient, task, and accent lights to weave dimension throughout the studio.
Natural Light Enhancement
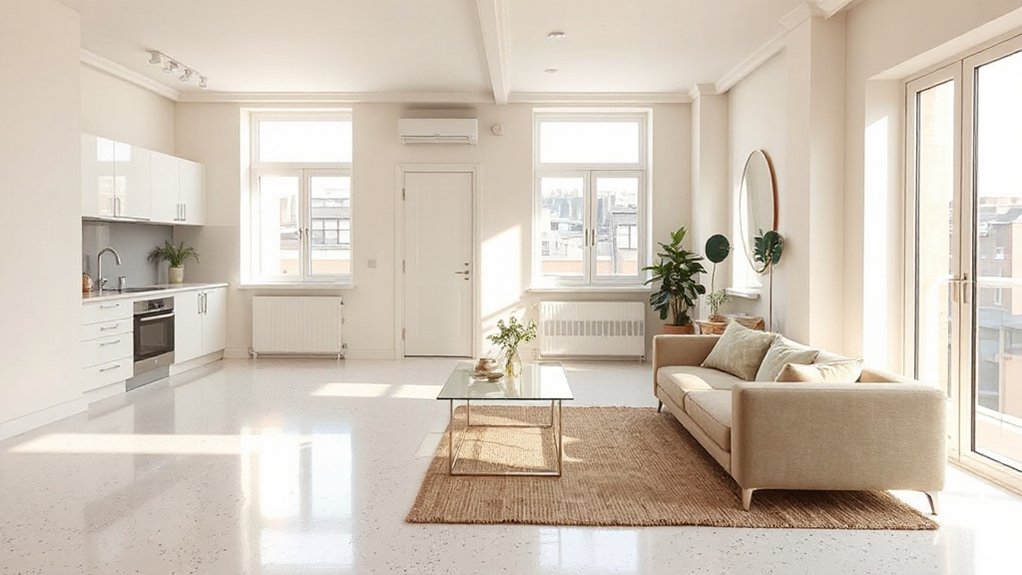
How can you maximize daylight without sacrificing privacy or style? In a compact space, you exploit natural light with precise choices.
Favor large, unobstructed windows or glass doors that pull daylight deeper into rooms. Choose light, reflective paints and minimal window trim to reduce visual barriers.
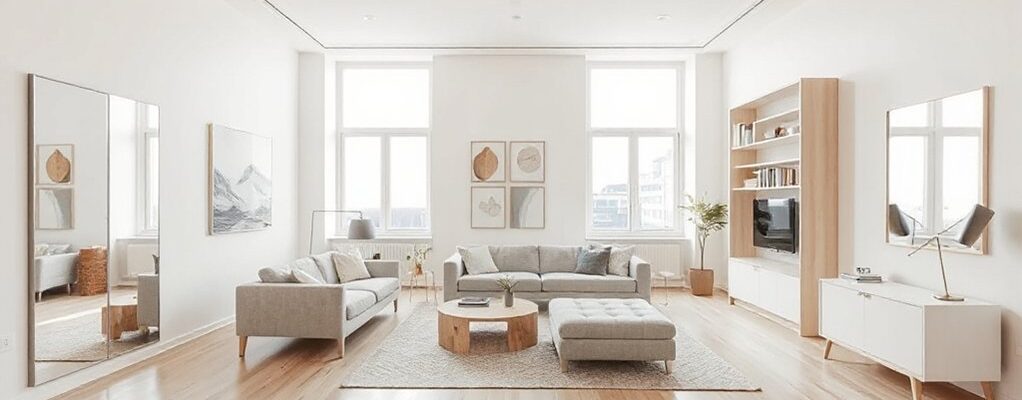
Use sheer or light-filtering window treatments to soften glare while preserving line of sight outdoors. Position mirrors opposite windows to bounce daylight without crowding walls.
Optimize plant placement to frame light sources and create vertical interest without blocking light paths. Keep window sills uncluttered to maintain airy rhythms.
Test glare at different times of day; adjust furnishings to sustain a light flow from morning to afternoon. True daylight becomes your architectural asset.
Layered Lighting Techniques
Layered lighting turns a small space from flat to functional by combining daylight with targeted artificial sources. You balance brightness and depth by layering light levels: ambient, task, and accent.
Start with ambient illumination to create even coverage without glare, then add task illumination where you perform focused activities, such as cooking or reading. Choose fixtures that align with zones rather than one central source, so you avoid harsh shadows and ambient shadows that emphasize edges.
Use adjustable task lights to keep paths clear and surfaces well-lit without overloading the room. Dimmer switches help modulate mood and function as daylight shifts.
Select color temperatures that harmonize—warm for relaxing corners, cool for work areas—ensuring cohesive, spacious perception. Aim for transparency, contrast, and purposeful placement to maximize perceived space.
Zone Without Walls: Create Distinct Areas in One Room
You can define distinct zones in a single room without walls by using visual separation techniques like rugs, lighting, and color shifts that guide the eye.
Smart furniture placement tricks—think perpendicular sofa runs, open shelving, and compact media corners—frame each area while keeping sightlines open.
This approach preserves flow while carving purposeful, functional spaces.
Distinct Zones, One Room
One-room living benefits from deliberate zoning: even without walls, you can define distinct areas by scale, color, and placement. You’ll map tasks to zones, then align furniture and lighting to reinforce purpose without crowding.
Use visual cues—rugs, shelving, and furniture height—to carve living, eating, and sleeping zones with purpose. Choose a cohesive color palette so progressions feel intentional rather than arbitrary.
Keep circulation clear: allow at least three feet around seating and work areas to maintain flow. Decorative wall art acts as focal anchors, signaling zone boundaries while adding character.
Acoustic treatments in chosen zones reduce noise spill and improve comfort, especially near busy kitchen or lounge corners. Pair practical layouts with restrained accessories to preserve spaciousness while sustaining function.
Visual Separation Techniques
Visual separation in a single room hinges on deliberate cues that signal purpose without walls. You shape distinct zones by outlining functions with strategic contrasts: color, texture, and light become your markers.
Use decorative screens not as dividers but as subtle silhouettes that hint at boundaries while preserving flow. Position screens to funnel sightlines toward key areas, creating visual pauses rather than rigid partitions.
Employ furniture scales and placements to imply separate domains without obstructing openness. Introduce visual illusions—achieved with mirrored surfaces, color gradients, or rug borders—to stretch perceived depth and gently demarcate spaces.
Maintain cohesion through a restrained palette and deliberate clutter control so each zone feels purposeful. The goal is clarity, not confinement; space remains fluid, yet clearly organized.
Furniture Placement Tricks
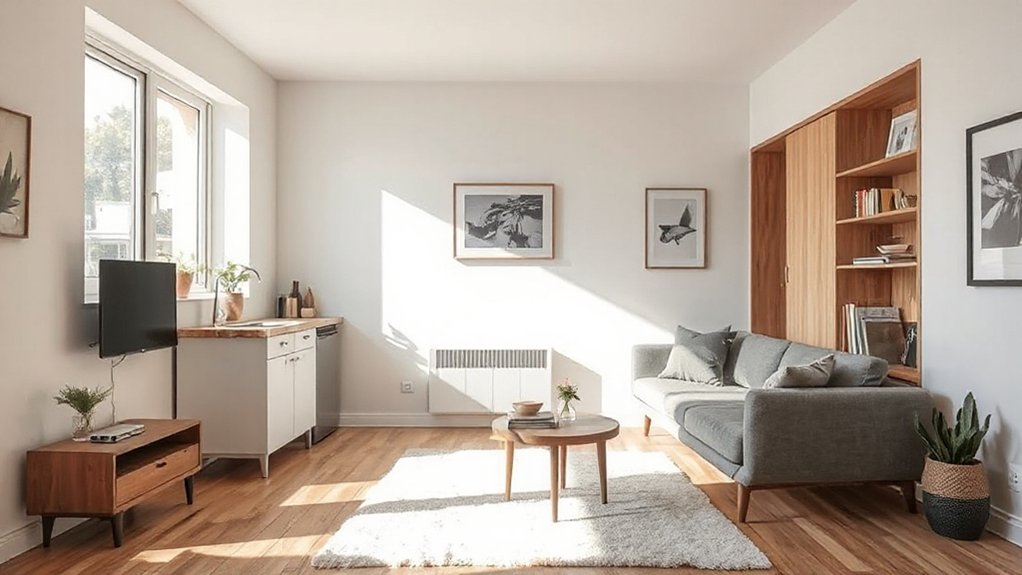
Strategically position furniture to carve zones without walls, turning a single space into clearly defined functions. You’ll use furniture arrangement to delineate living, dining, and sleeping areas without breaking sightlines.
Start with a dominant focal piece, like a sofa, and orient seating to create natural conversation corners. Place a rug beneath the sofa and coffee table to anchor the lounge zone while preserving flow to other functions.
Use open shelving or a console as a visual divider that doesn’t close off air. Choose low-profile pieces to maintain sightlines and avoid clutter.
Incorporate decorative accessories sparingly to emphasize each area—art, lighting, and plants that cue purpose. Keep traffic paths clear and adjust placements after living with the space to refine balance.
Color and Reflectivity: a Cohesive Palette That Visually Expands Space
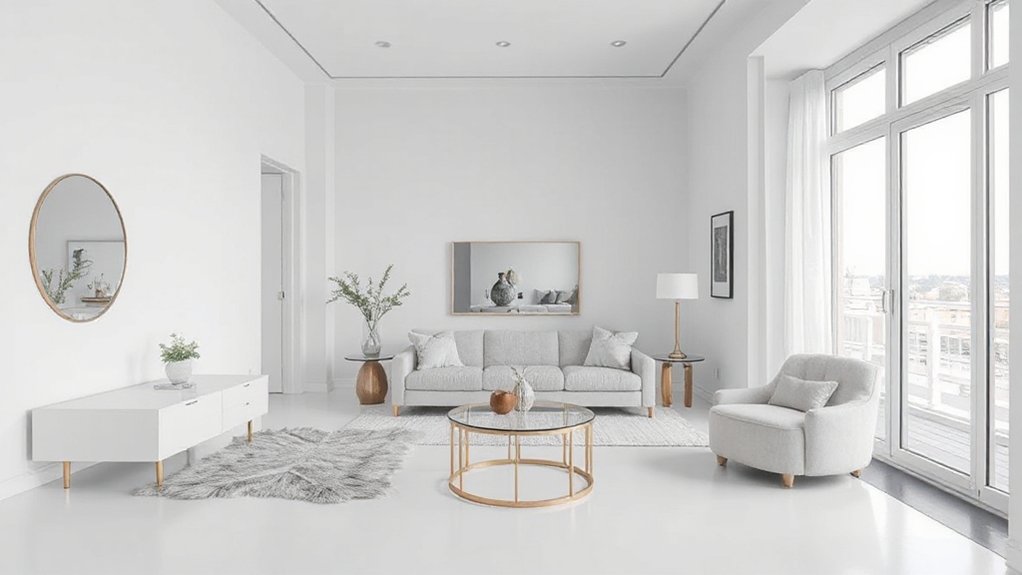
Color and reflectivity work together to elongate and brighten a studio. You choose a cohesive color palette that spans walls, floors, and furnishings, ensuring smooth progressions rather than jarring contrasts.
Focus on color schemes that lean cool and light for perceived depth, while reserving warmer accents for focal points to avoid flatness. Incorporate reflectivity tactics such as matte-to-satin finishes and tempered gloss on selected surfaces to bounce light without glare.
Balance value ranges so midtones carry the room forward, with white or pale neutrals dominating large expanses. Use strategic repetition of hue and finish to unify zones, preventing visual fragmentation.
Pair large, reflective surfaces with floor plans that maximize natural light, creating an expansive, calm atmosphere.
Storage That Shrinks Clutter: Multi-Functional, Space-Saving Solutions
Smart storage should work invisibly: multi-functional pieces that perform more than one task and slim down clutter at the source. You shape efficiency by pairing hidden compartments with visible design, so practicality remains quiet.
Prioritize compact furniture that multiplies utility without crowding sightlines: ottomans with storage, beds with drawers, and desks that fold into walls. Choose modular systems that adapt to evolving needs, letting you swap functions without reworking space.
Elevate harmony by linking storage to color and texture, so concealed capacity feels intentional, not gimmicky. Avoid excess materials; aim for slim profiles, clean edges, and consistent hardware.
The result is breathable space where smart storage reduces surface junk, streamlines routines, and preserves the studio’s aesthetic, making daily living feel effortless and precise.
Layout Tweaks for Flow and Airiness: Furniture Placement for Ease and Openness
To make a studio feel more spacious, start by rethinking furniture placement for smooth flow and open sightlines. Position major pieces to create distinct zones without walls, aligning paths to the entry and key views.
Choose low-profile sofas and slim dining tables to preserve sight of the room’s depth. Then cluster storage where it’s least obtrusive.
Use rugs to anchor zones and guide movement, not to trap it. Consider Murphy beds to free daytime space and simplify movement between living and sleeping areas.
Foldable or folding partitions offer flexible separation without rigid borders, preserving airiness when open.
Prioritize multi-function furniture that reduces clutter while maintaining function, ensuring every placement supports ease, natural light, and visual continuity.
Frequently Asked Questions
How Can I Make Ceilings Feel Higher in a Studio?
Yes, you can. Paint ceilings a bright, light color to visually raise them, and choose streamlined light fixtures that sit close to the ceiling, avoiding bulk; this elevates perceived height while maintaining a cohesive, modern aesthetic.
What Calms Noisy, Compact Spaces Effectively?
Sure thing: you tame chaos with soundproofing techniques and noise canceling devices, effectively calming noisy, compact spaces. You analyze surfaces, seal gaps, and treat reflections, achieving serene acoustics while maintaining style, efficiency, and a quietly confident, satirical edge.
Can Small Rugs Help Rooms Look Bigger?
Yes, small rugs can help rooms look bigger by defining zones and guiding traffic. Pair decorative lighting with cohesive color schemes to enhance depth, maintain balance, and avoid clutter, creating a visually extended, airy feel throughout your space.
Do Mirrors Really Expand a Tiny Living Area?
Yes, mirrors really expand a tiny living area. You’ll optimize mirror placement, using Reflection techniques to bounce light and visually multiply space; you’ll notice sharper lines and calmer textures as the room breathes, witty rhythm hiding clutter beneath.
How Can Plants Improve Perceived Space Without Clutter?
Indoor greenery subtly expands perceived space when you choose strategic Plant placement, avoiding clutter. You’ll opt for vertical shelves and single focal specimens, balancing foliage with open sightlines, so textures harmonize without crowding.
Conclusion
In just a few deliberate moves, you can make your studio feel airy, cohesive, and welcoming. Prioritize light—both natural and layered artificial—so walls read as expansive. Use slim, multi-functional furniture and smart storage to reduce clutter, creating clear zones with rugs and lighting rather than walls. A cohesive palette and mirrors amplify depth, while thoughtful layout sustains flow. Fun fact: open-plan studios with ample daylight report up to a 20% perceived increase in space, instantly transforming the feel of the room.