You’ll approach older terraced issues with a precise, diagnostic mindset, starting from a thorough inspection to map cracks, settlement signs, and moisture ingress. You’ll prioritize non-invasive fixes—crack injections, targeted underpinning, and drainage improvements—before addressing framing and timber elements. The goal is stability without erasing character, guided by engineering input for costly or persistent concerns. If you’re ready to weigh methods against disruption and cost, you’ll find a rational path that keeps more in check than you might expect.
Overview: What to Expect When Tending a Terraced Home

Terraced homes present unique challenges due to shared walls, aging materials, and evolving structural loads. When you tend to one, you assess baseline conditions, timelines, and compliance requirements with precision. You’ll map load paths, identify joint behavior, and quantify risks across both structural and decorative elements.
Historical preservation informs decisions, guiding you to retain original fabric while addressing deterioration, articulation, and material compatibility. You consider interior design implications, ensuring that layout changes respect party walls, ventilation, and acoustics without compromising stability.
You document observations, prioritize interventions, and set measurable milestones for monitoring. You’ll communicate expected outcomes to stakeholders, balancing preservation goals with practical remedies.
Your approach emphasizes data-driven judgments, risk stratification, and transparent reporting to maintain reliability, safety, and value in the terraced home.
What Causes Common Structural Issues in Older Terraces
Many structural issues in older terraces arise from material aging, cumulative loading, and settlement along shared party walls. You assess how historical preservation priorities can influence diagnostic focus, often limiting invasive investigation yet demanding rigorous factual appraisal.
Material deterioration accelerates where timber, brick, and mortar endure moisture ingress, thermal cycling, and load fluctuations from adjacent dwellings. Repetitive loading from floor joists and roof trusses compounds stress, especially at bond beams and lintels, prompting crack propagation and misalignment.
Settlement along party walls stems from soil compression, backfill compaction, and historic ground movement, producing differential movement between homes. Load redistribution due to adjacent renovations can reveal hidden defects.
The interplay of age-related wear and structural redundancy underscores the need to distinguish gradual degradation from abrupt failure to guide targeted remediation.
How to Safely Inspect Damp, Cracks, and Settlement
You should inspect damp areas safely by using proper PPE and non-invasive tools to identify moisture sources without causing damage.
Assess cracks early by documenting widths, orientations, and progression with a calibrated gauge at regular intervals.
Monitor settlement signs through baseline measurements of floor levels and door/frame gaps to detect any deviations over time.
Inspect Damp Safely
To safely inspect damp, begin by isolating moisture sources and documenting visible signs, such as staining, efflorescence, or peeling paint, while wearing appropriate PPE and using a moisture meter or infrared camera for noninvasive detection.
You’ll then classify findings by location, noting patterns that indicate active leakage versus historical damp exposure. Measure surface temperatures where practical and compare against ambient conditions to identify thermal anomalies.
Establish a moisture management plan focused on containment, ventilation, and drainage improvements. Implement Moisture barriers where appropriate, guaranteeing proper sequencing with existing substrates to prevent trapping moisture.
Prioritize damp prevention through targeted dehumidification, controlled humidity, and routine monitoring schedules. Record all measurements, affirm reproducibility, and communicate actionable steps to property managers or tradespeople for safe remediation.
Assess Cracks Early
Assess cracks early by establishing a baseline of wall, floor, and joint behavior before interventions. You conduct a structured survey to compare dimensional changes over time, identifying orientation, location, and progression patterns.
Document crack timing relative to events (seasonal shifts, loading, or humidity swings) to distinguish sudden from gradual movements. Record widths with a calibrated gauge and photograph at consistent intervals, ensuring scale accuracy.
Determine moisture sources by tracing staining, efflorescence, or damp patches near joints, openings, or penetrations. Note any ventilation or drainage faults contributing to propagation.
Correlate crack behavior with material properties and prior repairs, avoiding premature conclusions. Use conservative thresholds for intervention thresholds, prioritizing non-invasive measures first.
This approach minimizes false diagnoses and guides targeted, evidence-driven remediation decisions.
Monitor Settlement Signs
Regularly documenting settlement signs builds on the baseline crack monitoring, helping you distinguish ongoing movement from static conditions.
You approach monitoring with a systematic method: record wall alignments, door and window gaps, and floor slopes at fixed points using a level, plumb line, and labeled markers.
Establish a consistent interval—monthly during construction seasons, quarterly otherwise—and compare results to prior measurements.
Focus on changes beyond measurement tolerance to trigger further inspection.
For damp and moisture, note staining patterns that accompany settlement to separate hydrostatic effects from structural shift.
Confirm safe access, avoid leaning on weakened plaster, and document with photos and dates.
Foundation monitoring and settlement detection are essential for timely interventions and validation of repair effectiveness.
Maintain a clear log for engineers to review.
Stabilise Foundations on a Budget
You can start with a practical assessment of foundation loads and movement to identify cost-effective stabilization options.
Apply targeted, budget-friendly techniques—such as controlled underpinning limits, epoxy or polyurethane resin injections for cracks, and selective underpinning where necessary—to restore stiffness without extensive reconstruction.
Prioritize measurable performance criteria, monitor settlement indicators, and document results to determine the most efficient approach for ongoing stability.
Budget-Friendly Foundation Stabilisation
Funding foundation stabilisation on a budget is feasible when you target critical failure modes first, apply proven, cost-effective methods, and monitor results closely. You assess soil conditions, identify root causes of settlement, and prioritize interventions that offer measurable return on investment.
Foundation reinforcement should focus on axial load paths, shear resistance, and crack propagation control, using engineered填 materials and sleeves where appropriate. Employ non-destructive testing to track movement and verify performance after each step.
Favor cost effective repairs that provide durable stabilization, such as targeted underpinning strategies, resin-infused crack injections, or calibrated micro-piling where soil strata warrant. Document load tests and settlement trends to justify continued investment.
Prioritize safety, compliance, and long-term performance to sustain structural integrity without overspending.
Practical Stabilisation Techniques
Practical stabilisation techniques begin with targeted, evidence-based interventions that improve support while keeping costs controlled. You assess load paths, identify skewed walls, and prioritise minimally invasive actions to limit disruption.
Implement epoxy or polyurethane injections only where cracks indicate Mobilis joints are failing, ensuring compatibility with historic materials. For foundations, use passive underpinning strategies that employ monitored jacking and resin consolidations, avoiding overreach that could compromise adjacent structures.
Drainage improvements reduce hydrostatic pressure, so install discrete, reversible solutions aligned with budget constraints. Maintain historical preservation by selecting finishes and access routes that respect original aesthetics, minimising visible alterations.
Document every intervention with performance metrics and post-install monitoring to verify stabilisation, maintain aesthetic considerations, and support long-term structural integrity without excessive expenditure.
Repair Cracked Walls and Doors That Bind
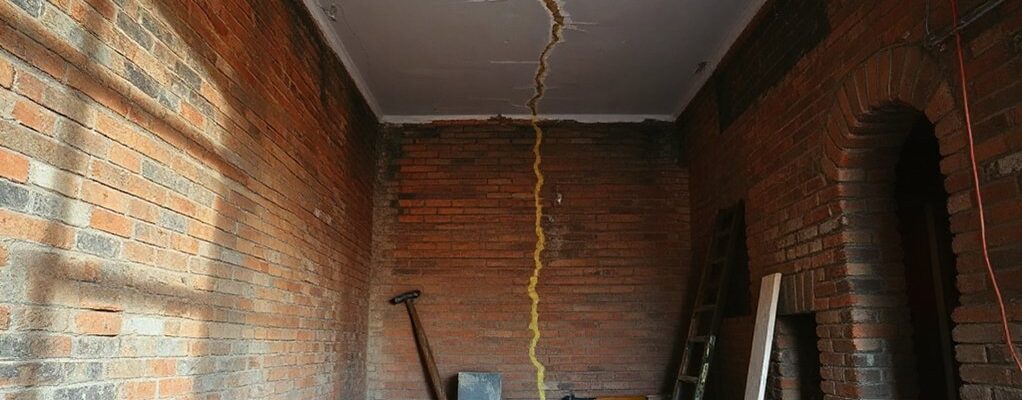
Cracked walls and doors that bind signal structural movement and moisture issues common in old terraced houses; address them promptly to prevent progressive damage.
You assess crack patterns first: vertical or diagonal cracks often indicate differential settlement, while hairline fractures may reflect surface drying. Measure crack width with a crack gauge and monitor changes over 28 days.
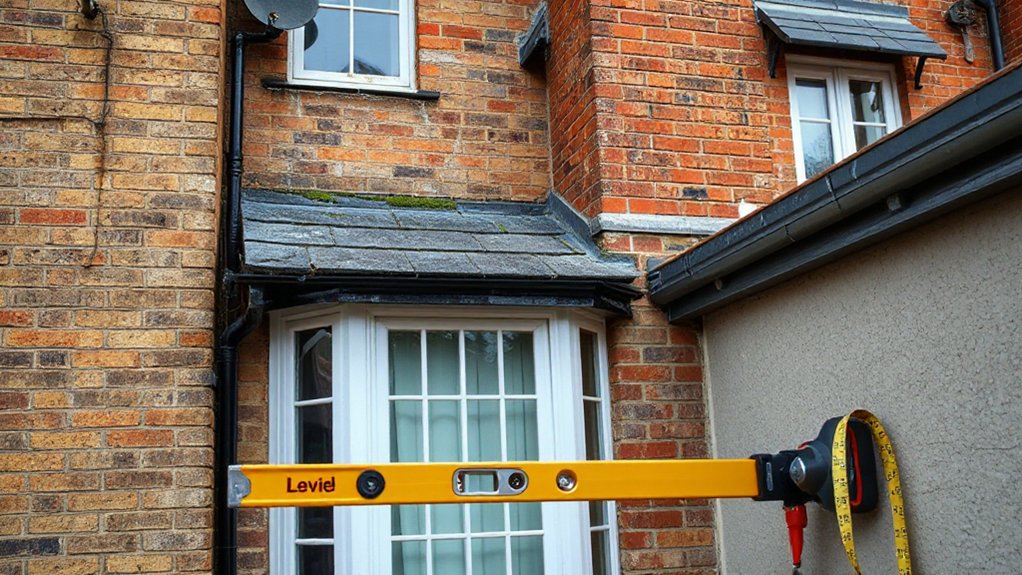
For door binding, verify frame squareness using a spirit level and plumb line; misalignment usually stems from foundation shifts or frame distortion.
Remove loose plaster only to inspect swells and underlying lathing; repair with appropriate compatible mortar or lime plaster where needed.
Stabilise referenced elements by adjusting hinge pintles, planing doors evenly, and reseating sashes with temporary shims.
Reassess after moisture stabilization and avoid sealant-only solutions that trap movement.
Improve Moisture Control: Insulation and Ventilation
Moisture control hinges on reducing trapped humidity and improving air exchange, so insulation and ventilation must work together to create a stable, breathable envelope. You should assess existing insulation levels, targeting thermal continuity at junctions, penetrations, and thermal bridges to minimize condensation risk.
Implement Moisture barriers where appropriate, ensuring continuity across walls, floors, and ceilings without creating hidden pockets. Choose assemblies with low vapor diffusion resistance yet adequate thermal resistance to slow moisture ingress.
Ventilation strategies must prioritize controllable, cross-flow exchange, favoring continuous background ventilation and intermittent extract where needed. Pair supply with balanced exhaust to avoid pressure-driven influx.
Monitor relative humidity and dew point, adjusting airtightness to maintain a stable indoor climate without compromising comfort or drying potential in aged fabric.
Timber Joists, Cables, and Roof Structure for Terraced Homes
What’re the key components and assessment priorities for timber joists, cables, and the roof structure in terraced homes?
You assess load-bearing members, lattice rigidity, and connections between joists, rafters, and walls.
Inspect timber joists for signs of decay, insect damage, splits, improper notch work, and sagging spans.
Verify rope or cable restraints, electrical cabling routes, and protection against damp ingress, ensuring compliance with safe clearance and sheath integrity.
Roof structure should reveal uniform sag patterns, effective insulation, and ventilation to reduce condensation.
Pay particular attention to ridge and hip tie connections, bearing points on party walls, and the condition of noggings and spacers.
Document any movement indicators, moisture staining, or corrosion near metal fixings, then prioritize remediation planning aligned with structural safety and service continuity.
DIY vs. Pro: When to Call in an Expert
Deciding between DIY fixes and professional intervention hinges on the complexity and risk of the work after evaluating timber, cables, and roof structure. You should assess load paths, material failure signs, and access limitations before choosing a path.
If the task involves structural elements, load-bearing walls, or altered properties from earlier repairs, call a Chartered Engineer or qualified contractor.
DIY work may suffice for minor, non-structural tasks, provided you follow current building codes, use appropriate PPE, and verify materials match existing specs.
For historical preservation, consult specialists to avoid compromising artifacts or concealed fabric.
When planning interior redesign that affects stiffness or alignment, document existing conditions and obtain approvals as needed.
Prioritize safety, accuracy, and long-term performance over speed or cost.
Frequently Asked Questions
Can Boundary Walls Affect Internal Framing in Terraces?
Yes, boundary walls can influence internal framing in terraces. If boundary integrity is compromised, lateral loads transfer unpredictably, stressing wall assemblies and connections, reducing Wall stability and potentially causing sagging, cracking, or misalignment in adjacent internal framing systems.
How Does Party Wall Legislation Influence Repairs?
You must understand that party wall compliance governs repairs, and you must follow legal requirements before you start. You’ll assess shared walls, obtain notices, and secure agreements, ensuring Party wall procedures align with legal requirements to avoid disputes.
What Are Signs of Subsidence vs. Settlement?
Subsidence shows rapid, continuing cracks and uneven doors or chimneys, while settlement produces uniform, gradual sinking with small cracks. You should assess foundation movement and soil stability, using monitoring, to distinguish patterns and guide remediation decisions.
Which Permits Are Required for Structural Alterations?
You’ll typically need planning permission and building regulations approvals for structural alterations, unless exempt, and may require listed-building consent in historical preservation contexts, ensuring compliance with Building regulations and safeguarding adjacent properties during work.
How to Budget for Unexpected Masonry Remediation Costs?
You should budget with a contingency for foundation inspection findings; if issues appear, your plan shifts. You’ll apply masonry repair techniques, estimate materials, labor, and permits, then adjust timelines to accommodate surprise remediation costs and safety priorities.
Conclusion
Conclusion: You’re guiding a living build, not a statue. With careful inspection, targeted underpinning, and proper moisture control, you’ll steady the heart of the terrace without erasing its character. Think like a structural diagnostician: diagnose cracks, monitor movement, and stabilize foundations on a budget. Preserve timber and roof integrity while boosting ventilation. When in doubt, call in an engineer to keep your approach precise, minimally invasive, and durable—your home’s stability depends on it.